
Related Manuals for Schell 01 181 06 99


Summary of Contents for Schell 01 181 06 99
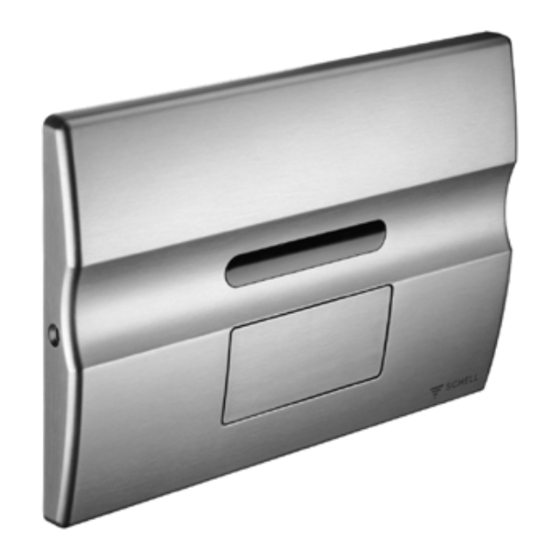
- Page 1 SCHELL WC-Elektronik Unterputzspülkasten Art.-Nr. / Item no. / Art.N° / N°-Art. / Cikkszám: 01 181 06 99 Montageanleitung Installation Guide Instrucciones para el montaje Guia de Instalação Szerelési útmutató...
-
Page 2: Notes On Installation
Non-contact infrared WC-control for auto- zur vollautomatischen sowie manuellen matical as well as for manual control of all Steu erung von SCHELL UP-Spül kästen ab SCHELL flushing cisterns from construction dem Baujahr 2007. Für Neumontage auf year 2007. For mounting on SCHELL WC SCHELL Montageelementen (Art.-Nr. - Page 3 2007. Adequado para instalação em elemento de automatikus, illetve a manuális para montar en SCHELL WC elementos de montagem schell wc (art. 03 250 00 99, 03 046 vezérléséhez. A SCHELL montaje (art. nr. 25 03 250 00, 25 03 046 00 99, 03 252 00 99), assim como upgrading szerelÈmoduljaival (cikkszám:...
- Page 4 ABS Kunststoff Oberflächen: PVD/Edelstahl Zubehör: Montageelement SCHELL UP-Spülkasten: Art. Nr.: 03 252 00 99, 03 046 00 99 (Nassbau) Art. Nr.: 03 250 00 99 (Trockenbau) Im Lieferumfang enthalten: Netzteil 230 V / 12 V 50 Hz: Art. Nr.: 01 183 00 99...
- Page 5 ABS plastic Available surfaces: PVD coated / stainless steel look Accessories: Installation module with integrated concealed cistern SCHELL : Art. no. 03 252 00 99, 03 046 00 99 (wet construction) Art. no. 03 250 00 99 (dry wall) Includes: Transformer 230 V / 12 V 50 Hz, Art no. 01 183 00 99...
- Page 6 Acabamentos disponíveis: Aço inox polido Acessórios: Estrutura metálica SCHELL com cisterna SCHELL: N°-Art.: 03 252 00 99, 03 046 00 99 (montagem sob pressão) N°-Art.: 03 250 00 99 (montagem a seco) Na fonte de alimentação contém: bloco de enerigia 230 V / 12 V 50 Hz: N°-Art.: 01 183 00 99...
- Page 7 Edelstahl, saválló * Auf Anfrage! * on request * Megrendelésre SCHELL Montageelement mit SCHELL UP Spülkasten Zubehör/Accessorie/Tartozék: SCHELL assembly element with SCHELL UP Netzteil 230V/12V/50 Hz flushing cistern Power supply 230V/12V/50 Hz SCHELL szerelÈelem SCHELL Hálózati egység vakolat alatti öblítÈtartállyal 230V/12V/50 Hz Art.Nr./Cikkszám: 03 252 00 99...
- Page 8 Montagebeispiel, Example of installation, Ejemplo de montaje, Exemplo de montagem, Szerelési példa 230V/50Hz...
- Page 9 Montagebeispiel, Example of installation, Ejemplo de montaje, Exemplo de montagem, Szerelési példa 1 12 V Versorgungsleitung (2 x 1,5 mm ) - max. Leitungslänge 100m 2 Wasserzulauf 3 Verkabelung für Haltegriff mit Drucktaste (optional nur bei 12V extern Version) 4 Unterputzdose für Netzteil (Einbauort beliebig) 5 Trafo 12V (Zubehör) 6 Verkabelung für Taster (min 2 x 0,5 mm 7 Taster (optional)
- Page 10 Anschlusselemente, Csatlakozóelemek Elektronikplatte von hinten und 12 V Netz-teil Backside of electronic panel and 12V power supply unit Visto reverso de la placa electro- nica y 12 V. modulo de red Parte traseira do painel electró- nico e unidade de alimentação a 12V Elektronikus elÈlap hátulról és 12 V-os...
- Page 11 Montage, Installation, Montaje, Instalação, Szerelés...
- Page 12 Montage, Installation, Montaje, Instalação, Szerelés 1 Standard-Lagerbock aus Spülkasten entfernen 2 Lagerbock mit integriertem Motorheber einsetzen 3 Distanzbolzen, Drückerstange Schutzplatte montieren, Kabel Motorheber bzw. das Stromversorgungskabel (bei 12V Version) herausführen 4 Montagerahmen befestigen 5 Drückerbolzen einstellen: Bolzen auf erforderliches Maß kürzen, bis zum Anschlag einsetzen und zum Fixieren nach rechts drehen.
- Page 13 Montage, Installation, Montaje, Instalação, Szerelés...
- Page 14 Montage, Installation, Montaje, Instalação, Szerelés Während Anschlussarbeiten Anlage stromlos schalten! 1 Externes Netzteil 230V/12V/50Hz. Maximal zulässige Ausgangsspannung 18V/50Hz (Leerlauf). Die Verwendung “elektronischer Trafos” (z.B. aus der Lichttechnik) ist unzulässig. 2 Stromversorgung 230V herstellen 3 Die Verbindungsleitung Steuerung - Trafo muss mit Kabeln (bis 50m H03VV-F2X1.0, darüber H03VV-F2X1.5) hergestellt werden. Die Verbindungsleitung zum Taster mit Kabel H03VV-F2X0.5.
- Page 15 Montage, Installation, Montaje, Instalação, Szerelés Desligar o controlo da fonte de alimentação durante a instalação! 1 Fonte de alimentação exterior 230V/12V/50Hz. Tensão máxima de saída admissível 18V / 50 Hz (em vazio). A utilização de “transformado- res electrónicos” ( e.g. utilizados em engenharia electrónica) são inadmissíveis. 2 Efectuar a ligação à...
-
Page 16: Diagnose Led
Spülprogrammeinstellung Programmeinstellung (nur bei Inbetriebnahme in den ersten 10 s): sobald Netzversorgung angeschlossen wird (Programm 2 werksseitig voreingestellt) Diagnose LED Rote LED blinkt bei Fernreflex während der ersten Minute nach Inbetrieb-nahme 12V Version: Anschließen an die Spannungsversorgung Um das Programm einer bereits eingestellten Steuerung zu ändern, muss das Gerät für etwa 30 s spannungslos gemacht wer- den, anschließend ist eine Neuprogrammierung möglich. -
Page 17: Diagnostics Led
Adjustment of flushing programs Adjustment of flushing programs (only possible in the first 10 s after initiation): as soon as mains adaptor will be connected (program 2 factory-made pre-adjusted) Diagnostics LED Red LED flashes at wide range reflex during the first 5 minutes after initiation. -
Page 18: Diagnostica Led
Ajuste de los programas Ajuste de los programas (posible solo en los primeros 10 s despues del comenzo): tan pronto como la conexión a la red ha sido efectuado (programa 2 preajustado en la fabrica) Diagnostica LED El LED parpadea en situaci- ón de reflejo distante durante el primer minuto puesto en marcha. -
Page 19: Led De Diagnóstico
Ajuste dos programas de descarga Ajuste dos programas de descarga (apenas possível nos primeiros 10 segs após iniciação): assim que liga as pilhas ou a alimentação de rede (activa-se o programa 2 – pré-ajustado de fábrica). LED de Diagnóstico O led vermelho pisca perante um reflexo de activação, durante os primeiros 5 minu- tos após iniciação... - Page 20 Öblítési program beállítása Programozás (csak üzembehelyezéskor az elsÈ 10 másodpercben): miután a készülék áram alá kerül (a 2. program gyárilag elÈre be van állítva) Diagnózis LED A piros LED távoli érzékeléskor az üzembe helyezés utáni elsÈ percben villog 12 V-os változat: Helyezze a készüléket feszültség alá Ahhoz, hogy a már elÈre beállított vezérlés programját meg lehessen változtatni, a készülék körülbelül 30 másodpercig ne legyen feszültség alatt, az újbóli programozás csak ezután lehetséges.
- Page 21 Funktion, Function, Funcionamiento, Função, Mködés Automatische Spülung beim Optionale Spülung Berührungslose Spülung durch Optionale Zwischenspülung Wegtreten Annäherung der Hand an den durch Anschluss Stützgriff mit integ- alle 10 Minuten (abschaltbar) Mindestverweilzeit IR Sensor oder manuell durch riertem Taster oder externem Taster (nur im Programm 3) 15 s Tastendruck...
- Page 24 SCHELL GmbH & Co. KG Armaturentechnologie Raiffeisenstraße 31 57462 Olpe Germany Telefon +49 (0) 27 61 / 8 92-0 Telefax +49 (0) 27 61 / 8 92-199 info@schell.eu www.schell.eu...
Need help?
Do you have a question about the 01 181 06 99 and is the answer not in the manual?
Questions and answers