Daikin DBG Series Service Instructions Manual
Gas electric/cooling commercial package units with r-410a refrigerant 15 - 25 tons & accessories
Hide thumbs
Also See for DBG Series:
- Installation instructions manual (48 pages) ,
- General information manual (40 pages) ,
- Installation instructions manual (36 pages)
Table of Contents
Advertisement
DBG Gas Electric/DBC Cooling
Commercial Package Units
15 - 25 Tons & Accessories
PROP 65 WARNING
FOR CALIFORNIA CONSUMERS
WARNING
Cancer and Reproductive Harm -
www.P65Warnings.ca.gov
Copyright ©2020
Service Instructions
with R-410A Refrigerant
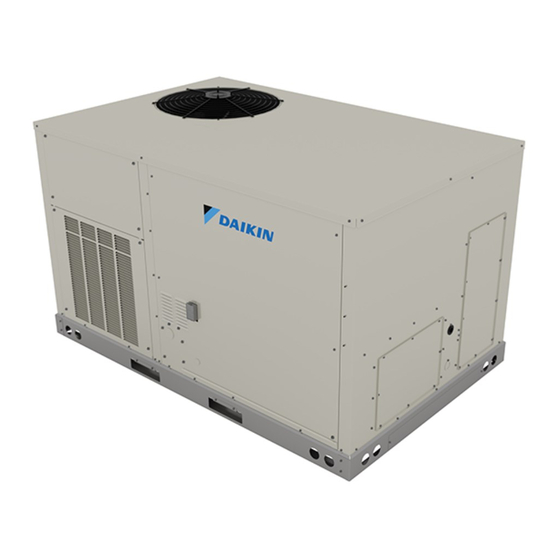
NOTE: 15 & 20 ton model shown in pictures.
25 ton model has 2 fans.
0140M00517-A
O
NLY PERSONNEL THAT HAVE BEEN TRAINED TO INSTALL
(
, "
")
REPAIR
HEREINAFTER
SERVICE
MANUAL SHOULD SERVICE THE EQUIPMENT
BE RESPONSIBLE FOR ANY INJURY OR PROPERTY DAMAGE ARISING FROM
IMPROPER SERVICE OR SERVICE PROCEDURES
ASSUME RESPONSIBILITY FOR ANY INJURY OR PROPERTY DAMAGE WHICH MAY
. I
,
RESULT
N ADDITION
IN JURISDICTIONS THAT REQUIRE ONE OR MORE
LICENSES TO SERVICE THE EQUIPMENT SPECIFIED IN THIS MANUAL
LICENSED PERSONNEL SHOULD SERVICE THE EQUIPMENT
,
,
INSTALLATION
ADJUSTMENT
SERVICING OR REPAIR OF THE EQUIPMENT
,
SPECIFIED IN THIS MANUAL
OR ATTEMPTING TO INSTALL
REPAIR THE EQUIPMENT SPECIFIED IN THIS MANUAL WITHOUT PROPER
TRAINING MAY RESULT IN PRODUCT DAMAGE
.
INJURY OR DEATH
,
,
ADJUST
SERVICE OR
THE EQUIPMENT SPECIFIED IN THIS
. T
HE MANUFACTURER WILL NOT
. I
F YOU SERVICE THIS UNIT
,
ONLY
. I
MPROPER
,
,
ADJUST
SERVICE OR
,
,
PROPERTY DAMAGE
PERSONAL
RSD6412023
June 2020
,
YOU
Advertisement
Chapters
Table of Contents

Subscribe to Our Youtube Channel
Related Manuals for Daikin DBG Series


Summary of Contents for Daikin DBG Series
- Page 1 Service Instructions DBG Gas Electric/DBC Cooling Commercial Package Units with R-410A Refrigerant 15 - 25 Tons & Accessories NOTE: 15 & 20 ton model shown in pictures. 25 ton model has 2 fans. PROP 65 WARNING NLY PERSONNEL THAT HAVE BEEN TRAINED TO INSTALL ADJUST SERVICE OR FOR CALIFORNIA CONSUMERS...
-
Page 2: Table Of Contents
To locate an authorized servicer, please consult your telephone book or the dealer from whom you purchased this product. For further assistance, please contact: CONSUMER INFORMATION LINE - DAIKIN BRAND PRODUCTS TOLL FREE 1-855-770-5678 (U.S. only) email us at: customerservice@daikindaikinac.com fax us at: (713) 856-1821 (Not a technical assistance line for dealers.) - Page 3 SAFE REFRIGERANT HANDLING While these items will not cover every conceivable situation, they should serve as a useful guide. WARNING Refrigerants are heavier than air. They can "push out" the oxygen in your lungs or in any enclosed space.To avoid possible difficulty in breathing or death: •...
-
Page 4: Product Identification
PRODUCT IDENTIFICATION 4,5,6 9,10,11 23 24 Revision Levels Major & Minor Brand Daikin Cooling Gas Heat Supply Fan/Drive Type/Motor Powered convenience outlet Non-powered convenience outlet Hinge Panels D Hinged Panels and Powered convenience outlet Hinged Panels and non-powered convenience outlet... -
Page 5: Product Design
PRODUCT DESIGN UNIT LOCATION • When the unit is heating, the temperature of the return air entering the unit must be between 50° F and 100° F. WARNING Ground Level Installations Only: O PREVENT POSSIBLE EQUIPMENT DAMAGE PROPERTY DAMAGE • When the unit is installed on the ground adjacent to the PERSONAL INJURY OR DEATH THE FOLLOWING BULLET POINTS MUST BE... - Page 6 PRODUCT DESIGN Roof Curb Installations Only: CLEARANCES Curb installations must comply with local codes and should be done in accordance with the established guidelines of the National Roofing Contractors Association. Proper unit installation requires that the roof curb be firmly and permanently attached to the roof structure.
- Page 7 PRODUCT DESIGN WARNING CAUTION HIGH VOLTAGE ! O PREVENT IMPROPER AND DANGEROUS OPERATION DUE TO WIRING O AVOID PERSONAL INJURY OR DEATH DUE TO ELECTRICAL ERRORS LABEL ALL WIRES PRIOR TO DISCONNECTION WHEN SERVICING SHOCK DO NOT TAMPER WITH FACTORY WIRING CONTROLS ERIFY PROPER OPERATION AFTER SERVICING INTERNAL POWER AND CONTROL WIRING OF THESE UNITS...
- Page 8 PRODUCT DESIGN Field connec�on Route field control wiring control wiring through grommet terminal block Field ELECTRICAL ENTRANCE LOCATIONS connec�on Unit is equipped with a Low Voltage Terminal Block and has line voltage Single Point wiring to the contactor. Low Voltage Control Wiring Field wiring 1.
-
Page 9: System Operation
DBG***XXX**XXX SYSTEM OPERATION FOR YOUR SAFETY READ BEFORE OPERATING WARNING: Improper If you do not follow these instructions exactly, alteration, service or a fire or explosion may result causing property maintenance can damage, personal injury or loss of life. cause injury or property damage. - Page 10 DBC/DBG***XXX**XXX SYSTEM OPERATION Typical Package Cooling or Package Gas Indoor Outdoor Coil Coil Thermostatic Expansion Valve...
- Page 11 SYSTEM OPERATION Direct Spark Ignition (DSI) Systems DCG units are equipped with a direct spark ignition system. HIGH VOLTAGE! Ignition is provided by 22,000 volt electronic spark. A flame Disconnect ALL power before servicing sensor then monitors for the presence of flame and closes or installing this unit.
- Page 12 SYSTEM OPERATION GAS SUPPLY PIPING Natural Gas Capacity of Pipe in Cubic Feet of Gas Per Hour (CFH) Length of Nominal Black Pipe Size (inches) WARNING Pipe in Feet 1 1/4 1 1 /2 1050 1600 O PREVENT PERSONAL INJURY OR DEATH DUE TO IMPROPER 1100 INSTALLATION ADJUSTMENT...
- Page 13 SYSTEM OPERATION Gas Piping Checks GAS INLET LOCATION (3/4” NPT) CAUTION O PREVENT PROPERTY DAMAGE OR PERSONAL INJURY DUE TO FIRE THE FOLLOWING INSTRUCTIONS MUST BE PERFORMED REGARDING GAS CONNECTIONS AND PRESSURE TESTING • T HE UNIT AND ITS GAS CONNECTIONS MUST BE LEAK TESTED BEFORE PLACING IN OPERATION ECAUSE OF THE DANGER OF 46-1/10”...
- Page 14 SYSTEM OPERATION For satisfactory operation, propane gas manifold pressure PROPANE TANK SIZING (MINIMUM) must be within 9.7 - 10.3 inches w.c. for high fire and within TANK SIZE REQUIRED IF LOWEST OUTDOOR 6.7 - 7.3 inches w.c. low fire at the manifold with all gas appli- MAXIMUM GAS TEMPERATURE (AVG.
- Page 15 SYSTEM OPERATION Roof Top Location and Installation 6. All pipe connections should be sealed with a pipe thread compound, which is resistant to the fuel used with the The gas supply piping location and installation for roof top units furnace. A soapy water solution should be used to check must be in accordance with local codes or, in the absence all joints for leaks.
- Page 16 SYSTEM OPERATION WARNING MOVING MACHINERY HAZARD! Base Rail O PREVENT POSSIBLE PERSONAL INJURY OR DEATH DISCONNECT “OFF” POWER TO THE UNIT AND PADLOCK IN THE POSITION BEFORE Open Vent 2” Min SERVICING FANS Contractor Responsibility See NOTE The installing contractor must be certain that: •...
- Page 17 SYSTEM OPERATION Pre-startup Precautions 2 SPEED MODELS Transformer and Induced Draft Motor NOTE: For 2 Speed Models, airflow adjustments must be made with the evaporator motor operating at high NOTE: On the 208/230 volt units only. speed,i.e, 2nd stage cooling or in heat mode. Ensure the transformer and induced draft motor are set on the appropriate voltage taps.
- Page 18 SYSTEM OPERATION Bearing Check Switch) requires resetting. Prior to energizing any fans, check and make sure that all 1. With electricity and gas turned on, the system switch in setscrews are tight so that bearings are properly secured to the “HEAT” or “AUTO” position and the fan switch in the shafts.
- Page 19 SYSTEM OPERATION 6. Replace the heat exchanger door on the unit. 6. Slowly lower the cooling temperature until first stage COOL (LOW COOL) starts. The blower, both fans, and first stage 7. If cooling and/or air circulation will be desired, turn ON compressor should now be operating.
-
Page 20: Scheduled Maintenance
SCHEDULED MAINTENANCE Filters 5. Be sure the Owner is instructed on the unit operation, filter, servicing, correct thermostat operation, etc. CAUTION MAINTENANCE O PREVENT PROPERTY DAMAGE DUE TO FIRE AND LOSS OF EQUIPMENT EFFICIENCY OR EQUIPMENT DAMAGE DUE TO DUST AND LINT BUILD UP WARNING ON INTERNAL PARTS NEVER OPERATE UNIT WITHOUT AN AIR FILTER... - Page 21 SCHEDULED MAINTENANCE Inspection & Cleaning NOTE: This will involve removing and reinstalling the heat exchanger door on the unit, which is held by two screws. All flue product carrying areas of the furnace, its vent system, If you are uncertain about your ability to do this, contact a and main burners should be examined by a qualified service qualified servicer.
-
Page 22: Troubleshooting Charts
DBC***XXX**XXX COOLING ANALYSIS CHART System Unsatisfactory No Cooling Complaint Operating Cooling Pressures POSSIBLE CAUSE Test Method DOTS IN ANALYSIS Remedy GUIDE INDICATE "POSSIBLE CAUSE" • Power Failure Test Voltage • • • Blown Fuse Inspect Fuse Size & Type • •... -
Page 23: Servicing
DBG***XXX**XXX SERVICING GAS HEATING ANALYSIS CHART Complaint No Heat Unsatisfactory Heat POSSIBLE CAUSE Test Method DOTS IN ANALYSIS Remedy GUIDE INDICATE "POSSIBLE CAUSE" • Power Failure Test Voltage • Blown Fuse Test Voltage • Loose Connection Check Wiring S-2, S-3 •... -
Page 24: Servicing Table Of Contents
SERVICING Table of Contents S-104 Checking Compressor Efficiency ....36 Checking Voltage ...........25 S-106 Overfeeding ...........36 Checking Wiring ..........26 S-109 Checking Subcooling ........37 Checking Thermostat, Wiring & Anticipator ...26 S-112 Checking Restricted Liquid Line ....37 S-3A Thermostat & Wiring ........26 S-113 Refrigerant Overcharge .........37 S-3B Cooling Anticipator .........26 S-114 Non-condensables .........37... -
Page 25: Checking Voltage
SERVICING S-1 CHECKING VOLTAGE Three phase units require a balanced 3 phase power supply to operate. If the percentage of voltage imbalance exceeds 3% the unit must not be operated until the voltage condition is corrected. HIGH VOLTAGE! Max. Voltage Deviation Disconnect ALL power before servicing % Voltage = From Average Voltage... -
Page 26: Checking Wiring
SERVICING S-2 CHECKING WIRING 3. No voltage indicates the trouble is in the thermostat or wiring. 4. Check the continuity of the thermostat and wiring. Repair or replace as necessary. HIGH VOLTAGE! Disconnect ALL power before servicing S-3B COOLING ANTICIPATOR or installing this unit. -
Page 27: Checking Contactor And/Or Relays
SERVICING S-4 CHECKING TRANSFORMER 1. Remove the leads from the holding coil. AND CONTROL CIRCUIT 2. Using an ohmmeter, test across the coil terminals. If the coil does not test continuous, replace the relay or contactor. HIGH VOLTAGE! Disconnect ALL power before servicing S-8 CHECKING CONTACTOR CONTACTS or installing this unit. - Page 28 SERVICING DCC: Testing relay contacts The Electronic Blower Time Delay Relay is used on PSC WARNING and belt driven models. Disconnect ALL power before servicing. HIGH VOLTAGE! Disconnect ALL power before servicing Turn power off. or installing this unit. Multiple power 1.
-
Page 29: Checking Loss Of Charge Protection
SERVICING If it cuts-out at 660 PSIG ± 10 PSIG, it is operating normally S-11 CHECKING LOSS OF CHARGE PROTEC- (See causes for high head pressure in Service Problem Anal- ysis Guide). If it cuts out below this pressure range, replace the control. -
Page 30: S-15A Resistance Check
SERVICING These capacitors have a 15,000 ohm, 2 watt resistor wired across its terminals. The object of the resistor is to discharge the capacitor under certain operating conditions, rather than having it discharge across the closing of the contacts within the switching device such as the Start Relay, and to reduce the chance of shock to the servicer. -
Page 31: S-15B Capacitance Check
SERVICING S-15B CAPACITANCE CHECK HIGH VOLTAGE! Using a hookup as shown below, take the amperage and Disconnect ALL power before servicing voltage readings and use them in the formula: or installing this unit. Multiple power sources may be present. Failure to do so may cause property damage, personal injury or death. -
Page 32: S-17A Resistance Test
SERVICING S-17A RESISTANCE TEST WARNING Each compressor is equipped with an internal overload. Disconnect ALL power before servicing. The line break internal overload senses both motor amperage and winding temperature. High motor temperature or amper- Disconnect all power to unit, making sure that all power age heats the disc causing it to open, breaking the common legs are open. -
Page 33: S-17D Operation Test
SERVICING S-17D OPERATION TEST 2. Start the system and run a “Cooling Performance Test. If the voltage, capacitor, overload and motor winding test fail to show the cause for failure: If the test shows: a. Below normal high side pressure. b. -
Page 34: Refrigeration Repair Practice
SERVICING Pressure test the system using dry nitrogen and soapy water S-100 REFRIGERATION REPAIR PRACTICE to locate leaks. If you wish to use a leak detector, charge the DANGER system to 10 psi using the appropriate refrigerant then use nitrogen to finish charging the system to working pressure, Always remove the refrigerant charge in a proper then apply the detector to suspect areas. -
Page 35: Charging
SERVICING Only use refrigerant certified to AHRI standards. Used refrigerant may cause compressor damage. The LOW SIDE HIGH SIDE manufacturer is not responsible for damage or the GAUGE GAUGE AND VALVE AND VALVE need for repairs resulting from the use of unapproved refrigerant types or used or recycled refrigerant. -
Page 36: Checking Compressor Efficiency
SERVICING S-108 CHECKING SUPERHEAT NOTE: Even though the compressor section of a Scroll compressor is more tolerant of liquid refrigerant, continued Refrigerant gas is considered superheated when its tempera- floodback or flooded start conditions may wash oil from the ture is higher than the saturation temperature corresponding bearing surfaces causing premature bearing failure.S-104 to its pressure. -
Page 37: Checking Subcooling
SERVICING S-109 CHECKING SUBCOOLING 5. Capture the charge, replace the valve and drier, evacuate and recharge. Refrigerant liquid is considered subcooled when its temperature is lower than the saturation temperature corresponding to its S-112 CHECKING RESTRICTED LIQUID LINE pressure. The degree of subcooling equals the degrees of temperature decrease below the saturation temperature at When the system is operating, the liquid line is warm to the the existing pressure. - Page 38 SERVICING Pressure vs. Temperature Chart R-410A °F °F °F °F °F °F PSIG PSIG PSIG PSIG PSIG PSIG -37.7 114.0 37.8 216.0 74.3 318.0 100.2 420.0 120.7 522.0 137.6 -34.7 38.7 74.9 100.7 121.0 137.9 116.0 218.0 320.0 422.0 524.0 -32.0 118.0 39.5...
- Page 39 SERVICING REQUIRED LIQUID LINE TEMPERATURE LIQUID PRESSURE REQUIRED SUBCOOLING TEMPERATURE (°F) AT ACCESS FITTING (PSIG)
-
Page 40: Compressor Burnout
(Negative Pressure). 2. Measure the static pressure of the supply duct, (Positive NOTE: Daikin does NOT approve the flushing method using Pressure). R-11 refrigerant. 3. Add the two readings together. -
Page 41: Checking Belt Tension
SERVICING 3. Select the proper speed tap or dip switch setting for direct drive units. 4. For gas heat units, the airflow must be adjusted so that the air temperature rise falls within the ranges given stated on Data Plate by adjusting the variable pitch sheave on the motor (see Blower Performance section in appropriate Specifications Sheet Manual for correct pulley adjustment). -
Page 42: Motor Sheave Adjustment
SERVICING S-300 TESTING PRIMARY LIMIT CONTROL S-207 MOTOR SHEAVE ADJUSTMENTS DCG units use a snap-disk type primary limit device. Some- Vl, Vm & 2vp Variable Pitch Key Type Motor times referred to as "stat on a stick". The limit setting is fixed Sheaves and must not be readjusted in the field. -
Page 43: Testing Auxiliary Limit
SERVICING S-301 TESTING AUXILIARY LIMIT The auxiliary limit control is a preset nonadjustable control mounted in the blower compartment area. It is connected in series with the rollout switch wiring to the gas valve. If its temperature should be exceeded, it will open, interrupting the voltage to the gas valve causing it to open. -
Page 44: Testing Inducer Motor
SERVICING S-303 TESTING INDUCER MOTOR If a limit switch opens, the indoor blower is energized on heat speed and the induced draft blower is energized. The LED on the control flashes "4" to indicate an open limit switch. The blower and inducer remain on while the limit switch is open. The gas valve is de-energized. -
Page 45: Checking Main Burners
SERVICING Regulator Cover Screws WARNING (Reg. Adj. Beneath these screws) High Fire Disconnect gas and electrical power supply. Adjust Low Fire Adjust In checking main burners, look for signs of rust, oversized and undersized carry-over ports restricted with foreign material, etc. INLET OUTLET S-306 CHECKING ORIFICES... -
Page 46: Checking Gas Pressure
SERVICING 2. Check orifice size with orifice sizing drills. WARNING 3. If resizing is required, a new orifice of the same physical Line Voltage now present. size and angle with proper drill size opening should be installed. 3. Put unit into heating cycle and turn on all other gas con- S-307 CHECKING GAS PRESSURE suming appliances. -
Page 47: Checking For Flashback
SERVICING HOSE S-309 CHECKING FOR FLASHBACK TO J-TUBE Flashback will also cause burning in the burner venturi, but is caused by the burning speed being greater than the gas- 1/4" COPPER TEE air flow velocity coming from a burner port. Flashback may occur at the moment of ignition, after a burner heats up or when the burner turns off. -
Page 48: Testing Ignition Control Module
SERVICING Use LPKT180300A propane conversion kit for propane con- Blower Off Delay Settings versions at altitudes below 2000 feet. Natural gas installations below 2000 feet do not require a kit. speed up For propane conversions above 2000 feet, high altitude kit COOL HEAT UNUSED... - Page 49 SERVICING • Check rollout limit TROUBLESHOOTING If the burner flames are not properly drawn into the Ignition Control Error Codes heat exchanger, the flame rollout protection device The following presents probable causes of questionable unit will open. Possible causes are restricted or blocked operation.
-
Page 50: Checking Flame Sensor
SERVICING Flame Detected with Gas Valve Closed (5 FLASH CODE) If flame is detected with the gas valve deenergized, the combustion and air circulator blowers are energized. The diagnostic fault code is five (5) flashes for this condition. The control can be reset by removing the power supply to the unit or it will automatically reset after one hour. -
Page 51: Accessories
ACCESSORIES - GAS/ELECTRIC... - Page 52 ACCESSORIES - GAS/ELECTRIC...
- Page 53 ACCESSORIES...
- Page 54 ACCESSORIES...
- Page 55 ACCESSORIES ROOF CURB D14CURB180300 INSULATED PANELS D14CURB180300 Models 14.5 15 - 25 Ton Measurement in inches. MOTORIZED FRESH AIR DAMPERS 25% FRESH AIR DAMPER MODELS MOTORIZED MANUAL 15-25 Tons S50MFD180300 S50MFD180300...
- Page 56 ACCESSORIES POWER EXHAUST FOR USE WITH DB* MODELS POWER EXHAUST MODEL VOLTAGE USED WITH 424651121 208-230V 15 - 25 Ton 424651131 460V 15 - 25 Ton 424651141 575V 15 - 25 Ton FLUE EXTENSION KIT FLUE EXTENSION KIT MODELS KIT # 15 - 25 Tons 220-GX-03 4.25...
-
Page 57: Accessories Wiring Diagrams
ECONOMIZER ACCESSORIES WIRING DIAGRAMS HIGH VOLTAGE! DISCONNECT ALL POWER BEFORE SERVICING OR INSTALLING THIS UNIT. MULTIPLE POWER SOURCES MAY BE PRESENT. FAILURE TO DO SO MAY CAUSE PROPERTY DAMAGE, PERSONAL INJURY OR DEATH. Wiring is subject to change. Always refer to the wiring diagram on the unit for the most up-to-date wiring. - Page 58 POWERED CONV. OUTLET ACCESSORIES WIRING DIAGRAMS HIGH VOLTAGE! DISCONNECT ALL POWER BEFORE SERVICING OR INSTALLING THIS UNIT. MULTIPLE POWER SOURCES MAY BE PRESENT. FAILURE TO DO SO MAY CAUSE PROPERTY DAMAGE, PERSONAL INJURY OR DEATH. FOR UNITS WITH SERIALS BEFORE 1607 15 - 25 TON UNITS 208V NOTE...
- Page 59 ACCESSORIES WIRING DIAGRAMS HIGH VOLTAGE! DISCONNECT ALL POWER BEFORE SERVICING OR INSTALLING THIS UNIT. MULTIPLE POWER SOURCES MAY BE PRESENT. FAILURE TO DO SO MAY CAUSE PROPERTY DAMAGE, PERSONAL INJURY OR DEATH. FOR UNITS WITH SERIALS 1607 AND NEWER 15 - 25 TON UNITS 208v NOTE GFI-CO...
- Page 60 ACCESSORIES WIRING DIAGRAMS HIGH VOLTAGE! DISCONNECT ALL POWER BEFORE SERVICING OR INSTALLING THIS UNIT. MULTIPLE POWER SOURCES MAY BE PRESENT. FAILURE TO DO SO MAY CAUSE PROPERTY DAMAGE, PERSONAL INJURY OR DEATH. PACKAGE SYSTEM WIRING DIAGRAM - 1 STAGE ELECTRIC HEAT TYPICAL HP ROOM THERMOSTAT SEE NOTE 1...
- Page 61 ACCESSORIES WIRING DIAGRAMS HIGH VOLTAGE! DISCONNECT ALL POWER BEFORE SERVICING OR INSTALLING THIS UNIT. MULTIPLE POWER SOURCES MAY BE PRESENT. FAILURE TO DO SO MAY CAUSE PROPERTY DAMAGE, PERSONAL INJURY OR DEATH. FOR UNITS WITH SERIALS BEFORE 1409 MODELS: DB*180 AND 240 CONNECT PARALLEL TO REVERSING VALVE 24 VAC ( IF USED ) SEE NOTE 2...
- Page 62 ACCESSORIES WIRING DIAGRAMS HIGH VOLTAGE! DISCONNECT ALL POWER BEFORE SERVICING OR INSTALLING THIS UNIT. MULTIPLE POWER SOURCES MAY BE PRESENT. FAILURE TO DO SO MAY CAUSE PROPERTY DAMAGE, PERSONAL INJURY OR DEATH. FOR UNITS WITH SERIALS 1409 AND NEWER NOTICE: The cut out speed & hard start settings are factory preset. Changing those settings may cause early motor failure.
- Page 63 ACCESSORIES WIRING DIAGRAMS HIGH VOLTAGE! DISCONNECT ALL POWER BEFORE SERVICING OR INSTALLING THIS UNIT. MULTIPLE POWER SOURCES MAY BE PRESENT. FAILURE TO DO SO MAY CAUSE PROPERTY DAMAGE, PERSONAL INJURY OR DEATH. FACTORY INSTALLED DISCONNECT SUPPLY VOLTAGE SUPPLY VOLTAGE DISCONNECT FACTORY WIRING LINE VOLTAGE FIELD WIRING...
- Page 64 ACCESSORIES WIRING DIAGRAMS HIGH VOLTAGE! DISCONNECT ALL POWER BEFORE SERVICING OR INSTALLING THIS UNIT. MULTIPLE POWER SOURCES MAY BE PRESENT. FAILURE TO DO SO MAY CAUSE PROPERTY DAMAGE, PERSONAL INJURY OR DEATH. 24V AC/DC 24V AC/DC AUX OUT + AUX OUT - INT/AUX - INT + ALARM...
- Page 65 ACCESSORIES WIRING DIAGRAMS HIGH VOLTAGE! DISCONNECT ALL POWER BEFORE SERVICING OR INSTALLING THIS UNIT. MULTIPLE POWER SOURCES MAY BE PRESENT. FAILURE TO DO SO MAY CAUSE PROPERTY DAMAGE, PERSONAL INJURY OR DEATH. PHASE MONITOR WIRING - NO SMOKE DETECTOR COMPONENT LEGEND BLOWER CONTACTOR TERMINAL BLOCK WIRING...
- Page 66 ACCESSORIES WIRING DIAGRAMS HIGH VOLTAGE! DISCONNECT ALL POWER BEFORE SERVICING OR INSTALLING THIS UNIT. MULTIPLE POWER SOURCES MAY BE PRESENT. FAILURE TO DO SO MAY CAUSE PROPERTY DAMAGE, PERSONAL INJURY OR DEATH. PHASE MONITOR WIRING WHEN UNIT EQUIPPED WITH SMOKE DETECTOR COMPONENT LEGEND BLOWER CONTACTOR TERMINAL BLOCK...
-
Page 67: Heater Kits
HEATER KITS ELECTRIC HEAT KITS HEATER KIT MINIMUM CFM HEATER KIT MINIMUM CFM HEATER KIT MINIMUM CFM UNIT MODEL NUMBER Downshot MODEL NUMBER Downshot MODEL NUMBER Downshot EHK3-31 5250 EHK4-31 5250 EHK7-31 5250 15 TON EHK3-46 5250 EHK4-46 5250 EHK7-46 5250 EHK3-60 5250... -
Page 68: Heater Kit Wiring Diagrams
EHK3-31 HEATER KIT WIRING DIAGRAMS HIGH VOLTAGE! DISCONNECT ALL POWER BEFORE SERVICING OR INSTALLING THIS UNIT. MULTIPLE POWER SOURCES MAY BE PRESENT. FAILURE TO DO SO MAY CAUSE PROPERTY DAMAGE, PERSONAL INJURY OR DEATH. FOR UNITS WITH SERIALS BEFORE 1409 Wiring is subject to change. - Page 69 EHK3-46 HEATER KIT WIRING DIAGRAMS HIGH VOLTAGE! DISCONNECT ALL POWER BEFORE SERVICING OR INSTALLING THIS UNIT. MULTIPLE POWER SOURCES MAY BE PRESENT. FAILURE TO DO SO MAY CAUSE PROPERTY DAMAGE, PERSONAL INJURY OR DEATH. FOR UNITS WITH SERIALS BEFORE 1409 Wiring is subject to change.
- Page 70 EHK3-46 HEATER KIT WIRING DIAGRAMS HIGH VOLTAGE! DISCONNECT ALL POWER BEFORE SERVICING OR INSTALLING THIS UNIT. MULTIPLE POWER SOURCES MAY BE PRESENT. FAILURE TO DO SO MAY CAUSE PROPERTY DAMAGE, PERSONAL INJURY OR DEATH. EHK3-46 with Time Delay Wiring is subject to change. Always refer to the wiring diagram on the unit for the most up-to-date wiring.
- Page 71 EHK3-46 HEATER KIT WIRING DIAGRAMS HIGH VOLTAGE! DISCONNECT ALL POWER BEFORE SERVICING OR INSTALLING THIS UNIT. MULTIPLE POWER SOURCES MAY BE PRESENT. FAILURE TO DO SO MAY CAUSE PROPERTY DAMAGE, PERSONAL INJURY OR DEATH. Wiring is subject to change. Always refer to the wiring diagram on the unit for the most up-to-date wiring.
- Page 72 EHK3-60 HEATER KIT WIRING DIAGRAMS HIGH VOLTAGE! DISCONNECT ALL POWER BEFORE SERVICING OR INSTALLING THIS UNIT. MULTIPLE POWER SOURCES MAY BE PRESENT. FAILURE TO DO SO MAY CAUSE PROPERTY DAMAGE, PERSONAL INJURY OR DEATH. FOR UNITS WITH SERIALS BEFORE 1409 Wiring is subject to change.
- Page 73 EHK3-60 HEATER KIT WIRING DIAGRAMS HIGH VOLTAGE! DISCONNECT ALL POWER BEFORE SERVICING OR INSTALLING THIS UNIT. MULTIPLE POWER SOURCES MAY BE PRESENT. FAILURE TO DO SO MAY CAUSE PROPERTY DAMAGE, PERSONAL INJURY OR DEATH. EHK3-60 with Time Delay Wiring is subject to change. Always refer to the wiring diagram on the unit for the most up-to-date wiring.
- Page 74 EHK3-60 HEATER KIT WIRING DIAGRAMS HIGH VOLTAGE! DISCONNECT ALL POWER BEFORE SERVICING OR INSTALLING THIS UNIT. MULTIPLE POWER SOURCES MAY BE PRESENT. FAILURE TO DO SO MAY CAUSE PROPERTY DAMAGE, PERSONAL INJURY OR DEATH. Wiring is subject to change. Always refer to the wiring diagram on the unit for the most up-to-date wiring.
- Page 75 EHK3-75 HEATER KIT WIRING DIAGRAMS HIGH VOLTAGE! DISCONNECT ALL POWER BEFORE SERVICING OR INSTALLING THIS UNIT. MULTIPLE POWER SOURCES MAY BE PRESENT. FAILURE TO DO SO MAY CAUSE PROPERTY DAMAGE, PERSONAL INJURY OR DEATH. FOR UNITS WITH SERIALS BEFORE 1409 Wiring is subject to change.
- Page 76 EHK3-75 HEATER KIT WIRING DIAGRAMS HIGH VOLTAGE! DISCONNECT ALL POWER BEFORE SERVICING OR INSTALLING THIS UNIT. MULTIPLE POWER SOURCES MAY BE PRESENT. FAILURE TO DO SO MAY CAUSE PROPERTY DAMAGE, PERSONAL INJURY OR DEATH. Wiring is subject to change. Always refer to the wiring diagram on the unit for the most up-to-date wiring.
- Page 77 EHK4-31 / EHK7-31 HEATER KIT WIRING DIAGRAMS HIGH VOLTAGE! DISCONNECT ALL POWER BEFORE SERVICING OR INSTALLING THIS UNIT. MULTIPLE POWER SOURCES MAY BE PRESENT. FAILURE TO DO SO MAY CAUSE PROPERTY DAMAGE, PERSONAL INJURY OR DEATH. Wiring is subject to change. Always refer to the wiring diagram on the unit for the most up-to-date wiring.
- Page 78 EHK4-31 / EHK7-31 HEATER KIT WIRING DIAGRAMS HIGH VOLTAGE! DISCONNECT ALL POWER BEFORE SERVICING OR INSTALLING THIS UNIT. MULTIPLE POWER SOURCES MAY BE PRESENT. FAILURE TO DO SO MAY CAUSE PROPERTY DAMAGE, PERSONAL INJURY OR DEATH. FOR UNITS WITH SERIALS BEFORE 1409 Wiring is subject to change.
- Page 79 EHK4-46 / EHK7-46 HEATER KIT WIRING DIAGRAMS HIGH VOLTAGE! DISCONNECT ALL POWER BEFORE SERVICING OR INSTALLING THIS UNIT. MULTIPLE POWER SOURCES MAY BE PRESENT. FAILURE TO DO SO MAY CAUSE PROPERTY DAMAGE, PERSONAL INJURY OR DEATH. FOR UNITS WITH SERIALS BEFORE 1409 HTR 3 HTR 2 HTR 1...
- Page 80 EHK4-46 / EHK7-46 HEATER KIT WIRING DIAGRAMS HIGH VOLTAGE! DISCONNECT ALL POWER BEFORE SERVICING OR INSTALLING THIS UNIT. MULTIPLE POWER SOURCES MAY BE PRESENT. FAILURE TO DO SO MAY CAUSE PROPERTY DAMAGE, PERSONAL INJURY OR DEATH. EHK4-46 / EHK7-46 with Time Delay HTR 3 HTR 2 HTR 1...
- Page 81 EHK4-46 / EHK7-46 HEATER KIT WIRING DIAGRAMS HIGH VOLTAGE! DISCONNECT ALL POWER BEFORE SERVICING OR INSTALLING THIS UNIT. MULTIPLE POWER SOURCES MAY BE PRESENT. FAILURE TO DO SO MAY CAUSE PROPERTY DAMAGE, PERSONAL INJURY OR DEATH. Wiring is subject to change. Always refer to the wiring diagram on the unit for the most up-to-date wiring.
- Page 82 EHK4-60 / EHK7-60 HEATER KIT WIRING DIAGRAMS HIGH VOLTAGE! DISCONNECT ALL POWER BEFORE SERVICING OR INSTALLING THIS UNIT. MULTIPLE POWER SOURCES MAY BE PRESENT. FAILURE TO DO SO MAY CAUSE PROPERTY DAMAGE, PERSONAL INJURY OR DEATH. FOR UNITS WITH SERIALS BEFORE 1409 HTR 3 HTR 2 HTR 1...
- Page 83 EHK4-60 / EHK7-60 HEATER KIT WIRING DIAGRAMS HIGH VOLTAGE! DISCONNECT ALL POWER BEFORE SERVICING OR INSTALLING THIS UNIT. MULTIPLE POWER SOURCES MAY BE PRESENT. FAILURE TO DO SO MAY CAUSE PROPERTY DAMAGE, PERSONAL INJURY OR DEATH. EHK4-60 / EHK7-60 with Time Delay HTR 3 HTR 2 HTR 1...
- Page 84 EHK4-60 / EHK7-60 HEATER KIT WIRING DIAGRAMS HIGH VOLTAGE! DISCONNECT ALL POWER BEFORE SERVICING OR INSTALLING THIS UNIT. MULTIPLE POWER SOURCES MAY BE PRESENT. FAILURE TO DO SO MAY CAUSE PROPERTY DAMAGE, PERSONAL INJURY OR DEATH. Wiring is subject to change. Always refer to the wiring diagram on the unit for the most up-to-date wiring.
- Page 85 EHK4-75 / EHK7-75 HEATER KIT WIRING DIAGRAMS HIGH VOLTAGE! DISCONNECT ALL POWER BEFORE SERVICING OR INSTALLING THIS UNIT. MULTIPLE POWER SOURCES MAY BE PRESENT. FAILURE TO DO SO MAY CAUSE PROPERTY DAMAGE, PERSONAL INJURY OR DEATH. FOR UNITS WITH SERIALS BEFORE 1409 HTR 3 HTR 2 HTR 1...
- Page 86 EHK4-75 / EHK7-75 HEATER KIT WIRING DIAGRAMS HIGH VOLTAGE! DISCONNECT ALL POWER BEFORE SERVICING OR INSTALLING THIS UNIT. MULTIPLE POWER SOURCES MAY BE PRESENT. FAILURE TO DO SO MAY CAUSE PROPERTY DAMAGE, PERSONAL INJURY OR DEATH. Wiring is subject to change. Always refer to the wiring diagram on the unit for the most up-to-date wiring.
- Page 87 EHK3-31 HEATER KIT WIRING DIAGRAMS HIGH VOLTAGE! DISCONNECT ALL POWER BEFORE SERVICING OR INSTALLING THIS UNIT. MULTIPLE POWER SOURCES MAY BE PRESENT. FAILURE TO DO SO MAY CAUSE PROPERTY DAMAGE, PERSONAL INJURY OR DEATH. FOR UNITS WITH SERIALS 1409 AND NEWER HTR 4 HTR 1 HTR 5...
- Page 88 EHK3-46 HEATER KIT WIRING DIAGRAMS HIGH VOLTAGE! DISCONNECT ALL POWER BEFORE SERVICING OR INSTALLING THIS UNIT. MULTIPLE POWER SOURCES MAY BE PRESENT. FAILURE TO DO SO MAY CAUSE PROPERTY DAMAGE, PERSONAL INJURY OR DEATH. FOR UNITS WITH SERIALS 1409 AND NEWER HTR 7 HTR 4 HTR 1...
- Page 89 EHK3-60 HEATER KIT WIRING DIAGRAMS HIGH VOLTAGE! DISCONNECT ALL POWER BEFORE SERVICING OR INSTALLING THIS UNIT. MULTIPLE POWER SOURCES MAY BE PRESENT. FAILURE TO DO SO MAY CAUSE PROPERTY DAMAGE, PERSONAL INJURY OR DEATH. FOR UNITS WITH SERIALS 1409 AND NEWER HTR 10 HTR 7 HTR 4...
- Page 90 EHK3-75 HEATER KIT WIRING DIAGRAMS HIGH VOLTAGE! DISCONNECT ALL POWER BEFORE SERVICING OR INSTALLING THIS UNIT. MULTIPLE POWER SOURCES MAY BE PRESENT. FAILURE TO DO SO MAY CAUSE PROPERTY DAMAGE, PERSONAL INJURY OR DEATH. FOR UNITS WITH SERIALS 1409 AND NEWER HTR 13 HTR 10 HTR 7...
- Page 91 EHK4-31 / EHK7-31 HEATER KIT WIRING DIAGRAMS HIGH VOLTAGE! DISCONNECT ALL POWER BEFORE SERVICING OR INSTALLING THIS UNIT. MULTIPLE POWER SOURCES MAY BE PRESENT. FAILURE TO DO SO MAY CAUSE PROPERTY DAMAGE, PERSONAL INJURY OR DEATH. FOR UNITS WITH SERIALS 1409 AND NEWER HTR 2 HTR 2 HTR 1...
- Page 92 EHK4-46 / EHK7-46 HEATER KIT WIRING DIAGRAMS HIGH VOLTAGE! DISCONNECT ALL POWER BEFORE SERVICING OR INSTALLING THIS UNIT. MULTIPLE POWER SOURCES MAY BE PRESENT. FAILURE TO DO SO MAY CAUSE PROPERTY DAMAGE, PERSONAL INJURY OR DEATH. FOR UNITS WITH SERIALS 1409 AND NEWER HTR 2 HTR 3 HTR 2 HTR 3 HTR 2 HTR 3...
- Page 93 EHK4-60 / EHK7-60 HEATER KIT WIRING DIAGRAMS HIGH VOLTAGE! DISCONNECT ALL POWER BEFORE SERVICING OR INSTALLING THIS UNIT. MULTIPLE POWER SOURCES MAY BE PRESENT. FAILURE TO DO SO MAY CAUSE PROPERTY DAMAGE, PERSONAL INJURY OR DEATH. FOR UNITS WITH SERIALS 1409 AND NEWER HTR 2 HTR 3 HTR 2 HTR 3 HTR 2 HTR 3...
- Page 94 EHK4-75 / EHK7-75 HEATER KIT WIRING DIAGRAMS HIGH VOLTAGE! DISCONNECT ALL POWER BEFORE SERVICING OR INSTALLING THIS UNIT. MULTIPLE POWER SOURCES MAY BE PRESENT. FAILURE TO DO SO MAY CAUSE PROPERTY DAMAGE, PERSONAL INJURY OR DEATH. FOR UNITS WITH SERIALS 1409 AND NEWER HTR 2 HTR 3 HTR 2 HTR 3 HTR 2 HTR 3...
-
Page 95: Unit Wiring Diagrams
DBC COMMERCIAL 15 - 25 Ton Packaged Air Conditioner Unit WIRING DIAGRAMS... - Page 96 UNIT WIRING DIAGRAMS DBC180-240XXX(3,4,7)V***A* Wiring is subject to change. Always refer to the wiring diagram on the unit for the most up-to-date wiring.
- Page 97 DBC180-240XXX(3,4,7)V***A* UNIT WIRING DIAGRAMS Wiring is subject to change. Always refer to the wiring diagram on the unit for the most up-to-date wiring.
- Page 98 UNIT WIRING DIAGRAMS DBC300XXX(3,4,7)B***AB DBC300XXX(3,4,7)V***A* POWER DIAGRAM DCC300 ***(3,4,7) LINE VOLTAGE CCAS1 CCH1 COMP 1 CCAS2 CCH2 COMP 2 CMC 1 FB 1 T3 T2 T1 LAC MC CMC 2 24V CNTL VOLTAGE LINE COMPONENT LEGEND VOLTAGE BLOWER CONTACTOR BLOWER RELAY CIRCUIT BREAKER COMPRESSORCONTACTOR CC AUX SWITCH...
- Page 99 DBC300XXX(3,4,7)V***A* UNIT WIRING DIAGRAMS THERMOSTAT WIRING SMOKE DETECTOR FIELD 2 STAGE COOLING CONTROL WIRING CLASS 2 SENSOR 1 SEN1 AUX A SUPPLY (LINE) VOLTAGE SENSOR 2 SEN2 AUX B 24 VAC SMK DET STAT OPTION CCR1 LPS1 HPS1 -t° HPS2 LPS2 CCR2 -t°...
- Page 100 DBG COMMERCIAL 15 - 25 Ton Packaged Gas/Electric Unit WIRING DIAGRAMS...
- Page 101 DBG180-240XXX3V***A* UNIT WIRING DIAGRAMS CCH1 CCHR1 COMP CCH2 CCHR2 POWER SUPPLY SEE NOTE 4 208V / 240V - 3 ph - 60Hz COMP GRND GRND HIGH SPEED HIGH SPEED CCR1 CCR2 UNUSED UNUSED HEAT HEAT COOL COOL PLF2 TO THERMOSTAT SEE NOTE 7 0140L03766-A Wiring is subject to change.
- Page 102 DBG180-240XXX3V***A* UNIT WIRING DIAGRAMS Wiring is subject to change. Always refer to the wiring diagram on the unit for the most up-to-date wiring.
- Page 103 DBG180-240XXX(4,7)V***AB UNIT WIRING DIAGRAMS CCH1 CCHR1 COMP CCH2 CCHR2 POWER SUPPLY SEE NOTE 4 460V / 575V - 3 ph - 60Hz COMP GRND GRND HIGH SPEED HIGH SPEED OR APPROPRIATE INPUT VOLTAGE CCR1 CCR2 UNUSED UNUSED HEAT HEAT COOL COOL PLF2 TO THERMOSTAT...
- Page 104 DBG180-240XXX(4,7)V***AB UNIT WIRING DIAGRAMS Wiring is subject to change. Always refer to the wiring diagram on the unit for the most up-to-date wiring.
- Page 105 UNIT WIRING DIAGRAMS DBG300XXX3(B,V)***AB POWER DIAGRAM IIC DIAGNOSTIC BLINK CODES DCG300***3 STAT US LIGHT EQUIPMENT STATUS CHECK NORMAL OPERATION ------- CHECK INPUT POWER NO POWER OR CHECK FUSE ON CONTROL INTERNAL CONTROL LINE VOLTAGE REPLACE CONTROL GAS FLOW GAS PRESSURE IGNITION FAILURE GAS VALVE 1 BLINK...
- Page 106 UNIT WIRING DIAGRAMS DBG300XXX(4,7)(B,V)****AB POWER DIAGRAM IIC DIAGNOSTIC BLINK CODES DCG300***(4,7) STATUS LIGHT EQUIPMENT STATUS CHECK NORMAL OPERATION ------- CHECK INPUT POWER NO POWER OR CHECK FUSE ON CONTROL INTERNAL CONTROL LINE VOLTAGE REPLACE CONTROL GAS FLOW GAS PRESSURE GAS VALVE IGNITION FAILURE 1 BLINK OPEN ROLLOU T SWITCH...
- Page 107 DBG300XXX(3,4,7)V***AB UNIT WIRING DIAGRAMS FIELD THERMOSTAT WIRING SMOKE DETECTOR CONTROL 2 STAGE COOLING WIRING CLASS 2 SEN1 SENSOR 1 AUX A SUPPLY (LINE) VOLTAGE SENSOR 2 SEN2 AUX B 24 VAC SMK DET STAT OPTION HPS1 LPS1 CCR1 -t° HPS2 LPS2 CCR2 -t°...
- Page 108 CUSTOMER FEEDBACK Daikin is very interested in all product comments. Please fill out the feedback form on the following link: https://daikincomfort.com/contact-us You can also scan the QR code on the right to be directed to the feedback page.
Need help?
Do you have a question about the DBG Series and is the answer not in the manual?
Questions and answers