
Related Manuals for Atomos Ronin


Summary of Contents for Atomos Ronin
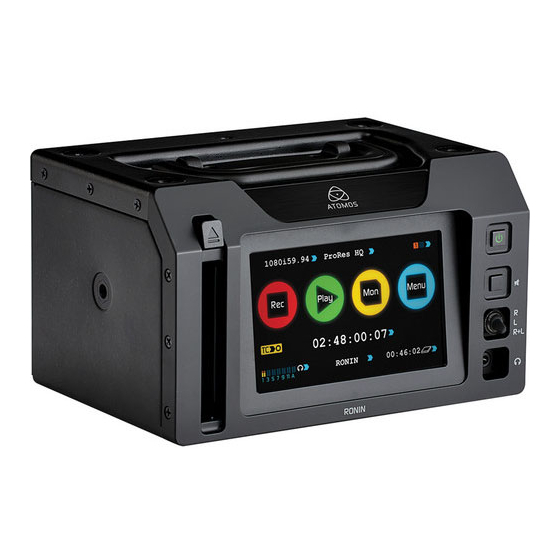
- Page 1 Atomos Ronin User Manual EDITION 1: JUNE 2013 Have you registered your Ronin yet? Upgrade to 3 year warranty now. Website: www.atomos.com | Sales: sales@atomos.com | Support: support@atomos.com...
-
Page 2: Table Of Contents
............• The Ronin can become warm or hot with prolonged use. Do not place it in Screen Lock . -
Page 3: Warranty & Conditions
Software and/or the Atomos • Unauthorised repairs or attempted repairs; Ronin in whole or in part. Any failure to comply with the above or any • Tampering with or modification of the goods; other terms and conditions contained herein will result in the automatic •... -
Page 4: Introduction
Like the Samurai, it can operate on location with battery Your Ronin comes with a standard 1 year warranty on all parts and or DC power, but it can also be used in a fixed facility, rack-mounted accessories. -
Page 5: What's Included
1. What’s included We try to provide you with as complete a package as possible, you don’t Atomos does not sell storage and your package will not contain any have to add anything except 2.5” storage media (you can buy additional spinning disks or SSDs. -
Page 6: What You Also Need
Ronin is going to be attached to a tripod or if it is Here are some things that you should bear in mind when using not going to be subject to excessive vibration. -
Page 7: Hd-Sdi Cables
The Master Caddy can’t be inserted the wrong way round. Always make sure that the disk connector faces the slot in the Ronin. You have to be quite firm to push the Master Caddy into place, but don’t push too hard, just in case something isn’t set up or aligned properly. - Page 8 No. 1 and to the left of batter No. 2 as you look at the back of the Ronin. Pull the latches towards the batteries to release them.
-
Page 9: Connecting And Powering Up
This switch and button arrangement allows for the internal power supply to charge the batteries even when the Ronin is not in active use. Battery level condition can only be checked when the Ronin is running. -
Page 10: Power On/Power Off
There is also a pair of XLR Balanced Line-out sockets with adjustable This feature is compatible with certain Sony/Canon cameras only. This level control. On the front of the Ronin is a 3.5mm Headphone Out connection is also used for Serial commands control, which is still under Socket, which has itís own independent level control and mute switch. -
Page 11: Other Physical Features
The Ronin is highly portable, but also has mounting fixtures as well as rack-mounting capabilities. The top of the Ronin unit incorporates a convenient handle for hand carrying. There are fold-down feet on the bottom of the unit that provide various tilting combinations for use on a desk or as part of mobile production. -
Page 12: Using The Ronin
This is the screen you see whenever you are not in a function or sub-menu, and it is the first screen that the Ronin boots into when you turn it on. All A large blue arrow in the top right of the screen will... -
Page 13: Home Screen / Menu Functions
Mon (Monitor) STANDBY Pressing this icon connects the incoming video signal to the screen, so that you can use the Ronin as a field monitor. More about monitoring in the next section, Monitoring and Recording. RECORDING icon is dimmed and disabled if there is no valid video input OR if the disk is full. -
Page 14: Screen Lock
Ronin Info Shows the software (firmware) version and unique device ID (DID) of your Ronin device. This will be useful if you ever have to speak to Atomos technical support or a support agent from your reseller. You can also check on the Atomos website to ensure you are running the latest firmware: http://www.atomos.com/Ronin/firmware/... -
Page 15: Batteries Screen / Auto Switching/Manual Switching
Unit Name Warning: If both of the batteries are fully depleted, the unit will turn itself off. The Ronin will switch to the battery screen for the last 5 seconds of available power before shutting down, alerting you that unit name serves two main purposes: shutdown is about to occur. -
Page 16: Audio In
Audio During Playback Mode When you enter into Playback mode on the Ronin it will only output channels 1/2 on the headphones and XLR outputs, please bear this in mind when you select the audio channels for recording. Also note, all recorded audio channels will be present on the SDI output. -
Page 17: Monitoring And Recording
8. Monitoring and Recording Connect to input Before recording As soon as you connect a supported input to the Ronin’s SDI input: • Check there is a valid signal by looking at the main screen, ensuring it looks like the ‘ready-to-record’ screen •... -
Page 18: Smartcontrol
There is a flag within the SDI signal that lets the Ronin know the start/stop record has been pressed on the camera; in turn this will trigger the Ronin to start/ • REC is in the top right corner of the monitor screen stop recording at the same time as the camera. -
Page 19: Using The Ronin As A Field Monitor/Electronic Viewfinder
Camcorder icon. A new set of icons will appear On the right hand side are the icons for each SmartMonitor tool. By default the Ronin uses red, but you can change the colour in the settings and the threshold can be set to high, med or low. -
Page 20: Smartlog
To help you determine the exposure range with more accuracy, please use the scale above: You can apply all filters to your monitor at the same time but set up individually for your needs Atomos Ronin – User Manual Edition 1: June 2013... -
Page 21: Exporting .Xml
• Then it will return you to the previous screen points shown on the timeline of the clip once selected. You can carry on recording but please remember before you eject the drive to export your XML files. Atomos Ronin – User Manual Edition 1: June 2013... -
Page 22: Organising Material On Disk
If you do not set this up Ronin will start recording from menu screen. Scene 1 and Shot 1 automatically. The Ronin uses the exFAT file system. This is recognised natively by both PCs and Macs, without any need to install driver software. -
Page 23: Anti-Shock Technology
Should one of these events occur, the Ronin will sense the hard disk slowdown. If there is a break in the recording it will detect the number of frames involved and will then continue to record when it is safe to do so. -
Page 24: Timecode
Ronin has been out of record. The start timecode of each clip will be the exact time of day when recording started. -
Page 25: Pulldown
You will, of course, want the Ronin to record eg 1080p24, not 1080i60 Rec button will highlight. to the disk. In many cases, it is not easy for the Ronin to detect the pulldown operation in the video, so you will have to set the correct mode 3:2 pulldown detection is difficult, if not impossible to detect on in the Ronin as well as setting it on your camera. -
Page 26: Playback & Playout
You will then be taken to the Play Navigation screen. exFAT Disks If the disk has been formatted on Ronin it will use the ExFat file system. The Play navigation screen will display a list of files that have been recorded. -
Page 27: Play Mode / Pause Mode
Note that you can jump between any of the controls while in playback: you do not have to press Stop first. Fast Reverse/Fast Forward Plays the clip at 8x normal speed Fast Fast Reverse/Fast Fast Forward Plays the clip at 64x normal speed Atomos Ronin – User Manual Edition 1: June 2013... -
Page 28: Loop Mode
At any time, you can hide all the visible controls by simply touching The Ronin has the ability to play back a single clip in loop mode via the the screen (away from any controls) once. Touch it again to bring SDI output. -
Page 29: Connecting And Editing
Windows and MAC OS. The Operating Systems that support exFAT are: If you have used a FAT32 formatted disk in the Ronin this will have a • Windows XP - install the following update : folder structure Scene, Shot, Take. This will mean you either transfer all http://www.microsoft.com/download/en/details.aspx?id=19364... -
Page 30: Importing / Import Into Final Cut Pro
Ronin disk. Importing Ronin footage into Final Cut Pro You can import Ronin footage into Final Cut Pro (FCP) in just a few simple steps. First, connect the Ronin Docking Station to your Apple Mac using the Firewire 800 port (USB 2.0 will also work). -
Page 31: Smartlog With Fcpx
• Select the drive (in this example it is EXCVIDEO) • Double-click the unitname.FCPXML file • This will open FCP X and import the .xml file • Select the Ronin drive under Devices (in this example it is called EXCVIDEO) • Choose the unitname.FCPXML, select Import FCP X will make a event of the disk name and reference all the footage in that event. -
Page 32: External Power Supply
If you are using a Connect H2S to bring an HDMI input to the Ronin, connect the HDMI cable to the HDMI input of the Converter, and take a short HD-SDI cable from the Converter to the Ronin. -
Page 33: Software Upgrades
Video. 3. Put 2 freshly charged batteries on your Ronin. a. It is very important that your Ronin does not lose power during a firmware upgrade. b. This is a necessary precaution to make doubly sure that power is not lost. -
Page 34: Technical Specifications
• Connect H2S converter • Connect S2H converter Website: www.atomos.com | Sales: sales@atomos.com | Support: support@atomos.com Atomos Ronin – User Manual Edition 1: June 2013 © ATOMOS Global Pty. Ltd. trading as ATOMOS under license. All trademarks are the property of their respective owners.
Need help?
Do you have a question about the Ronin and is the answer not in the manual?
Questions and answers