Advertisement
Quick Links
Advertisement

Related Manuals for Atomos ZATO CONNECT


Summary of Contents for Atomos ZATO CONNECT
- Page 1 52JATOMOS ZATO CONNECT USER MANUAL Al"OMOS...
- Page 2 I/O AND PHYSICAL FEATURES The front of the ZATO CONNECT is almost entirely covered by its 5" SuperAtom IPS display. On the right side of the device, you'll find the multi-purpose Power button, as well as the ZATO CONNECT's SD Card slot.
- Page 3 The left side of the enclosure houses the 3.5mm Mic/Line Input jack, a 3.5mm Headphone jack, and a 2.5mm Serial/LANC connector. The primary I/O of the ZATO CONNECT is located at the rear of the device. It consists of two...
- Page 4 An additional USB-C port named USB PD is placed to the left of the battery slot. If you want to power your ZATO CONNECT via a USB PD power adapter or a power bank, this is where you'd connect those to.
- Page 5 Other physical features are the device's ventilation holes along the top and bottom edges of the enclosure, which should not get obstructed or covered up during use. To provide mounting flexibility, the ZATO CONNECT includes 1/4"20 threads on the top and bottom.
-
Page 6: Batteries And Power
BATTERIES & POWER Before you can power on the ZATO CONNECT, you first need to attach a power source to it. This could either be an NP-F/L-Series battery, or a USB PD power bank or power adapter. HamI USB1 <OUT... - Page 7 Note: The ZATO CONNECT usually operates at ~10W during regular use, but it may draw up to 20W of power under load. Please ensure that your USB PD power source can supply at least 20W of power for reliable operation in any situation.
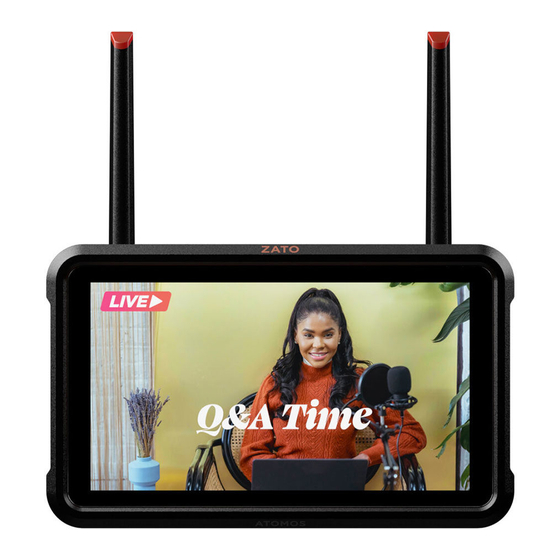
- Page 8 BAR & BOTTOM ROW MENUS After turning on the ZATO CONNECT for the first time, you'll be greeted by a NO INPUT message, sitting on top of a bright orange backdrop. This signals that there's currently no Input Source connected to the ZATO CONNECT.
- Page 9 SD Card Icon: Shows a live preview of the remaining record time with the currently inserted SD card. LIVE Button: Press to start or stop the streaming output of the ZATO CONNECT. Network: Details WiFi connection status and signal strength. The second icon highlights the Ethernet connection status.
- Page 10 16:9: Brings up the 16:9 Frame Guide. 1.91: Brings up the 1.91 Frame Guide. 4:3: Brings up the 4:3 Frame Guide. 1:1: Brings up the 1:1 (Square) Frame Guide. 4:5: Brings up the 4:5 Frame Guide. 9:16: Brings up the 9:16 Frame Guide. Menu Icon: Provides quick access to the last Menu you've previously had open.
- Page 11 I/O TAB – INPUT, OUTPUT & AUDIO The I/O Tab in the ZATO CONNECT's main menu includes three sub-menus, which can be accessed via the shelf menu on the left side of the menu window. Input: The Input menu includes the Video Input section on the left, allowing you to toggle between HDMI and USB UVC video input sources.
- Page 12 Note: While the HDMI Out port supports outputting 1080p signals at up to 60fps, the USB UVC output is limited to a maximum output frame rate of 30fps. If the ZATO CONNECT's input signal surpasses 30fps, the ZATO's USB UVC output will automatically drop frames to output a signal at half of the original frame rate.
- Page 13 final adjustments via the Output Mix slider. Note: Both Line (-10 dBu) and Mic Levels (-40 dBu) are supported. You may switch between them by pressing the label text on the right side of the menu window.
- Page 14 WiFi and Ethernet. WiFi: To connect your ZATO CONNECT to a WiFi network, either at home, your studio, your phone hotspot, or any other WiFi access point, enable the WiFi switch on the left of this menu. Within seconds, the ZATO will fetch a list of available networks within its range and display them in the field on the right.
- Page 15 open the network properties. In there, tap on the password field. A keyboard will pop up, allowing you to enter the password. Once you enter the password and confirm by pressing OK, the keyboard overlay closes, and you'll return to the WiFi submenu. A loading indicator is displayed, highlighting that your ZATO is attempting to connect to the WiFi network.
- Page 16 Before establishing a network connection via Ethernet, ensure that WiFi is disabled. Next, connect the included USB-C to Ethernet dongle to the port labeled USB2 in the back of the ZATO CONNECT. After that, navigate to the Ethernet tab within the Network menu and press the ON/OFF...
- Page 17 Under Configure IPV4, you can either leave the ZATO in its default state, Using DHCP, or you can switch it over to Manual mode for a fully manual network configuration. Next, connect your Ethernet cable to the USB-C to Ethernet adapter. If you've selected Using DHCP in the previous step, the ZATO will automatically fetch its network configuration parameters from the Switch/Router you're connected to.
- Page 18 Note: Before connecting to the Atomos Cloud, your device must first be connected to the Internet. You can connect your ZATO CONNECT to the Internet via WiFi, or via the included USB-C to Ethernet adapter. For more information, check out the article "Network Tab – WiFi &...
- Page 19 Note: Since the destination and stream key have not been configured yet, these fields will stay empty for now. Next, you will need to configure the services for this device at atomos.cloud. Tap on the + symbol next to Add Destination in the device box and a new window will open, displaying...
- Page 20 Connect menu along with a QR code. Scan the QR code to connect to Atomos Cloud Studio on your mobile device, or navigate to atomos.cloud on a desktop browser. Either sign up for a new account, or log in to an existing account.
- Page 21 Select a destination, and you will be prompted to enter your credentials and other settings for that destination. Once you've configured your destination, engage the ON/OFF switch to send the streaming destination information including the Stream Key to the ZATO CONNECT.
- Page 22 Stream Key is hidden, but you can toggle its visibility by tapping on the "Eye" icon on the left. Once all the destination information is available on the ZATO CONNECT, you can start or stop the streaming output via the LIVE button in the top menu bar. ...
- Page 23 Once the destination platform receives the RTMP/S feed from the ZATO CONNECT, the live stream will begin. To end the live stream, just press the ZATO's Live button again. The stream will automatically end, when it's no longer receiving an RTMP/S feed.
-
Page 24: Add Media
After you transferred your overlay graphics to the SD card, insert it into the SD card slot on the right side of the ZATO CONNECT. Add Media: In the Overlay tab, start in the Add Media submenu, where you can load up to 8 PNG graphics into the ZATO's media slots. - Page 25 Once selected, press Browse Files, which opens up the file browser, allowing you to navigate the folder structure of your SD Card. When you're in the folder containing your PNG graphics, select the file you want to load. A popup will open, asking you if you want to upload this graphic to the previously selected media slot.
- Page 26 Before you can add an overlay graphic to your image, you need to create a preset. Press on the Preset you want to use and then on Edit, allowing you to configure it freely and to your liking. Next, select the Overlay Position you want to assign a PNG graphic to. After that, select the graphic you want to use from the Media Slots on the right and press Save.
- Page 27 Repeat this step for all the other overlay graphics you want to add to this particular preset. Once all the position assignments are completed, you may apply the preset to your image by pressing the Apply button in the bottom right corner of this menu. Once the Apply button is pressed, it changes its state to Hide, so if you press it again, it will hide all overlays currently applied to the image.
- Page 28 PiP: With the release of AtomOS Lite 10.03.01, we've added the ability to apply PiP overlays to your program stream by choosing one out of three different sources. For configuration, we've added the PiP menu to the Overlay tab. Selectable Picture-in-Picture sources include USB UVC, HDMI inputs, and also recorded clips from the SD Card.
- Page 29 firmware 10.03.01, as this is the version where PiP was introduced to its feature set. The first step in setting up your ZATO CONNECT for a PiP workflow is selecting your main input source that the PiP overlay will sit on top of. For this, connect either an HDMI device to the ZATO’s HDMI Input or a USB UVC device to its USB-1 port.
- Page 30 LIVE RECH.264ST •01:05:13 IN1080p24 AUDIOMIX ouT1080p24 POWERUSBPD NETWORK RecordMedia Network Connect Overlay General VIDEOINPUT Input >HDMI Audio qil7 16.9 1.91 9:16 If you want your main feed to be a playback file from an SD Card instead, select SD Card in the Input menu.
- Page 31 For this, navigate to the PiP menu within the Overlay tab. Once you’re there, you may now physically connect your additional PiP input source to the ZATO CONNECT (HDMI or USB UVC) or select the SD Card if your PiP overlay should be playing back a pre-recorded file.
- Page 32 Example 2: If the SD Card is your main input source, you can select either HDMI or USB as a PiP input source. Example 3: If USB is your main input source, you can select either HDMI or the SD Card as a PiP input source.
- Page 33 RECORD MEDIA – CODEC, FILE NAME & MEDIA INFO The Record Media tab acts as the main access point for organization on the ZATO CONNECT. Here, you'll find the Codec, File Name, and Media Info sub-menus. Codec: Codec Format details the codec type you're recording in. Presently, only H.264 recording in an MP4 container is available.
- Page 34 This is where you can adjust the naming of the files you're going to record with the ZATO CONNECT. At the top, File Name previews the naming of the file that would be used if you'd press the record button right now. Under Unit Name, you can personalize the name of your device by entering a new one via the keyboard.
- Page 35 GENERAL TAB – POWER, DISPLAY, DATE & TIME, ABOUT DEVICE The General Tab in the ZATO CONNECT's main menu includes four less frequently visited sub-menus. Power, Display, Date & Time, as well as About Device. Power: The Power section provides basic instructions on the multipurpose utilization of the ZATO's power button, as well as providing more information on the Battery &...
- Page 36 "Not Connected" instead. Display: The Display menu only contains one large horizontal slider, allowing you to adjust the brightness/backlight strength of the ZATO CONNECT. Date & Time: In this menu, you can configure the ZATO's handling of the Date & Time.
- Page 37 Atomos Cloud Studio account (if you've previously paired it). To do this, log into your account via atomos.cloud, and click on the three dots in the top right corner of your device's entry. A dropdown menu will open, allowing you to unpair your device. Once you press unpair device, you will need to confirm your selection once more in another popup...
- Page 38 Pressing the Download License button creates a .TXT file on the SD card, including licenses for the 3rd party software libraries we use on the ZATO CONNECT.
- Page 39 ZATO PRODUCT SPECIFICATIONS Physical Specifications Dimensions (W x H x D mm) 151mm / 5.94" x 91,5mm / 3.6" x 29,5mm / 1.16" Weight 245g / 8.64oz. Environmental Ambient operating temperature Up to 40 Degrees Celsius Construction and Control Body Polycarbonate ABS Plastic Cooling Passive...
- Page 40 Ethernet via included USB-C Dongle Wi-fi WiFi 5 USB Host USB Webcam Atomos Cloud Connect to Atomos Cloud Studio services Cellular Connect to Hot Spot via Wi-Fi Web Streaming USB UVC up to 1080p60 RTMP / S Authenticate via Atomos Cloud Studio...
- Page 41 HDMI 2ch, input dependent Analogue Audio in 3.5mm Jack - 5v power Analogue Audio Out 3.5mm Jack Headphone out 3.5mm Jack Resolution and Frame Rates (Record, Monitor & Playback) FHD 1920 x 1080 Progressive up to 1080p60 Recording CODEC H.264 up to 1080p60 Playback Loop...
- Page 42 Display Flip Vertical and Horizontal (Selfie mode) Supported Applications Video Codecs All Applications with support for H.264 in .MP4 wrapper What’s in the box 2 x Wi-Fi Antennas with black caps, 5 x Antenna colored caps: White/Red/Yellow/ Black/ Green, 2 x Antenna Top Caps, 2 x Antenna Mount Cover, 1 x USB-C to USB-C Cable, Accessories included USB-C to Ethernet Adapter, 1 x Antenna Storage Pouch, 1 x Quick Start Guide, 1 x Screen Cloth...
Need help?
Do you have a question about the ZATO CONNECT and is the answer not in the manual?
Questions and answers
Unable to submit ZATO CONNECT registration due to my serial number labeled invalid on your site. entered number is off the products box, 13 characters proceeded by; S/N under a box labeled ATOMZATCO1