
Subscribe to Our Youtube Channel
Related Manuals for Otto OTWILLOW


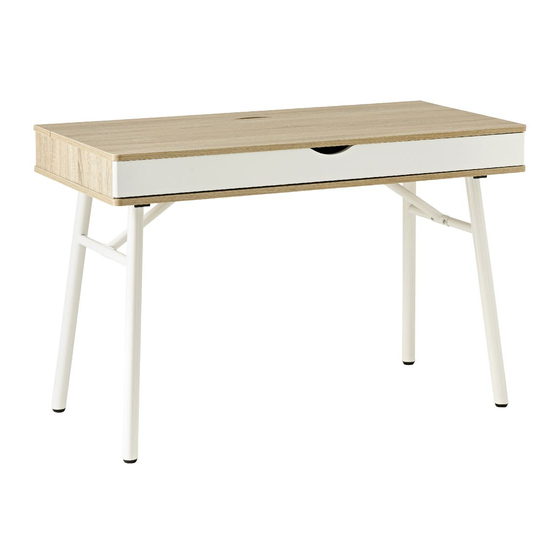
Summary of Contents for Otto OTWILLOW
- Page 1 ASSEMBLY INSTRUCTIONS WILLOW 1 DRAWER 1150MM DESK OTWILLOW This design and instruction booklet is subject to copyright. 1 Carton www.officeworks.com.au For spare parts or hardware call (03) 9310 3011 or email hardware@kyvas.com.au...
- Page 2 To view an assembly video, go to https://www.officeworks.com.au/ Search the product by item code or name: Click on the icon to watch the video. People Required General Advice Customer Service Contact Details More Than One Person Is Required Assemble On A Clean Flat Spare Parts &...
- Page 3 Part Overview Part List Parts located in Carton - OTWILLOW Hardware List Hardware Pack located in Carton - OTWILLOW Allen Key (M6 x 30mm) M6-size (M6 x 12mm) X 12pcs X 12pcs X 1pc For missing hardware, please contact Kyvas on (03) 9310 3011 or email hardware@kyvas.com.au...
- Page 4 Assembly Disassemble the drawer section from part 1 in order to take the fillers out. y l l...
- Page 6 Care Advice Care lnstructions - PVC/ Melamine Finish Desk Keep away and protect from direct sunlight and heat. Do not place sharp materials(knife,fork,etc) directly onto your furniture as sharp material may scrape and damage the finish. Clean up spills quickly. Water left over a prolonged period of time may cause damage.
- Page 7 Hinge adjustment If the doors do not appear square or aligned, loosen or tighen the appropriate screws on each case hinge as illustrated. 1) Side to side adjustment: Loosen screw A, adjust gap with screw B and re-tighten screw A. 2) Depth adjustment: Loosen screw A, push hinge arm forwards or backwards, re-tighten...
- Page 8 Warranty 3 years Product Warranty – valid for Australian customers only Officeworks Ltd warrants that this product will be free from defects and work as intended for 3 years from the date of purchase by the original customer. If the product has any defects or does not work as intended during the Warranty Period, Officeworks will, at its election and at its expense, repair or replace the product.
Need help?
Do you have a question about the OTWILLOW and is the answer not in the manual?
Questions and answers