Advertisement
Quick Links
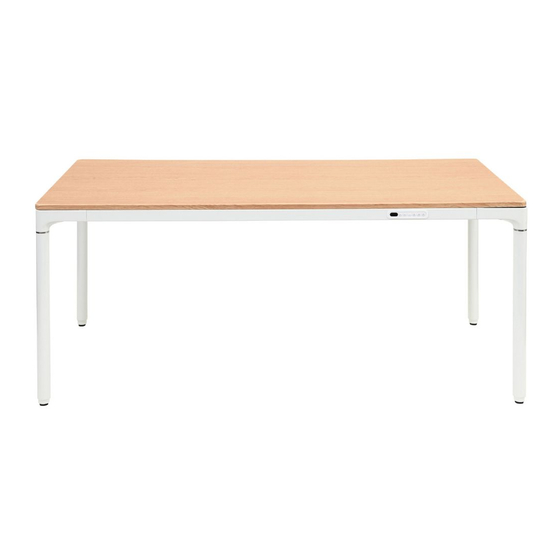
SKEIN ELECTRIC HEIGHT ADJUSTABLE DESK 1600OA
T
h
s i
d
e
s
g i
n
a
n
d
n i
w
w
. w
f o
c i f
e
w
r o
s k
c .
For spare parts or hardware call 1300 OFFICE
OTSKE160OA
t s
u r
t c
o i
n
b
o
o
l k
t e
s i
o
m
a .
u
s
u
b
e j
t c
o t
c
o
p
r y
g i
1 (
3
0
0
6
1 / 26
h
. t
3 Cartons
3
3
4
2
3
. )
Advertisement

Related Manuals for Otto SKEIN 1600OA


Summary of Contents for Otto SKEIN 1600OA
- Page 1 SKEIN ELECTRIC HEIGHT ADJUSTABLE DESK 1600OA OTSKE160OA c i f 3 Cartons For spare parts or hardware call 1300 OFFICE 1 / 26...
- Page 2 60 minutes People Required 2 / 26...
- Page 3 Tools Required CAUTION: Do not use tools other than those required, as this can damage your new item NOTE Please check you have all hardware before assembling. If you are missing any hardware, please contact 1300 OFFICE (1300 633 423). Please ensure you have the name of the item, required hardware part and quantity.
-
Page 4: Safety And Warnings
Safety and Warnings •This table complies with the prescribed safety regulations. Inappropriate use may cause damage to persons and table. •Please read the operation manual prior to start using the table. It provides you with important information about safety, use, installation and maintenance of the table, and thus protecting you and your children and avoiding damage on the table. - Page 5 Parts Located in Carton - OTSKE160O1 5 / 26...
- Page 6 6 / 26...
- Page 7 Parts Located in Carton - OTSKE160O2 Parts Located in Carton - OTSKE160O3 7 / 26...
- Page 8 ST5x18 ST3.5x16 M5x10 Ax18 Cx32 70mm 14.2- 7x3 Ex16 Spare parts number- Spare parts number- Spare parts number- HWSKEPWRCB HWSKETRNFR HWSKECNTPN 8 / 26...
- Page 9 Step 1 Install legs Insert the beam into column 9 / 26...
- Page 10 Step 2 Install the legs Fix the 8x screws(C) by allen key (D). C C C 10 / 26...
- Page 11 Step 3 Install legs Insert the beam into column 11 / 26...
- Page 12 Step 4 Install the legs C C C Fix the 8x screws(C) by allen key (D). 12 / 26...
- Page 13 Step 5 Install the long beams Insert the long beam into the legs. 11 12 Fix the long beam by 8 screws(C) with allen key(D). 13 / 26...
- Page 14 Step 6 Install the long beams Insert the long beam to other side legs,and clear up the cables. Running the connect cable into long beam, go out from the cut out. 14 / 26...
- Page 15 Step 7 Install the long beams Fixed the long beams in other side by 8 screws(C). 15/ 26...
- Page 16 Step 8 Install the controller Push the controller into the long beam 16 / 26...
- Page 17 Step 9 Stick the rubber spacer. 17 / 26...
- Page 18 Step 10 Install the tabletop Fix the top by 2 screws (A). 18 / 26...
- Page 19 Step 11 Install the tabletop Fix the top by 16 screws (A). Ax16 19 / 26...
- Page 20 Step 12 Install the control box Fix the control box by 2 screws (B). 20 / 26...
- Page 21 Step 13 Install the cable bag Hookup the bag on the beam. Hookup 21 / 26...
- Page 22 Step 14 Connect the cables Put the adapoter on the bag. Handset column4 column3 column2 column1 Use the cable tie (F) to fix the cable at proper position and keep cables organized Tear off Manage Cable 22 / 26...
- Page 23 Step 15 Finished Maximum weight capacity 120 KG 23 / 26...
- Page 24 Press 5S Press 2S 24 / 26...
- Page 25 Press 2S Press 2S Press 8S Press 5S Press 5S 25 / 26...
- Page 26 Warranty 5 years Product Warranty – valid for Australian customers only Officeworks Ltd warrants that this product will be free from defects and work as intended for 5 years from the date of purchase by the original customer. If the product has any defects or does not work as intended during the Warranty Period, Officeworks will, at its election and at its expense, repair or replace the product.
Need help?
Do you have a question about the SKEIN 1600OA and is the answer not in the manual?
Questions and answers