Advertisement
Quick Links
FOR AGES:
WEIGHT LIMIT:
3-9
Manual en
español ubicado
en GQBrands.com
Spanish Manual located
at GQBrands.com
CUSTOMER SERVICE
GQBrands.com • CustomerService@GQBrands.com • 1-866-498-5269 • 4401 Samuell Blvd, Ste 150, Mesquite, TX 75149
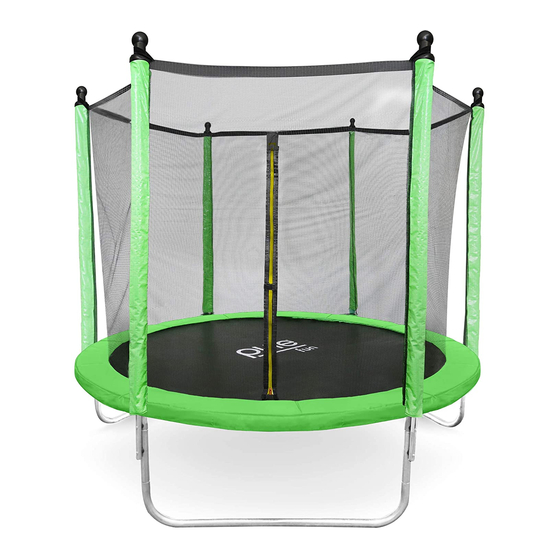
DURA-BOUNCE 8FT TRAMPOLINE SET
MODEL# 9308TS
PRODUCT MANUAL - VERSION 5.20.01
TO BUILD:
250
Lbs
113 Kgs
TOOLS NEEDED:
2
X
Advertisement

Subscribe to Our Youtube Channel
Summary of Contents for Pure Fun DURA-BOUNCE 8FT TRAMPOLINE SET
- Page 1 DURA-BOUNCE 8FT TRAMPOLINE SET MODEL# 9308TS PRODUCT MANUAL - VERSION 5.20.01 FOR AGES: WEIGHT LIMIT: TO BUILD: TOOLS NEEDED: 113 Kgs Manual en español ubicado en GQBrands.com Spanish Manual located at GQBrands.com CUSTOMER SERVICE GQBrands.com • CustomerService@GQBrands.com • 1-866-498-5269 • 4401 Samuell Blvd, Ste 150, Mesquite, TX 75149...
- Page 2 CUSTOMER SERVICE INFORMATION Thank you for purchasing: DURA-BOUNCE 8FT TRAMPOLINE SET MODEL# 9308TS If you have an issue with your item, do not return. Please report To register you product please visit: items that are damaged or missing parts to the manufacturer GQ www.globalqualitybrands.com/product-registration...
- Page 3 WARNINGS ADULT ASSEMBLY REQUIRED CHOKING HAZARD - Small Parts NOT for children under 3 years of age. Please read these warnings and the information in this manual in its entirety. Failure to comply with the following instructions may increase the risk of serious injury and/or death: •...
-
Page 4: Trampoline - Parts List
TRAMPOLINE - PARTS LIST Jump Mat Frame Pad Curved Frame with T-Section “U” Shaped Leg Leg Extension Spring Screw TOOLS INCLUDED Spring Tool Wrench Screwdriver GQBrands.com CustomerService@GQBrands.com 1-866-498-5269... -
Page 5: Enclosure - Parts List
ENCLOSURE - PARTS LIST Lower Pole Upper Pole Pole Foam Pole Sleeve Pole Cap Enclosure Net 15- 80mm M6 Bolt Plastic M6 Nut Washer Washer Cap Nut 9308TS... - Page 6 ASSEMBLY INSTRUCTIONS STEP 1: Parts: Part 4 (x3) - “U” Shaped Leg Part 5 (x6) - Extension Leg Attach the Leg Extensions (5) to all T- Section with the horizontal opening facing the inside of the frame. Place the “U” Shaped Legs (4) with the openings aligning to the horizontal opening from the Extension Leg.
- Page 7 ASSEMBLY INSTRUCTIONS STEP 4: Once all x3 completed Legs have been installed, Flip each at a time and connect them to ensure they stay connected. With the help of another adult, carefully flip the complete frame so it stands on its own. Once all assemble legs are connected, make sure to push all parts together to make sure they are connected and snug...
- Page 8 ASSEMBLY INSTRUCTIONS LEARNING TO INSTALL SPRINGS Install the Spring (6) by placing the “R” “R” “C” Hook on the V-Ring of the Trampoline Mat. Hook Hook Using the Spring Tool (8), pull the “C” Hook until it reaches the opening in the frame. Spring ends facing down “R”...
- Page 9 ASSEMBLY INSTRUCTIONS STEP 7: Parts: Part 2 (x1) - Frame Pad Unfold the Frame Pad (2) and place it on top of the Top Rail and springs. The Frame Pad must cover the Top Rails completely to avoid injury. STEP 8: Tighten the Elastic Hook at the bottom of the Frame to the V-Ring as shown to secure to the trampoline.
- Page 10 ASSEMBLY INSTRUCTIONS STEP 9: Parts: Part 9 (x6) - Lower Pole Align the openings of the Lower Pole (9) to the openings of the T-Section and the middle opening of the Leg extension. STEP 10: Following the instructions on Page 11, Lower Pole install all Lower Poles to the frame of the Locations...
- Page 11 ASSEMBLY INSTRUCTIONS 80mm M6 Bolt M6 Nut Plastic Washer Washer Nut Cap 9308TS...
- Page 12 ASSEMBLY INSTRUCTIONS STEP 11: Parts: Part 11 (x6) - Pole Foam Slide x6 Pole Foams (11) once all Lower Poles have been installed. STEP 12: Parts: Larger Part 10 (x6) - Upper Pole Opening Part 11 (x6) - Pole Foam Part 12 (x6) - Pole Sleeve Slide all x6 Pole Foams(11) to x6 Upper Poles.
- Page 13 ASSEMBLY INSTRUCTIONS STEP 13: Slide all x6 Assembled Upper Poles with the larger opening sliding through the bottom pole. Make sure that the top of the Bottom Pole aligns and attached to the bottom Upper pole when sliding the sleeve down. STEP 14: Parts: Part 13 (x6) - Pole Caps...
- Page 14 ASSEMBLY INSTRUCTIONS STEP 15: Parts: Part 14 (x1) -Enclosure Net Place the Enclosure Net (Part 14) in the middle of the Trampoline, and hook each upper loop to a Pole Cap NOTE: Leaving the zipper open will make it easier to install the enclosure netting.
- Page 15 ASSEMBLY INSTRUCTIONS STEP 16: Close the zipper of the enclosure netting and secure with the Buckle Hook. At the bottom of the Enclosure netting there are hooks that need to be attached to the V-Rings of the trampoline. Secure all Hooks to tighten the Enclosure netting to the trampoline as shown.
-
Page 16: Frequently Asked Questions
FREQUENTLY ASKED QUESTIONS • Question: “The foam padding or mat is • Question: “I had a part missing from damaged, what should I do?” my box” or “something was damaged in shipping, can you send it to me?” Answer: If you are still within your warranty period (90 Days from initial Answer: If it has been 30 days or less purchase) you should contact customer...


Need help?
Do you have a question about the DURA-BOUNCE 8FT TRAMPOLINE SET and is the answer not in the manual?
Questions and answers