Advertisement
Quick Links
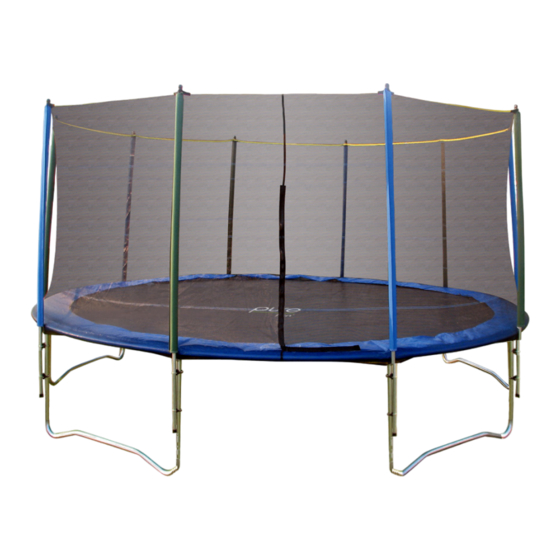
Pure Fun 12' Trampoline/Enclosure Set
Model No. 9012TS-12
Owner's Manual
Please read all the instructions before using this product.
Consult a physician before beginning any exercise program or strenuous activity
T
he contents of this package
are not suitable for children
under 3 years of age.
Contains small parts which
may cause choking.
Age Recommendation:
6+ YRS
Pure Fun is a Trademark of
Pure Global Brands, Inc.
Do not allow more than one person on the trampoline at any time.
Do not allow small children to use unless supervised by an adult.
ADULT ASSEMBLY REQUIRED.
For special offers and to ensure warranty protection, register your product at:
www.pureglobalbrands.com
Advertisement

Related Manuals for Pure Fun 9012TS-12


Summary of Contents for Pure Fun 9012TS-12
- Page 1 Age Recommendation: 6+ YRS Pure Fun is a Trademark of Pure Global Brands, Inc. Do not allow more than one person on the trampoline at any time. Do not allow small children to use unless supervised by an adult.
- Page 2 OWNERS MANUAL CUSTOMER SERVICE INFORMATION Thank you for purchasing our Pure Fun™ 12’ Trampoline/Enclosure Set. At Pure Global Brands, we want all of our customers to be completely satisfied with their purchase. Please take time to review the contents of the product you have just received to make sure that all of the parts are included.
-
Page 3: Limited Warranty
(photocopy of the original store receipt, indicating the date of purchase). All freight and handling fees are the responsibility of the consumer to pay, both to and from Pure Fun. All warranty claims must be preauthorized by Pure Fun. Preauthorization can be obtained by calling 866-498- 5269. - Page 4 WARNING CHOKING HAZARD – Small parts NOT for children under 3 years. Warning! While every attempt is made to ensure the highest degree of protection in all equipment, we cannot guarantee freedom from injury. The user assumes all risks of injury due to use. All merchandise is sold on this condition, which no representative of the company can waive or change.
- Page 5 Failure to do so can result in serious injury, death, and property damage for which Pure Fun is not liable. Ensure the Enclosure frame has been assembled correctly per the instructions in the manual.
- Page 6 It is possible for the Trampoline and Safety Net to be blown about by high wind. If you anticipate high winds, the Trampoline and Safety Net should be moved to a sheltered location or be disassembled. Pure Fun™ is not responsible for any damage resulting from wind or extreme weather.
-
Page 7: Trampoline Placement
TRAMPOLINE PLACEMENT The minimum overhead clearance required is 26 feet (8 meters). Ensure that no hazards or obstruc- tions are near the trampoline such as tree branches, swing sets, swimming pools, electrical power wires, walls, fences, roof overhangs etc. Please be aware of the following when selecting a place for your trampoline: •... - Page 8 Care & Use This trampoline must be assembled by adults. It must be erected exactly as detailed in the assembly instructions. Two adults are required to assemble this trampoline. This product should only be used by children over the age of 6. Please ensure children under the age of 3 years old do not play with or are given any part of this trampoline when being assembled or when complete as it contains small parts which may pose a choking hazard.
- Page 9 HIGH WINDS: It is possible for the Trampoline to be blown about by high wind. If you anticipate high winds, the Trampoline must be moved to a sheltered location, or be disassembled. Pure Fun™ is not responsible for any damage to property or product resulting from wind or extreme weather.
-
Page 10: Disposal Information
Do not use the trampoline or supervise a child’s use of the trampoline when under the influence of alcohol, drugs or medications. Allow each jumper a brief turn on the trampoline. Extended bouncing exposes an over tired user to an increased risk of injury. The trampoline mat is several feet from the ground. - Page 11 IMPORTANT It is essential that the intended site for this trampoline is completely flat and level. If the ground is not level this will cause movement in the frame and could cause stress on the joined sections. The recommended safe play area is 8 feet (2.5m around the trampoline on all sides and 26 feet (8m) above the top.
- Page 12 To assemble this trampoline you will need to use the included Spring Tool. Do not discard or misplace Spring Tool. You will need this to remove/replace springs if required. PRIOR TO ASSEMBLING: Please visit: www.pureglobalbrands.com for any important product information updates and/or additional safety warnings before assembling or using this product.
- Page 13 WARNING: READ AND FOLLOW THESE INSTRUCTIONS, PRIOR TO ASSEMBLY AND USE OF THIS EQUIPMENT. ASSEMBLE TRAMPOLINE WHERE YOU WILL BE USING IT. ONCE IT IS ASSEMBLED, MOVING YOUR TRAMPOLINE REQUIRES THAT YOU USE AT LEAST 4 ADULTS PLACED EQUIDISTANT AROUND THE TRAMPOLINE. IF IT MUST BE MOVED YOUR WARRANTY REQUIRES THAT YOU TAPE THE TOP RAIL FRAME JOINTS TO PREVENT SLIPPAGE.
- Page 14 STEP 2 – TOP RAIL AND SUPPORT ASSEMBLY 1. Slide T-section (#4) onto flattened end of the top rail (#3). Ensure the hole on the side of the T-section matches up with the hole on the side of the top rail. If necessary, use the spring hook tool to help you widen the T-section so it slides easily on the top rail.
- Page 15 4. Fit the W-shape Leg Bases (#5) onto the Leg Extensions (#6) as shown in Fig 4. Compress the spring pins with your thumb to allow the tubes to be fully inserted. Make sure they click into place. Fit the remaining tubes (#5) using these instructions.
-
Page 16: Step 3 - Trampoline Mat Assembly
ONCE YOUR TRAMPOLINE IS ASSEMBLED, MOVING IT REQUIRES THAT YOU securely tape the top rail frame joints and use a MINIMUM of 4 adults placed equidistant around the unit. Failure to do so will result in damage to the assembly. NEVER DRAG YOUR TRAMPOLINE IN ORDER TO MOVE IT!! STEP 3 –... - Page 17 The following figures show how to connect the springs and tighten the trampoline mat as evenly as possible: A. Using a “clock” as a relative guide, choose a point that represents 12 o’clock on your jump mat. Attach the spring to the V-ring of the jump mat. Attach the hook end of the tool to the other end of spring as shown in the directions on the previous page and line up to the spring hole.
-
Page 18: Step 5 - Frame Pad Assembly
STEP 5 – FRAME PAD ASSEMBLY You will need 2 adults to assemble the frame pad to keep it even during installa- tion. A. Lay the Frame Pad (2) over the trampoline so that the springs and the steel frame are covered. Ensure that the Frame Pad covers all metal parts. - Page 19 Enclosure Parts List & Assembly Instructions Parts List - 12’ Enclosure - 8 Poles Part Number Description 12’ (4 Legs) Upper Pole Lower Pole Steel Jig Screw Set Safety Net Spacer Pole Cover Pole Cap Safety Nut Wrench PARTS DIAGRAM FOR ENCLOSURE 1.
- Page 20 Read the Safety Warning information on Page 5 before assembling or using your Enclosure. STEP 1 – Pole Assembly A. Put the Upper (1) and Lower (2) sections of the Enclosure Poles together as shown below. B. If necessary, attach the Pole Caps (8) to the tops of each Enclosure Pole. C.
- Page 21 STEP 3 – Attach Safety Net Top A. Locate the section on the Safety Net with the zippered “doorway” and align it to the desired position you want it to be on the trampoline. B. Make sure you note that the sewn edge with the elastic bands with hooked-ends is the bottom of the net. C.
- Page 22 STEP 4 – Attach Safety Net Bottom A. Hook the Net to the V-Rings on the trampoline mat in the direction shown in the diagram below. B. The Safety Net will begin to be pulled taut, and tighten around the frame as you proceed. Use caution on pinch points, and apply the necessary force to attach the remaining bands to the V-Rings.
- Page 23 CARE AND MAINTENANCE GENERAL: Your trampoline is designed for year-round outdoor use, so it generally requires very little maintenance. However, a little care and forethought can add years to your trampoline’s life. Remember that the bed (mat) and frame pads are made of synthetic materials and are easily damaged by cigarette ends, fireworks and bonfire debris. With all products it is vital that the equipment is checked regularly and often by an adult.
- Page 24 Secure the trampoline frame to the ground. You can purchase an ANCHOR KIT for your trampoline from Pure Fun, by visiting us on the web at www.pureglobalbrands.com or by calling 866-498-5269. MOVING THE TRAMPOLINE - When moving the trampoline, a minimum of three people are required.
- Page 25 INFORMATION ON USE OF THE TRAMPOLINE Initially, get accustomed to the feel and bounce of the trampoline. The focus must be on the funda- mentals of your body position and you should practice each bounce (the basic bounces) until you can perform each with ease and control.
- Page 26 SAFETY CONCERN SITUATIONS: Mounting and Dismounting: Be very careful when getting on and off the trampoline. DO NOT mount the trampoline by grabbing the frame pad, by stepping onto the springs, or by jumping onto the mat from any surface (e.g. a deck, roof, or ladder) as this will increase your risk of injury. DO NOT dismount by jumping off the trampoline.
- Page 27 LESSON PLAN The following lessons are recommended in order to learn basic steps and bounces before moving onto more difficult or complicated bounces. You should read and understand all safety instructions before mounting the trampoline. A complete discussion and demonstration of body mechanics and trampoline guidelines should occur between the supervisor and student.
- Page 28 BASIC TRAMPOLINE BOUNCES THE BASIC BOUNCE Start from standing position, feet shoulder width apart and head up and eyes on mat. Swing arms forward, up and around in a circular motion. Bring feet together while in mid-air and point toes down- ward.
- Page 29 IF YOU STILL HAVE YOUR PROOF OF PURCHASE, YOU MAY BE ELIGIBLE FOR A DISCOUNTED RATE EVEN IF YOU ARE OUT OF WARRANTY. Question: “Can I use any brand enclosure for my trampoline, or just Pure Fun?” Answer: ENCLOSURE DESIGNS ARE VERY SIMILAR, BUT THERE ARE SOME SPECIFIC DIMENSIONS LIKE WIDTH BETWEEN LEGS AND SPRING SIZE WHICH CAN AFFECT THE CIRCUMFRENCE OF THE TRAMPOLINE FRAME.
- Page 30 Pure Fun Trampoline Accessories Trampoline Anchor Kit - 9201AK The Pure Fun Trampoline Anchor Kit is designed to help secure large trampolines against rough weather. Kit includes 4 Tie-down straps, D-rings and ground anchor stakes. 12’ Trampoline Cover - 9212TC Pure Fun’s all-weather Trampoline Covers protect and...
Need help?
Do you have a question about the 9012TS-12 and is the answer not in the manual?
Questions and answers