Advertisement
Quick Links
Advertisement

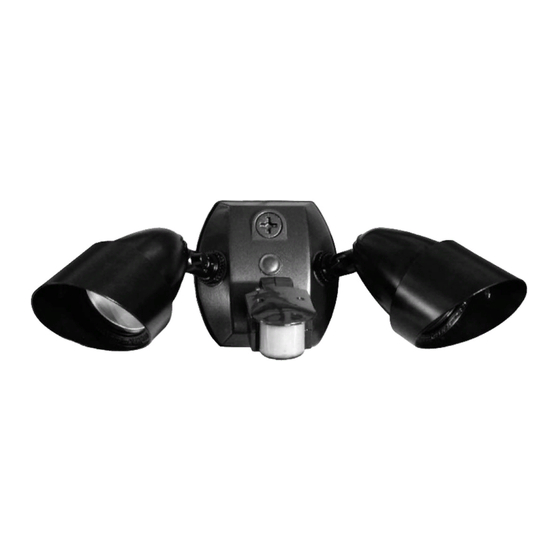
Summary of Contents for RAB GoodNight Light
- Page 1 Good NIGHT LIGHT Installation Manual SNL1 SNL2...
- Page 2 How Does RAB’s Good Night Light Work? The Good Night Light infrared How are the Time, Sensitivity and sensor “sees” small temperature Photocell adjusted? changes caused by the motion of Turn controls gently using adjustment people or cars within its Detection tool provided.
-
Page 3: Specifications
Specifications Built for Severe Conditions: Switching Capacity: Double weatherproofing for long life. Runs at 20% lamp wattage from dusk to dawn. Brightens to full Photoelectric Control: wattage upon sensor detection. Deactivates lights during daylight. 180 watts Incandescent maximum. Fully adjustable for 24 hour operation or custom applications. - Page 4 Why RAB Sensors are BEST for You Smaller is better! Good Night Light uses state-of-the-art surface mount technology (SMT), just like cellular phones and beepers. SMT gives you more reliability, greater RF immunity, and a compact sensor that can fit neatly where others cannot.
- Page 5 Cautions TURN OFF POWER BY REMOVING POWER FUSE OR TURNING OFF CIRCUIT BREAKER BEFORE INSTALLATION. Read entire Installation Manual before proceeding. All wiring MUST comply with local electrical codes and should be installed by a qualified electrician. Total lighting load must not exceed 180 watts quartz and incandescent only.
- Page 6 TURN OFF POWER BY REMOVING POWER FUSE OR TURNING OFF CIRCUIT BREAKER BEFORE INSTALLATION. Good Night Light floodlight kits come pre-wired and assembled on the RAB CU4 EZ plate, allowing for mounting on round, rectangular or octagonal surface or recessed boxes. Mounting...
- Page 7 5. Attach ground wire(s) to junction box grounding screw. Connect as shown in wiring diagram on right 6. Twist on wire nuts. Secure with electrical tape. 7. Align gaskets, EZ Plate and metal mounting plate to insure proper seal. Tighten EZ Plate center screw (make sure O-ring gasket is on the screw) to attach EZ Plate to the box.
- Page 8 Picking A Location Location Considerations: Detection Pattern • Choose a location from which the • The sensor has a “Double Look sensor can “see” all the paths of Down” Lens with one “Look Out” movement that will be illuminated zone and two “Look Down” zones, by its lights.
- Page 9 Aiming and Walk Testing 3. To reduce range, use the lens Test Period: masks provided or tilt sensor down. The sensor has a 3 minute Test Repeat steps #2 and #3 until you Period which allows it to be aimed are satisfied with the coverage.
- Page 10 Technical Tips: Lights Do Not Turn Off 1. Make sure sensor is not aimed Problem: at something that would move or Passing cars activate sensor. change temperature such as waving WRONG! branches, water, air conditioners, windows or heating vents–even on neighboring property.
- Page 11 Technical Tips: Range appears limited 4. Check that movement is not direct- 1. Check that the sensor is level from ly towards sensor. Sensor will see side to side and pointed at the area movement across its pattern more you desire. If unit is tilted, part of the quickly.
- Page 12 Lights Turn Off Technical Tips: Too Quickly Lights Do Not Turn On 1. Check if sensor is being “tricked” 1. Check that lamps and fixtures by reflected light. If lights shine or work. Compare wiring to the Wiring reflect into the photocell, (located Diagram in this manual.
- Page 13 Technical Tips: Lights Turn On and Off Incorrectly 7. Make sure lights are not visible 1. Make sure the sensor is installed from or reflecting back into sensor. on its own dedicated circuit free of Check for white or reflective surfaces motor loads such as HVAC close to the sensor.
- Page 14 Technical Tips: Lights Turn On For Unknown Reasons 1. Lights may turn on occassionally during rain, snow and windstorms because the sensor is detecting changes in temperature. If this is a constant problem, mount the sensor in a more protected area. 2.
- Page 15 2. Call the Tech Help Line For repair or replacement, return the at 888 RAB-1000, 8AM to 6PM product freight prepaid and insured Eastern Time M-F and we will be glad to help you. Before you call,...
- Page 16 • Metal Plate (for surface junction box mounting) Easy Installation & Product Help Toll Free Phone Toll Free Fax Fax On Demand Call our friendly experts Send faxes to RAB Faxed Information, 8AM-6PM ET Mon.-Fri. 24/7 24/7 888 RAB-1000 888 RAB-1232...


Need help?
Do you have a question about the GoodNight Light and is the answer not in the manual?
Questions and answers