GRASS VALLEY K2 Dyno Quick Start Manual
Replay system
Hide thumbs
Also See for K2 Dyno:
- Datasheet (8 pages) ,
- Quick start manual (36 pages) ,
- Service manual (88 pages)

Related Manuals for GRASS VALLEY K2 Dyno


Summary of Contents for GRASS VALLEY K2 Dyno
- Page 1 K2 Dyno Replay System Quick Start Guide Software Version 1.5 071-8681-01 January 2010...
- Page 2 Affiliate with the N.V. KEMA in The Netherlands CERTIFICATE Certificate Number: 510040.001 The Quality System of: Thomson Inc, and its wor dwide Grass Valley division affiliates DBA GRASS VALLEY Headquarters 15655 SW Greystone Ct. 10 Presidential Way 400 Providence Mine Rd...
- Page 3 K2 Dyno Replay System Quick Start Guide Software Version 1.5 071-8681-01 January 2010...
- Page 4 Copyright Copyright © Grass Valley, Inc. All rights reserved. Printed in the United States of America. Portions of software © 2000 – 2010, Microsoft Corporation. All rights reserved. This document may not be copied in whole or in part, or otherwise reproduced except as specifically permitted under U.S.
-
Page 5: Installation
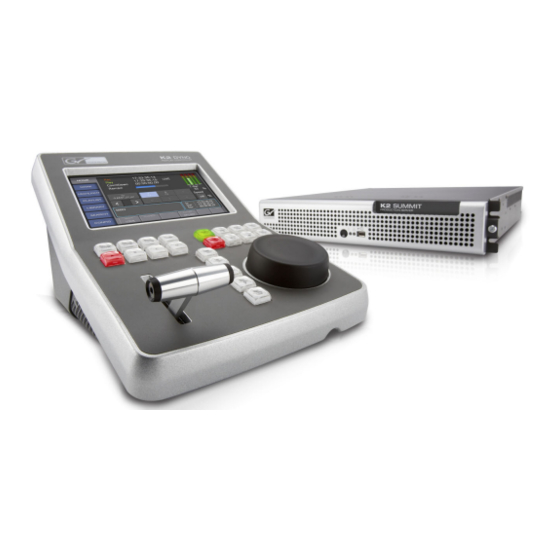
This section documents the installation of the bundled K2 Summit Production Client and K2 Dyno Replay Controller that you buy as a Dyno-Pack. If you are connecting a K2 Solo Media Server or a K2 Summit Production Client that is not part of a Dyno-Pack and has not been previously controlled by a K2 Dyno Controller, refer to the K2 Dyno Controller Installation Manual. -
Page 6: System Overview
Chapter 1 Installation Gather additional items To complete a typical K2 Dyno Replay System, as referenced in this Quick Start Guide, you must provide the following items: • Two VGA monitors (1024 x 768 • Ethernet cable, either crossover or... - Page 7 Each channel can be both an input (record channel) and an output (play channel). For the K2 Dyno Replay System documented in this Quick Start Guide, C1 and C2 are record channels and C3 and C4 are play channels.
- Page 8 Press RS-232 power switch 100-240 V~ 4A 50-60Hz There is no logon for the K2 Dyno Controller. Start up K2 Summit Client K2 SUMMIT PRODUCTION CLIENT Press standby switch Log on to the K2 Summit Client with the default Windows administrator account: •...
-
Page 9: Configure Network
Configure network Configure network On both the K2 Summit Client and on the K2 Dyno Controller, use standard Windows operating system procedures to configure a static IP address. IP addresses must be on the same subnet. You can also configure a host name if desired. - Page 10 • Configure channels as record channels. Make video and audio settings as appropriate for your input. • Configure channels as play channels. Make video and audio settings as appropriate for your output. K2 Dyno Replay System Quick Start Guide 28 January 2010...
- Page 11 In AppCenter, click View | Video Monitor Toolbar Full Screen Video Monitor K2 SUMMIT PRODUCTION CLIENT You can also double-click on a monitor area in multi-view or control screen to switch between views. 28 January 2010 K2 Dyno Replay System Quick Start Guide...
- Page 12 Chapter 1 Installation K2 Dyno Replay System Quick Start Guide 28 January 2010...
-
Page 13: Operation
Start a new session Prerequisite: Dyno Server software must be installed on the K2 Summit/Solo. On the K2 Summit Production Client that you receive with the K2 Dyno Replay System (Dyno-Pack), it is pre-installed. On the K2 Dyno Replay Controller, open K2 Replay Client... - Page 14 (camera angle) playout Send Goto To gang channels, press both P1 and P2 at the same time. For more information about channel operation modes, refer to “Channel operation overview” on page K2 Dyno Replay System Quick Start Guide 28 January 2010...
- Page 15 The Shift button also affects the function of controls displayed on the touch screen. Press to switch angles during playout. Refer to “Controller buttons: Reference” on the inside back cover for more information on button functions. 28 January 2010 K2 Dyno Replay System Quick Start Guide...
- Page 16 B t m L i b A d d A d d *Highlight views on VGA monitor: Highlight clip plus metadata keywords Highlight clip plus thumbnail Highlight clips in table format K2 Dyno Replay System Quick Start Guide 28 January 2010...
- Page 17 You can pre-make metadata keywords with the Dyno Keyword Editor application, which you install on a sep arate PC. You then import K2 Dyno Editor files (XML) into the Dyno Controller using the IMP/EXP soft key on the Config menu. See Import page.
- Page 18 • To configure play options, including pre-set play speed, on the controller touch screen, press and then touch PLAYOPT Shift PLAYOPT S h i TIMELINE • To play at pre-set speed, press and then PLAY F a s K2 Dyno Replay System Quick Start Guide 28 January 2010...
- Page 19 Add highlight to playlist N e w A d d On the controller touch screen, select the tab to see the highlight clip added to Playlist the playlist. 28 January 2010 K2 Dyno Replay System Quick Start Guide...
- Page 20 • To configure mix effects, such as duration times and transition types, touch the tab, scroll with < > , and then touch CONFIG • Playlist target duration can be adjusted on the Playlist tab. K2 Dyno Replay System Quick Start Guide 28 January 2010...
- Page 21 CONFIG TransMon highlight clip thumbnails also show progress. You can also import keyword XML files using the IMP/EXP menu screen. You create these files with the Dyno Keyword Editor application. 28 January 2010 K2 Dyno Replay System Quick Start Guide...
- Page 22 Press Send S e n You can similarly set and/or select other paths. On the tab touch to monitor transfer progress. Indicators on CONFIG TransMon highlight clip thumbnails also show progress. K2 Dyno Replay System Quick Start Guide 28 January 2010...
- Page 23 Select HIGHLIGHT tab Open the bin screen Browse up to Double-touch to see bins open a bin Rename bin. Use keyboard if desired. Touch < > to navigate between bins. 28 January 2010 K2 Dyno Replay System Quick Start Guide...
- Page 24 The Dyno controller application closes and the Windows operating system shuts down. You can also select rather than to close the RETURN TO INITIAL SCREEN SHUTDOWN current session and return to the session start up screen. K2 Dyno Replay System Quick Start Guide 28 January 2010...
- Page 25 • A,B, angles can be selected for playback on P1 or P2 • P1 and P2 playout channel content can be “swapped” by pressing buttons Fn then Take. 28 January 2010 K2 Dyno Replay System Quick Start Guide...
- Page 26 Take button illuminates green to indicate ready for Take to PGM channel. • P1 and P2 playout channel content can be “swapped” by pressing buttons Fn then Take. K2 Dyno Replay System Quick Start Guide 28 January 2010...
-
Page 27: Tips And Shortcuts
• From the Setup Screen, you can adjust controller panel attributes, such as LCD and button brightness, and optimize jog knob sensitivity to 5% or 10%. To open the Setup screen, press three buttons at the same time S h i Send Goto 28 January 2010 K2 Dyno Replay System Quick Start Guide... - Page 28 • Swap channels between PI and P2 playout channels by pressing and then Take • Set T-Lever control and knob speed/response in Config menu, Play-2 and Play-3 tabs. K2 Dyno Replay System Quick Start Guide 28 January 2010...
-
Page 29: Problems And Solutions
Digital video display device Wrong video output type selected Verify and select video output type required by the does not display properly. for the Play channel. display device (see display device manuals). 28 January 2010 K2 Dyno Replay System Quick Start Guide... -
Page 30: Finding More Information
CD-ROM that you receive with your product. The K2 Documentation CD includes the following documents: • — Provides instructions for a installing a K2 Dyno K2 Dyno Installation Manual Replay System using a K2 Solo Media Server or a K2 Summit Production Client that is not part of a Dyno-Pack and has not been previously controlled by a K2 Dyno Controller. -
Page 31: Grass Valley Product Support
Grass Valley Product Support To get technical assistance, check on the status of a question, or to report a new issues, contact Grass Valley Product Support via e-mail, the Web, or by phone or fax. Web Technical Support To access support information on the Web, visit the product support Web page on the Grass Valley Web site. -
Page 32: Waste Electrical And Electronic Equipment Directive
Middle East, Near East, Africa Middle East +971 4 299 64 40 Near East and Africa +800 80 80 20 20; +33 1 48 25 20 20 Waste Electrical and Electronic Equipment Directive K2 Dyno Replay System Quick Start Guide 28 January 2010... - Page 33 Waste Electrical and Electronic Equipment Directive • 28 January 2010 K2 Dyno Replay System Quick Start Guide...
- Page 34 Controller buttons: Reference 9 10 11 12 13 14 15 16 New PL Create new playlist Invokes special functions Add current selected item to PL as bottom Add PL event Add clip to Library type bin Switch between local (playback) and Add Lib Local Add selected item to selected Highlight bin.
Need help?
Do you have a question about the K2 Dyno and is the answer not in the manual?
Questions and answers