Table of Contents
Advertisement
Available languages
Available languages
Quick Links
Advertisement
Table of Contents

Related Manuals for DHS Fitness DHS8742


Summary of Contents for DHS Fitness DHS8742
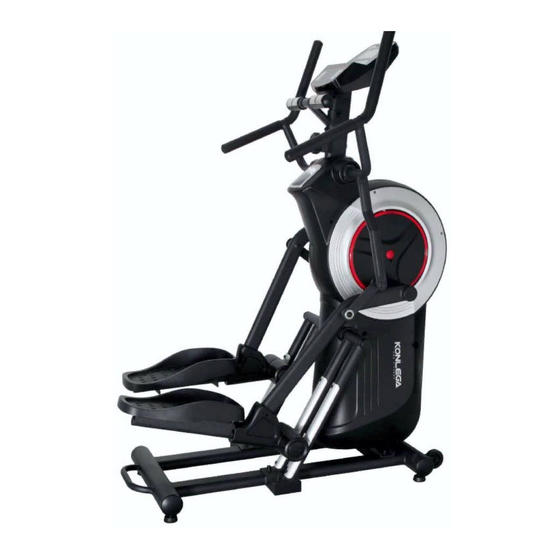
- Page 1 MANUALUL UTILIZATORULUI CROSS TRAINER DHS8742 IMPORTANT! Citiți cu atenție toate instrucțiunile înainte de a utiliza acest produs. Păstrați acest manual pentru referințe ulterioare. Specificațiile acestui produs pot varia ușor față de ilustrații și pot fi modificate fără notificare.
-
Page 2: Informații Privind Siguranța
INFORMAȚII PRIVIND SIGURANȚA Rețineți următoarele măsuri de siguranță înainte de asamblarea și utilizarea aparatului. 1. După asamblarea completă, verificați dacă toate componentele, cum ar fi șuruburile, piulițele și șaibele, sunt poziționate și fixate corect și strânse ferm. 2. Verificați în mod regulat capacul, de protecție al lanțului care asigură securitatea părților în mișcare ale aparatului, că... - Page 3 PĂRȚI COMPONENTE Descriere Cant. Descriere Cant. Cadru principal Piuliță nylon M8 Cadru inferior 31 L/R Capac terminal rotund 3L/R Cadru șine de ghidaj Pedală Suportul legătură pedală Capac terminal decorativ 5 L/R Braț Șurub M6x20 6 L/R Ghidon Rulment Cadru suport pedală Șurub imbus M6x20 Ghidon mijlociu Șaibă...
- Page 4 DIAGRAMĂ...
- Page 5 ASAMBLARE Pasul 1 1. Fixați cadrul principal(1) de cadrul inferior(2) cu șurubul(16) șaiba cu arc(17), șaiba(13); 2. Plasați mai întâi cadrul șinelor de ghidare(3L/R) pe cadrul principal(1). 3. Fixați cadrul ramelor de ghidare(3L/R) pe cadrul inferior(2) cu șurubul(16) șaiba cu arc(17), și șaiba(13), la final fixați celălalt capăt al cadrului(1) cu șurubul(37), șaiba cu arc(22) și șaibă(23).
- Page 6 Pasul 2 1. Fixați cadrul de susținere a pedalei(7) la suportul de legătură a pedalei(4), cu șurubul cap cruce(29), șaiba cu arc(22), șaiba(24) și piulița de nylon(30). 2. Introduceți mai întâi suportul de susținere a pedalei(7) asamblat și suportul de fixare a pedalei(4) în braț(5L/R) și apoi puneți-l separat pe cadrul cu șine de ghidare(3L/R).
- Page 7 Pasul 3 1. Introduceți mai întâi firul de puls(48) prin gaura din cadru principal(1) și trageți-l prin gaura de sus a cadrului, la final fixați în sfârșit ghidonul central(8) pe cadrul principal(1) cu șuruburile (46),(21), șaiba(24), șaiba cu arc(47) și piulița(49). 2.
- Page 8 ÎNCĂLZIRE ȘI RECUPERARE Un program de antrenament bun constă în, încălzire, exercițiu propriu-zis și recuperare. Faceți întregul program de cel puțin două până la trei ori pe săptămână, odihnindu-vă pentru o zi între antrenamente. După câteva luni, vă puteți mări numărul de antrenamente la patru sau cinci ori pe săptămână.
- Page 9 Ridicarea umerilor Ridicați-vă umărul drept în sus spre ureche, odată. Apoi ridicați umărul stâng sus în timp ce vă coborâți umărul drept odată. Întindere călcâi Sprijiniți-vă pe un perete cu piciorul stâng în fața celui drept și cu brațele înainte. Păstrați piciorul drept drept și piciorul stâng pe podea; apoi îndoiți piciorul stâng și înclinați-vă...
- Page 10 OWNER’S MANUAL CROSS TRAINER DHS8742 IMPORTANT! Please read all instructions carefully before using this product. Retain this manual for future reference. The specifications of this product may vary slightly from the illustrations and are subject to change without notice.
-
Page 11: Important Safety Notice
IMPORTANT SAFETY NOTICE Note the following precautions before assembling and operating the machine. 1. Once fully assembled, please check that all hardware parts such as bolts, nuts and washers are positioned and secured firmly. 2. Please check regularly that the safety chain guard that protects the moving parts of the machine is secured and in good order. -
Page 12: Parts List
PARTS LIST Description Description Mainframe Nylon nut M8 Bottom frame 31 L/R Round end cap 3L/R Guide rail frame Pedal Pedal connection support Decoration end cap 5 L/R Crank Hex bolt M6x20 6 L/R Handlebar Bearing Pedal support frame Inner hex cylinder head bolt M6x20 Middle handlebar Spring washer Adjustable feet... -
Page 13: Parts Drawing
PARTS DRAWING ASSEMBLY... - Page 14 Step1 fix the main frame (1) to the bottom frame (2) with inner hex cylinder head bolt (16), spring washer (17), washer (13); insert the guide rail frame (3L/R) to the mainframe (1) first , and then fix the guide rail frame (3L/R) to the bottom frame (2) with inner hex cylinder head bolt (16), spring washer (17), washer (13), at last fix the other end to the mainframe (1) with inner hex pan head bolt (34),spring washer (22) and washer (23).
- Page 15 Step2 fix the pedal support frame (7) to the pedal connection support (4) by inner hex pan head bolt (29), spring washer (22), washer (24) and nylon nut (30). insert the assembled pedal support frame (7) and pedal connection support (4) into the crank (5L/R) first, and then put it to the guide rail frame (3L/R) separately.
- Page 16 Step3 draw the handle pulse wire (48) through the hole of the mainframe (1) first, and then pull it out from the top hole of the mainframe, at last fix the middle handlebar(8) to the mainframe (1) by inner hex pan head bolt (46),inner hex pan head bolt (21), washer (24), arc washer (47) and cap nut (49).
-
Page 17: Warm Up And Cool Down Routine
WARM UP AND COOL DOWN ROUTINE A good exercise program consists of a warm-up, aerobic exercise, and a cool down. Do the entire program at least two to three times a week, resting for a day between workouts. After several months you can increase your workouts to four or five times per week. - Page 18 Shoulder Lift Lift your right shoulder up toward your ear for one count. Then lift your left shoulder up for one count as you lower your right shoulder. Calf-Achilles Stretch Lean against a wall with your left leg in front of the right and your arms forward.
Need help?
Do you have a question about the DHS8742 and is the answer not in the manual?
Questions and answers