Chapters
Table of Contents

Related Manuals for HomeMatic HmIP-BRA


Summary of Contents for HomeMatic HmIP-BRA
- Page 1 Montageanleitung Mounting instruction Tasterwippe für Markenschalter – S. 2 universal / mit Pfeilen Button Rocker for brand switch p. 11 systems – universal / with arrows HmIP-BRA HmIP-BRU...
- Page 2 Lieferumfang Anzahl Bezeichnung Tasterwippe (Universal bzw. mit Pfeilen) Adapter Wechselrahmen Bedienungsanleitung Dokumentation © 2018 eQ-3 AG, Deutschland Alle Rechte vorbehalten. Ohne schriftliche Zustimmung des Herausgebers darf diese Anleitung auch nicht auszugsweise in irgendeiner Form reproduziert werden oder unter Verwendung elektronischer, mechanischer oder chemischer Verfahren verviel- fältigt oder verarbeitet werden.
-
Page 5: Table Of Contents
Inhaltsverzeichnis Hinweise zur Anleitung ...........6 Funktion und Geräteübersicht ........7 Montage ................8 Montage im Rahmen anderer Hersteller .....9 Technische Daten ............10... -
Page 6: Hinweise Zur Anleitung
Hinweise zur Anleitung Hinweise zur Anleitung Lesen Sie diese Anleitung sorgfältig, bevor Sie Ihr Home- matic IP Gerät in Betrieb nehmen. Bewahren Sie die An- leitung zum späteren Nachschlagen auf! Wenn Sie das Gerät anderen Personen zur Nutzung über- lassen, übergeben Sie auch diese Anleitung. Benutzte Symbole: Achtung! Hier wird auf eine Gefahr hingewiesen. -
Page 7: Funktion Und Geräteübersicht
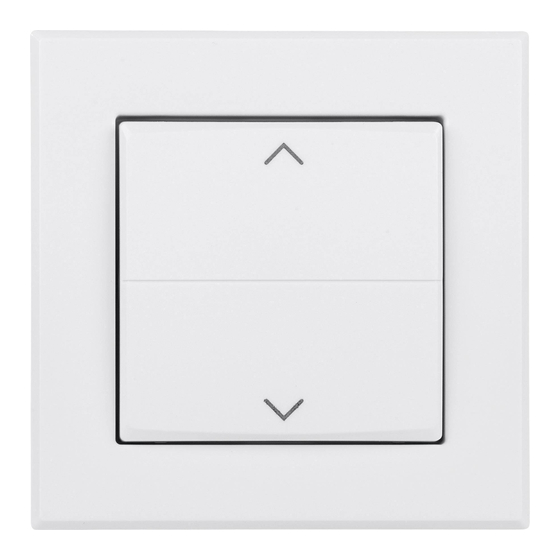
Funktion und Geräteübersicht Funktion und Geräteübersicht Die Homematic IP Tasterwippe für Markenschalter kann einfach auf einen Homematic IP Aktor (z. B. Schaltaktor oder Jalousieaktor für Markenschalter) aufgesetzt wer- den, um den Aktor über die Tasterwippe zu schalten. Die Montage gestaltet sich durch den ab Werk bereits in die Tasterwippe eingesetzten Adapter und die an den Homematic IP Aktor angepasste Bauweise sehr einfach. -
Page 8: Montage
Sie wie folgt vor: • Setzen Sie den Wechselrahmen (A) auf den be- reits installierten Homematic IP Aktor auf (s. Ab- bildung 2). Alternativ haben Sie die Möglichkeit, den vorhandenen Rahmen mit 55er-Innenmaß weiter zu verwenden (s. „4 Montage im Rahmen anderer Hersteller“... -
Page 9: Montage Im Rahmen Anderer Hersteller
Montage im Rahmen anderer Hersteller Montage im Rahmen anderer Hersteller Die Tasterwippe passt in die Rahmen folgender Hersteller: Hersteller Rahmen Berker S.1, B.1, B.3, B.7 Busch Jaeger carat*, future linear*, solo*, Busch- axcent*, Busch-dynasty*, balance SI ELSO GIRA Standard 55, E2, E22, Event, Esprit, ClassiX, E3 merten 1-M,... -
Page 10: Technische Daten
Technische Daten Technische Daten Kurzbezeichnung: HmIP-BRA bzw. HmIP- Umgebungstemperatur: 5 bis 35 °C Abmessungen (B x H x T): 86 x 86 x 16 mm Gewicht: 45 g Technische Änderungen vorbehalten. Entsorgungshinweis Gerät nicht im Hausmüll entsorgen! Elektroni- sche Geräte sind entsprechend der Richtlinie über Elektro- und Elektronik-Altgeräte über die... - Page 11 Package contents Quantity Description Rocker (universal applications or with arrows) Adapters Clip-on frame User manual Documentation © 2018 eQ-3 AG, Germany All rights reserved. Translation from the original version in Ger- man. This manual may not be reproduced in any format, either in whole or in part, nor may it be duplicated or edited by electronic, mechanical or chemical means, without the written consent of the publisher.
- Page 12 Table of contents Information about this manual........13 Function and device overview ........14 Mounting ................15 Mounting into frames of other manufacturers ..16 Technical specifications ..........17...
-
Page 13: Information About This Manual
Information about this manual Please read this manual carefully before beginning operation with your Homematic IP component. Keep the manual so you can refer to it at a later date if you need to. If you hand over the device to other persons for use, please hand over this manual as well. -
Page 14: Function And Device Overview
Function and device overview Function and device overview The Homematic IP Button Rocker for brand switch systems can simply be clicked to a Homematic IP actuator (e.g. switch actuator or blind actuator for brand switch systems) to switch the actuator via the push- button rocker. -
Page 15: Mounting
• Place the clip-on frame (A) onto the installed Homematic IP actuator (see fig. 2). Alternatively, you can continue using the existing frame with an inner dimension of 55 mm (see “4 Mounting into frames of other manufacturers” on page <?>). -
Page 16: Mounting Into Frames Of Other Manufacturers
Mounting into frames of other manufacturers Mounting into frames of other manufacturers The push-button rocker is designed to fit into frames supplied by the following manufacturers: Manufacturer Frame Berker S.1, B.1, B.3, B.7 Busch Jaeger carat*, future linear*, solo*, Busch- axcent*, Busch-dynasty*, balance SI ELSO GIRA... -
Page 17: Technical Specifications
Technical specifications Technical specifications Short description: HmIP-BRA or HmIP-BRU Ambient temperature: 5 to 35 °C Dimensions (W x H x D): 86 x 86 x 16 mm Weight: 45 g Subject to technical changes. Instructions for disposal Do not dispose of the device with regular... - Page 18 Kostenloser Download der Homematic IP App! Free download of the Homematic IP app! Bevollmächtigter des Herstellers: Manufacturer’s authorised representative: eQ-3 AG Maiburger Straße 29 26789 Leer / GERMANY www.eQ-3.de...
Need help?
Do you have a question about the HmIP-BRA and is the answer not in the manual?
Questions and answers