Advertisement
Available languages
Available languages
Table of Contents
IB516006EN
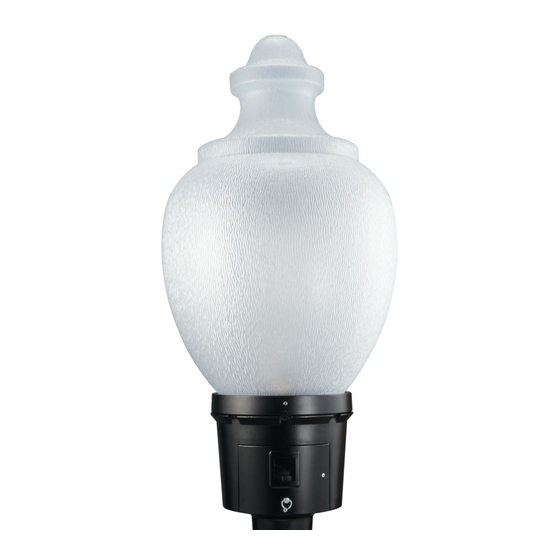
Installation Instructions – Utility LED Acorn (ULA)
Instructions d'installation – Luminaire à DEL à globe conique
Instrucciones de instalación – Utility LED Acorn (ULA)
Risk of Fire, Electrical Shock, Cuts or other Casualty Hazards- Installation and maintenance of this
product must be performed by a qualified electrician. This product must be installed in accordance
with the applicable installation code by a person familiar with the construction and operation of the
product and hazards involved.
Risk of Fire and Electric Shock- Make certain power is OFF before starting installation or attempting
any maintenance. Disconnect power at fuse or circuit breaker.
Risk of Fire- Refer to product label for specific minimum supply conductor requirements.
Risk of Burn- Disconnect power and allow fixture to cool before handling or servicing.
Risk of Personal Injury- Fixture may become damaged and/or unstable if not installed properly.
Failure to comply with these instructions may result in death, serious bodily injury and property damage.
DISCLAIMER OF LIABILITY: Eaton assumes no liability for damages or losses of any kind that may arise from the
improper, careless, or negligent installation, handling or use of this product.
NOTICE: Green ground wire provided in proper location. Do not relocate.
ATTENTION Receiving Department: Note actual fixture description of any shortage or noticeable damage on
delivery receipt. File claim for common carrier (LTL) directly with carrier. Claims for concealed damage must be
filed within 15 days of delivery. All damaged material, complete with original packing must be retained.
Safety: This fixture must be wired in accordance with the National Electrical Code and applicable local codes and
ordinances. Proper grounding is required to insure personal safety. Carefully observe grounding procedure under
installation section.
APPLICATIONS: This lighting fixture is designed for outdoor lighting services, and should not be used in area
of limited ventilation or inside high ambient temperature enclosures. It must be stored in a dry location prior to
installation. Do not expose lighting fixture to rain, dust or other environmental conditions prior to installation
and insertion of photo control or shorting cap (if so equipped). Best results will be obtained if installed and
maintained according to the following recommendations. UL requires minimum fixture mounting height of 12
feet.
WARNING
Brand Logo
reversed out of
black
Streetworks
INS #
INS #
Advertisement
Table of Contents

Summary of Contents for Eaton Streetworks ULA Utility LED Acorn
- Page 1 Failure to comply with these instructions may result in death, serious bodily injury and property damage. DISCLAIMER OF LIABILITY: Eaton assumes no liability for damages or losses of any kind that may arise from the improper, careless, or negligent installation, handling or use of this product.
-
Page 2: Installation
Place luminaire on pole and rotate until “STREET SIDE” is oriented toward the street or desired position. Tighten three square head bolts to 140-160 in-lbs. #8 Hex Head (Figure 2.) Screw (2X) Figure 3. EATON IB516006EN Installation instructions... - Page 3 Screw (2X) House Side Shield LED Engine (Do Not Touch) 1/4”-20 Set Screw (4X) Torque: 5-10 in-lbs. (Apply Breakable Thread Locker) 1/4”-20 Set Screw (4X) Torque: 5-10 in-lbs. (Apply Breakable Thread Locker) Figure 5. Figure 4. EATON IB516006EN Installation instructions...
- Page 4 La désobéissance aux instructions suivantes représente un risque de blessures graves ou mortelles et de dommages matériels. EXONÉRATION DE RESPONSABILITÉ : Eaton n’assume aucune responsabilité pour les dommages ou pertes de quelque nature que ce soit pouvant découler d’une installation, d’une manipulation ou d’une utilisation inappropriée, imprudente ou négligente de ce produit.
-
Page 5: Outils Requis
électrique. Vous pouvez retirer le support de fixation en Figure 3. desserrant les deux (2) vis à tête hexagonale no 8 et en soulevant le support de manière à l'éloigner du plateau d’alimentation (Figure 3). Après avoir raccordé les lignes de service, insérez l’interrupteur photo-électrique puis EATON IB516006EN Instructions d’installation... - Page 6 Couple de serrage 0,6 à 1,1 Nm (5 à 10 po-lb) (Appliquez un adhésif frein-filet enlevable) 4 vis de pression 6,3 mm (1/4 po)-20 Couple de serrage 0,6 à 1,1 Nm (5 à 10 po-lb) (Appliquez un adhésif frein-filet enlevable) Figure 4. Figure 5. EATON IB516006EN Instructions d’installation...
- Page 7 El incumplimiento de estas instrucciones puede provocar la muerte, lesiones corporales graves y daños materiales. RENUNCIA DE RESPONSABILIDAD: Eaton no asume ninguna responsabilidad por daños o pérdidas de ningún tipo que puedan derivarse de la instalación, manipulación o uso incorrecto, descuidado o negligente de este producto.
-
Page 8: Instalación
Coloque la luminaria en el poste y gírela hasta que el "LADO DE LA CALLE" esté orientado hacia la calle o en la posición deseada. Apriete los tres pernos de cabeza cuadrada a 140-160 in-lbs. (Figura 2.) Tornillo de cabeza hexagonal #8 (2X) Figura 3. EATON IB516006EN Instrucciones de instalación... - Page 9 1/4" - Set de 20 Tornillos de fijación (4X) Torque: 5-10 in-lbs. (Aplicar bloqueador de hilo rompible) 1/4" - Set de 20 Tornillos de fijación (4X) Torque: 5-10 in-lbs. (Aplicar bloqueador de hilo rompible) Figura 5. Figura 4. EATON IB516006EN Instrucciones de instalación...
- Page 10 Warranties and Limitation of Liability Please refer to www.eaton.com/LightingWarrantyTerms for our terms and conditions. Garanties et limitation de responsabilité Veuillez consulter le site www.eaton.com/LightingWarrantyTerms pour obtenir les conditions générales. Garantías y Limitación de Responsabilidad Visite www.eaton.com/LightingWarrantyTerms para conocer nuestros términos y condiciones.


Need help?
Do you have a question about the Streetworks ULA Utility LED Acorn and is the answer not in the manual?
Questions and answers