Table of Contents
Advertisement
Quick Links
Advertisement
Table of Contents

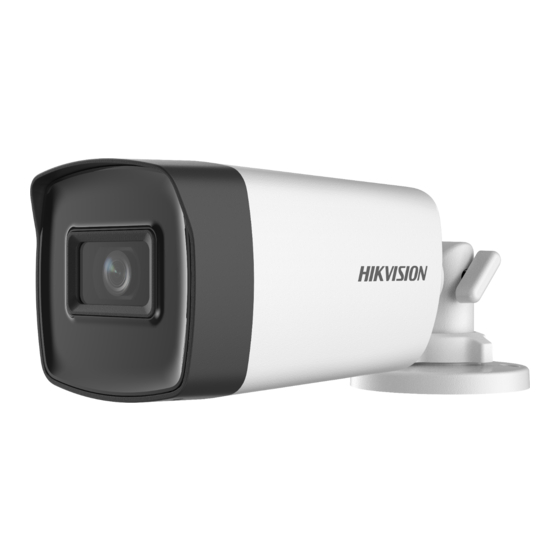
Summary of Contents for HIKVISION DS-2CE17H0T-IT3F
- Page 1 DS-2CE17H0T-IT3F Bullet Camera User Manual...
- Page 2 EU Conformity Statement This product and, if applicable, the supplied accessories too are marked with “CE” and comply therefore with the applicable harmonized European standards listed under the Low Voltage Directive 2014/35/EU, the EMC Directive 2014/30/EU. UM DS-2CE17H0T-IT3F 052220NA...
- Page 3 Cautions: Injury or equipment damage may occur if any of the cautions are neglected. Warnings Cautions Follow these Follow these safeguards to prevent precautions to prevent serious injury or death. potential injury or material damage. UM DS-2CE17H0T-IT3F 052220NA...
- Page 4 To avoid heat accumulation, good ventilation is required for the operating environment. Keep the camera away from liquid while in use for non-waterproof device. While in delivery, pack the camera in its original packing or packing of the same material. UM DS-2CE17H0T-IT3F 052220NA...
-
Page 5: Table Of Contents
2 Installation ............6 Ceiling/Wall Mounting without Junction Box ..7 Ceiling/Wall Mounting with Junction Box ....8 3 Menu Description ..........9 Video Format ............. 11 Exposure ..............11 DAY/NIGHT ..............12 VIDEO SETTINGS ............14 UM DS-2CE17H0T-IT3F 052220NA... -
Page 6: Introduction
Make sure the wall is strong enough to withstand three times the weight of the camera and the mount. If the product does not function properly, contact your dealer or the nearest service center. Do NOT disassemble the camera for repair or maintenance yourself. UM DS-2CE17H0T-IT3F 052220NA... -
Page 7: Ceiling/Wall Mounting Without Junction Box
2) Loosen screw A to adjust the tilt position [0° to 180°]. 3) Loosen screw B to adjust the rotation position [0° to 360°]. Turn the trim ring clockwise and tighten screws A and B to finish installation. UM DS-2CE17H0T-IT3F 052220NA... -
Page 8: Ceiling/Wall Mounting With Junction Box
Attach the camera to the junction box cover with three PM4 × 10 screws. Figure 5, Attach Camera to Junction Box Cover Secure the junction box body onto the wall with three PA4 × 25 screws (supplied). UM DS-2CE17H0T-IT3F 052220NA... -
Page 9: Menu Description
Mounting without Junction Box to finish the installation. 3 Menu Description Please follow the steps below to call the menu. NOTE: The actual display may vary by camera model. Connect the camera to the TVI DVR and the monitor as shown below. UM DS-2CE17H0T-IT3F 052220NA... - Page 10 Click the direction arrow to control the camera. 1) Click up/down direction button to select the item. 2) Click Iris+ to confirm the selection. 3) Click left/right direction button to adjust the value of the selected item. UM DS-2CE17H0T-IT3F 052220NA...
-
Page 11: Video Format
SHUTTER: Adjusts the exposure by limiting the time over which light is admitted. AGC (Automatic Gain Control): Optimizes the image clarity in poor light conditions. The AGC level can be set to HIGH, MEDIUM, or LOW. UM DS-2CE17H0T-IT3F 052220NA... -
Page 12: Day/Night
AUTO: Automatically switch Color or B&W (Black and White) according to actual scene brightness. Figure 12, Auto IR LIGHT: You can turn on/off the IR LIGHT to meet the requirements of different circumstances. UM DS-2CE17H0T-IT3F 052220NA... - Page 13 UM DS-2CE17H0T-IT3F 052220NA...
-
Page 14: Video Settings
You can set the mode to AUTO or MANUAL. AUTO: White balance adjusts automatically based on the scene illumination color temperature. MANUAL: You can adjust the R-GAIN and B-GAIN value to correct colors manually. UM DS-2CE17H0T-IT3F 052220NA... - Page 15 EXIT: Move the cursor to EXIT and click Iris+ to exit the menu without saving. SAVE & EXIT: Move the cursor to SAVE & EXIT and click Iris+ to save the settings and exit the menu. UM DS-2CE17H0T-IT3F 052220NA...


Need help?
Do you have a question about the DS-2CE17H0T-IT3F and is the answer not in the manual?
Questions and answers