Advertisement
Quick Links
Advertisement

Related Manuals for Walker Edison BWJRTOL


Summary of Contents for Walker Edison BWJRTOL
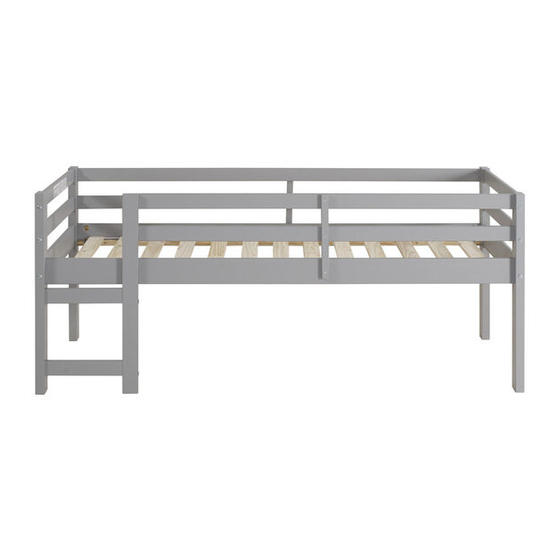
- Page 1 Item #: BWJRTOL Assembly Instructions Révisé en 12/2017 Revised 09/2018 2018...
- Page 2 39 1/2 in. W x 7 in. H on the upper DANGER D’ ÉTRANGLEMENT- Ne jamais attacher ni suspendre quelque chose au lit, qui ne fait pas partie du lit superposé. Ceci inclut, sans s’y limiter : crochets, ceintures ou cordes à...
- Page 3 18 18...
- Page 4 Ref. Qty. 10x40mm 1/4x80mm 7x40mm 7x80mm 7x120mm 7x100mm 4,0x30mm Hex Key 15x100mm 15x50mm...
- Page 5 Step 1 Insert wood dowels (D) into slats (10,13,14 and 15). 10x40mm Step 2 Insert wood dowels (A) into guard rails (18) 10x40mm and ladder (19,20).
- Page 6 Step 3 7x120mm Attach legs (6,8) to slats (10,13,14) using screws (H) and Hex Key Hex Key (L). Step 4 7x120mm Attach legs (6,9) to slats (10 and 13) using screws (H) and Hex Key Hex Key (L).
- Page 7 Step 5 E E E E E E E E 1/4x80mm Insert barrel nuts (E) into bed rail (21) Attach bed rails (10,13 and 14) to legs (6,8,9) using bolts (D) and Hex Key Hex Key Hex Key (L). Step 6 E E E E E E E E E E E E E 1/4x80mm...
- Page 8 Step 7 18 18 7x80mm Attach guard rails (18) to legs (6,9) using bolts (G) and Hex Key Hex Key Hex Key (L). Step 8 Attach step (15) to leg (8) using bolts (G) and Hex Key (L). 7x80mm Hex Key Hex Key...
- Page 9 Step 9 Attach ladder side rail (22) to step (15) and bed rail (20) using bolts (I,F) and Hex Key (L). 7x100mm Hex Key Hex Key 7x40mm Step 10 17 17 7x40mm 7x80mm Attach guard rail (17) to leg (06) and ladder side rail (22) using bolts (G,F) and Hex Key (L).
- Page 10 Step 11 Connect guard rail support (05) to guard rail (17,18) and bed rail (20,21) using screw (J). Follow measurements shown in diagram. 4,0x30 P.10...
- Page 11 Step 12 2 1/2" 4,0x30mm Install slat kit (23) to bed rails with screws (J). Spacer tape will face up. P.11...
- Page 12 Item #: Tri Bunk Bed Assembly Instructions P.12...
- Page 13 11 11 P.13...
- Page 14 Step 1 Insert wood dowels (D) into slats (10,13,14 and 15). 10x40mm Step 2 Insert wood dowels (A) into guard rails (18) 10x40mm and ladder (19,21 and 24). P.14...
- Page 15 Step 3 7x120mm Attach legs (1,3) to slats (10,13,14) using screws (H) and Hex Key (L). Hex Key Step 4 7x120mm Attach legs (2,4) to slats (10 and 13) using screws (H) and Hex Key Hex Key (L). P.15...
- Page 16 Step 5 Insert barrel nuts (E) into bed rails (21,24) Attach bed rails (10,13) to legs (2,4) using bolts (D) and Hex Key (L). 1/4x80mm Hex Key Hex Key Step 6 Insert barrel nuts (E) into bed rails (21,24) Attach bed rails (10,13 and 14) to legs (1,3) using bolts (D)and Hex Key (L).
- Page 17 Step 7 E E E E E E E E 1/4x80mm Insert barrel nuts (E) into bed rail (21) Attach bed rails (10,13 and 14) to legs (1,2,3 and 4) using bolts (D) and Hex Key Hex Key Hex Key (L). Step 8 E E E E E E E E E E E E E E...
- Page 18 Step 9 18 18 7x80mm Attach guard rails (18) to legs (1,2) using bolts (G) and Hex Key Hex Key Hex Key (L). Step 10 Attach step (15) to legs (3,4) using bolts (G) and Hex Key (L). 7x80mm Hex Key Hex Key P.18...
- Page 19 Step 11 7x100mm Attach ladder side rail (11 and 12) to step (15) using bolts (I) and Hex Key Hex Key Hex Key (L). Step 12 Attach ladder side rail (11,12) to bed rail (19,24) using bolts (F) and Hex Key (L). 7x40mm Hex Key Hex Key...
- Page 20 Step 13 7x40mm Attach guard rail (16) to ladder side rail (11,12) using bolts (F) and Hex Key (L). Hex Key Hex Key Step 14 4,0x30 Connect guard rail support (05) to guard rail (16,18) and bed rail (19,21) using screw (J). Follow measurements shown in diagram.
- Page 21 Step 15 2 1/2" 4,0x30mm Install slat kit (23) to bed rails with screws (J). Spacer tape will face up. P.21...
- Page 22 Step 16 2 1/2" J J J 4,0x30mm Install slat kit (23) to bed rails with screws (J). Spacer tape will face up. P.22...
- Page 23 Step 17 15x100 15x50 P.23...
Need help?
Do you have a question about the BWJRTOL and is the answer not in the manual?
Questions and answers