
Related Manuals for Chino IR-HA Series


Summary of Contents for Chino IR-HA Series
- Page 1 INST.No.INE-567-P1CE IR-HA Series PORTABLE RADIATION THERMOMETER Model: IR-HAI IR-HAS IR-HAQ Always keep this instruction with the unit. Please be sure to deliver these instructions with the unit to the end user.
- Page 3 NOTE 1. The descriptions of this manual are subject to change without notice. 2. If a question has arisen or if an omission was found in this manual, please contact your nearest CHINO’s sales agent or your dealer. 3. Copy right of this instruction manual belongs to CHINO Corporation. All or part of this instruction manual shall not be released to the third party.
- Page 4 ●When the thermometer is not used for 2 weeks or more, take out the batteries from it. Otherwise, the thermometer may be damaged by liquid leakage of the batteries. ●For failures of the thermometer, don’t overhaul it by yourself, and contact your sales agent of CHINO Corporation.
- Page 5 INST.No.INE-567-P1CE 4 Disposal ●When you discard this product, please obey the regulation of each local government. [How To Remove The Lithium Battery For Purpose of Discarding] Warning Make sure to turn off the thermometer when the lithium battery is removed. Caution Do not remove the lithium battery by yourself except when the thermometer is discarded because it may cause breakage or any trouble of the thermometer.
- Page 6 INST.No.INE-567-P1CE 3) To Remove The Lithium Battery ①Make sure where the lithium battery is mounted. Lithium battery ②Using an insulated tool with a thin end, remove the lithium battery from the battery holder. Caution 1) Some parts of this thermometer contain toxic chemical substances, whose amount is, however, less than defined by RoHS.
- Page 7 Disassembling or modifying this thermometer is prohibited. ! If it is broken, smoking or abnormal order is detected, turn off the power supply immediately and contact your sales agent of CHINO Corporation. ! Caution (May cause injury or physical damage) Avoid using in the places where;...
-
Page 8: Table Of Contents
INST.No.INE-567-P1CE CONTENTS 1. Introduction ..............1 8. Memory Input Mode (Display/Saving Data)... 25 1.1 General ..............1 8.1 Data Display ............25 1.2 Configuration ............1 8.2 Data Save ............. 26 2. Model and Attachments ..........2 8.2.1 Manual Memory Mode Saving ......26 2.1 Model .............. -
Page 9: Introduction
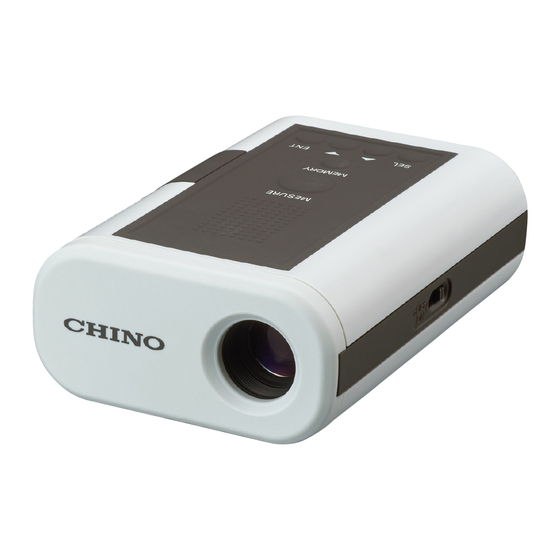
1. Introduction 1.1 General IR-HA series is small and light weight portable radiation thermometer equipped with well-lighted viewfinder. Direct viewfinder realizes measurement of an article with small diameter from a distance. Digital indication is available in the viewfinder, so measured value can be seen while checking an object. -
Page 10: Model And Attachments
INST.No.INE-567-P1CE 2. Model and Attachments 2.1 Model □ □ IR-HA Thermometer types °C ) I : Single-color type for medium temperature (300 to 1000 S : For single-color type for high temperature (600 to 2000°C) Q : High function type ( 2-color type 600 to 2000°C, single-color wide range type 400 to 3000°C) Unit... -
Page 11: Names And Functions Of Component Parts
DC power supply jack to connect AC power adaptor sold separately. ⑮Thermocouple input A connector to connect thermocouple. connector (K-thermocouple) A nameplate to indicate name of the IR-HA series model, serial number, ⑯Nameplate and measuring range. For inquiry, make sure to give us the information on the nameplate. -
Page 12: External Display Marker And Viewfinder Inside
INST.No.INE-567-P1CE 3.2 External Display Marker and Viewfinder Inside [Note] When battery mark is blinking, saving to the SD card is disabled. ①Main marker ②Status marker So change the batteries. Center circle of the Aim mark Tb CONT MEM PEAK aim mark ③Measuring unit Main display display... -
Page 13: Operation Key
INST.No.INE-567-P1CE 3.3 Operation Key ①Measurement key Power ON and measurement start/stop ③Select key ②Memory key ⑥Registration key ④Up key ⑤Down key Indication in Name Function this manual Turns ON power supply and starts/stops measurement. ①Measurement Power supply is automatically turned OFF if no key operation is done for MEASURE 30sec.under "HOLD"... -
Page 14: Preparation For Measurement
INST.No.INE-567-P1CE 4. Preparation for Measurement 4.1 Loading batteries 1) Put something hard like a coin to the slit of front cover to remove the cover. Insert to this slit. Front cover Do not remove the front cover with your bare hands. Caution Removing it by your bare hands may injure your fingers and nails. -
Page 15: About Sd Card
INST.No.INE-567-P1CE 4.2 About SD Card Caution ・Operation under SD card other than our recommended item is not guaranteed. ・Maximum capacity is 2GB, so 2GB or more can not be used. ・If SD card is formatted (initialized) by PC etc., the card may not work properly. Refer to "6.13 SD Card Data Initialization"... -
Page 16: Date/Time Setting At Initial Start-Up
INST.No.INE-567-P1CE 4.4 Date/Time Setting at Initial Start-up ◆ Display to set Date/Time appears by turning ON the power supply by holding down MEASURE key. If no key operation has done for 30sec., power supply is automatically turned OFF. Remark [Year setting] 1) Set "Year"... -
Page 17: Cautions On Measurement
INST.No.INE-567-P1CE 4.5 Cautions on Measurement ! ◆ To protect the eyes, make sure to turn "ON (attenuation side)" beam attenuation filter switch if measuring 1500°C or more. FILTER [Enlarged view] FILTER To the attenuation side! Warning Never sight the objective lens of the thermometer to the sunlight directly for protecting your eyes and a detecting element. -
Page 18: Measuring Distance And Measuring Diameter
INST.No.INE-567-P1CE 4.6 Measuring Distance and Measuring Diameter The relation of measuring distance and measuring diameter is shown below. φ98 φ33 φ20 φ20 0m 4m 5m 10m 4.7 Targeting For the accurate temperature measurement, it is necessary to target at an object correctly. The following figures (1), (2), and (3) show the correct targeting based on the relation of the measuring distance and the measuring diamete (1... -
Page 19: Emissivity (Ratio) Setting
INST.No.INE-567-P1CE 5. Emissivity (ratio) Setting Emissivity (ratio) setting can not be done while in memory input mode. Caution For canceling memory input mode, push MEMORY key to turn off " " under main marker Remark If no key operation has done for 30sec. while in "HOLD" state, power supply is turned OFF automatically. -
Page 20: Auto Emmisivity Setting By Thermocouple
INST.No.INE-567-P1CE 5.2 Auto Emmisivity Setting by Thermocouple The thermometer has a function of contact type thermometer using K thermocouple. Furthermore, the emissivity of the thermometer can be automatically set by assuming the contact temperature measured by the thermocouple as a true temperature. For turning "on"... -
Page 21: Setting Mode
INST.No.INE-567-P1CE 6. Setting Mode ◆ Set each parameter Turn ON the power by holding down MEASURE key. 2) Start setting mode by holding down SEL key while in the "HOLD" status. Status flow is shown on the right. For each setting and selection, refer to the individual sections. -
Page 22: Lower Limit Temperature Alarm Setting
INST.No.INE-567-P1CE 6.1 Lower Limit Temperature Alarm Setting This setting is for a judgment of lower limit temperature alarm during measurement. When the alarm is judged, status marker "AL" (lower temperature alarm) is lit and buzzer rings. If "oFF" is selected, neither the alarm judgment nor the buzzer are activated. [Lower limit temperature 1) Hold down SEL key while in the "HOLD"... -
Page 23: Higher Limit Temperature Alarm
INST.No.INE-567-P1CE 6.2 Higher Limit Temperature Alarm This setting is for a judgment of higher limit temperature alarm during measurement. When the alarm is judged, status marker "AH" (higher temperature alarm) is lit and buzzer rings. If "oFF" is selected, neither the alarm judgment nor the buzzer are activated. [Higher limit temperature 1) From setting mode display, push SEL key several times to alarm setting display]... -
Page 24: Signal Modulation Selection
INST.No.INE-567-P1CE 6.3 Signal Modulation Selection This setting is used to extract nothing else than average value and maximum value continuously from the measurement signal (original signal). [Signal modulation 1) From setting mode display, push SEL key several times to selection display] display "modu"... -
Page 25: Attenuation Rate Setting
INST.No.INE-567-P1CE 6.4.2 Attenuation Rate Setting (This is only valid if "PEAk" is selected for signal modulation) [Attenuation rate setting display] 1) From setting mode display, push SEL key several times to Tb CONT MEM PEAK display "dEC" on the sub display. 2) Numeric value on the main display blinks in the order of 0→2→5→10(°C/sec) when... -
Page 26: 2-Color Tyep/Single-Color Wide Range Type
INST.No.INE-567-P1CE 6.7 2-color tyep/Single-color wide range type Selection (*High Function Type IR-HAQ) This setting is used on high function type IR-HAQ to select to use as 2-color type or single-color wide type. [2-color type/single-color wide 1) From setting mode display, push SEL key several times to range type selection display] display "CoLr"... -
Page 27: Memory Mode Selection
INST.No.INE-567-P1CE 6.8 Memory Mode Selection This setting is used to select data saving method, manual memory mode or interval memory in memory input mode. Manual memory mode: Measured data is saved when ENT key is pushed. Interval memory mode: Measured data is saved by every set interval. Reference This setting in only valid at memory input mode. -
Page 28: Data Save Folder Selection
INST.No.INE-567-P1CE 6.10 Data Save Folder Selection This setting is used to select data saving folder. [Data save folder selection display] 1) From setting mode display, push SEL key several times to display "FLdr" on the sub display. Tb CONT MEM PEAK 2) Push ... -
Page 29: Date/Time Setting
Caution If date/time set is initialized at power ON, it may be a result of low built-in lithium battery. Contact your nearest sales agent of CHINO Corporation or your dealer. 6.13 SD Card Data Initialization This setting is used to initialize data saved in the SD card when all those data becomes unnecessary or data exceeds 9999 and it displays 'over' then saving becomes no longer available. -
Page 30: Measuring Mode
INST.No.INE-567-P1CE 7. Measuring Mode ◆ There are two types of measuring method. [Standard measuring mode] ······ This mode is for portable measurement. [Continuous measuring mode] ··· This mode is for continuous measurement which this thermometer is fixed and measuring for a long time at same location. "... -
Page 31: Standard Measuring Mode
INST.No.INE-567-P1CE Status marker 7.1 Standard Measuring Mode [Standard measuring mode display] 1) Sight through the viewfinder and match the center circle Tb CONT MEM PEAK of the targeting circle to the center of object measured. MEAS 2) Turn ON the power by holding down MEASURE key. ℃... -
Page 32: Continuous Measuring Mode
INST.No.INE-567-P1CE 7.2 Continuous Measuring Mode 1) Start the thermometer by pushing key and push and hold MEASURE key while power OFF. [Continuous measuring display] 2) " " under main marker "CONT" lights and it becomes Tb CONT MEM PEAK continuous measuring mode. -
Page 33: Memory Input Mode (Display/Saving Data)
INST.No.INE-567-P1CE 8. Memory Input Mode (Display/Saving Data) ◆ This is a function of display/saving data. 1) Turn ON the power by holding down MEASURE key 2) Push MEMORY key on standard measuring mode or continuous measuring mode under "HOLD" status to start memory input mode. -
Page 34: Data Save
INST.No.INE-567-P1CE 8.2 Data Save ◆There are two types of data saving method. *Refer to "6.8 Memory Mode Selection" for memory mode settings. [Manual memory mode]············ Measured data is saved at the time when ENT key is pushed. [Interval memory mode] ··········· Measured data is saved at every set interval time. Caution ・If you are about to save when the number of the file is exceeded, "OVEr"... -
Page 35: Interval Memory Mode Saving
INST.No.INE-567-P1CE 8.2.2 Interval Memory Mode Saving *If the memory mode setting is not "int" (interval memory mode), refer to "int" is displayed only for "6.8 Memory Mode Selection" and change memory mode to "int". a moment when MEMORY key is pushed. 1) By push MEMORY key on standard measuring mode or continuous measuring mode under "HOLD"... -
Page 36: Data File And Folder
INST.No.INE-567-P1CE 8.3 Data File and Folder [SD card (Maximum2GB)] Folder 1 file × Maximum 512 folders 9999 files 9999 data Remark ・For one file, in the order from 1 to 9999 data can be saved. Caution ・Measured data is saved in a folder or a file set at setting mode. ・Past data is not available to be overwritten. -
Page 37: File Saving Format
INST.No.INE-567-P1CE 8.4 File Saving Format File Saving Format Data Radiation Thermocouple Field Date/Time Status Emissivity CR LR number temp. temp. Data string 1 2 3 4 2 0 1 7 2 3 ? 1 2 0 1 3 0 0 0 0 ? ? 5 0 ? ? 6 1 ¥r ¥n Number of... -
Page 38: Zero/Span Adjustment Mode
INST.No.INE-567-P1CE 9. Zero/Span Adjustment Mode ◆ By measuring scale lower limit (zero side) and higher limit (span side) with your black body furnace and input black body furnace temperature, this function performs zero/span adjustment. Caution ・ Be sure to prepare a black body furnace and a reference radiation thermometer. -
Page 39: Initialize Zero/Span Adjustment
INST.No.INE-567-P1CE 9.1 Initialize Zero/Span Adjustment [Initialize Zero/Span This setting is used to initialize zero/span adjustment values. Adjustment display] 1) Start zero/span adjustment by push and holding key, ENT Tb CONT MEM PEAK key, and MEASURE key at the same time while power OFF. 2) Display "init"... -
Page 40: Ingaas Zero Adjustment
INST.No.INE-567-P1CE 9.3 InGaAs Zero Adjustment (*IR-HAI or IR-HAQ) Performs InGaAs zero adjustment. [InGaAs zero adjustment Collimate the thermometer and sight the black body furnace to display] input the temperature of the furnace. Tb CONT MEM PEAK 1) From zero/span adjustment mode display, push SEL key several times to display "inGZ"... -
Page 41: Si Zero Adjustment
INST.No.INE-567-P1CE 9.5 Si Zero Adjustment (*IR-HAS ot IR-HAQ) Performs Si zero adjustment. [Si zero adjustment display] Collimate the thermometer and sight the black body furnace to Tb CONT MEM PEAK input the temperature of the furnace. 1) From zero/span adjustment mode display, push SEL key several times to display "Si Z"... -
Page 42: 2-Color Zero Adjustment
INST.No.INE-567-P1CE 9.7 2-Color Zero Adjustment (*IR-HAQ) Performs 2-color adjustment. [2-color adjustment display] Collimate the thermometer and sight the black body furnace to input the temperature of the furnace. Tb CONT MEM PEAK 1) From zero/span adjustment mode display, push SEL key several times to display "2C Z"... - Page 43 INST.No.INE-567-P1CE 10. Maintenance and Inspection 10.1 Cleaning of Objective Lens Wipe the objective lens periodically with a soft cloth for accurate measurement. 10.2 Cleaning of External LCD and Eyepiece Cover Wipe the external LCD and eyepiece cover periodically with a soft cloth for clear view. 10.3 Self-Diagnostic Function This thermometer has self-diagnostic function and displays following indications at abnormality.
-
Page 44: Accessories
INST.No.INE-567-P1CE 11. Accessories 11.1 Thermocouple The thermometer can be used as a surface thermometer by connecting a K-thermocouple (sold separately). Connect the thermocouple by inserting its connector to the connector inside the connector cover. Refer to the figure of "3.1 Names and Functions of Component parts" for the location of thermocouple input connector. -
Page 45: Specifications
INST.No.INE-567-P1CE 12. Specifications 12.1 Specifications High function type Single-color type for Single-color type for high Type (2-color type+single-color medium temperature temperature wide rang type) □ □ □ Model IR-HAIN IR-HASN IR-HAQN Measuring System Narrow band radiation thermometer Detecting Element InGaAs Si/InGaAs Measuring 1.55μm... -
Page 46: External Dimensions
INST.No.INE-567-P1CE 12.2 External Dimensions Unit: mm -38-... -
Page 47: Emissivity Table
INST.No.INE-567-P1CE 13. Emissivity Table The emissivity are values determined by the material of object, profile of its surface, surface roughness, oxidized or not, measuring temperature, measuring wavelength and other factors. They are represented by the thermal radiation ratio "ε" when a black body furnace at the same temperature is measured in the same wavelength band. -
Page 48: Emissivity (Λ=0.9Μm)
INST.No.INE-567-P1CE 13.1.2 Emissivity (λ=0.9μm) 13.1.3 Emissivity (λ=1.55μm) Metal Emissivity Metal Emissivity Aluminum 0.10 to 0.23 Aluminum 0.09 to 0.40 Gold 0.015 to 0.02 Chrome 0.34 to 0.80 Chrome 0.36 Cobalt 0.28 to 0.65 Cobalt 0.28 to 0.30 Copper 0.05 to 0.80 Iron 0.33 to 0.36 Gold... -
Page 49: Start-Up Option
INST.No.INE-567-P1CE 14. Start-up Option 14.1 Start-up Option The following operation modes are available by the key combinations at the start up. Key Operation Mode Remarks Measurement with same Standard measuring or Push MEASURE key only measuring mode last Continuous measuring start-up Push ... -
Page 50: List Of Parameters
INST.No.INE-567-P1CE 15. List of Parameters Section Name Parameter Name Setting range Initial value of this display manual Single-color: 1.900 to 0.100 Emissivity (ratio) setting 1.000 2-color: 1.200 to 0.800 oFF" or " Lower limit temperature alarm 300 to 1000°C (IR-HAI) 600 to 2000°C (IR-HAS) 400 to 3000°C Higher limit temperature alarm... - Page 52 32-8, KUMANO-CHO, ITABASHI-KU, TOKYO 173-8632 Telephone:+81-3-3956-2171 Facsimile:+81-3-3956-0915 Web site http://www.chino.co.jp/...
Need help?
Do you have a question about the IR-HA Series and is the answer not in the manual?
Questions and answers