Table of Contents
Advertisement
Quick Links
Advertisement
Table of Contents

Related Manuals for Roland LV-290


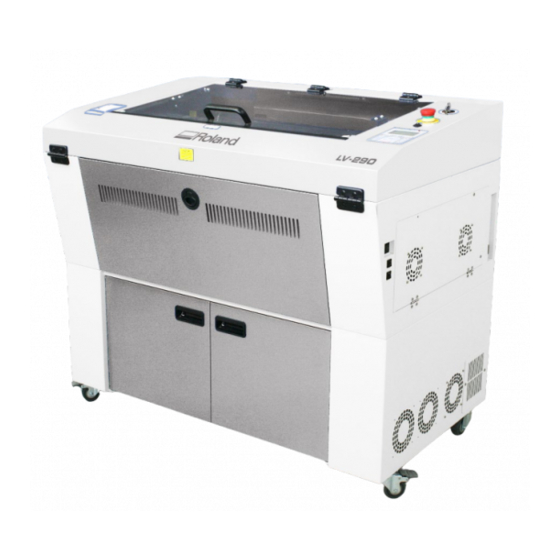
Summary of Contents for Roland LV-290
- Page 2 Roland DG Corporation. • Roland DG Corporation assumes no responsibility for any direct or indirect loss or damage that may occur through use of this product, regardless of any failure to perform on the part of this product.
- Page 3 For the USA FEDERAL COMMUNICATIONS COMMISSION RADIO FREQUENCY INTERFERENCE STATEMENT Responsible Party: Roland DGA Corporation Address: 15363 Barranca Parkway Irvine, CA 92618 U.S.A. Telephone: 949-727-2100 Type of Equipment: Laser Engraver Model Name: LV-290 NOTE: This equipment has been tested and found to comply with the limits for a Class A digital device, pursuant to part 15 of the FCC Rules.
-
Page 4: Table Of Contents
File Transfer ......................................54 Adobe Illustrator Output Instruction ............................... 56 4.2.5 Using Autodesk Inventor with This Machine......................65 Chapter 5 Operating LV-290 ..........................68 5.1 Using the Hardware .................................. 69 5.1.1 Laser Key Switch ................................69 5.1.2 Adjusting the LCD Display Screen’s Contrast Setting ..................69... - Page 5 CorelDRAW Example (Color Management) ..........................106 5.2.3 Using the Printer Driver ............................. 107 5.2.3.1 LV-290 Printer Driver >> Options Page ........................108 5.2.3.2 LV-290 Printer Driver >> Pen Page ........................... 115 5.2.3.3 LV-290 Printer Driver >> Advanced Page ........................118 5.2.3.4 LV-290 Printer Driver >>...
- Page 6 Menu Bar ........................................ 135 Tool Box ........................................136 Work Area ......................................136 Property Table ...................................... 136 Object Browser..................................... 136 Exit ........................................... 136 5.3.2 SmartCONTROL Vision Output Function ......................137 Processed Condition Setup ................................137 Output Preview ....................................140 Output ........................................141 5.3.3 SmartCONTROL Vision Function ..........................
- Page 7 Chapter 9 Basic Troubleshooting ........................209 Quality Problems....................................210 Non-operational Problems ................................. 210 Other Problems....................................210 Chapter 10 Appendix ............................211 10.1 Glossary ....................................212 10.2 Specification Sheet ................................213...
-
Page 8: Chapter 1 Safety
Chapter 1 Safety Principles of a CO2 Laser Safety Ratings The Safety Interlock System Safety Labels Safety Measures Operating Environment... -
Page 9: Principles Of A Co2 Laser
One of the key safety features found on the LV-290 is a Class 2 red beam safety guidance pointer (similar to a laser-pointer presentation pen) allowing the operator to see the exact location where the laser beam will fire. -
Page 10: Product Label
This label is located at the right-back side of machine. All the product information such as Serial Number, Model Numbers, Laser Power and Electric power can be found here. Before requiring any further tech support, always provide the service person with the information on this label. LV-290 CDRH Label This label indicates the class level of CDRH. - Page 11 This label indicates the class level of CE Laser Path Warning Label LV-290 is very safe under normal functioning conditions. However, in case of any accident, Laser Path Warning Label will be affixed on the possible laser path. When operators are nearby these paths, they should be careful of the possible injury while the machine is operating.
- Page 12 Emergency Stop Label This label indicates the emergency stop button. You can find this label on the right upper side of the machine. Aperture warning stickers (mirror): This label indicates the laser path. Normally you can find this label inside of machine or laser exit. Please take extra caution of this area when you conduct maintenance or operate machine.
-
Page 13: Safety Measures
Ensure the immediate work area of the machine is well-ventilated. Odors, vapors, and dust are by products generated during the laser engraving and cutting process. An exhaust system, vacuum cutting box, and honeycomb table are recommended. Please contact your authorized Roland DG Corporation dealer for more information. -
Page 14: Safety Notice For Class 4 Machine
• Avoid small, enclosed areas with poor ventilation. • Avoid areas with high levels of noise and electrical noise. • Select a location that is large enough to accommodate the LV-290, an exhaust system, a computer and a work or storage table. -
Page 15: Ec-Declaration Of Conformity
1.8 EC-Declaration of Conformity EC DECLARATION OF CONFORMITY Manufacturer Roland DG Corporation. Address of Manufacturer 1-6-4 Shinmiyakoda, Kita-ku, Hamamatsu-shi, Shizuoka-ken, 431-2103, Japan Product Name Laser Engraver Model No. LV-290, LV-####@@-XXXYYY (#### = 1, 2 … 8, 9, 0 or blank (Table Size), @@=none character, blank, II, III, IV …... -
Page 16: Chapter 2 Unpacking& Contents
Chapter 2 Unpacking& Contents Unloading and Unpacking How to pack properly Contents and Accessories Checklist... -
Page 17: Unloading And Unpacking
2.1 Unloading and Unpacking The LV-290 is shipped in one crate that contains the machine, the software, and all of the necessary accessories. The following section shows detailed step-by-step instructions for unpacking and assembly of the machine. WARNING More than one person may be needed when loading and unloading the shipping crate in order to... -
Page 18: Unpacking And Unloading
Unpacking and Unloading Move the shipping crate close to the desired working location of the machine. Unpack following the steps below. Step 1. Put the top board on the floor. Make sure the outer side faces up. Put the top board on the floor. Step 2. - Page 19 Step 3. Release 4 screws to take out the slide step 2 screws on the other side Take out the Slide Step Step. 4. Put the slide step next to the top board. Top board Slide step...
- Page 20 Step. 5 Loosen the 4 screws to take off the left and right spacer before rolling down this machine. Right Spacer Left Spacer on the other side Step. 6. Carefully roll down the machine off the packing crate.
-
Page 21: How To Re-Pack The Machine
2.2 How to Re-pack the Machine Step 1. Set up the ramp with the top board and slide step and carefully push the machine onto the wood pallet. NOTE: More than one person may be needed when loading and unloading the shipping crate in order to avoid body injury or damage to the machine. - Page 22 Step 3. Fasten the belts accordingly and make sure the machine is affixed on the wood plate. * Put the belt into the red circle part Step 4. Moving the buckle to tighten the belt and buckle up as below pictures. Step 5.
-
Page 23: Contents And Accessories Checklist
2.3 Contents and Accessories Checklist Please check to make sure that all of the following items are included within the shipping crate. If any of the following items are missing, immediately contact your authorized Roland DG Corporation dealer. -
Page 24: Before You Use This Machine
2.4 Before You Use This Machine Before you use this machine, you must remove the tape protected mirror. Step 1. Open the front cover. Step 2. Remove a tape protected mirror. DO NOT touch the mirror, when you remove the tape. Tape WARNING You must remove the tape protected mirror, before you use the machine. -
Page 25: Chapter 3 Mechanical Overview
Chapter 3 Mechanical Overview Front View Top View Right View Left View Rear View... -
Page 26: Front View
Please take some time to familiarize yourself with this section regarding the mechanical overview of the LV-290. References will be made back to the different parts of the LV-290 in later sections. 3.1 Front View SmartEXT Pass-through Door (Front) Lower Front Door 3.2 Top View... -
Page 27: Right (Profile) View
3.3 Right (Profile) View USB Storage Port USB Port Ethernet Port Power On/ Off Switch Power Cable Inlet 3.4 Left (Profile) View Access Panel Mirror #1... -
Page 28: Rear View
3.5 Rear View SmartLID Operation Handles Ventilation Openings SmartEXTTM Pass-Through Door (Rear) -
Page 29: Chapter 4 Setup And Installation
Chapter 4 Setup and Installation Machine Setup - Powering Up the Machine - Power Cable Connection - Connecting the Computer Graphics Software Setup - Recommended Computer Configuration - Installation of the USB Driver - Installation of the Print Driver - Installation of the SmartCONTROL... -
Page 30: Machine Setup
4.1.2 Connecting the Computer The LV-290 can communicate with a computer through a USB Port or LAN Port connection interface. Regardless of the connection method chosen, you will need to connect the respective connection cable from the LV-290 to your computer. -
Page 31: Ethernet Connectivity
DO NOT connect USB cable when using Ethernet function for data transmission. If you have purchased additional Optional Accessories for the LV-290, please refer to chapter 7 for instructions on how to properly setup your optional accessories. These should be setup prior... - Page 32 Networking Connectivity Setup LV-290 is built-in with LAN port to enable multiple laser engravers to be operated by one PC and multiple PCs to share a single unit of laser engraver. Follow the setup instructions below. Step 1. Connect LAN cable to the LAN port of this machine and turn on machine Step 2.
- Page 33 Step 4. Go to <Ports> tab of LV-290 printer properties, and select <Add Port>, and follow the instruction to enter the TCP/IP information received from laser machine control panel in step 2.
- Page 37 Ethernet Connectivity Setup ROLAND laser engraver is built-in with LAN port to transmit data from PC to laser engraver with ease and higher speed instead of USB port option. Step 1. Connect LAN cable to the LAN port of this machine and turn on machine Step 2.
- Page 38 Step 6. Choose the <Internet Protocol Version 4(TCP/IPv4)> and click <Properties> to open up the setting window. Step 7. Enter the IP address and Subnet mask setting values, and choose <OK> Note the IP address 192.168.3.X (X value can be 1~255, while can’t be the same number as machine control panel setting in step 4)
- Page 39 Step 8. Go to <Control Panel> <Device and Printers> of computer and right click on the laser machine printer, choose <Printer Properties>.
- Page 40 Step 9. Select <Add Pot> under Ports tab and follow the instruction to enter the TCP/IP information in laser machine’s control panel in step 4.
- Page 43 Troubleshooting While users configure the Ethernet setting precisely with DHCP = OFF (assign the machine a static IP) referring to the manual, sometimes the communication might still not be able to work, at this time you can refer to below actions to have a basic troubleshooting with IT technician.
- Page 44 Command line mode window Type “ping x.x.x.x –t” after the prompt symbol, (x.x.x.x is the IP address you set on the laser machine, ie: 192.168.100.101)., press “Enter” to run the “Ping” tool. If the communication is OK between your PC and Laser machine, you will see reply from the destination IP. If the communication is not ok, you will see “Request timed out”...
- Page 45 PING and send files, if the files can be sent and the result of PING is normal (can get response from destination IP), the Ethernet function of LV-290 is normal, it should be something wrong in the LAN environment , ask the administrator of the LAN to solve the problem.
-
Page 46: Usb Storage Setup
Windows FAT16/FAT32 file system format A maximum of 32G of storage capacity Step 1. Make sure the page setup and orientation is match LV-290. Please refer to Chapter 5.2.1 for page setup and orientation. Step 2. Open the file in graphics software and click File Print from menu bar, and the Print window will appear... - Page 47 Step 4. Checking the Print to file checkbox and click the Print button. Step 5. Select the save folder and define file name, then click “Save” to convert Step 6. Move the file to the USB flash drive...
- Page 48 Step 7. Insert USB flash drive to the USB Storage port of this machine NOTE USB storage function only supported for the PRN format, you can convert the file to PRN format from the printer driver. Step 8. Navigate the control panel through <F4> Function <File Management> <USB Drive File> Step 9.
-
Page 49: Graphics Software Setup
Technical support will not be offered, if you experience output problems with non-supported graphics software. 4.2.1 Recommended Computer Configuration The LV-290 operates under Windows operating systems and is designed to work on a computer that meets the following minimum requirements. Computer Compatibility •... - Page 50 3) Click <Next>. 4) The installation would be finished in few seconds.
- Page 51 When working with the LV-290 Printer Driver within your graphics software, you will need to have the LV-290 set as the default printer to get proper output. If you select to not have the LV-290 to be the default printer, please remember to manually change this on your own from within the graphic...
-
Page 52: Installation Of The Smartcontrol Vision
4.2.3 Installation of the SmartCONTROL Vision 1) Turn the LV-290’s power on. 2) Take out the SmartCONTROL installation disk and insert to CD-ROM drive of computer. Wait few seconds for the CD Manager to begin the Setup automatically. 3) Click on “Install SmartCONTROL” from the menu of the SmartCONTROL installation CD. - Page 53 5) The installation would be finished in few seconds. 6) Installation is complete, please click “OK” button to continue the Device Driver installation. 7) The Device Driver Installation Wizard window will pop up, click “Next” to continue.
- Page 54 8) Windows security dialog box will appear and ask you “Would you like to install this device software?”, choose “Always trust software from AISYS VISION CORPRATION" and click “Install” button to continue. 9) After installing the device driver, click “Finish” to close device driver installation wizard window. 10) When installation is complete, SmartCONTROL will create a “SmartCONTROL”...
-
Page 55: Using Adobe's Ap With This Machine
Enable Advance Printing Features; otherwise the machine is unable to recognize or read general files when uploaded. Deselect “Enable Advance Printing Features” 1) Click to select Control Panel Devices and Printers 2) Select your printer (for example, LV-290), right-click your mouse and choose Printer properties to enter LV-290 Properties setup... -
Page 56: File Transfer
3) The click the Advanced tab, then deselect Enable Advanced Printing Features, now all files can be recognized and uploaded. File Transfer 1) Select your working object, and then at the upper toolbar please choose File Print. - Page 57 2) At the print setup screen, at Print Preset please select Custom, and choose LV-290 printer driver. 3) Then click on the “Print Settings…” button to enter Preferences settings. 4) After all preferences are set, click Print to send file to the machine for print out.
-
Page 58: Adobe Illustrator Output Instruction
Adobe Illustrator Output Instruction Step 1. Go to “Control Panel” “Devices and Printers” Step 2. Right click on the icon of the laser machine model and select "printer properties" Step 3. Go to the “Advanced” tab and select ”Print directly to the printer”, then click “OK” button to complete the settings. - Page 59 Step 7. Extract the file and copy the “Laser_Pen.ase” to C:\\Users\your user name\AppData\Roaming\Adobe\Adobe Illustrator 23 Settings\en_US\x64\Swatches If you don’t have the Laser_pen.ase file, please browse the installation CD. Click on <Browse CD> from the menu of the Roland DG installation CD. Step 8. Run the Adobe Illustrator.
- Page 60 Step 9. Click “File” “New…” from the menu bar. Step 10. Click “More Settings” Step 11. Input the Width and Height of working area according to your machine model and set the Color Mode to “RGB”. Then click “Create Document” button to create the document.
- Page 61 Step 12. Click “File” “Document Setup…” from the menu bar to set the document. Step 13. Click “Custom…” button and the “Custom Transparency Flattener Options” window will pop up.
- Page 62 Step 14. Set “Raster/Vector Balance” to 75, and check “Convert All Text to Outlines”, “Convert All Strokes to Outlines”, and “Clip Complex Regions” checkboxes, then click “OK” to close the window. Step 15. Click the “Window” from the menu bar and click the “Swatches”, and then the “Swatches” window will pop...
- Page 63 Step 16. Click the menu of the Swatches and select “Open Swatch Library” “User Defined” “Laser_Pen” to open the swatch library. Step 17. Draw your artwork and assign the colors from the Laser_Pen swatch library. Step 18. After the drawing is complete, please click “File” “Print” from the menu bar, then the “Print” window will pop up.
- Page 64 Step 20. Click the “Setup…” button to set your parameter. Adobe Illustrator will show a message of the printer. Please check the “Don’t Show Again” checkbox and click “Continue” button to set the printer parameter. Step 21. Select your machine and click the “Preferences” button, then the “Printer Preferences” window will pop Step 22.
- Page 65 Step 23. After the parameter setting is completed, click “OK” button to close the “Printer Preferences” window. Step 24. Click “Print” button to close the “Print” window.
- Page 66 Step 25. Uncheck the “Auto-Rotate” checkbox and click icon, then click “Print” button to send the file to your machine. Step 26. Press the “Start/Stop” button on the control panel of the machine to start the job.
-
Page 67: Using Autodesk Inventor With This Machine
4.2.5 Using Autodesk Inventor with This Machine. 1) Start drawing. 2) Delete border and title block by right clicking on sheet1 and selecting delete. - Page 68 3) Set sheet size to match working area of engraver. Engraver working area can be found on the paper tab of the windows driver. 4) Start sketch. 5) Engraving Finish sketch. b. Right click on sketch and select properties. Line Type: By Layer d.
- Page 69 6) Cutting Finish sketch. b. Right click on sketch and select properties. Line Type: Continuous d. Line Weight: .001 in. Set color to match one of the 16 colors available in the pen tab of the windows driver. NOTE All objects created in one particular sketch will have the same properties meaning all will engrave or all will cut.
-
Page 70: Chapter 5 Operating Lv-290
- Page Setup and Orientation - Color Management - Using the LV-290 Printer Driver - LV-290 Printer Driver >> Options Page - LV-290 Printer Driver >> Pen Page - LV-290 Printer Driver >> Advanced Page - LV-290 Printer Driver >> Paper Page... -
Page 71: Using The Hardware
Once you have installed the USB Driver of this machine (for use with USB connection) and have connected the LV- 290 to your computer, you will need to familiarize yourself with the LV-290 control panel and Printer Driver. The printer driver will be where specific laser parameters for your jobs are configured, while the control panel will allow you to set repeat times, manipulate file order, perform auto / manual focusing, and more. -
Page 72: Graphic Control Panel Overview
5.1.3 Graphic Control Panel Overview The Control Panel The control panel on the LV-290 provides an easy access to all the manual controls needed for cutting and engraving. The liquid crystal display (LCD), functional, directional and selection buttons make navigating through the machine’s manual controls easy to do. - Page 73 Directional ( / / / ) – Four directional buttons allow you to navigate the selection cursor through the control panel menu and adjust the value of specific settings. In general, the / directional buttons cycle through the various selections, while the / directional buttons adjust the value of that particular selection.
-
Page 74: Graphic Control Panel Navigation Chart
5.1.4 Graphic Control Panel Navigation Chart... -
Page 75: Graphic Control Panel Function
5.1.5 Graphic Control Panel Function Pages When the LV-290 is powered on, the machine will perform a series of safety checks and initialization routines. The LCD display screen will display the copyright, ROLAND logo, and machine initialization pages before going to the main work page. -
Page 76: Carriage / Work Table Adjustment Page
Carriage / Work Table Adjustment Page Navigating to this page: Main Work Page Press / / / or F3 Carriage / Work Table Adjustment Page The Carriage / Work Table Adjustment Page allow you to manually increase and decrease the height of the work table (Z-axis). -
Page 77: Smartcenter Page
SmartCENTER Page Navigating to this page: Main Work Page Press SmartCENTER Page Under SmartCENTER mode the job will begin after the system positions the carriage to the center position between two points or four points indicated by the user. The SmartCENTER mode has to be enabled through the driver. -
Page 78: Functions Page
Menu Page • File Management Page – this page allows you to manage the files that you have loaded onto the LV-290. • Machine Setting Page – this page allows you to access and modify various machine settings, including: Set Lens, Tune Auto Focus, Set Table Down, Set Red Beam, Carriage Lock, Set Command Mode, Set File Save Mode, Set Vector Mode, LAN Setup, Other, Reset. -
Page 79: File Management Page
File Management Page Navigating to this page: Main Work Page Press Functions Page Select <File Manage menu> from the menu File Management Page The File Management Page allows you to manage the files from system or USB drive. File Management Page Relevant Buttons Function F1 (Back) -
Page 80: System File Page
System File Page Navigating to this page: Main Work Page Press Functions Page Select <File Manage menu> from the menu File Management Page Select <System File> from the menu System File Page The System File Page allows you to manage the files that you have loaded onto this machine. You can scroll through your jobs, delete a selected job, delete all jobs, and go to the Link / DLink Page to set and arrange multiple loaded jobs into a single job queue for processing. -
Page 81: Usb Drive File Page
USB Drive File Page Navigating to this page: Main Work Page Press Functions Page Select <File Manage menu> from the menu File Management Page Select <USB Drive File> from the menu USB Drive File Page The USB Drive File Page allows you to load file from USB storage. You can scroll through your job to processing. USB Drive File Page Relevant Buttons Function... -
Page 82: Link / Dlink Page
Link / DLink Page Navigating to this page: Main Work Page Press Functions Page Select <File Manage menu> from the menu File Management Page Press F2 Link / Dlink Page The Link / DLink Page allows you to set, arrange, and remove loaded jobs to and from a job queue for processing. Use the directional keys to cycle through your loaded jobs, then simply press the <F2 (Link)>... -
Page 83: File Information Page
File Information Page Navigating to this page: Main Work Page Press Functions Page Select <File Manage menu> from the menu File Management Page Select a job file and press Enter File Information Page The File Information Page allows you to view the speed, power, DPI, and PPI settings of the selected job. In addition, you will be able to go to the File Management Edit Page from this menu to change raster/ vector speed and power settings for the selected job. -
Page 84: File Management Edit Page
File Management Edit Page Navigating to this page: Main Work Page Press Functions Page Select <File Manage menu> from the menu File Management Page Select a job file and press Enter File Information Page Press File Management Edit Page The File Management Edit Page allows you the choice to modify your raster or vector settings for the selected job, as well as setting the number of times to repeat the process of the selected job (Repeat Num). -
Page 85: File Edit Raster Page
File Edit Raster Page Navigating to this page: Main Work Page Press Functions Page Select <File Manage menu> from the menu File Management Page Select a job file and press Enter File Information Page Press File Management Edit Page Select <Raster Setting> from the menu File Edit Raster Page The File Edit Raster Page allows you to edit the raster power and speed settings, as well as enable or disable... -
Page 86: File Edit Vector Page
File Edit Vector Page Navigating to this page: Main Work Page Press Functions Page Select <File Manage menu> from the menu File Management Page Select a job file and press Enter File Information Page Press File Management Edit Page Select <Vector Setting> from the menu File Edit Vector Page The File Edit Vector Page allows you to edit the vector pen, vector power, vector speed, and vector PPI, and... -
Page 87: Machine Setting Page
Machine Setting Page Navigating to this page: Main Work Page Press Functions Page Select <Machine Setting> from the menu Machine Setting Page The Machine Setting Page allows you to access and modify various machine settings, including: Set Lens, Tune Auto Focus, Set Table Down, Red Beam on/ off, Carriage Free, select Command Mode, File Save, Select Vector Mode, LAN setup, Other, and Reset etc. - Page 88 Machine Setting Page Relevant Buttons Function F1 (Back) Back to previous page F3 (Next) Scroll to next page F4 (Prev) Scroll to previous page / Directional Scroll through your loaded jobs Enter Perform the selection Start / Stop Back to Main Work Page Auto Focus Initiate the auto focus function...
-
Page 89: Machine Setting- Select Lens Page
Machine Setting- Select Lens Page Navigating to this page: Main Work Page Press Functions Page Select <Machine Setting> from the menu Machine Setting Page Select <Select Lens> from the menu Set Lens Page The Select Lens Page allows you to modify the lens settings after you have changed to a different focal lens. Remember to save your settings after you have made the proper changes. -
Page 90: Machine Setting- Tune Auto Focus Page
Machine Setting- Tune Auto Focus Page Navigating to this page: Main Work Page Press Functions Page Select <Machine Setting> from the menu Machine Setting Page Select <Tune Auto Focus> from the menu Tune Auto Focus Page The Tune Auto Focus Page allows you to manually adjust the auto focus default value, or distance from lens carriage to the worktable (Z-axis) when the Auto Focus button is pressed. -
Page 91: Machine Setting- Table Down Page
Machine Setting- Table Down Page Navigating to this page: Main Work Page Press Functions Page Select <Machine Setting> from the menu Machine Setting Page Select <Table Down> from the menu Table Down Page The Set Table Down Page allows you to select whether or not this machine, displays a table moving down warning message at startup. -
Page 92: Machine Setting- Red Beam Page
Machine Setting- Red Beam Page Navigating to this page: Main Work Page Press Functions Page Select <Machine Setting> from the menu Machine Setting Page Select <Red Beam> from the menu Red Beam Page The Red Beam Page allows you to turn on or off the red dot laser pointer on the lens carriage. Enabling this function will indicate the exact area the engraving laser will fire upon. -
Page 93: Machine Setting- Carriage Free Page
Machine Setting- Carriage Free Page Navigating to this page: Main Work Page Press Functions Page Select <Machine Setting> from the menu Machine Setting Page Select <Carriage Free> from the menu Carriage Free Page The Carriage Free Page allows you to decide whether the lens carriage to be locked or free for hand movement. If the Carriage Free setting is set to <YES>, then you will be able to manually move the lens carriage along the X and Y axis by hand with the top door open. -
Page 94: Machine Setting- Command Mode Page
Machine Setting- Command Mode Page Navigating to this page: Main Work Page Press Functions Page Select <Machine Setting> from the menu Machine Setting Page Select <Command Mode> from the menu Command Mode Page The Command Mode Page allows you to configure vector settings when outputting in Default or HPGL mode. Default mode refers to output the file through standard Windows print driver and also recognized by the most popular graphic software programs such as CorelDRAW, Photoshop, Illustrator, and more. -
Page 95: Machine Setting- File Save Mode Page
Machine Setting- File Save Mode Page Navigating to this page: Main Work Page Press Functions Page Select <Machine Setting> from the menu Machine Setting Page Select <File Save Mode> from the menu File Save Mode Page The File Save Mode Page allows you to set whether or not this machine, automatically deletes each job file after processing. -
Page 96: Machine Setting- Set Standby Mode Page
Machine Setting- Set Standby Mode Page Navigating to this page: Main Work Page Press Functions Page Select <Machine Setting> from the menu Machine Setting Page Select <Set Standby Mode> from the menu Set Standby Mode Page The Set Standby Mode page allows you to configure the laser machine automatically enter into power saving if machine is idle for a specified time. -
Page 97: Machine Setting- Save Position Page
Machine Setting- Save Position Page Navigating to this page: Main Work Page Press Functions Page Select <Machine Setting> from the menu Machine Setting Page Select <Set Position> from the menu Save Position Page The Save Position Function allows you to save the current X-axis and Y-axis positions of the lens carriage to be the origin for subsequent jobs. -
Page 98: Machine Setting- Vector Mode Page
Machine Setting- Vector Mode Page Navigating to this page: Main Work Page Press Functions Page Select <Machine Setting> from the menu Machine Setting Page Select <Vector Mode> from the menu Vector Mode Page The Vector Mode Page allows you to adjust and balance vector mode’s quality and speed settings based on your specific job. -
Page 99: Machine Setting- Lan Setup Wizard Page
Machine Setting- LAN Setup Wizard Page Navigating to this page: Main Work Page Press Functions Page Select <Machine Setting> from the menu Machine Setting Page Select <LAN Setup Wizard> from the menu LAN Setup Wizard Page The LAN Setup Wizard Page allows you to connect the laser machine with ethernet to transmit files from computer to laser machine for processing jobs. -
Page 100: Machine Setting- Scaling Page
Machine Setting- Scaling Page Navigating to this page: Main Work Page Press Functions Page Select <Machine Setting> from the menu Machine Setting Page Select <Scaling> from the menu Scaling Page The Scaling Page allows you to fine tune the laser machine output scale to precisely fit the original graphic file design scale when precision output is requried to your application. -
Page 101: Machine Setting- Others Page
Machine Setting- Others Page Navigating to this page: Main Work Page Press Functions Page Select <Machine Setting> from the menu Machine Setting Page Select <Others> from the menu Others Page The Others Page allows you to change various settings that correspond to the control panel. The Language setting will allow users to change available languages displayed on the control panel. -
Page 102: Machine Setting- Reset Page
Machine Setting- Reset Page Navigating to this page: Main Work Page Press Functions Page Select <Machine Setting> from the menu Machine Setting Page Select <Reset> from the menu Reset Page The Reset Page will restore machine settings back to factory default. Press ENTER to confirm the change and restart the machine. -
Page 103: Advanced Option Page
The Advanced Option Page allows you to access multiple setting for laser machine optional peripherals, including SmartGUARD, Auto-Feeder, and AAS Calibration. Auto-Feeder and AAS Calibration options are only available for those LV-290 machines with CO2 laser tube configuration. Advanced Option Page... -
Page 104: Advanced Option- Smartguard Page
Advanced Option- SmartGUARD Page Navigating to this page: Main Work Page Press Functions Page Select <Advanced Options> from the menu Advanced Option Page Select <SmartGUARD> from the menu SmartGUARD Page After optional SmartGUARD hardware installation, please enter the function menu on the control panel to enable the SmartGUARD fire alarm. -
Page 105: Information Page
Information Page Navigating to this page: Main Work Page Press Functions Page Select <Machine Setting> from the menu Information Page The Information Page allows you to view information regarding the system such copyright, laser machine name, firmware version, and other information. Information Page Relevant Buttons Function... -
Page 106: The Lv-290 Printer Driver
Ensure that the LV-290 has been selected as the DEFAULT PRINTER. You can do so by going into your Windows Control Panel → Printers and Faxes. If the LV-290 is not selected as DEFAULT PRINTER, you may set it up through the graphics software as well. -
Page 107: Page Setup And Orientation
5.2.1 Page Setup and Orientation The first thing you must do before working with the LV-290 Printer Driver will be to make sure the page and layout settings are properly configured within your graphics software. You will need to access and edit the Page Setup or Layout page of your graphics software to set your graphics software’s page layout to match this machine’s work... -
Page 108: Color Management
Page Setup and Orientation properly set in your graphics software, you will also need to make sure Color Management is DISABLED prior to working with the LV-290 Printer Driver. From your graphic software’s Color Management page: •... -
Page 109: Using The Printer Driver
Now after you have properly set the Page and Layout and Color Management of your graphics software, you are ready to configure the details of your actual job through the LV-290 printer driver. The Printer Driver allows you to adjust your engraving / cutting options. After you have setup your image, design, or text to be engraved in your software application, you can access the Printer Driver by going to <FILE>... -
Page 110: Printer Driver >> Options Page
Black & White mode. NOTE Selecting the Black & White mode will enable the Raster page on the LV-290 Printer Driver, allowing you to adjust advanced stamp-related settings. - Page 111 3D Mode allows the naked eyes to visualize the curvatures of the 3D effect by applying 200 grayscale power level technology to create different depth of engraving. Stamp Mode: The stamp mode is one of the more dynamic functions of the LV-290 laser engravers by applying 200 power levels to create different steps. NOTE Selecting the Black &...
- Page 112 Lower DPI settings result in coarser and shallower engravings but require less time to complete. The LV-290 offers 8 DPI options: 125, 250, 300, 380, 500, 600, 760, 1000, and 1500 experiment with different settings to get your desired effect.
- Page 113 Print Immediately (Options Page) [DEFAULT SETTING: Unselected] Checking this will instruct the LV-290 to immediately begin the laser engraving process, when you select Print from your graphic software program. If Print Immediately is not checked, then selecting Print will transfer the job file to the LV-290 system and will need to be initialized from the LV-290 control panel.
- Page 114 Preview (Options Page) [DEFAULT SETTING: Unselected] Users can use the Preview function to check a simulated output of the job. An estimated working time will also be shown. Please make sure to set the file printing option to “print to file” in order to activate the Preview function.
- Page 115 After entering the filename and pressing <ok>, the Preview screen will be shown. The output file can be previewed and an estimated working time of the job is also displayed. File Function (Options Page): The file function section allows you to manage various laser parameters. This section is useful when performing duplicate jobs on a variety of objects, allowing you to save your frequently used laser parameters and load them in the future.
- Page 116 LV-290 material database settings allow you easy to load the several parameters. If you are loading LV-290 parameter database as your operating parameter, please click <Parameter> under OPTIONS page, and direct load from several build-in parameter folders.
-
Page 117: Printer Driver >> Pen Page
5.2.3.2 LV-290 Printer Driver >> Pen Page The LV-290 incorporates the use of 16 different colors to represent 16 different laser power and speed settings when cutting and engraving. These colors are referred to as “Pens”. Think of each pen as a designated laser setting, rather than as a color. - Page 118 Speed (Pen Page) [DEFAULT SETTING: 50] The speed slider controls the laser’s speed during operation (engraving speed) with settings ranging from 0.1 – 100%. Keep in mind, the speed setting refers to the lens carriage moves at when cutting or engraving straight lines.
- Page 119 Auto Focus (Pen Page) [DEFAULT SETTING: Unselected] This checkbox sets the Auto Focus for that particular job. With the Auto Focus button checked, LV-290 will automatically initialize the auto focus procedure before starting the job. This will ensure the focal distance is properly set based on the particular material you are working with and the focal lens you have installed.
-
Page 120: Printer Driver >> Advanced Page
If Pen 2 is selected, Pen 10 will be reserved and so on…) 5.2.3.3 LV-290 Printer Driver >> Advanced Page Scaling (Advanced Page) [DEFAULT SETTING: 0] In some cases you may find a slight output inaccuracy in the actual output compared to what you have set in the computer. - Page 121 Center: Sets the current position of the laser head as the center point for your subsequent job. As an example, if the subsequent job is to vector cut a circle and you have the Position Mode set to Center, then the LV-290 will vector cut a circle around the initial position of the laser head. •...
- Page 122 (front end to rear end of the work table) Normally, the LV-290 engraves from left to right, top to bottom. Selecting Bottom Up will alter the engraving sequence and the engraving will start from the bottom and work its way to the rear of the working table.
- Page 123 Vector Function (Advanced Page) [DEFAULT SETTING: Normal] • Normal: This selection will not apply any special advanced vector function to your job. This is the default Vector Function setting. • All Raster Output: This selection will instruct the print driver to process your entire image as a raster engraving.
- Page 124 Decal Cutting: this function is developing to reduce material weeding job after laser cutting for multiple layers adhesive materials, such as lettering vinyl, heat transfer film, and twill film. This function allows allocating different parameters for corresponding decal layer numbers to do die cut (cut through media) for the unwanted parts, and kiss-cut (half cut) for the kept material parts, after the laser cutting, users can just peel off the materials to get rid of waste parts.
- Page 125 Use Cluster (Advanced Page) [DEFAULT SETTING: Unselected] This setting allows you to change how the LV-290 interprets and processes individual / independent areas of an image in order to minimize job-processing times. The Cluster function is only applicable when multiple areas of an image are broken down and isolated from each other (areas not touching each other, blank space in-between).
- Page 126 True Image Mode (Advance Page) [DEFAULT SETTING: Unselected] This setting allows you to improve the engraving quality by reordering the line by line output sequence and by doing so masking the banding problems. This feature is only suitable for engraving large sized graphics.
-
Page 127: Printer Driver >> Paper Page
(at the position you wish to engrave). Unit (Paper Page) [DEFAULT SETTING: Metric (mm)] Here you can set your preferred measurement standard in which you would like to use with the LV-290 printer driver. You can choose between metric or imperial standards. - Page 128 Image Tuning (Paper Page) [DEFAULT SETTING: 0] In the event that you are processing extremely fine and detailed designs requiring near- microscopic edge- to-edge precision, you will need to adjust the image tuning setting. To adjust this setting, we recommend that you engrave a small black square design as a sample and use a magnifying glass to view the engraved results.
- Page 129 If you are processing a very large area requiring the maximum work table area, you will want to enable this mode. Enabling this mode will extend the LV-290 maximum work area to 29" x 18" (740 mm x 460 mm) from the default 25.197"...
-
Page 130: Printer Driver >> Language Page
5.2.3.5 LV-290 Printer Driver >> Language Page This page allows you to specify the language displayed by the LV-290 Printer Driver. Current language options allow for: English, Spanish, French, Chinese (Simplified, Traditional), Japanese, and German. Remember to select “Save to Default” on Options Page to save the specified language. -
Page 131: Printer Driver >> Raster Page
5.2.3.6 LV-290 Printer Driver >> Raster Page NOTE The Raster Page is only available when Black & White Mode Setting is selected from the Options Page, this page offers a number of advanced Raster Engraving output options. Contrast (Raster Page) [DEFAULT SETTING: 0] This provides a quick and easy way to immediately adjust the contrast of an engraved image. - Page 132 Halftone (Raster Page) [DEFAULT SETTING: Dithering] This option controls the way a raster-engraved image is processed. The “digital image to engraved output” process can be processed via two methods: Dithering or Error Diffusion. Each offer additional output options yielding different output effects, style, and quality. •...
- Page 133 There is no “correct” or “best” setting when using the Raster options. The most appropriate settings will be based on a variety of factors: your design, the material you are engraving on, and the results you wish to achieve, etc. Please take some time to experiment with the multitude of raster options to get the one you feel is the best for your piece.
-
Page 134: Printer Driver >> Stamp Page
5.2.3.7 LV-290 Printer Driver >> Stamp Page Producing stamps require different operational steps than your standard engraving or cutting jobs. The Stamp page offers dynamic options allowing you to customize your stamp production process. NOTE The Stamp page will only appear and be accessible when you have selected the Stamp Mode from the Options Page. - Page 135 NOTE The visual representations of the Pitch and Shoulder Levels in the LV-290 driver are an exaggerated representation to allow for easy visual guidance and precise input. Remember we are working with distances less than 1 mm here.
-
Page 136: Smartcontrol Vision
5.3 SmartCONTROL Vision 5.3.1 SmartCONTROL Vision Introduction Reminder Window In order to avoid transmission collisions, each time you launch the SmartCONTROL software, it will show a reminding message that shut down SmartCONTROL first if you want to print files through other graphic software to laser machine. -
Page 137: Main Window
Main Window The Main Window of SmartCONTROL software is divided into several unique sections: The Menu Bar, the Tool Box, the Work Area, and the Property Table. Menu Bar Tool Box Property Table Object Browser Work Area Menu Bar Similar to many Windows based program, the Menu Bar contains the locations of almost all the functions of the SmartCONTROL Software. -
Page 138: Tool Box
Tool Box The default Tool Box is composed of the Standard Bar, the Properties Bar, the Draw Bar, the Font Bar, and the Edit Bar. These bars provide visual references for the most commonly used tools. More information regarding different tools would be present in the VIEW MENU section. -
Page 139: Smartcontrol Vision Output Function
5.3.2 SmartCONTROL Vision Output Function Output Function is to set up laser parameters and output graphic to laser machine. The function can be accessed through Menu Bar as indicated below. Processed Condition Setup Set the engraving output parameters such as pen parameters, page setting and output mode by selecting Processed Condition Setup under Output function. - Page 140 Pen parameters SmartCONTROL provides 16 color pens, and each pen presents laser parameter setting, once colors are set, the pen would refer to the specified parameters when you apply the colors to an output. Pen Parameters under Processed Condition Setup would enable you to adjust the power, speed of each color pen. (1) Choose a color pen (2) Adjust the bar next to speed, power and PPI for the chosen color pen Remark:...
- Page 141 Page Setting Set the page parameters, including output page size, Resolution, Rotary Attachment. (1) Machine setting Set the size of machine. It will be the working area. Output Mode ...
-
Page 142: Output Preview
Manual color fill Select this mode when you would like to designate specific power and speed settings and link them to certain colors of your image. The LV-290 printer driver allows a maximum of 16 pen parameters to be set. -
Page 143: Output
Output The output box would show all the output setting, and you can press “Execute” to star t engraving or press Exit to close output and return to editing or output setting. (1) Output Select Objects Only Checking this will instruct the laser machine to prints the objects that you have selected. (2) Keep Mark Match Position Checking this will instruct the SmartCONTROL Vision used last time mark position to process job. -
Page 144: Smartcontrol Vision Function
5.3.3 SmartCONTROL Vision Function Running the SmartCONTROL Vision 1) Launch SmartCONTROL software program and click “New File” or “Open File” to open history file. 2) Go to “Vision” in the Menu Bar and select “SmartCONTROL Vision”. 3) Make sure connection status indicator shows green for both “USB Status” and “CCD Status”... -
Page 145: Smartcontrol Tm Vision Main Window
NOTE If the connection status indicator shows red, please reconnect the two USB cables and make sure “USB Status” green light is on, and the “CCD Status” green light is blinking. ▲Incorrect Connection ▲ Successful Connection Incorrect connection may cause the SmartVISIONTM PRO fail to work. SmartCONTROL Vision Main Window SmartCONTROL... -
Page 146: Smartcontrol Tm Vision Function
• SmartCONTROL Vision Function There are three functions of SmartCONTROL Vision, including CCD calibration, Mark Learning and Advance. • Live View Window Displaying the object read by SmartCONTROL Vision in real time. • Laser ROI Frame It allows user to choose the registration marks for learning, all the objects in the frame will be defined as mark. •... - Page 147 Mark Learning Tab Mark Learning allows users to learn, save and load the marks. Mark Learning Mark Mode Define using two, three or four-marks mode Mark Number Assign a number to the mark SmartCONTROL Vision is about to learn.
- Page 148 Start Learning Start to lean the marks. Mark Diameter/Line width Set the registration mark diameter, dimension or line width, and the laser ROI frame will auto adjust to the suitable size for best result. Save Marks Save the marks which are learned. Load Marks Load the marks which are saved.
-
Page 149: Smartcontrol Tm Vision Calibration
Advanced Tab Array Copy Check the box to enable the Array Copy function. X Copy/ Y Copy Define the duplicated numbers of horizontal (X) and vertical (Y) X Gap / Y Gap Define the graphics gap of horizontal (X) and vertical (Y). SmartCONTROL Vision Calibration Calibration function is aimed to fine-tune the position of the SmartVISION... - Page 150 4) Click “CCD Calibration” tab and press the “Start Calibration” button. 5) SmartCONTROL will show step by step instruction to guide you how to do the calibration. 6) Move the laser carriage to blank area and click OK. 7) The laser machine will engrave a calibration mark.
- Page 151 8) Click “OK” to continue. 9) Click “Mark Learning” tab and set the Mark Number as 0. (Mark 0 is special for CCD calibration use.) 10) Use the mouse to move the laser ROI frame and make sure the frame crosshair is aimed at the center of the engraved calibration mark.
- Page 152 11) Press “Start Learning” button, then the Learned Mark Window will show the memorized mark. Click “CCD Calibration” tab and press the “Start Calibration” button again.
- Page 153 13) The message in step 3 will pop up, move the laser carriage to blank area and click OK. 14) Laser will engrave a new calibration mark and calibrate automatically. After calibration is done, the crosshair of laser ROI frame will aim at center of calibration mark. 15) The “Calibration completed”...
-
Page 154: Convert And Import File
Convert and Import File For the best output quality, we recommend you convert the graphic file to prn format via SmartCONTROL print driver from the graphics software (e.g. CorelDRAW or Illustrator). SmartCONTROL print driver will install to your computer automatically when you installed SmartCONTROL software. - Page 155 2) Select your SmartCONTROL’s driver <SmartCONTROL-LV-290> from the printer list 3) Click Apply and Cancel to close the print window. 4) From the primary menu, click Layout → Page Setup, then the Options window will pop up.
- Page 156 5) Click the “Get page size from printer” button to fit SmartVISION Pro CCD working area. Model Working area LV-290 with SmartVISION Pro CCD 550mm x 440mm (21.6” x 17.3”) 6) Click OK to end the paper size adjustment. Here we use CorelDraw as illustration of how to convert a file.
- Page 157 3) Click “Color” tab to make sure the “Output colors as:” set as RGB, and then click “OK” to continue. 4) Click “OK” and Print To File window will appear 5) Select the save folder and define file name, then click “Save” to convert...
- Page 158 6) Close the graphics software (here is Corel Draw) and open the SmartCONTROL Software. 7) Click “File” “Field Setting…”, then the field setting window will pop up 8) Click “Machine Setting”...
- Page 159 9) Click “Follow Output Machine” to set the correct work area. 10) Click OK to end the work area setting. 11) Click “File” “Import”...
- Page 160 12) Select the converted file and click “Open” to import the saved file to SmartCONTROL 13) File import is completed.
-
Page 161: Operating Smartcontrol Tm Vision
Operating SmartCONTROL Vision SmartCONTROL allows users to assign any graphic to be registration marks, at the meantime, if high precise cutting is required, we suggest you to use circle, square, crosshair or star as registration mark which we call it “Registration Mark Ready”... - Page 162 2) Click “AutoFocus” button of laser machine to automatically set the focal distance precisely. 3) Open the file or import prn file. 4) Click “Vision” on the menu bar and select “SmartCONTROL Vision” to launch the Vision operation window 5) Go to the “Mark Learning” tab and select mark mode. The illustration is 4 marks mode. 6) Input registration mark diameter/ dimension or line width value in the Mark Diameter / Line Width field.
- Page 163 7) Move SmartVISION Pro CCD module to read the first mark, and make sure the mark shown on the software screen. NOTE Following is the order of the mark #1 to mark #4. 8) Use the mouse to move the laser ROI frame until the crosshair of the frame aims at the center of registration mark.
- Page 164 9) Click ”Start Learning” button and the Learned Mark Window will show the learned pattern. Mark Learned Window 10) Click "Output" on menu bar and click "Processed Condition Setup"...
- Page 165 11) Select machine from “Machine Mode” and set the processing parameter in “Pen Parameter” tab 12) Click "Output" on menu bar and click "Output"...
- Page 166 13) Check "Output Selected Objects Only" and the "Execute" button to start CCD reading and laser processing. NOTE When SmartCONTROLTM Vision is under processing, any emergency, press "STOP SmartCONTROL Vision" button to stop the CCD action immediately. 14) SmartVISION Pro CCD will automatically search for the registration marks and perform laser cutting jobs.
- Page 167 16) Click “Execute” of Output window to process job. 17) If there is an error with the placement, SmartCONTROL Vision may not find the marks correctly. "Pattern Match Failure" message will pop up, press "OK "button to continue. 18) Move the carriage with red beam to the failed mark. 19) Click “Execute”...
- Page 168 SmartCONTROL Vision Operation – Define Marks from Graphic Scenario Sometimes the printed objects may not include registration marks like circle, square, cross, or star for CCD reading, SmartVISION Pro CCD present a substitute solution for it. 1) Place the printed object on the machine platform. 2) Click “AutoFocus”...
- Page 169 5) Move the mouse cursor to where you want to learn as registration mark and left click the mouse button, a vertex will be added on the object. 6) Click “Vision” on the menu bar and select “Mark 1 Definition,” a check on the Mark 1 Definition will be shown.
- Page 170 8) Click “Vision” on the menu bar and select “SmartCONTROL Vision.” 9) Go to the “Mark Learning” tab and select mark mode. The illustration here is 4 marks mode. 10) Input mark diameter or line width value in the Mark diameter / line width field. When the mark is defined as part of the graphic, it is recommended to set the mark diameter / line width as 2.5mm to get best reading results.
- Page 171 11) Move the SmartVISION Pro CCD module to the first marks till it’s shown on the live window. 12) Use the mouse to move the laser ROI frame and ensure the crosshair of the frame aims at the defined mark. 13) Click ”Start Learning”...
- Page 172 NOTE When SmartCONTROLTM Vision is under processing, any emergency, press "STOP SmartCONTROL Vision" button to stop the CCD action immediately. 14) Repeat Step 11 to Step 13 to complete the 2 ~ 4 marks learning. 15) Click "Output" on menu bar and click "Processed Condition Setup"...
- Page 173 16) Select machine from “Machine Mode” and set the laser processing parameter in “Pen Parameter” tab 17) Click "Output" on menu bar and click "Output". 18) Check "Output Selected Objects Only" and the "Execute" button to start CCD reading and laser processing.
- Page 174 NOTE When SmartCONTROLTM Vision is under processing, any emergency, press "STOP SmartCONTROL Vision" button to stop the CCD action immediately. 19) SmartVISION Pro CCD will automatically search for the registration marks and perform laser cutting job. 20) Processing completed, place the next object on the platform. 21) Click “Execute”...
- Page 175 22) If there is an error with the material placement, SmartCONTROL Vision may not be read correctly. "Pattern Match Failure" message will pop up, press the "OK "button to continue. 23) Move the carriage with red beam to the failed mark. 24) Click “Execute”...
- Page 176 1) Place the printed object on the machine platform 2) Click “AutoFocus” button of laser machine to automatically set the focal distance precisely. 3) Open the file or import prn file. 4) Follow Chapter 4.6.1 step 4 ~ step 13 to define, learn, and read registration marks.
- Page 177 5) Click "Advanced" tab. 6) Check Array Copy box and enter the matrix numbers of the X and Y copy. 7) Enter the gap value of X and Y. Gap is defined as the distance from image to image shown in below.
- Page 178 NOTE The following picture shows the laser working path for graphics with Array Copy function. Please learn marks from lower left corner graphic. Learn mark from the lower left corner graphic. 8) Follow Chapter 4.6.1 step 14 ~ step 17 to execute the job, the SamrtVISION Pro CCD will automatically move, read marks and processing job.
-
Page 179: Chapter 6 Engraving And Cutting Techniques
Chapter 6 Engraving and Cutting Techniques Raster Engraving Vector Cutting Vector and Raster 3D Tips Modify Image Setting of a Picture for Better Engraving Quality... -
Page 180: Raster Engraving
The LV-290 Printer Driver determines which sections should be raster engraved or vector cut based on the outline width of that particular area or section of the design. In order to prep a particular section for vector cutting, you will need to set that object’s fill color to white and set its outline thickness between 0.001"... -
Page 181: Vector And Raster
5) Now your string of characters has been properly designated as an area to be vector cut. Simply “print” your job (output the file to the LV-290) and watch as your string of characters is vector cut. 6.3 Vector and Raster In some cases, you will want to process both raster engraving and vector cutting tasks within a single project. -
Page 182: Tips
6.4 3D Tips 3D Mode is one of the functions of this laser engraver. Instead of traditional two dimensional graphic processing, 3D Mode allows the naked eyes to visualize the curvatures of the 3D effect by applying 200 power levels technology to create different depth of engraving. -
Page 183: Laser Professional Ap
Laser Professional AP Currently, quite few laser professional application softwares like Laser Type, 3D studio, EngraveLab are available in the market. You can not only create all kinds of vector images with these AP but also convert these vector images into 3D module, which is a great way to produce 3D graphics. -
Page 184: A Way To Produce 3D Graphics
A way to produce 3D graphics For the production of 3D graphics, in addition to the requirement of having great familiarity with the software, a significant amount of time is required to design and arrange the layout. Thus, we use a relatively simple graphic for illustration so that you would understand how to produce 3D graphics better. -
Page 186: Step 2. Produce Three-Dimensional Characters
This machine requests your attention If you need to produce circular 3D graphics, you only need to select Radial as the gray level type in the pull-down menu of Type. Then, a circular 3D graphic may be produced. Step 2. Produce three-dimensional characters... -
Page 188: Step 3. Combine The 3D Images
Step 3. Combine the 3D images After finishing the production for each of the objects, you may proceed with the combination of the objects. The combined graphic may be output with the laser engraver. Output the 3D graphic After selecting the graphic to be output, set the Mode as 3D Mode in the driver. After setting the engraving parameters, output the 3D graphic. - Page 189 Polish Dust will accumulate during the engraving when acrylic is engraved. The acrylic may be polished with Polish after the engraving. After the processing, don’t remove the engraved object. Use the Control Panel to lower the platform (for about 7~8 mm) and then engrave once again to achieve the better finish. After engraving the wooden objects, please use a toothbrush with some clean water to remove the dust on top of the object.
-
Page 190: Modify Image Settings Of Picture For Better Engraving Quality
6.5 Modify Image Settings of Picture for Better Engraving Quality 1. Connect your digital camera to the computer by USB cable. 2. Download the picture from the digital camera to the computer 3. Select the picture that you want to engrave. 4. - Page 191 Change the Bitmap settings by setting “Color” to Grayscale (8-bit) and “Resolution” to 300 dpi and click OK. Finally, Invert the image by selecting Effects/Transform/Invert...
- Page 192 Now you are ready to output the modified image by clicking File/Print NOTE This instruction is a simple example for general use. There are many tips and tricks to achieve a good engraving quality. It takes a lot of practice and experience to achieve a good engraving quality.
-
Page 193: Chapter 7 Optional Items
Chapter 7 Optional Items Fume Extraction Unit Option Air Compressor Option Items Focus Lens Option... -
Page 194: Fume Extraction Unit
LV-290's Fume Extraction Units are specifically designed to prevent personnel from inhaling hazardous fumes and dust generated by the laser process. Available for all LV-290 engravers, the Fume Extraction Unit represents the latest in exhaust extraction and odor reduction technology for all types of applications. Quiet operation, high vacuum capacity, compact design and long life expectancy are but a few outstanding features. -
Page 195: Air Compressor
7.2 Air Compressor Specifically designed for laser engravers, the air compressor utilizes an oil-free diaphragm. The air compressor helps to eliminate harmful and potentially damaging moisture from the laser optics, maximizing life of the laser optics. In addition, the air compressor provides an optimal air flow to the SmartAIR nozzles to minimize flaming, suppress working temperatures, and blow away dust and particle by products generated from the laser process. - Page 196 Connect a 1/4" tubing to the air tube fastener valve on the air compressor. NOTE It is important that the ¼" air tubing has clean, straight cuts on each end. Jagged or slanted cuts will not produce adequate sealing capabilities. Open the bottom front doors of this machine to locate both the Air-Assist Valve and Internal Power Sockets.
- Page 197 With the SmartAIR nozzle and air compressor properly installed and operating, all configurations and settings relating to air-assist functions are controlled through the LV-290 printer driver and hardware control panel. Please refer to the LV-290 PEN page on print driver section of this manual for details on how to enable and configure air-assist functionality.
-
Page 198: Focus Lens Options
7.3.1 CO2 Laser Focus Lens Roland DG Cop. offers four different focal lenses namely the 1.5”, 2.0”, 2.5”, and 4.0” for different applications. The number description, 1.5”, 2.0”, 2.5”, and 4.0” signifies the distance of where passed through beam will converge. For example, when a laser beam passes through a 2.0”... - Page 199 Cutting edges achieved with the different lenses...
-
Page 200: Chapter 8 Basic Maintenance
Chapter 8 Basic Maintenance Suggested Cleaning and Maintenance Supplies Maintaining the Work table and Motion System - Accessing the Work table and Motion System - Cleaning the Work table and Motion System - Lubrication of the Y Rails Cleaning the Optics System - Removing the Mirrors - Cleaning the Mirrors - Removing and Cleaning the Focal Lens... -
Page 201: Suggested Cleaning And Maintenance Supplies
Keeping your machine clean and well maintained will ensure quality output, consistent reliability, and extended product life. Smoke, dust or residue build-up inside the laser system or the mechanical components can cause a reduction in the laser power, irregularities in the motion system, reduced product life cycle, and a host of other avoidable problems. -
Page 202: Maintaining The Work Table And Motion System
8.2 Maintaining the Work table and Motion System 8.2.1 Accessing the Work Table and Motion System It will be important to gain full access to the work table and motion system to properly clean and maintain these areas. To do so, you will need to lift the SmartLID. You can do this via the following steps: Opening the SmartLID: The top lid of the machine can be lifted open by using the handles from the rear side. -
Page 203: Cleaning The Work Table And Motion System
8.2.2 Cleaning the Work Table and Motion System Clean the working table and the motion system on a frequent basis through the following steps: 1) Turn the power off and unplug this machine before cleaning. 2) Use a vacuum cleaner with a flexible nozzle to remove dust and debris from the work table and motion system. -
Page 204: Lubrication Of The X & Y Rails
PS2 grease to a paper or cotton towel and apply to the X rail, and Y rails of LV-290 weekly. You can purchase PS2 grease from NSK dealers worldwide. - Page 205 Seal the lubrication slot plate back to the X rail Remove the lubrication slot plate on X rail Inject small amount of grease to this injection opening inside the linear bearing Open the belt by hand and use cotton swab to clean the linear guide (make sure to clean top, bottom and surface of linear guide).
-
Page 206: Cleaning The Optics System
8.3 Cleaning the Optics System 8.3.1 Removing the Mirrors We recommend that you check the mirrors once or twice a week to see if they require cleaning. If any debris or smoke residue is present, use the following steps to clean them. NOTE •... - Page 207 Loosen the thumbscrew securing mirror #1. Thumbscrew Clean the mirror in the proper manner. Place the mirror back to the optics holder after cleaning. Tighten the thumbscrew. Close and secure all the covers. Mirror 2, 3, 4 These mirrors are located in the work table area of this machine. Mirror 2 Mirror 4 Mirror 3...
-
Page 208: Cleaning The Mirrors
Mirror 4 Unscrew the three thumbscrews securing the lens carriage panel and remove the lens carriage panel to reveal mirror 4 and the focal lens. Loosen the top thumbscrew to remove mirror 4 (as shown in the picture below). Top Thumbscrew Clean the lens in the proper manner. -
Page 209: Removing And Cleaning The Focal Lens
CAUTION • If the center of the mirror is scratched, contact your machine representatives for replacement. • DO NOT apply any finger pressure or any other cleaning solutions to the mirror or focal lens surface. • The optics components are very fragile, handle carefully and follow the cleaning procedure well. 8.3.3 Removing and Cleaning the Focal Lens Unscrew the three thumbscrews securing the lens carriage panel and remove the lens carriage panel to reveal the focal lens. -
Page 210: Cleaning The Exhaust Duct
8.4 Cleaning the Exhaust Duct Efficient exhaust ventilation is crucial to laser cutting quality. We suggest you to clean the Exhaust Duct from accumulated dust regularly will help to maintain the ventilation efficiency of your laser engraving system. Step 1. Remove screws fixing the rear door panel of laser machine Step 2. -
Page 211: Chapter 9 Basic Troubleshooting
Chapter 9 Basic Troubleshooting... -
Page 212: Quality Problems
Quality Problems • Check focal length setting under F4 function key > Machine Setting > Set Focus Lens to see if it matches the type of the lens installed. • Check if the focal lens is installed correctly or if focal lens is not fixed properly. •... -
Page 213: Chapter 10 Appendix
Chapter 10 Appendix Glossary Specification Sheet... -
Page 214: Glossary
10.1 Glossary Color Fill – Term within the awards and engraving industry used to describe the variety of techniques used to add color or contrast to engraving. DPI – Dots Per Inch or Pixels Per Inch. The resolution of an image is defined by the amount of dots/pixels included in an inch. -
Page 215: Specification Sheet
10.2 Specification Sheet ** Speed is not equal to throughput. Visit www.rolanddg.com for more details. LV-290 When with SmartVISION Pro CCD: 550 mm x 440 mm (21.7 x17.3 in.) Work Area When without SmartVISION Pro CCD: 640 mm x 460 mm (25.2 x18.1 in.) Extendable to 740 x 460 mm (29.1 x 18.1 in.) Max. - Page 216 FA01785 R1-190805...
Need help?
Do you have a question about the LV-290 and is the answer not in the manual?
Questions and answers