Table of Contents
Advertisement
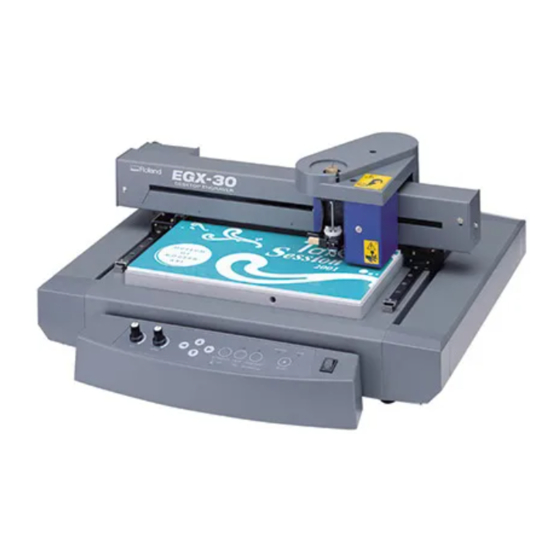
USER'S MANUAL
Thank you very much for purchasing the EGX-30.
•
To ensure correct and safe usage with a full under-
standing of this product's performance, please be sure
to read through this manual completely and store it in
a safe location.
•
Unauthorized copying or transferral, in whole or in
part, of this manual is prohibited.
•
The contents of this operation manual and the
specifications of this product are subject to change
without notice.
•
The operation manual and the product have been
prepared and tested as much as possible. If you find
any misprint or error, please inform us.
•
Roland DG Corp. assumes no responsibility for any
direct or indirect loss or damage which may occur
through use of this product, regardless of any failure to
perform on the part of this product.
•
Roland DG Corp. assumes no responsibility for any
direct or indirect loss or damage which may occur
with respect to any article made using this product.
Advertisement
Table of Contents

Related Manuals for Roland EGX-30


Summary of Contents for Roland EGX-30
- Page 1 USER'S MANUAL Thank you very much for purchasing the EGX-30. • To ensure correct and safe usage with a full under- standing of this product's performance, please be sure to read through this manual completely and store it in a safe location.
- Page 2 AVIS Cet appareil numérique de la classe A respecte toutes les exigences du Règlement sur le matériel brouilleur du Canada. ROLAND DG CORPORATION 1-6-4 Shinmiyakoda, Hamamatsu-shi, Shizuoka-ken, JAPAN 431-2103 MODEL NAME : See the MODEL given on the rating plate.
-
Page 3: Table Of Contents
Pentium are registered trademarks of Intel Corporation in the United States. IBM is a registered trademark of International Business Corporation. Other company names and product name are trademarks or registerd trademarks of their respective holders. Copyright © 2001 Roland DG Corporation http : //www.rolanddg. com/... -
Page 4: To Ensure Safe Use
Use with other than the included power cord and contact your authorized Roland DG may lead to fire or electrocution. Corp. dealer or service center. Do not use with a damaged power... - Page 5 When not in use for extended When unplugging the electrical periods, unplug the power cord from power cord from the power outlet, the electrical outlet. grasp the plug, not the cord. Failure to do so may Unplugging by pulling the cord may damage result in danger of it, leading to fire or electrocution.
-
Page 6: About The Labels Affixed To The Unit
About the Labels Affixed to the Unit These labels are affixed to the body of this product. The following figure describes the location and content of these messages. Model name Rating label Do not inadvertently allow Use a rated power supply. the hands, hair, or necktie near the rotating parts while in operation. -
Page 7: Pour Utiliser En Toute Sécurité
Débranchez le fil électrique et N'utilisez que le cordon contacter votre revendeur ou votre centre d'alimentation fourni avec ce de service de la société Roland DG produit. autorisé. L'utilisation avec un autre cordon d'alimentation que celui fourni pourrait entrainer un risque d'incendie ou d'électrocution. - Page 8 Ne pas utiliser avec une fiche ou un Ne pas endommager ou modifier le fil électrique endommagé ou avec fil électrique. Ne pas le plier, le une prise mal fixée. tordre, l'étirer, l'attacher ou le serrer Une négligence à de façon excessive. Ne pas mettre ce niveau pourrait d'objet ou de poids dessus.
-
Page 9: À Propos Des Étiquettes Collées Sur L'appareil
À propos des étiquettes collées sur l'appareil Ces étiquettes sont collées à l'extérieur de l'appareil. Les dessins suivants indiquent l'endroit et le contenu des messages. Nom du modèle Étiquette des caractéristiques Garder les mains, électriques cheveux et cravates Utiliser l'alimentation appropriée éloignés des pièces tournantes pendant que l'appareil fonctionne. -
Page 10: Great Features
This produces a lustrous engraved area and an attractive finish, especially when aluminum is used. Tools that can be used with the EGX-30 are optionally available from Roland DG Corp. For details, see "Appendix A List of Options"... -
Page 11: Part Names
3 Part Names Front Dust collector hose port Depth regulator nose This is where the dust collector This is used to attach the is attached to take up cuttings character cutter for engraving while engraving is in progress. and to adjust the amount of Tool mounting screw blade extension. -
Page 12: Task Flow
Held down origin point. 4 Task Flow Follow the steps shown below to work with materials on the EGX-30. 1. Install and connect the computer and the EGX-30. 2. Install the driver software and set up the interface. 3. Use a software application to create the data. -
Page 13: Installation And Connections
Places exposed to strong illumination or direct sunlight. When arranging setup space for the EGX-30, make sure you have a space that is at least 800 mm (32 in.) wide, 800 mm (32 in.) in depth, and 600 mm (24 in.) in height. -
Page 14: Installing The Software
Installing the Software The included CD-ROM contains several pieces of software for operating the EGX-30. System Requirements <Dr.Engrave> ® ® ® - Microsoft Windows 95, Windows 98, Windows Me, Windows NT 4.0, Windows 2000, or Windows XP operating system ®... - Page 15 When you make the settings for the communication for the cable connected to the computer. parameters of EGX-30, make the parameters match the values displayed here. When using an RS-232C (serial) cable Click [Close] to finish installing the driver.
- Page 16 How to use Help If you have trouble using the program or driver, see the help screens. Help contains information such as descriptions of software opera- tion, explanations of commands, and tips for using the software more effectively. From the [Help] menu, click [Contents]. Clicking on text that is green and underlined (by a solid or dotted line) displays an explanation.
-
Page 17: Interface Setup
Interface Setup EGX-30 automatically detects the type of interface (parallel or serial) from the first batch of data sent from the computer after the power is switched on. When using a serial connection for the interface, however, the communication parameters on the computer should be set as follows. -
Page 18: Before Starting To Cut
6 Before Starting to Cut Loading the Material If the material is not secured correctly, it may not be cut as intended. Some examples of material loading are shown below. Refer to these to use the appropriate method for the material at hand to secure it in place. -
Page 19: Installing A Tool
Installing a Tool The steps for installing a tool are shown below. Follow these steps to install the appropriate tool for the task. For Engraving (Character Cutter) * Use SELECT key to choose "ENGRAVER" as the mode. When installing a cutter for engraving, make sure the tip of the cutter protrudes beyond the surface of the material by an amount equal to the depth of engraving to be performed. - Page 20 Press the SET SURFACE key to raise the cutter. Use the spanner to turn the depth regulator nose in the direction of the arrow to extend the blade depth to the desired engraving depth. Turning the nose by an amount equal to the length of one side causes the tool to be extended by 0.125 mm (0.005 in.).
- Page 21 For the Scoring (Diamond scraper) * Use SELECT key to choose "SCORE" as the mode. When performing scoring, be sure to purchase the diamond scraper (optionally available). Loosen the tool mounting screw and insert the Provisionally tighten the diamond scraper in the special adapter into the tool carriage.
-
Page 22: Setting The Origin Point
The origin point set with the software determines the position on the EGX-30 that is set. Usually, the origin on the EGX-30 is set to a location at the front left of the material secured in place. This section explains how to set the origin point at the front left of a piece of material. -
Page 23: Test Cutting
Test Cutting The EGX-30 can perform test cutting to check whether cutting conditions are correct. Test cutting is also recommended to determine optimal cutting conditions, such as the compatibility of the material and tool, and the cutting speed. If the results of test cutting are less than satisfactory, refer to " About Tools and Materials" and " Setting Cutting Conditions"... -
Page 24: Attaching A Vacuum Cleaner
Scoring speed When the values set within the application software or the driver are sent after adjusting the cutting speed on the EGX-30, the software and driver values are changed. Conversely, you can also change the cutting speed by rotating the knobs on the EGX-30 after starting a cutting operation using the software and driver values. -
Page 25: Sending Cutting Data
..Press the PAUSE/VIEW key to pause operation. Stop sending data from the computer, then switch off the power to the EGX-30. To restart the cutting operation from the beginning, switch the power back on, and send the data from the computer again. -
Page 26: Maintenance
NOTICE When cleaning the EGX-30, make sure that the main unit's power OFF. Use a dry cloth to clean the unit. When engraving has been performed, use a whisk broom or a vacuum cleaner to clean up any cuttings. -
Page 27: If There's A Problem
10 If There's a Problem... If operation of the EGX-30 becomes abnormal, immediately switch off the power to the unit. No Power Is the power cord plugged in correctly? Make sure the power cord is plugged in securely. Is the power switch set to ON? Make sure the power is turned on. -
Page 28: Appendix A List Of Options
However, these commands are not supported in mode 1. A "CAMM-GL II Programmer's Manual" is available for separate purchase for those wishing to create their own programs for this machine. For further information, please contact the nearest Roland DG Corp. dealer or distributor. mode 2... -
Page 29: Appendix C Specifications
Power cord: 1, Dust collector hose and duct: 1, Character cutter: 1, Engraving-tool holder: 1, Diamond scraper adapter: 1, Hexagonal screw driver: 1, Spanner: 1, Hexagonal wrench: 1, Test material: 1, Adhesive sheet for securing material: 1, Roland Software package CD-ROM: 1, User’s manual: 1... - Page 30 Interface specification [Parallel] Standard In compliance with the specification of Centronics Input signal STROBE(1BIT), DATA(8BIT) Output signal BUSY(1BIT), ACK(1BIT) I/O signal level TTL level Transmission method Asynchronous [Serial] Standard RS-232C specification Transmission method Asynchronous, duplex data transmission Transmission speed 9600 Parity sheck None Data bits...
- Page 32 Opening the sealed package or sealed disk package implies your acceptance of the terms and conditions of this agreement. If you do NOT accept this agreement, retain the package UNOPENED. The enclosed Roland product is a single user version.
Need help?
Do you have a question about the EGX-30 and is the answer not in the manual?
Questions and answers