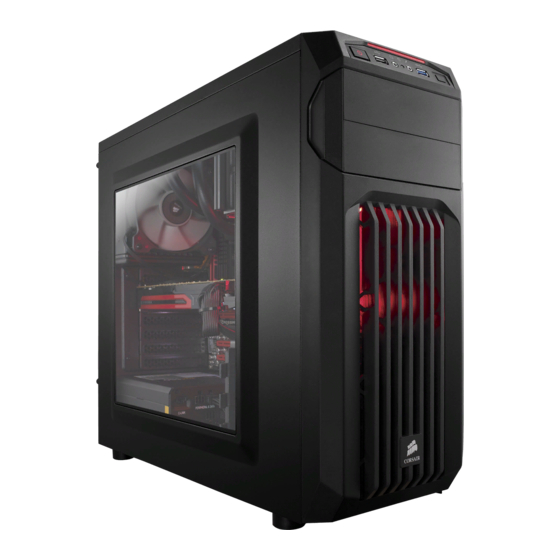
Corsair CARBIDE Series Installation Manual
Mid-tower gaming case
Hide thumbs
Also See for CARBIDE Series:
- User manual ,
- Manual (76 pages) ,
- Installation manual (64 pages)

Subscribe to Our Youtube Channel
Related Manuals for Corsair CARBIDE Series


Summary of Contents for Corsair CARBIDE Series
- Page 1 SPEC-01 CARBIDE SERIES® MID-TOWER GAMING CASE INSTALLATION GUIDE / GUIDE D'INSTALLATION INSTALLATIONSHANDBUCH / GUIDA DI INSTALLAZIONE GUÍA DE INSTALACIÓN / 安装指南 / インストールガイド...
- Page 2 English: ........................1-10 Français: ........................11-20 Italiano: ........................21-30 Deutsch: ........................31-40 Español: .........................41-50 Россию: ........................51-60 中文: .........................61-70 日本語: ........................71-80...
-
Page 3: Table Of Contents
Thank you for purchasing a Maximum PSU length: ................ 230mm Carbide Series SPEC-01 Mid-Tower PC Case. ® Carbide Series SPEC-01 is proof that great looks, 447mm 200mm smart design, and durable construction don’t need to be pricy, and that basic doesn’t need to be boring. -
Page 4: Accessory Kit Contents
SPEC-01 Accessory Kit Contents Case Features I/O Panel (x2 USB 3.0, Headphone/ Mic, and Power/ Reset) Removable front fascia x2 Tool-free removable ODD covers Windowed side panel Solid side panel x4 Tool-free 3.5" hardrive trays with 2.5" compatibility Cable ties MBD/HDD screws SSD/ODD screws 3-pin 120mm LED Fan... -
Page 5: Removing The Side Panels
Install the add-on card and STEP 02 secure with thumbscrews. Note: Corsair recommends removing both side panels and setting them aside when building your system to avoid accidental damage. Both side panels are interchangeable and should be removed to reduce clutter. -
Page 6: Removing The Front Fascia
STEP 07 SPEC-01 5. Removing the Front Fascia 7. Installing SSDs and HDDs To remove the front fascia The four included drive trays (front panel), grasp the tab support both 3.5" and 2.5" located at the bottom fascia devices. and pull outward. To install a 3.5"... -
Page 7: Powering The Case Fans
USB 2.0 POWER SW HDD LED POWER LED – Front x2 120mm or x2 140mm HD AUDIO RESET SW POWER LED + x2 120mm Rear 120mm Bottom Side To learn more about this case visit the product page at corsair.com... - Page 8 SPEC-01 Table des matières Spécifications du boîtier Félicitations: ................................11 Spécifications du boîtier: ............................12 Contenu du kit d’accessoires: ..........................13 Attributs du boîtier: ..............................14 Retrait des panneaux latéraux: ...........................15 Installation des cartes PCI-E/PCI: ........................15 Installation de la carte mère: ..........................16 Installation du bloc d’alimentation: ........................16 Longueur: ....................
-
Page 9: Contenu Du Kit D'accessoires
SPEC-01 Contenu du kit d’accessoires Attributs du boîtier Panneau E/S (x2 USB 3.0, Casque/Mic, et Alimentation/Réinitialisation) Façade amovible x2 caches pour lecteurs optiques amovibles sans outils Panneau latéral à fenêtre Panneau latéral normal x4 plateaux pour disque dur 3,5 pouces, sans outils, avec compatibilité 2,5 pouces attache-câbles vis pour MBD/HDD vis pour SSD/... -
Page 10: Retrait Des Panneaux Latéraux
STEP 02 Installez la carte Remarque : Corsair recommande complémentaire et fixez-la de retirer les deux panneaux avec les vis. latéraux et de les mettre de côté lors de la construction de votre système, afin d’éviter tout... -
Page 11: Retrait De La Façade
STEP 07 SPEC-01 SPEC-01 5. Retrait de la façade 7. Installation de disques SSD et de lecteurs de disques durs Pour retirer la façade Les quatre plateaux (panneau avant), inclus prennent en charge tirez sur la languette située en indifféremment les disques 3,5 bas de la façade. -
Page 12: Alimentation Des Ventilateurs Du Boîtier
POWER LED – Avant x2 120mm or x2 140mm HD AUDIO RESET SW POWER LED + Haut x2 120mm Arrière 120mm Côté Milieu Pour en savoir plus sur ce boîtier, veuillez vous rendre sur corsair.com à la page des produits. - Page 13 Altezza massima raffreddatore CPU: 150mm: ......150mm Grazie per aver acquistato un case mid-tower Lunghezza massima PSU: 230mm: ..........230mm per PC Carbide Series® SPEC-01. Il Carbide Series SPEC-01 è la prova che un look elegante, 447mm 200mm un design intelligente ed una struttura resistente non devono necessariamente essere costosi e che la semplicità...
-
Page 14: Contenuto Kit Di Accessori
SPEC-01 Contenuto kit di accessori Caratteristiche case Pannello I/O (2 prese USB 3.0, cuffie/microfono, alimentazione/Reset) Frontale rimovibile 2 coperture per unità ODD rimovibili Pannello laterale con finestra Pannello laterale senza finestra 4 vani unità disco rigido 3,5 pollici senza viti con compatibilità per unità 2,5 pollici fascette per cavi viti per scheda viti per unità... -
Page 15: Rimozione Dei Pannelli Laterali
Installare la scheda add-on e STEP 02 fissare con le viti a testa piatta. Nota: Corsair consiglia di rimuovere e mettere da parte entrambi i pannelli per evitare danni accidentali durante l’assemblaggio del sistema. Entrambi i pannelli... -
Page 16: Rimozione Del Frontale
STEP 07 SPEC-01 SPEC-01 5. Rimozione del frontale 7. Installazione unità SSD e HDD Per rimuovere il frontale I quattro vani unità inclusi (pannello frontale), afferrare la supportano dischi da 3, 5 e 2,5 linguetta posizionata in basso pollici. e tirare verso l’esterno. Per installare un’unità... -
Page 17: Alimentazione Ventole Del Case
Visitare il sito www.corsair.force.com e richiedere un RMA in modo da permetterci di sostituire le parti danneggiate. USB 3.0 4. Dopo è possibile montare una ventola? Posizioni di montaggio delle ventole USB 2.0... - Page 18 PC-Gehäuse der Carbide Series® SPEC-01 entschieden haben. 447mm 200mm Die Carbide Series SPEC-01 ist der Beweis dafür, dass großartiges Aussehen, intelligentes Design und haltbare Konstruktion nicht kostspielig und Basisgeräte nicht langweilig sein müssen. Sie erhalten aggressives Design, eine riesige Seitenplatte, damit Sie Ihre Komponenten bewundern können, und einen LED-beleuchteten Front-...
-
Page 19: Inhalt Zubehörkit
SPEC-01 Inhalt Zubehörkit Merkmale Gehäuse I/O-Abdeckung (2 USB 3.0-Anschlüsse, Kopfhörer/Mikrofon und Stromschalter/Reset) Abnehmbare Frontplatte 2 werkzeuglos abnehmbare ODD-Abdeckungen Seitenabdeckung mit Fenster Stabile Seitenabdeckung 4 werkzeuglose 3,5-Zoll-Festplattenfächer, kompatibel mit 2,5-Zoll- Festplatten Kabelbinder MBD/HDD- SSD/ODD-Schrauben Schrauben 3-poliger 120 mm LED-Lüfter Staubfilter des unteren Netzteils Schiene für PCI-E-Schraube 4 werkzeuglose 3,5-Zoll-Festplattenkäfige, kompatibel mit 2,5-Zoll- Festplatten... -
Page 20: Entfernen Der
SPEC-01 SPEC-01 STEP 02 1. Entfernen der Seitenplatten 3. Installation der PCI-E-/PCI-Karte(n) Entfernen Sie einfach die Entfernen Sie die Rändelschrauben und Rändelschrauben schieben Sie die Seitenplatte und dazugehörige nach hinten heraus. Steckplatzabdeckungen. STEP 02 Hinweis: Sie sollten beim Bau Installieren Sie die Ihres Systems beide Seitenplatten Erweiterungskarte und entfernen und beiseite legen, um... -
Page 21: Entfernen Der Frontplatte
STEP 07 SPEC-01 SPEC-01 5. Entfernen der Frontplatte 7. Installation von SSDs und HDDs Ziehen Sie zum Entfernen Die vier im Lieferumfang enthaltenen Laufwerkeinschübe der Frontplatte an ihrer unterstützen sowohl 3,5-Zoll- als Entriegelungstaste an der auch 2,5-Zoll-Laufwerke. Unterseite und ziehen Sie sie heraus. -
Page 22: Antrieb Der Gehäuselüfter
Lüfter nicht mehr funktioniert? und die Pinbelegung finden Sie in der Anleitung Ihres Motherboards. Bitte besuchen Sie corsair.force.com und fordern Sie eine RMA an, damit wir das/die beschädigte(n) Teil(e) ersetzen können. USB 3.0 4. Wo kann ich einen Lüfter anbringen? Punkte für Lüfterhalterungen... - Page 23 Altura máxima del ventilador del CPU (UCP): ......150mm Gracias por comprar un chasis tipo torre Longitud máxima del CPU: .............. 230mm media Carbide Series® SPEC-01. Carbide Series SPEC-01 demuestra que un diseño 447mm 200mm distinguido, inteligente y de construcción duradera no necesita ser costoso, y que algo básico no necesita...
-
Page 24: Características Del Chasis
SPEC-01 Contenido de los accesorios Características del chasis Panel de I/O (2 USB 3.0, auricular/micrófono, y alimentación/reinicio) Fascia frontal desmontable 2 cubiertas desmontables para ODD sin necesidad de herramientas Panel lateral con ventana Panel lateral sólido 4 bandejas para disco duro de 3.5" sin necesidad de herramientas compatible con 2.5"... -
Page 25: Cómo Remover Los Paneles Laterales
STEP 02 Instale la tarjeta que se va Nota: Corsair recomienda remover a añadir y asegúrela con los ambos paneles laterales y ponerlos tornillos mariposa. en un lugar seguro cuando monte su sistema para que no se dañen. -
Page 26: Cómo Instalar Un Odd (Unidad De Disco Óptico)
STEP 07 SPEC-01 SPEC-01 5. Cómo remover la fascia frontal 7. Cómo instalar unidades SSD y HDD Para remover la fascia frontal Las cuatro bandejas de discos (panel frontal), tome la que se incluyen soportan discos de 3.5" y 2.5". pestaña localizada al fondo de la fascia y tire hacia afuera. -
Page 27: Cómo Alimentar Los Ventiladores Del Chasis
Por favor, diríjase a corsair.force.com y pida un RMA para que podamos reemplazar las piezas dañadas. USB 3.0 4. - Page 28 Максимальная высота вентилятора ЦП: .......... 150mm Благодарим Вас за приобретение корпуса ПК Максимальная длина источника питания: ........230mm Carbide Series® SPEC-01 формата Mid-Tower. Carbide Series SPEC-01 это защищенные корпуса с 447mm 200mm великолепным внешним видом, интеллектуальным дизайном и конструкцией длительного использования, которые...
-
Page 29: Содержимое Комплекта Аксессуаров
SPEC-01 Содержимое комплекта аксессуаров Особенности корпуса Панель ввода-вывода (2 разъема USB 3.0, наушники/микрофон, питание/сброс) Съемная передняя панель 2 крышки оптических дисков, снимаемых без использования инструментов Боковая панель с декоративным окном Solid side panel 4 отсека для жестких 3,5-дюймовых дисков, совместимые с 2,5-дюймовыми устройствами... -
Page 30: Снятие Боковых Панелей
STEP 02 Примечание. Во избежание случайных Установите дополнительную плату и повреждений при построении системы закрепите ее барашковыми винтами. компания Corsair рекомендует снять и отложить в сторону боковые панели. Обе боковые панели взаимозаменяемы и должны быть сняты во избежание путаницы. STEP 04... -
Page 31: Снятие Передней Панели
STEP 07 SPEC-01 SPEC-01 5. Снятие передней панели 7. Установка твердотельных и жестких дисков Для снятия передней панели Четыре имеющихся дисковых возьмитесь за выступ в нижней ее отсека поддерживают как 3,5-, так части и потяните панель наружу. и 2,5-дюймовые диски. Для... -
Page 32: Питание Вентиляторов Корпуса
Расположение разъемов и контактов для один из вентиляторов больше не работает? передней панели см. в руководстве по материнской плате. Перейдите на сайт corsair.force.com и запросите разрешение на возврат материалов (RMA), чтобы мы смогли заменить поврежденные части. USB 3.0 4. Где можно установить вентилятор? Расположение... - Page 33 安装前置 I/O 连接器: ..............................69 常见问题: ..................................70 最大 GPU 长度: 顶槽: ......................414mm 底槽: ......................275mm 恭喜! 最大 CPU 冷却器高度: ................150mm 感谢您购买 Carbide Series SPEC-01 中塔式 PC 机 最大 PSU 长度: ................... 230mm 箱。 Carbide Series SPEC-01 证明,拥有优美外观、智能设计 447mm 200mm 和耐用结构,不再需要支付昂贵费用,从此再无购机烦恼。...
-
Page 34: 机箱特点
SPEC-01 配件 机箱特点 I/O 面板(2 个 USB 3.0、头戴式耳机/话筒及电源/重置键) 可拆卸的前饰板 2 个免工具可拆卸的 ODD 盖 窗口化侧面板 固定侧面板 4 个免工具 3.5" 硬盘托架,兼容 2.5" 硬盘 根束线带 颗 MBD/HDD 螺钉 颗 SSD/ODD 螺钉 3 针 120mm LED 风扇 底部 PSU 滤尘器 PCI-E 螺杆 4 个免工具 3.5" 硬盘仓,兼容 2.5" 硬盘 2 个顶部... -
Page 35: 拆卸侧面板
SPEC-01 SPEC-01 STEP 02 1. 拆卸侧面板 3. 安装 PCI-E/PCI 卡 只需拆卸指旋螺钉,然后将侧面板 拧下指旋螺钉和相应槽盖。 向后滑动并滑离即可。 安装附加卡并用指旋螺钉固定。 注意:Corsair 建议在组装系统时拆下两 STEP 02 个侧面板并将其放在一边,以防止出现 意外损坏。两个侧面板都是可互换的, 应当拆下避免出现混乱。 STEP 04 STEP 04 STEP 03 2. 安装主板 4. 安装 PSU(电源设备) 首先,安装主板的 I/O 防护罩(请 将 PSU 放置在机箱底部并与机箱螺 参阅主板手册的相关说明)。 孔对齐 ,然后使用电源附带的螺钉... -
Page 36: 安装 Odd
STEP 07 SPEC-01 SPEC-01 5. 拆下前饰板 7. 安装 SSD 和 HDD 要拆下前饰板(前面板), 请抓住 4 个随附的驱动器托架支持 3.5" 和 底饰板处的舌片向外拉。 2.5" 驱动器。 要安装 3.5" HDD,请从两侧拉动驱 动器托架,以拉开安装点。接着将 HDD 放入托架,并向后推动驱动器 直到密合。无需螺钉即可将驱动器 固定在托架上。 要安装 2.5" SSD,请将驱动器置于 托架上,然后使用随附的螺钉安装 STEP 06 SSD。 STEP 08 STEP 06 6. 安装 ODD(光盘驱动器) 8. -
Page 37: 连接机箱风扇电源
(请参阅主板手册确定风扇端板的 如有必要,您可以拆下前饰板(步骤 5)和取下面板两侧的 2 个螺钉,来 位置)后,插入随附的风扇电缆。 拆卸 I/O 面板。 2. 极性是否影响 I/O 面板电源和重置接头? 不,仅影响 LED 接头。 10. 安装前置 I/O 连接器 3. 如果我的机箱受损或其中一台风扇不再工作,我该与谁联系? 请登录 corsair.force.com 申请 RMA,我们可以更换受损的部件。 请参阅主板手册确定前面板端板和 4. 风扇可安装的位置? 引脚的位置。 风扇安装位置 前面 x2 120mm or x2 140mm USB 3.0 顶部... - Page 38 SPEC-01 目次 ケースの仕様 はじめに: ..................................71 ケースの仕: ..................................72 アクセサリーキットの内容: ............................73 ケースの特徴: .................................74 サイドパネルの取り外し: ............................75 PCI-E/PCIカードの取り付け: ............................75 マザーボードの取り付け: ............................76 PSUの取り付け:................................76 長さ: ......................447mm フロントフェイシアの取り外し: ..........................77 幅: ........................ 200mm ODDの取り付け: ................................77 SSDとHDDの取り付け: ..............................78 高さ: ......................428mm 第2フロントファンの取り付け: ..........................78 重量: ........................ 4.8kg ケースファンへの電力供給: ............................79 フロントI/Oコネクタの取り付け: ..........................79 よくある質問: .................................80 GPU最大長:...
-
Page 39: アクセサリーキットの内容
SPEC-01 アクセサリーキットの内容 ケースの特徴 I/Oパネル(USB 3.0x2、ヘッドフォン/マイク、電源/リセット) 取り外し可能フロントフェイシア 工具不要の取り外し可能ODDカバーx2 窓付きのサイドパネル ソリッドサイドパネル 工具不要の2.5インチ対応の3.5インチハードディスクトレイx4 ケーブルタイ MBD/HDDねじ SSD/ODDねじ 3ピン120mm LEDファン 底部のPSUダストフィルタ PCI-Eねじレール 工具不要の2.5インチ対応の3.5インチハードディスクケージx4 上部の120mmファンマウントx2 CPUバックプレートの切り抜き SSDナベ頭ねじ 短いファンねじ 長いファンねじ マザーボード絶縁体... -
Page 40: サイドパネルの取り外し
SPEC-01 SPEC-01 STEP 02 1. サイドパネルの取り外し 3. PCI-E/PCIカードの取り付け 蝶ねじを取り外してから、サイド 蝶ねじと対応するスロットカバー を取り外します。 パネルを後ろにスライドさせて、 取り外します。 アドオンカードを取り付けて、蝶 STEP 02 注記:Corsair では、システムを構築 ねじで固定します。 する際、事故による破損を避けるため に、両サイドのパネルを取り外して、 それらを脇に置くよう推奨します。 両 サイドのパネルは相互に交換可能で、 乱雑さを低減するために除去する必要 があります。 STEP 04 STEP 04 STEP 03 2. マザーボードの取り付け 4. PSU(電源ユニット)の取り付け 最初に、マザーボードのI/Oシー ケースの底部にPSUを配置してか ルドを取り付けます(ガイダンス ら、ケースの穴を揃えて、PSUを... -
Page 41: フロントフェイシアの取り外し
STEP 07 SPEC-01 SPEC-01 5. フロントフェイシアの取り外し 7. SSDとHDDの取り付け フロントフェイシア(フロントパ 4つの同梱のドライブトレイ ネル)を取り外すには、底部のフ は、3.5インチと2.5インチ両方の ェイシアにあるタブを掴み、外側 ドライブに対応しています。 に引きます。 3.5インチHDDを取り付けるには、 各サイドからドライブトレイを引 いて、取り付け位置まで伸ばしま す。 次に、HDDをトレイに配置し て、ドライブを押し戻して、閉じ ます。 ドライブをトレイに固定す るためにねじは不要です。 STEP 06 2.5インチSSDを取り付けるには、 STEP 08 トレイ上にドライブを配置して、 同梱のねじを使用して、 SSDを取り付けます。 STEP 06 6. ODDの取り付け(光学ディスクドライブ) 8. 第2フロントファンの取り付け 最初に、フロントパネル5.25イン 追加の120mmまたは140mmファ チのドライブベイカバーを取り外... -
Page 42: ケースファンへの電力供給
う、RMAを依頼します。 配列は、マザーボードのマニュアルを確 認してください。 4. どこにファンを搭載できますか? ファンマウントの位置 USB 3.0 フロント x2 120mm or x2 140mm USB 2.0 POWER SW HDD LED POWER LED – x2 120mm 上部 リア 120mm HD AUDIO RESET SW POWER LED + 底部 サイド 中央 このケースに関する詳細は、corsair.com の製品ページにアクセスしてください... - Page 43 46221 Landing Parkway • Fremont • California • 94538 • USA © 2014 Corsair Components, Inc. All rights reserved. Corsair, the sails logo, and Carbide Series are registered trademarks in the United States and/or other countries. All other trademarks are the property of their respective owners. Product may vary slightly from those pictured. Document Number: 49-001240 revAA...
Need help?
Do you have a question about the CARBIDE Series and is the answer not in the manual?
Questions and answers