
Related Manuals for Inovance CP700 Series


Summary of Contents for Inovance CP700 Series
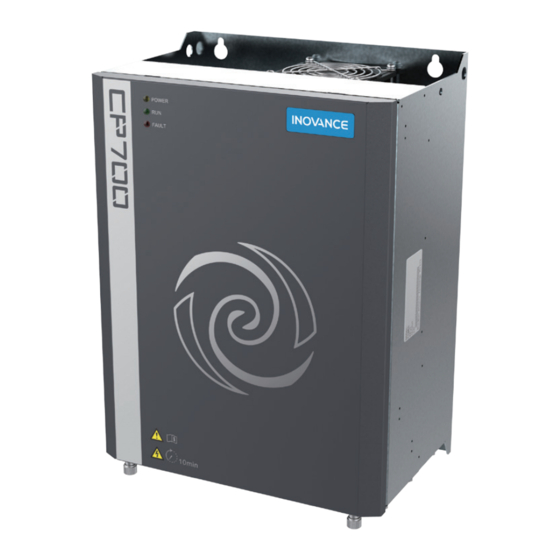
- Page 1 User Guide CP700 Series AC Drive For Air Compressors User Guide Data code 19010796...
- Page 2 HMI and Internet of Things (IoT) equipment without commissioning, which supports one-button startup. This user guide describes the correct use of the CP700 series AC drive for air compressors, including selection, mounting, wiring, and commissioning. Read and understand the user guide before use and forward the user guide to end users.
- Page 3 This user guide is shipped with the product. You can contact your sales representative for any additional order. To obtain the electronic version of the user guide, log in to Inovance's website (http://www.inovance.com), click "Download", search the user guide name, and then download the PDF.
- Page 4 Revision History Contents Preface ............................1 Revision History ......................... 2 Safety Instructions ........................5 Safety Precautions ....................... 5 Safety Levels and Definitions ..................... 5 Safety Instructions ....................... 5 Safety Signs ........................10 1 Product Information ......................11 1.1 Nameplate and Model Number .................. 11 1.2 Components ........................
- Page 5 Revision History 4.1 Fault Codes and Solutions ..................39 4.2 Symptoms and Solutions .................... 50 5 Maintenance .......................... 52 5.1 Daily Maintenance ....................... 52 5.2 Periodic Inspection ...................... 53 5.3 Replacement of Wear Parts ..................53 ..................53 5.3.1 Lifetime of Wear Parts ..................
- Page 6 4) Use this equipment according to the designated environment requirements. Damage caused by improper usage is not covered by warranty. 5) Inovance shall take no responsibility for any personal injuries or property damage caused by improper usage. Safety Levels and Definitions...
- Page 7 Safety Instructions WARNING ◆ Do not install the equipment if you find damage, rust, or indications of use on the equipment or accessories. ◆ Do not install the equipment if you find water seepage, component missing or damage upon unpacking. ◆...
- Page 8 Safety Instructions DANGER ◆ Equipment installation, wiring, maintenance, inspection, or parts replacement must be performed by only professionals. ◆ Installation, wiring, maintenance, inspection, or parts replacement must be performed by only experienced personnel who have been trained with necessary electrical information.
- Page 9 Safety Instructions Power-on DANGER ◆ Before power-on, make sure that the equipment is installed properly with reliable wiring and the motor can be restarted. ◆ Before power-on, make sure that the power supply meets equipment requirements to prevent equipment damage or even a fire. ◆...
- Page 10 Safety Instructions WARNING ◆ Perform daily and periodic inspection and maintenance for the equipment according to maintenance requirements and keep a maintenance record. Repair DANGER ◆ Equipment installation, wiring, maintenance, inspection, or parts replacement must be performed by only professionals. ◆...
- Page 11 Safety Instructions Safety Signs ■ Description of safety signs in the user guide Read the user guide before installation and operation. Reliably ground the system and equipment. Danger! High temperature! Prevent personal injuries caused by machines. High voltage! Wait xx minutes before further operations. **min ■...
- Page 12 Rated input OUTPUT: 3PH AC 0-440V 45.0A 0-500Hz 22kW Rated output Manufacturing S/N: XXXXXXXXXXXXXXXX number Suzhou Inovance Technology Co., Ltd. CP700 - 4T 22 - H Product Series Mounting Mode Backplate mounting CP700 AC drive for air compressors Voltage Class Motor (kW) Three phase 200–240 V...
- Page 13 1 Product Information 1.2 Components Figure 1-2 Component diagram (CP700-4T18.5-H to CP700-4T22-H) Component Name Component Name LED indicator panel Nameplate STO card (optional) Control circuit port Logo Wire bracket Variable frequency cooling blower Indicator terminal Front cover Air end output terminal EMC screw/voltage dependent Grounding terminal resistor (VDR) grounding terminal...
- Page 14 1 Product Information 1.3 Technical Data Table 1-1 CP700 series AC drive models and technical data Variable Frequency Mains Frequency Main Cooling Blower Cooling Blower Cooling Blower Model Power Input Output Power Rated Power Rated (kW) Current (A) Current (A)
- Page 15 1 Product Information Table 1-2 CP700 series technical data Item Specification Output frequency Vector control: 0–500 Hz 2–8 kHz: The carrier frequency is adjusted Carrier frequency automatically according to heatsink temperature. Input frequency Digital setting: 0.01 Hz resolution Three phase 220 V: 7.5–45 kW AC drive capacity Three phase 380 V: 5.5–75 kW...
- Page 16 1 Product Information Item Specification Two for the pressure sensor: 0–20 mA input, 12-bit resolution, and correction accuracy of 0.5% Analog input Two for the temperature sensor: resistance input, 12-bit resolution, and correction accuracy of 0.5% Four common inputs: NPN input method Digital input Two PTC protective circuits (compatible with common inputs)
- Page 17 1 Product Information 1.4 Overall Dimensions The CP700 series AC drive for air compressors can be mounted on the wall. The specific mounting dimensions are as follows. Figure 1-3 Wall-mounting dimensions - 16 -...
- Page 18 1 Product Information Table 1-3 Physical dimensions and mounting hole diameters of wall-mounted models Mounting Dimensions Physical Dimensions (mm) Weight (mm) AC Drive Model (kg) Three phase 200 VAC to 240 VAC, 50/60 Hz CP700-2T7.5-H φ6 CP700-2T11-H φ7 14.5 CP700-2T15-H φ7 14.5 CP700-2T18.5-H φ7...
- Page 19 1 Product Information 1.5 Recommended System Solution 1.5.1 CP700 System Structure Three-phase AC power Circuit breaker 220 VAC solenoid valve CP700 series AC drive Fuse Pressure sensor Electromagnetic IT6070T contactor PT100 Input reactor Power and Emergency Single plug cable communication...
- Page 20 1 Product Information 1.5.2 Peripheral Electrical Devices Table 1-4 Description of peripheral electrical devices of the CP700 AC system Part Name Mounting Location Function Description Short circuit breaker: cuts off power supply when overcurrent occurs on downstream devices, so as to prevent accidents.
- Page 21 1 Product Information Part Name Mounting Location Function Description Air compressor air AC drive output side Supplies energy to the air end. Air compressor AC drive output side Supplies cooling air to the air compressor system. cooling blower 220 VAC solenoid AC drive control Used for control system air intake.
- Page 22 2 Installation and Wiring 2 Installation and Wiring 2.1 Installation 2.1.1 Installation Environment 1) Ambient temperature: Ambient temperature has a great effect on the AC drive's life. The operating ambient temperature of the AC drive must not exceed the allowable temperature range (-10℃...
- Page 23 2 Installation and Wiring 2.1.2 Installation Clearance Requirements Hot air Installation clearance requirements (three phase 220 V) Power Rating Dimension 7.5–22 kW A ≥ 200 mm B ≥ 50 mm 30–45 kW A ≥ 300 mm B ≥ 50 mm Installation clearance requirements (three phase 380 V) Power Rating...
- Page 24 2 Installation and Wiring Cover removal procedures Step 2: Hold the cover with both hands and turn it up by 15° ( ), push it up ( ), and ① ② then take it down. Cover removal is complete. Cover mounting procedures Step 1: Hold the cover with both hands, align the positioning pin at the top of the cover to the cabinet hole.
- Page 25 2 Installation and Wiring Cover removal procedures Step 3: Tighten the captive screws. Cover mounting is complete. 2.2 Wiring 2.2.1 Main Circuit Terminal Arrangement Main circuit terminals adopt the bottom-in and bottom-out mode, as shown below. U1 V1 W1 POWER AIR END MAINS FREQUENCY COOLING BLOWER...
- Page 26 2 Installation and Wiring U3 V3 W3 V1 W1 POWER AIR END VARIABLE FREQUENCY MAINS FREQUENCY COOLING BLOWER COOLING BLOWER Figure 2-5 Main circuit terminal arrangement of CP700-2T11-H to CP700-2T15-H and CP700- 4T18.5-H to CP700-4T22-H U3 V3 W3 U1 V1 W1 U2 V2 W2 POWER MAINS FREQUENCY...
- Page 27 2 Installation and Wiring Table 2-1 Main circuit terminal description Terminal Symbol Terminal Name Function Description R, S, and T Input terminal Three-phase AC input U1, V1, and W1 Output terminal Air end three-phase AC output Three phase 220 V: 7.5 kW three-phase AC output Mains frequency cooling blower Three phase 380 V: 5.5–15 kW three-phase AC output...
- Page 28 2 Installation and Wiring 24V1COM1 24V1COM1 485+485-GND RJ45 24V2 T1A T1C T2A T2C P1+ P1- P2+ P2- PT2- D1 D2 D3 D4 D5 D6 485-GND RJ45 24V2 COM2 T1A T1C T2A T2C P1+ P1- P2+ P2- PT1+PT1-PT2+ PT2- D1 D2 D3 D4 D5 D6 COM Figure 2-9 CP700 control terminal arrangement Table 2-2 Control terminal description Terminal...
- Page 29 2 Installation and Wiring Terminal Category Function Description Technical Specifications Symbol Independent 24 V power 24V2 24V2 external supply 24 V power output (optional); power supply output current 4 A Independent 24 V power port COM2 supply ground 485+ RS485 communication+ Half duplex RS485 communication;...
- Page 30 2 Installation and Wiring 2.2.3 Control Terminal Wiring CP700 AC drive RJ45 Temperature DI input Solenoid valve Pressure sensor sensor DI1: emergency stop (220 VAC output) (24V4 to 20 mA) (PT100) DI3: PTC RS485 DB9(2) DB9(1) (with IoT) IT6070T Figure 2-10 Control terminal wiring (three phase 380 V 5.5–15 kW, three phase 220 V 7.5 kW) CP700 AC drive RJ45 Solenoid valve...
- Page 31 2 Installation and Wiring 2.3 Power Grid System Requirement The AC drive is applicable to power grid systems with neutral points grounded. If the AC drive is used in an IT power system, screw 1 shown in the following figure must be screwed out to remove the jumper of the VDR.
- Page 32 2 Installation and Wiring Table 2-3 Main power cable selection requirements Input/Air end output Cooling Blower Output Cooling Blower Output Grounding Rated (U1/V1/W1) (U2/V2/W2) (U3/V3/W3) Terminal Terminal Terminal Terminal Input Screw/ AC Drive Model Recommended Screw/ Recommended Screw/ Recommended Screw/ Current Tightening Cable (mm Tightening...
- Page 33 2 Installation and Wiring 2.4.2 Control Cables Perform control cable wiring and main power cable wiring separately, and fasten and fix cables with a tie around the port to ensure that the connection is tight and reliable. Wire bracket Wire bracket Wire bracket VARIABLE FREQUENCY MAINS FREQUENCY...
- Page 34 3 Display Description and Commissioning 3 Display Description and Commissioning 3.1 Indicator Description The CP700 series AC drive for air compressors has three LED indicators, indicating real- time status for power, running, and faults. Indicator positions are shown below. POWER FAULT Figure 3-1 Indicator positions...
- Page 35 Check whether pressure and temperature are parameters. • normal. Incorrect Correct Trial running is complete. Figure 3-2 Commissioning process of the CP700 series AC drive for air compressors - 34 -...
- Page 36 3 Display Description and Commissioning 3.3 System Commissioning Case Study 1) When power is on, HMI display automatically switches to the following page. Menu 2017-8-11 Fri 9:35:06 0.55 Discharge pressure Discharge temperature ℃ Uninstall 0.00 Air end frequency Air end power 0.55 Accumulated power consumption...
- Page 37 3 Display Description and Commissioning 3) Touch "User Parameters" to open the "Rights Management" dialog box for password setting. Rights Management Enter the user parameter password. Password: ****** Log In Log Out Figure 3-5 Password setting dialog box (example) Touch the password input box to enable the digit keypad and enter a password, as shown in Figure 3-6.
- Page 38 3 Display Description and Commissioning On the "User Parameters" page, set parameters related to the air end and cooling blower, as shown in Figure 3-7. User Parameters Menu Discharge pressure Sleeping pressure 0.70 0.80 Transition frequency Sleep determination time 60.00 Air end settings Sleep wake-up...
- Page 39 3 Display Description and Commissioning Protection Parameters Menu Air supply stop Pre-warning Uninstallation pressure pressure pressure 0.80 0.90 0.85 Loading Shutdown Pre-warning delay temperature temperature ℃ ℃ Figure 3-8 Protection parameter settings (example) 5) Touch "AC Drive Parameters" to set parameters. AC Drive Parameters Menu Maximum frequency...
- Page 40 4 Troubleshooting 4 Troubleshooting 4.1 Fault Codes and Solutions The following faults may occur during the use of the AC drive. Perform fault analysis according to the solutions below. Fault Fault Description Possible Cause Solution Code 1) Eliminate external faults. Check whether short-circuit occurs on the motor or contactor.
- Page 41 4 Troubleshooting Fault Fault Description Possible Cause Solution Code 1) Eliminate external faults. Check whether short-circuit occurs on the motor or contactor. 1) The output circuit of the 2) Set the motor parameters accord- AC drive is grounded or ing to the motor nameplate and short circuited.
- Page 42 4 Troubleshooting Fault Fault Description Possible Cause Solution Code 1) Eliminate external faults. Check whether short-circuit occurs on the motor or contactor. 1) The output circuit of the 2) Set the motor parameters accord- AC drive is grounded or ing to the motor nameplate and short circuited.
- Page 43 2) Adjust the voltage to the normal allowable range. range. Undervoltage Err09 3) The bus voltage is abnor- 3) Contact the agent or Inovance for mal. technical support. 4) The rectifier bridge, snub- 4) Contact the agent or Inovance for ber resistor, drive board, technical support.
- Page 44 1) The three-phase power input is abnormal. 1) Eliminate external faults. 2) The drive board, lightning Input phase loss Err12 2) Contact the agent or Inovance for protection board, control technical support. board, or rectifier bridge is abnormal. 1) The motor is faulty.
- Page 45 4 Troubleshooting Fault Fault Description Possible Cause Solution Code 1) The host computer is 1) Check wiring of the host comput- abnormal. 2) The communication 2) Check connection of the commu- cable is faulty. nication cable. 3) F0-28 (Auxiliary frequen- 3) Set the communication extension Communication Err16...
- Page 46 4 Troubleshooting Fault Fault Description Possible Cause Solution Code 1) Motor auto-tuning is not 1) Perform motor auto-tuning. performed. 2) Set F9-69 (Detection level of speed 2) F9-69 (Detection level of error) and F9-70 (Detection time Large speed error speed error) and F9-70 Err42 of speed error) correctly based on (Detection time of speed...
- Page 47 4 Troubleshooting Fault Fault Description Possible Cause Solution Code Pre-warning of 1) The pressure sensor is pressure sensor 1 connected with the tem- perature sensor cable by 1) Connect the pressure sensor cable mistake. correctly. 2) The setting of P2 pres- 2) Set the P2 pressure range accord- sure range does not meet ing to the requirements of the...
- Page 48 4 Troubleshooting Fault Fault Description Possible Cause Solution Code The value of A8-31 (Motor lubricating grease running Motor lubricating Apply the lubricating grease and clear time) reaches that of A8-26 grease mainte- A8-31 (Motor lubricating grease run- (Motor lubricating grease nance pre-warning ning time).
- Page 49 Stop for air filter filter maintenance period ≥ Err88 maintenance Long-time stop pre-warning 2) Contact the agent or Inovance for time technical support. 1) Maintain the equipment and clear Oil filter running time - Oil related running time.
- Page 50 (AC 110/220 V). Err95 overcurrent broken. 2) Replace the solenoid valve. 3) When the AC drive is run- 3) Contact the agent or Inovance for ning with load, the TA/ technical support. TC terminal has no 220 V output. Phase sequence...
- Page 51 The pre-charge resistor of the AC drive is damaged. Contact the agent or Inovance for The control board or operating technical support. panel is faulty. The rectifier bridge is damaged. The cable connecting the drive...
- Page 52 The cable connecting the drive Re-connect wirings and ensure se- board and control board is in poor cure connection. contact. Contact the agent or Inovance for The drive board is faulty. technical support. Related parameters are incorrectly Check and set the parameters in set.
- Page 53 5 Maintenance 5 Maintenance 5.1 Daily Maintenance Check the following items daily to avoid deterioration in performance or products. Copy this checklist and sign the "checked" column after each inspection. Inspection Item Inspection Details Checked ◆ Check whether the ambient temperature, humidity and vibration Installation Envi- are within the permissible range.
- Page 54 5 Maintenance 5.2 Periodic Inspection Inspection Inspection Method and Inspection Inspection Details Checked Item Troubleshooting Period ◆ Check by observing and Check whether abnormal hearing. noise or vibration exists. ◆ Tighten fasteners. Check whether fasteners such ◆ Replace the deformed as screws are loose.
- Page 55 5 Maintenance [1] The standard lifetime indicates the lifetime when the components are used in the following conditions. You can determine when to replace these components according to the actual operating time. NOTE 1) Ambient temperature: 40℃ 2) Load rate: 80% 3) Operating rate: 24 hours per day 5.3.2 Number of Cooling Fans Model...
- Page 56 5 Maintenance ■ After replacement is completed, check that the air flow direction is upright. Removing the Fan (CP700-4T5.5-H to CP700-4T7.5-H) 1) Disconnect the fan pow- 2) Remove the two screws 3) Remove the fan and fan cover er cable. (Top view) from the fan cover using a from the AC drive.
- Page 57 5 Maintenance Removing the Fan (CP700-4T11-H to CP700-4T15-H) 1) Disconnect the fan power 2) Remove the four screws 3) Remove the fan and fan cable. (Top view) from the fan cover using a cover from the AC drive. screwdriver. Fan cover Fan power Fan power cable socket...
- Page 58 For storage of the AC drive, pay attention to the following three aspects: 1) Pack the AC drive with the original packing box provided by Inovance. 2) Do not expose the AC drive to moisture, high temperature, or outdoor direct sun- light for a long time.
- Page 59 Appendix A Parameter Table Appendix A Parameter Table ☆ : The parameter can be modified when the AC drive is in either stop or running state. ★ : The parameter cannot be modified when the AC drive is in the running state. ●...
- Page 60 Appendix A Parameter Table Param. Param. Name Setting Range Default Property 0: Digital setting (initial value F0-08 can be modified by keypad or terminal UP/DOWN, non-retentive at power failure) 1: Digital setting (initial value F0-08 can be modified by keypad or terminal UP/Down, retentive at power failure) 2: AI1 Auxiliary frequency...
- Page 61 Appendix A Parameter Table Param. Param. Name Setting Range Default Property 0: Set by F0-12 1: AI1 Setting channel of 2: AI2 F0-11 frequency reference ★ 4: Pulse reference (DIO1) upper limit 5: Communication setting 6: Multi-reference Frequency reference F0-14 (Frequency reference lower limit) to F0-12 155.00 Hz ☆...
- Page 62 Appendix A Parameter Table Param. Param. Name Setting Range Default Property 0.01 A to 655.35 A (AC drive power ≤ 55 Model depen- F1-03 Rated motor current ★ dent 0.1 A to 6553.5 A (AC drive power > 55 kW) Rated motor frequen- Model depen- F1-04...
- Page 63 Appendix A Parameter Table Param. Param. Name Setting Range Default Property Percentage of friction F1-23 0.00% to 100.00% 0.00% ★ torque Auto-tuning direction (inertia and synchro- F1-26 0 to 1 ★ nous motor auto-tun- ing) Numerator of motor F1-32 1 to 65535 ★...
- Page 64 Appendix A Parameter Table Param. Param. Name Setting Range Default Property 0: Digital setting (F2-10) 1: AI1 2: AI2 Torque upper limit 4: Pulse reference (DIO1) F2-09 source in speed con- 5: Communication setting (1000H) ☆ trol (electric) 6: Min. (AI1, AI2) 7: Max.
- Page 65 Appendix A Parameter Table Param. Param. Name Setting Range Default Property Vector overvoltage F2-24 0 to 1000 ☆ suppression KP Acceleration rate F2-25 0 to 200 ☆ compensation gain Acceleration rate F2-26 0 to 500 ☆ compensation filter Vector overvoltage 0: Disabled F2-27 ☆...
- Page 66 Appendix A Parameter Table Param. Param. Name Setting Range Default Property Generating power F2-54 0.0% to 200.0% 0.0% ★ limit Group F3: V/F Control Parameters 0: Linear V/F 1: Multi-point V/F 2: Square V/F 3: 1.2-power V/F F3-00 V/F curve setting 4: 1.4-power V/F ★...
- Page 67 Appendix A Parameter Table Param. Param. Name Setting Range Default Property 0.0s to 1000.0s Voltage rise time of V/ F3-15 Note: It sets the time for the output voltage 0.0s ☆ F separation to rise from 0 to the rated motor voltage. 0.0s to 1000.0s Voltage decline time F3-16...
- Page 68 Appendix A Parameter Table Param. Param. Name Setting Range Default Property 32: Immediate DC injec- 0: No function tion braking F4-00 DI1 function selection ★ 1: Forward run (FWD) 33: External fault nor- 2: Reverse run (REV) mally closed (NC) input 3: Three-wire control 34: Frequency modifi- 4: Forward jog (FJOG)
- Page 69 Appendix A Parameter Table Param. Param. Name Setting Range Default Property 0: Two-wire control mode 1 Terminal I/O control 1: Two-wire control mode 2 F4-11 ★ mode 2: Three-wire control mode 1 3: Three-wire control mode 2 Terminal UP/DOWN F4-12 0.001 Hz/s to 65.535 Hz/s 1.000 Hz/s ☆...
- Page 70 Appendix A Parameter Table Param. Param. Name Setting Range Default Property Ones: AI1 curve selection 1: Curve 1 (2 points, see F4-13 to F4-16) 2: Curve 2 (2 points, see F4-18 to F4-21) 3: Curve 3 (2 points, see F4-23 to F4-26) F4-33 AI curve selection ☆...
- Page 71 Appendix A Parameter Table Param. Param. Name Setting Range Default Property 20: Communication setting FMR output function 23: Zero-speed running F5-01 ☆ selection 2 (having output at stop) 0: No function 24: Accumulative pow- 1: AC drive running er-on time reached 2: Fault output (stop Relay function selec- 25: Frequency-level...
- Page 72 Appendix A Parameter Table Param. Param. Name Setting Range Default Property 0: Output frequency 1: Set frequency 2: Output current 3: Output torque (100.0% corresponding to FMP output function F5-06 ☆ two times of the rated motor torque) selection 4: Output power 5: Output voltage (100% corresponding to 1.2 times of the rated AC drive voltage) 6: Pulse reference (100% corresponding to...
- Page 73 Appendix A Parameter Table Param. Param. Name Setting Range Default Property Group F6: Start/Stop Control 0: Direct start 1: Catching a spinning motor (asynchro- F6-00 Start mode nous motor) ☆ 2: Pre-excitation startup (asynchronous motor) 0: From stop frequency Mode of catching a F6-01 1: From 50 Hz ★...
- Page 74 Appendix A Parameter Table Param. Param. Name Setting Range Default Property Voltage rise time at F6-20 catching a spinning 0.5s to 3.0s 1.0s ☆ motor Demagnetization F6-21 00.00s to 10.00s 1.00s ☆ time Startup pre-torque F6-22 000.0% to 200.0% 0.0% ☆...
- Page 75 Appendix A Parameter Table Param. Param. Name Setting Range Default Property 0000 to FFFF Bit00: Frequency reference (Hz) Bit01: Bus voltage (V) Bit02: DI state Bit03: DO state Bit4: AI1 voltage (V) LED display stop Bit05: AI2 voltage (V) F7-05 ☆...
- Page 76 Appendix A Parameter Table Param. Param. Name Setting Range Default Property Model depen- F8-08 Deceleration time 4 0.0s to 6500.0s ☆ dent F8-09 Jump frequency 1 0.00 Hz to the maximum frequency 0.00Hz ☆ F8-10 Jump frequency 2 0.00 Hz to the maximum frequency 0.00Hz ☆...
- Page 77 Appendix A Parameter Table Param. Param. Name Setting Range Default Property Detection width of F8-33 0.0% to 100.0% (maximum frequency) 0.0% ☆ frequency 2 0.0% to 300.0% Zero current detec- F8-34 The value 100.0% corresponds to the rated 5.0% ☆ tion level motor current.
- Page 78 Appendix A Parameter Table Param. Param. Name Setting Range Default Property Group F9: Fault and Protection AC drive overload F9-00 0 to 1 ☆ suppression Motor overload pro- F9-01 0.20 to 10.00 1.00 ☆ tection gain Motor overload F9-02 pre-warning coeffi- 50% to 100% ☆...
- Page 79 Appendix A Parameter Table Param. Param. Name Setting Range Default Property 0: No fault 19: Motor auto-tuning 1: Hardware fault abnormal 2: Overcurrent 20: Reserved during acceleration 21: EEPROM read/ 3: Overcurrent write error during deceleration 22: Motor auto-tuning 4: Overcurrent abnormal during constant 23: Motor short-cir-...
- Page 80 Appendix A Parameter Table Param. Param. Name Setting Range Default Property F9-26 3rd fault subcode ● Frequency upon 2nd F9-27 0.00 Hz to 655.35 Hz 0.00 Hz ● fault Current upon 2nd F9-28 0.00 A to 655.35 A 0.00 A ●...
- Page 81 Appendix A Parameter Table Param. Param. Name Setting Range Default Property Ones: Motor overload (E11) 0: Coast to Tens: Reserved stop Hundreds: Output phase loss (E13) 1: Decelerate Fault protection Thousands: Heatsink overheat (E14) to stop F9-48 ★ action selection 1 Ten thousands: External fault (E15) 2: Restart Note: Output phase loss is valid only in V/...
- Page 82 Appendix A Parameter Table Param. Param. Name Setting Range Default Property 52525 0: Coast to Ones: PID feedback lost during running stop (E31) 1: Decelerate Tens: Reserved Fault protection to stop F9-52 Hundreds: Reserved ★ action selection 5 2: Restart Thousands: Excessive speed deviation allowed (E42)
- Page 83 Appendix A Parameter Table Param. Param. Name Setting Range Default Property Load loss detection F9-64 0.0% to 100.0% 10.0% ☆ level Load loss detection F9-65 0.0s to 60.0s 1.0s ☆ time 0.0% to 50.0% (maximum frequency) Overspeed detection F9-67 (Overspeed detection is disabled when it is 5.0% ☆...
- Page 84 Appendix A Parameter Table Param. Param. Name Setting Range Default Property PID reference change FA-11 0.00 to 650.00s 0.00s ☆ time PID feedback filter FA-12 0.00 to 60.00s 0.00s ☆ time FA-13 PID deviation gain 0.0% to 100.0% 100.0% ☆ FA-15 Proportional gain Kp2 0.0 to 1000.0 20.0 ☆...
- Page 85 Appendix A Parameter Table Param. Param. Name Setting Range Default Property Designated count Fb-09 1 to 65535 1000 ☆ value Reset mode of revolu- 0: Edge Fb-10 ☆ tion counting 1: Level Reset signal of revolu- 0: Retain Fb-11 ☆ tion counting 1: Reset Calculation retentive...
- Page 86 Appendix A Parameter Table Param. Param. Name Setting Range Default Property Ones: Retentive upon power failure 0: Non-retentive upon power failure Simple PLC retentive 1: Retentive upon power failure FC-17 ☆ selection Tens: Retentive upon stop 0: Non-retentive upon stop 1: Retentive upon stop Running time of simple FC-18...
- Page 87 Appendix A Parameter Table Param. Param. Name Setting Range Default Property Acceleration/decelera- FC-35 tion time of simple PLC 0 to 3 ☆ reference 8 Running time of simple FC-36 0.0s (h) to 6553.5s (h) 0.0s (h) ☆ PLC reference 9 Acceleration/decelera- FC-37 tion time of simple PLC...
- Page 88 Appendix A Parameter Table Param. Param. Name Setting Range Default Property Group Fd: Communication Parameters 0: 300 bps 1: 600 bps 2: 1200 bps 3: 2400 bps 4: 4800 bps Fd-00 Modbus baud rate ☆ 5: 9600 bps 6: 19200 bps 7: 38400 bps 8: 57600 bps 9: 115200 bps...
- Page 89 Appendix A Parameter Table Param. Param. Name Setting Range Default Property 0: 20 Kbps 1: 50 Kbps 2: 100 Kbps Fd-12 CAN baud rate 3: 125 Kbps ★ 4: 250 Kbps 5: 500 Kbps 6: 1 Mbps Fd-13 CAN station number 1 to 127 (Valid for CANlink and CANopen) ★...
- Page 90 Appendix A Parameter Table Param. Param. Name Setting Range Default Property Group FE: User-Defined Parameters User-defined parame- FE-00 F0-01 ☆ ter 0 User-defined parame- FE-01 F0-02 ☆ ter 1 User-defined parame- FE-02 F0-03 ☆ ter 2 User-defined parame- FE-03 F0-07 ☆...
- Page 91 Appendix A Parameter Table Param. Param. Name Setting Range Default Property User-defined parame- FE-21 F0-00 ☆ ter 21 User-defined parame- FE-22 F0-00 ☆ ter 22 User-defined parame- FE-23 F0-00 ☆ ter 23 User-defined parame- FE-24 F0-00 ☆ ter 24 User-defined parame- FE-25 F0-00 ☆...
- Page 92 Appendix A Parameter Table Param. Param. Name Setting Range Default Property Group A0: Torque Control and Limit Parameters 0: Speed control A0-00 Speed/Torque control ★ 1: Torque control 0: Digital setting 1 (A0-03) 1: AI1 2: AI2 Torque reference 4: Pulse setting (DIO1) A0-01 channel selection in 5: Communication setting (1000H)
- Page 93 Appendix A Parameter Table Param. Param. Name Setting Range Default Property 0: Set by A1-06 1: DO state 2: DI state VDI state setting Ones: VDI1 A1-05 00000 ★ mode Tens: VDI2 Hundreds: VDI3 Thousands: VDI4 Ten thousands: VDI5 0: Disabled 1: Enabled Ones: VDI1 Selection of VDI active...
- Page 94 Appendix A Parameter Table Param. Param. Name Setting Range Default Property A4-10 Time constant (quick) 0 to 65535 ☆ Frequency sup- A4-11 pression coefficient 0 to 65535 ☆ (quick) Time constant A4-12 0 to 65535 ☆ (intermediate) Frequency sup- A4-13 pression coefficient 0 to 65535 ☆...
- Page 95 Appendix A Parameter Table Param. Param. Name Setting Range Default Property 0: Random PWM invalid A5-03 Random PWM depth ☆ 1 to 10: PWM carrier random depth 0: Disabled 0 (Asynchro- A5-04 Fast current limit ☆ 1: Enabled nous motor in SVC mode) A5-05 Sampling delay 1 to 13...
- Page 96 Appendix A Parameter Table Param. Param. Name Setting Range Default Property AI curve 5 maximum A6-12 (AI curve 5 inflection 2 input) to A6-14 10.00 V ☆ input +10.00V Corresponding per- A6-15 centage of AI curve 5 -100.0% to +100.0% 100.0% ☆...
- Page 97 Appendix A Parameter Table Param. Param. Name Setting Range Default Property A8-12 Temperature at stop 0 to 200℃ 110℃ ☆ Pre-warning tempera- A8-13 0 to 200℃ 105℃ ☆ ture A8-14 Wakeup time 0 to 100s ☆ Preparation time A8-15 0 to 100s ☆...
- Page 98 Appendix A Parameter Table Param. Param. Name Setting Range Default Property Ones: Solenoid valve overcurrent (E95) 0: Coast to stop 2: Restart allowed 5: Canceled Tens: Phase sequence abnormal (E96) 55202 0: Coast to stop 0: Coast to Equipment fault 5: Canceled stop A8-35...
- Page 99 Appendix A Parameter Table Param. Param. Name Setting Range Default Property Set low temperature A8-53 -10 to 25℃ 0℃ ☆ value Warm-up exiting A8-54 0 to 30℃ 5℃ ☆ setting value Warm-up frequency A8-55 0.00 to F0-12 10.00 Hz ☆ setting value Frequency lower limit A8-56...
- Page 100 Appendix A Parameter Table Param. Param. Name Setting Range Default Property Carrier frequency A8-83 switching point 2 3.0 to 99.0 ☆ (deceleration) A8-84 Closed-loop current 0 to 1 ☆ Closed-loop current A8-85 1 to 200 ☆ value Closed-loop current A8-86 0.1 to 50.0 ☆...
- Page 101 Appendix A Parameter Table Param. Param. Name Setting Range Default Property Quick auto-tuning of stator resistance 0: Disabled A9-12 ☆ before asynchronous 1: Enabled motor startup Stator resistance coef- ficient 1 by asynchro- A9-13 0 to 65535 ★ nous motor quick auto-tuning Stator resistance coef- ficient 2 by asynchro-...
- Page 102 Appendix A Parameter Table Param. Param. Name Setting Range Default Property Minimum carrier frequency of synchro- A9-28 0.8 kHz to F0-15 (Carrier frequency) 2.0 kHz ☆ nous motor in SVC mode Synchronous motor A9-29 excitation current t 0% to 80% ☆...
- Page 103 Appendix A Parameter Table Param. Param. Name Setting Range Default Property PT100 measured volt- Factory-cor- AC-22 -3.300 V to +3.300 V ☆ age 2 rected Factory-cor- AC-23 PT100 target voltage 2 -3.300 V to +3.300 V ☆ rected PT1000 measured Factory-cor- AC-24 -3.300 V to +3.300 V...
- Page 104 Appendix A Parameter Table Param. Param. Name Setting Range Default Property AF-26 RPDO4-SubIndex1-H 0x0000 to 0xFFFF 0x0000 ☆ AF-27 RPDO4-SubIndex1- L 0x0000 to 0xFFFF 0x0000 ☆ AF-28 RPDO4-SubIndex2-H 0x0000 to 0xFFFF 0x0000 ☆ AF-29 RPDO4-SubIndex2- L 0x0000 to 0xFFFF 0x0000 ☆...
- Page 105 Appendix A Parameter Table Param. Param. Name Setting Range Default Property Group B0: Control Mode, Linear Speed, and Winding Diameter Parameters 0: Disabled 1: Open-loop torque control B0-00 Tension control mode 2: Closed-loop speed control ★ 3: Closed-loop torque control 4: Constant linear speed control 0: Winding B0-01 Winding mode...
- Page 106 Appendix A Parameter Table Param. Param. Name Setting Range Default Property Winding diameter 0: Disabled B0-16 ☆ change rate 0.1 mm to 10.0 mm 0: Disabled Winding diameter B0-17 1: Decrease inhibited during winding, and ☆ change direction limit increase inhibited during unwinding Winding diameter 0: Disabled B0-18...
- Page 107 Appendix A Parameter Table Param. Param. Name Setting Range Default Property B0-34 Material thickness 2 0.01 mm to 100.00 mm 0.01 mm ☆ B0-35 Material thickness 3 0.01 mm to 100.00 mm 0.01 mm ☆ B0-36 Maximum thickness 0.01 mm to 100.00 mm 1.00 mm ☆...
- Page 108 Appendix A Parameter Table Param. Param. Name Setting Range Default Property Multi-friction force B1-20 0.0% to 50.0% 0.0% ☆ compensation torque 2 Multi-friction force B1-21 0.0% to 50.0% 0.0% ☆ compensation torque 3 Multi-friction force B1-22 0.0% to 50.0% 0.0% ☆...
- Page 109 Appendix A Parameter Table Param. Param. Name Setting Range Default Property B2-02 Tension taper 0.0% to 100.0% 0.0% ☆ Correction coefficient B2-03 of taper compensa- 0 mm to 10000 mm 0 mm ☆ tion Closed-loop tension 0: Disabled B2-04 ★ taper function 1: Enabled 0: Set by B2-06...
- Page 110 Appendix A Parameter Table A.2 Monitoring Parameters Param. Communication Param. Name Min. Unit Address Group U0: Monitoring Parameters U0-00 Running frequency 0.01 Hz 7000H U0-01 Frequency reference 0.01 Hz 7001H U0-02 Bus voltage 0.1 V 7002H U0-03 Output voltage 7003H U0-04 Output current 0.01A...
- Page 111 Appendix A Parameter Table Param. Communication Param. Name Min. Unit Address U0-38 ABZ position 7026H Target voltage upon V/F sep- U0-39 7027H aration Output voltage upon V/F U0-40 7028H separation U0-41 DI state display 7029H U0-42 DO state display 702AH U0-43 DI function state display 1 702BH...
- Page 112 Appendix A Parameter Table Param. Communication Param. Name Min. Unit Address U0-89 Small valve opening tag 7055H U0-91 Step size 7057H U0-92 Control output 7058H U0-93 Output factor 7059H U0-94 Pressure deviation 705AH U0-95 Protection pressure 705BH Group U1: Special Process Monitoring Parameters U1-00 Pressure PID reference 7100H...
- Page 113 Warranty Agreement Warranty Agreement 1) Inovance provides an 18-month free warranty to the equipment itself from the date of manufacturing for the failure or damage under normal use conditions. 2) Within the warranty period, maintenance will be charged for the damage caused by the following reasons: a.
- Page 114 Service Hotline: 400-777-1260 http: //www.inovance.com Suzhou Inovance Technology Co., Ltd. Add.: No. 16 Youxiang Road, Yuexi Town, Wuzhong District, Suzhou 215104, P.R. China Tel: +86-512-6637 6666 Fax: +86-512-6285 6720 Service Hotline: 400-777-1260 http: //www.inovance.com Copyright Shenzhen Inovance Technology Co., Ltd.
Need help?
Do you have a question about the CP700 Series and is the answer not in the manual?
Questions and answers