Ubiquiti Rocket Prism 5AC Quick Start Manual
Hide thumbs
Also See for Rocket Prism 5AC:
- Quick start manual (29 pages) ,
- Quick start manual (25 pages)
Table of Contents
Advertisement
Quick Links
RP-5AC-Gen2 Quick Start Guide
Package Contents
Rocket Prism 5AC
Power Cord
Installation Requirements
The GPS Antenna needs to have clear line of sight to the sky for proper GPS operation.
Shielded Category 5 (or above) cabling with drain wire should be used for all wired
Ethernet connections and should be grounded through the AC ground of the PoE.
We recommend that you protect your networks from harmful outdoor environments and
destructive ESD events with industrial-grade, shielded Ethernet cable from Ubiquiti. For
more details, visit
Surge protection should be used for all outdoor installations. We recommend that you use
two Ethernet Surge Protectors, model ETH-SP, one near the RocketPrism and the other at
the entry point to the building. The ETH-SP will absorb power surges and safely discharge
them into the ground.
https://dl.ubnt.com/qsg/RP-5AC-Gen2/RP-5AC-Gen2_EN.html[2/10/2020 12:16:45 PM]
RP-5AC-Gen2 Quick Start Guide
GPS Antenna
ui.com/toughcable
Gigabit PoE (24V, 1A) with
Mounting Bracket
Advertisement
Table of Contents

Related Manuals for Ubiquiti Rocket Prism 5AC


Summary of Contents for Ubiquiti Rocket Prism 5AC
- Page 1 Ethernet connections and should be grounded through the AC ground of the PoE. We recommend that you protect your networks from harmful outdoor environments and destructive ESD events with industrial-grade, shielded Ethernet cable from Ubiquiti. For more details, visit ui.com/toughcable Surge protection should be used for all outdoor installations.
-
Page 2: Hardware Overview
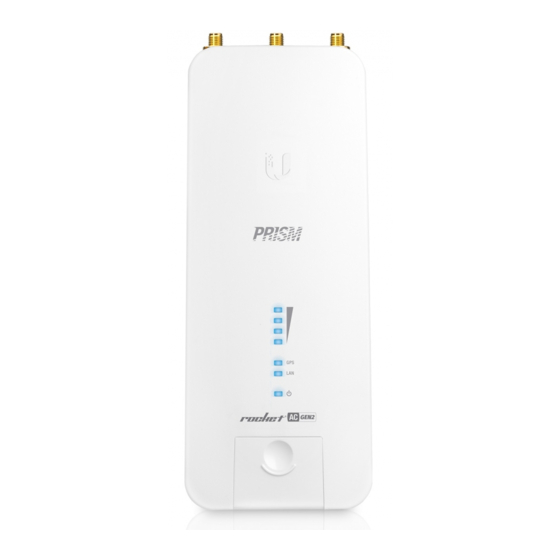
RP-5AC-Gen2 Quick Start Guide * Shown without the antenna. Hardware Overview https://dl.ubnt.com/qsg/RP-5AC-Gen2/RP-5AC-Gen2_EN.html[2/10/2020 12:16:45 PM]... - Page 3 RP-5AC-Gen2 Quick Start Guide RP-SMA Antenna Connectors Used to attach RF cables (not included). GPS Antenna Connector Used to attach the GPS Antenna. LEDs Signal In airOS®, you can modify the wireless signal strength threshold values for each LED https://dl.ubnt.com/qsg/RP-5AC-Gen2/RP-5AC-Gen2_EN.html[2/10/2020 12:16:45 PM]...
-
Page 4: Hardware Installation
The Gigabit Ethernet port is used to connect the power and should be connected to the LAN and DHCP server. Hardware Installation The Rocket is designed to mount directly onto a Ubiquiti airMAX RocketDish™ antenna for Point-to-Point use or an airMAX Sector antenna for Point-to-MultiPoint use. https://dl.ubnt.com/qsg/RP-5AC-Gen2/RP-5AC-Gen2_EN.html[2/10/2020 12:16:45 PM]... - Page 5 RP-5AC-Gen2 Quick Start Guide https://dl.ubnt.com/qsg/RP-5AC-Gen2/RP-5AC-Gen2_EN.html[2/10/2020 12:16:45 PM]...
- Page 6 RP-5AC-Gen2 Quick Start Guide https://dl.ubnt.com/qsg/RP-5AC-Gen2/RP-5AC-Gen2_EN.html[2/10/2020 12:16:45 PM]...
- Page 7 RP-5AC-Gen2 Quick Start Guide https://dl.ubnt.com/qsg/RP-5AC-Gen2/RP-5AC-Gen2_EN.html[2/10/2020 12:16:45 PM]...
- Page 8 RP-5AC-Gen2 Quick Start Guide https://dl.ubnt.com/qsg/RP-5AC-Gen2/RP-5AC-Gen2_EN.html[2/10/2020 12:16:45 PM]...
- Page 9 RP-5AC-Gen2 Quick Start Guide https://dl.ubnt.com/qsg/RP-5AC-Gen2/RP-5AC-Gen2_EN.html[2/10/2020 12:16:45 PM]...
- Page 10 RP-5AC-Gen2 Quick Start Guide https://dl.ubnt.com/qsg/RP-5AC-Gen2/RP-5AC-Gen2_EN.html[2/10/2020 12:16:45 PM]...
- Page 11 RP-5AC-Gen2 Quick Start Guide https://dl.ubnt.com/qsg/RP-5AC-Gen2/RP-5AC-Gen2_EN.html[2/10/2020 12:16:45 PM]...
- Page 12 RP-5AC-Gen2 Quick Start Guide https://dl.ubnt.com/qsg/RP-5AC-Gen2/RP-5AC-Gen2_EN.html[2/10/2020 12:16:45 PM]...
- Page 13 RP-5AC-Gen2 Quick Start Guide https://dl.ubnt.com/qsg/RP-5AC-Gen2/RP-5AC-Gen2_EN.html[2/10/2020 12:16:45 PM]...
- Page 14 RP-5AC-Gen2 Quick Start Guide 10. Connect the power using: included Gigabit PoE Adapter PoE switch WARNING: The switch port must comply with the power specifications listed in this Quick Start Guide. Connecting to the PoE Adapter https://dl.ubnt.com/qsg/RP-5AC-Gen2/RP-5AC-Gen2_EN.html[2/10/2020 12:16:45 PM]...
- Page 15 RP-5AC-Gen2 Quick Start Guide 1. Connect the Ethernet cable from the device to the POE port of the PoE adapter. 2. Connect an Ethernet cable from your LAN to the LAN port of the PoE adapter. 3. Connect the Power Cord to the adapter, and then plug the Power Cord into a power outlet.
-
Page 16: Web Portal
RP-5AC-Gen2 Quick Start Guide 2. Connect your device’s Wi-Fi to the SSID named: <model>:<MAC Address> Note: Ensure that DHCP is enabled on your Wi-Fi adapter. 3. Launch the app and follow the on-screen instructions. Web Portal 1. Connect your device’s Wi-Fi to the SSID named: <model>:<MAC Address> Note: Ensure that your Wi-Fi connection has DHCP enabled. - Page 17 RP-5AC-Gen2 Quick Start Guide 4. Create a username and password. Confirm your new password and then click Save. The airOS Configuration Interface will appear, allowing you to customize your settings as needed. For additional details, refer to the User Guide available at ui.com/download/airmax- https://dl.ubnt.com/qsg/RP-5AC-Gen2/RP-5AC-Gen2_EN.html[2/10/2020 12:16:45 PM]...
-
Page 18: Installer Compliance Responsibility
RP-5AC-Gen2 Quick Start Guide Installer Compliance Responsibility Devices must be professionally installed and it is the professional installer’s responsibility to make sure the device is operated within local country regulatory requirements. Antenna Select your antenna from the list. If Calculate EIRP Limit is enabled, transmit output power is automatically adjusted to comply with the regulations of the applicable country. -
Page 19: Specifications
RP-5AC-Gen2 Quick Start Guide Specifications RP-5AC-Gen2 Dimensions 88 x 40 x 230 mm (3.47 x 1.58 x 9.06") Weight 400 g (14.11 oz) Networking Interface (1) 10/100/1000 Ethernet Port RF Connectors (2) RP-SMA (Waterproof) (1) GPS (Waterproof) LEDs (4) Signal Strength, GPS, Power, LAN Enclosure Die-Cast Aluminum with White Powder Coating... -
Page 20: Electrical Safety Information
RP-5AC-Gen2 Quick Start Guide 1. Read, follow, and keep these instructions. 2. Heed all warnings. 3. Only use attachments/accessories specified by the manufacturer. WARNING: Do not use this product in location that can be submerged by water. WARNING: Avoid using this product during an electrical storm. There may be a remote risk of electric shock from lightning. - Page 21 RP-5AC-Gen2 Quick Start Guide This equipment has been tested and found to comply with the limits for a Class A digital device, pursuant to part 15 of the FCC Rules. These limits are designed to provide reasonable protection against harmful interference when the equipment is operated in a commercial environment.
-
Page 22: Australia And New Zealand
RP-5AC-Gen2 Quick Start Guide Déclaration sur l’exposition aux rayonnements Cet équipement est conforme aux limites prévues pour l’exposition aux rayonnements dans un environnement non contrôlé. Lors de l’installation et de la mise en fonctionnement de l’équipement, assurez-vous qu’il y ait une distance minimale de 193 cm entre l’élément rayonnant et vous. -
Page 23: Weee Compliance Statement
RP-5AC-Gen2 Quick Start Guide countries listed may use the 5.8 GHz frequency band. WEEE Compliance Statement Declaration of Conformity Online Resources © 2020 Ubiquiti Inc. All rights reserved. https://dl.ubnt.com/qsg/RP-5AC-Gen2/RP-5AC-Gen2_EN.html[2/10/2020 12:16:45 PM]...
Need help?
Do you have a question about the Rocket Prism 5AC and is the answer not in the manual?
Questions and answers