
Related Manuals for Elmo L-12W


Summary of Contents for Elmo L-12W
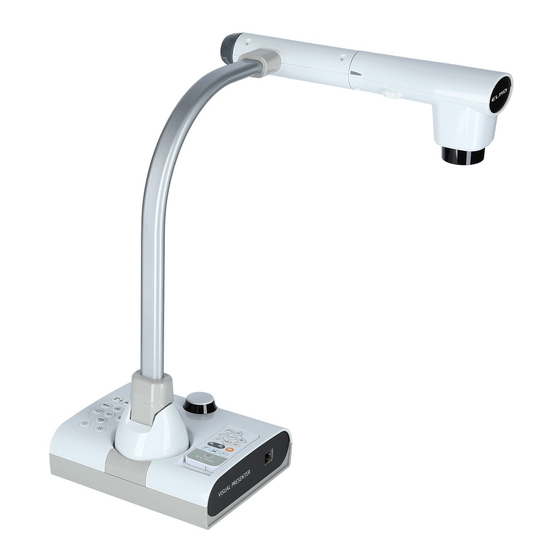
- Page 1 L-12W / TT-12W INSTRUCTION MANUAL Please read this instruction manual carefully before using this product and keep it for future reference.
-
Page 2: Important Safeguards
IMPORTANT SAFEGUARDS ■ Read Instructions All the safety and operating instructions should be read before the appliance is operated. ■ Retain Instructions The safety and operating instructions should be retained for future reference. ■ Heed Warnings All warnings on the product and in the operating instructions should be adhered to. ■... - Page 3 ■ Power Sources This product should be operated only from the type of power source indicated on the marking label. If you are not sure of the type of power supply to your home consult your appliance dealer or local power company. For products intended to operate from battery power, or other sources, refer to the operating instructions.
- Page 4 ■ Servicing Do not attempt to service this product yourself as opening or removing covers may expose you to dangerous voltage or other hazards. Refer all servicing to qualified service personnel. ■ Damage Requiring Service Unplug this product from the wall outlet and refer servicing to qualified service personnel under the following conditions: •...
- Page 5 CAUTION RISK OF ELECTRIC SHOCK DO NOT OPEN CAUTION: TO REDUCE THE RISK OF ELECTRIC SHOCK, DO NOT REMOVE COVER (OR BACK). NO USER-SERVICEABLE PARTS INSIDE. REFER SERVICING TO QUALIFIED SERVICE PERSONNEL. The lightning flash with arrowhead symbol, within an equilateral triangle, is intended to alert the user to the presence of uninsulated “dangerous voltage”...
- Page 6 WARNING: TO REDUCE THE RISK OF FIRE OR ELECTRIC SHOCK, DO NOT EXPOSE THIS PRODUCT TO RAIN OR MOISTURE. The connection of a non-shielded equipment interface cable to this equipment will invalidate the FCC Certification or Declaration of this device and may cause interference levels which exceed the limits established by the FCC for this equipment.
-
Page 7: Before You Use
BEFORE YOU USE When using this device, be sure to use the supplied power cord and AC adapter. The power cord and AC adapter that come with this product are for this product only. Do not use them with another product. ... - Page 8 If any liquid from a battery leaks onto your skin or clothes, flush the area with clean water immediately. If it gets into your eye, flush immediately with clean water and then contact a doctor. Do not keep the batteries in the reach of children because there may be a choking hazard. If a battery is swallowed, consult a physician immediately as this could result in asphyxiation or the battery may become lodged in the stomach or esophagus.
- Page 9 viii...
-
Page 10: Table Of Contents
CONTENTS IMPORTANT SAFEGUARDS ..............................i BEFORE YOU USE ....................................ⅵ CONTENTS ....................................2 1.BUNDLED ITEMS .................................. 4 2.BASIC OPERATIONS ................................5 2-1 Document Camera ..................................5 Part names......................................5 Operating panel .....................................6 Rear panel and cable connection ............................7 Side panel ......................................9 Moving parts of the document camera ..........................10 2-2 Supplied accessories ................................. - Page 11 Connecting to the network ..............................54 Using the share menu ................................55 Using Miracast ..................................... 56 Using the timer .................................... 58 Using ELMO Play ..................................59 Using the file manager ................................59 Using the automatic deskew function ..........................59 Using a whiteboard ................................... 60 Using the drawing function ..............................
-
Page 12: Bundled Items
BUNDLED ITEMS The items below are included with the product. If any item is missing, contact the dealer from whom you purchased the product. AC adapter P.14 Coin battery Document camera (for remote control) Remote control P.11 P.11 HDMI cable fixture × 2 Cable tie ×... -
Page 13: Basic Operations
BASIC OPERATIONS 2-1 Document Camera Part names „ ① ⑥ ⑤ ④ ② ⑦ ③ ⑩ ⑧ ⑨ Name ① LED lighting switch P.23 ② LED lighting P.23 ③ Built-in mic ④ Zoom dial P.21 ⑤ AF button P.21 ⑥ Operating panel ⑦... -
Page 14: Operating Panel
Operating panel „ Power LED ① ② ③ ④ ⑤ ⑥ ⑦ ⑧ ⑨ ⑩ ⑪ ⑫ Mark Function To turn on or off the power. ① Power on: The Power LED turns blue. Power off (standby status): The Power LED turns red. To switch to the Camera mode. -
Page 15: Rear Panel And Cable Connection
Rear panel and cable connection „ ① ② ③ ④ ⑤ ⑥ Mark Function ① To connect the AC adapter. (Power cable is supplied with the product.) ② To output digital images. (HDMI cable is not supplied with the product.)[TYPE-A] ③... - Page 16 ④ Connecting to a device with an analog RGB input port Connect a commercially available RGB cable to the [ ] port on the rear panel. ⑤ Connecting to a device with an analog RGB output port Connect a commercially available RGB cable to the [ ] port on the rear panel.
-
Page 17: Side Panel
Side panel „ ① ② ③ ④ ⑤ Mark Function ① To output audio. (Audio cable is not supplied with the product.) To connect a microphone. (Microphone is not supplied with this product.) ② Use a commercially available electret condenser microphone. To insert an SD card (commercially available). -
Page 18: Moving Parts Of The Document Camera
Moving parts of the document camera „ The product can be moved as shown below. -
Page 19: Supplied Accessories
2-2 Supplied accessories Remote control „ Preparation of the remote control Remove the battery case by pressing the release lock inward. Insert the coin battery into the battery case, so you see the positive (+) side facing up. Then insert the battery case into the remote control. N o t e •... -
Page 20: Fixture
Fixture „ How to use the supplied fixture and cable tie You can fix the HDMI cable to the HDMI port by using the supplied fixture and cable tie. Items to use (supplied) Fixture × 2 Cable tie x 2 (For HDMI cable) ①... - Page 21 When the plug does not have a concave part, wrap the cable tie as shown below. Concave part with concave part without concave part ① Wrap the cable tie around the root of the cable and pull it tight. Fixture Cable tie HDMI cable ②...
-
Page 22: Shooting Images
2-3 Shooting images P.21 Setting up the product „ Set up the product as shown in the figure above. Then connect the product to a projector or a monitor, and turn on the power of the product. P.15 Connecting the power cable Connect the power cable and the AC adapter. -
Page 23: Turn On / Off The Power
Turn on / off the power ・ When the AC adapter is connected to an outlet, the Power LED[ ] will flash red first, and then will turn red after several seconds. Press the [ ] button on the operating panel or the [ ] button on the remote control to turn on the power. -
Page 24: Start Screen
Start screen „ At start up, the Document camera screen will be displayed . The Pen menu for drawing will be displayed when either tab is selected in the Document camera screen. (The same Pen menu will be displayed no matter which tab is selected . Use the tab you like according to the subject.) The Menu area will be displayed by selecting the bottom tab in the Document camera screen. -
Page 25: Status Area
Status area „ The status of the camera will be displayed with icons. Icon Name Function WiFi ※ 1 To display the WiFi status. LAN ※ 1 This icon will be displayed when a LAN cable is connected. SD card This icon will be displayed when the recording destination is set to SD card. -
Page 26: Pen Menu For Drawing
Pen menu for drawing „ When either tab is selected in the Document camera screen, the Pen menu, the Highlighter menu, the Eraser menu and the Hand tool menu will be displayed. Select the menu you want to use. Long press the menu to display the sub menu. You can change the type of Pen or Eraser from the sub menu. -
Page 27: Menu Area
Eraser Type Icon Function To delete a line drawn by Pen or Highlighter. (A continuously drawn line can be erased.) Eraser Press the line or swing the finger while pressing the line to erase it. To delete all the lines that are drawn on the screen by pressing this icon. - Page 28 Icon Main menu Sub menu Function To capture the camera image and save it as a still image. Capture ○ (Long press) To select the destination media To pause or restart the camera image. Freeze ※ 1 ※ Pressing this icon long will perform the keystone correction.
-
Page 29: Adjusting The Size
Adjusting the size „ The display range of the document can be adjusted by rotating the zoom dial on the product or by pressing the [ ] buttons on the remote control. ・ZOOM-IN :The subject will be shown in large size. ・ZOOM-OUT :The subject will be shown in small size. -
Page 30: Adjusting The Brightness
Adjusting the brightness „ Use the [ ] buttons on the operating panel or the remote control to change the level of brightness of the displayed image. The brightness of the image will not change automatically in response to the brightness of the shooting environment. -
Page 31: Turning On / Off The Led Lighting
Turning on / off the LED lighting „ The LED lighting can be turned on or off by sliding the LED lighting switch. ・ 「ON」 : The LED lighting will turn on. ・ 「OFF」 : The LED lighting will turn off. Caution •... -
Page 32: Selecting The Image Source
Selecting the image source „ You can select the image source as described below. Camera image: ] button on the operating panel or [ ] button on the remote control. Image being input to the [ / ] port: ] button on the operating panel or [ ] button on the remote control. -
Page 33: Configuring The Settings
2-4 Configuring the settings Each setting of the product can be configured from the menu (texts or icons) displayed on the screen. How to configure the settings „ ① Press the [ ] button on the operating panel or the remote control to display the menu on the screen. - Page 34 WiFi or LAN. Timer To sound an alarm at a set time. To access the portal run by ELMO. ELMO Play Apps on the portal can be downloaded. To open folders of the internal storage, SD card or USB flash File manager drive.
- Page 35 ・How to uninstall the installed app Long press the icon of the app you want to uninstall to display the Trash can icon. Drag and drop the selected icon onto the Trash can icon to delete the app or hide the icon.
-
Page 36: Checking The Camera Settings
Checking the camera settings „ Select the Settings icon [ ] in the Home screen. The Settings screen will be displayed and you can configure various settings. Camera settings Icon Setting item Function Auto 1920x1080 Resolution To set the output resolution. 1280x720 UXGA 1600x1200... - Page 37 Icon Setting item Function Digital Server URL To set the URL of the server for the digital textbook. textbook Enable Keystone To set whether to add Keystone correction to Auto correction deskew function. Disable Enable USB camera To set whether to use the product as a USB camera. Disable Camera quality settings Icon...
- Page 38 Product information Application To display the application version of the product. Version To check whether the latest update version of the app is available. When the latest update version is available, a notice will be displayed. Application Install the latest version accordingly. update ※...
-
Page 39: Checking The System Setting
Checking the system setting „ The System settings menu will be displayed when the System Setting icon [ ] in the Settings screen is pressed. To return to the previous screen, press the Return icon [ ]. WiFi and network Icon Name Selection item... - Page 40 Device Icon Name Selection item Function Available capacity Apps (Data and content item) Still image and video To display the total capacity for Audio (Music, each item. Total capacity of ringtone, podcast etc.) Storage internal storage Download Cache data Other Mount the SD card To insert the SD card.
- Page 41 A confirmation window will be displayed. reset Select “Reset” to initialize the system. ※ Note that installed apps will also be deleted. System Icon Name Selection item Function Important legal information between the Visual Presenter Legal information Customer and Elmo is described here.
-
Page 42: Advanced Operations
ADVANCED OPERATIONS 3-1 Using an SD card/USB flash drive With the product, you can record the camera image as a still image to an SD card, USB flash drive, or internal memory. Also, you can record the camera image as a video to an SD card, USB flash drive or internal memory. -
Page 43: Recording
N o t e • About SD card - SDXC card cannot be used. - Video recording is only possible to an SD card (SD / SDHC) with class10 speed or above. - We recommend that you use an SD card with class 10 speed or above. •... -
Page 44: Video
The recording destination can be changed by long pressing the Capture icon. The sub menu will be displayed and you can change the destination each time the still image recording is performed. ※ Captured still images can be saved in the following destination: SD card / USB flash drive / internal storage(The currently selected device will be displayed as destination in the Status area.) ※... - Page 45 The recording destination can be changed by long pressing the Record icon. The sub menu will be displayed and you can change the destination each time the video recording is performed. Video recording will start once the recording destination is set. ※...
-
Page 46: Displaying The Recorded Data
Displaying the recorded data „ Content items display (list of still images/videos) Basic operations ① Press the [ ] button on the operating panel or the [ ] button on the remote control to display the content items (list of still images/videos). ②... - Page 47 Menu Media select → Recognized media will be displayed. List of content items → Thumbnail list of content items stored in the selected media will be displayed. Menu Icon Name Function Split screen To enter the Split screen select mode. Select the content items to compare. Content item select To enter the mode that multiple content items can be selected.
-
Page 48: Displaying A Still Image Full-Screen
Displaying a still image full-screen You can display a still image you selected from the list of content items (still image / video) full-screen. < Thumbnails > < Full-screen image > Basic operations ① Display the list of content items (still image / video). Press the[... - Page 49 ③ Confirm the still image you want to display full-screen. Press the[ ]button on the operating panel or the[ ]button on the remote control or click with the mouse. The menu will be displayed. If you want to hide the menu, press the Hide [ ]icon.
- Page 50 Operation of the Still image menu While a still image is displayed full-screen, the Still image menu will be displayed. Select the Hide icon[ ]to hide the menu. Press the[ ] buttons on the operating panel or the[ ]buttons on the remote control to move the cursor. The cursor can also be moved by using the mouse.
-
Page 51: Playing A Video Full-Screen
Playing a video full-screen You can display a still image you selected from the list of content items (still image / video) full-screen. < Full-screen image > < Thumbnails > Basic operations ① Display the list of content items (still image / video). Press the[... - Page 52 ③ Confirm the video you want to display full-screen. Press the[ ]button on the operating panel or the[ ]button on the remote control or click with the mouse. The selected video will be played automatically. ④ To return to the List of content items screen, press the[ ]buttons on the operating panel or the[ ]buttons on the remote control to display the Return[ / ]button.
- Page 53 Operation of the Video menu While a video is displayed full-screen, the Video menu will be displayed. Select the Hide icon[ ]to hide the menu. Press the[ ]buttons on the operating panel or the[ ]buttons on the remote control to move the cursor. The cursor can also be moved by using the mouse.
-
Page 54: Using By Connecting To A Computer With A Usb Cable
3-2 Using by connecting to a computer with a USB cable This product is compliant with UVC (USB video class) and troublesome installing of a driver is not required. You can use the product with a video conference system or other various application software by simply connecting a USB cable to the USB port of a computer. -
Page 55: Using With The Portable Iwb (Sold Separately)
3-3 Using with the portable IWB (sold separately) By using the separately sold portable IWB with the product, you can draw on camera images directly and record the result. You can also directly perform such operations as zooming in/out with the product. Connection with the portable IWB „... -
Page 56: Basic Operations Of The Portable Iwb
Basic operations of the portable IWB „ ● Recognition of the write range (calibration) Hold down Button 1 on the pen (for three seconds or more) near the portable IWB receiver (within a 2 cm radius from the receiver). The tablet enters the Calibration mode with a long beep. Portal IWB receiver 2 cm radius Button 1... - Page 57 By using the pen, you can draw on the camera image or the whiteboard. N o t e • Be sure the pen is perpendicular to the screen when clicking. • If you click the wrong place in relation to the cursor, hold down Button 2 on the pen (for two seconds or more), and then calibrate again.
-
Page 58: Other Useful Functions
"WPS Office" installed in the product. ※ You need to install WPS Office from ELMO Play (chargeable). Product license will be required for downloading WPS Office. For further information, consult the dealer from whom you purchased this product or our branch/office near your location. - Page 59 Also, the Camera icon will be added to the left top of the screen. When this icon is pressed, the Camera image will be displayed in the split screen. ※ When the Media select icon is pressed while a content item is selected, the list of content items of the selected recording media will be displayed , while the content item selection is maintained.
-
Page 60: Using The Qr Code Reader
Maximizing the split screen In the Split screen view, press the content item. The selected content item will be displayed enlarged. Press the enlarged content item again and it will return to the previous size. Changing screen positions You can change the positon of the content items in the Split screen view. Long press the content item and move the selected content item by drag and drop action. - Page 61 Step 3. A dialog to confirm whether to open the relevant URL will be displayed. Step 4. Select “OK” . The browser will open and the relevant website will be displayed. Step 5. To return to the Document camera screen, press the Return icon [ ] displayed on the top left of the screen.
-
Page 62: Using The Digital Textbook
Using the digital textbook „ You can access the Digital textbook server to read the digital textbook. Select “Digital textbook” from the Camera settings menu to display the Server URL input screen. Enter the information by using the keyboard. ※ The Digital textbook app does not appear on the Home screen if the Digital textbook configuration is not completed. -
Page 63: Using The Share Menu
Using the share menu „ Select the Share menu [ ] from the menu in the Content item select screen to copy the selected content item to other media or share it with someone. Press “Cancel” to return to the list of content items. Select the media to copy a content item. -
Page 64: Using Miracast
Using Miracast „ The product can be connected to a device that supports Miracast to perform Miracast output or Miracast input. By connecting the product to a display device with a receiver attached, you can transmit the image between the product and the display device wirelessly. ※... - Page 65 To finish mirroring, press the Miracast icon again. When the Connection device selection setting is completed, the product will connect to the device automatically. ※ In case the connection device is not found during the search, the product will continue the automatic connection process until the device is found, while displaying the camera image.
-
Page 66: Using The Timer
Using the timer „ Open the Home screen and select “Timer” . You can set the timer at the desired time. The alarm will sound at the set time. ※ The maximum time that can be set is 59 minutes and 50 seconds. ※... -
Page 67: Using Elmo Play
Using ELMO Play „ You can download apps from the portal run by ELMO. The selected apps will be downloaded and installed automatically, which can be used with the product. For further information, visit the ELMO portal. Using the file manager „... -
Page 68: Using A Whiteboard
■ How to cancel Freeze button [ ] again. The skew correction will be cancelled and the original image will be displayed. Caution Depending on the using environment or the shooting condition, the Auto deskew function may not work properly. Using a whiteboard „... - Page 69 Step 4. Start drawing using the Pen menu for drawing. Select the Pen icon to open the Pen menu to start drawing. For details, refer to “Pen menu for drawing” ※ The drawings added to each whiteboard will be maintained while the Camera app is running.
-
Page 70: Using The Drawing Function
Using the drawing function „ You can also draw over the live camera image. Step 1. Select the Document Camera icon [ ] to display the camera image. Camera image Right tab Left tab Bottom tab Step 2. Select either the left tab or right tab to open the Pen menu for drawing. Pen menu for drawing Step 3. -
Page 71: Using The Browser
Using the browser „ After the WiFi configuration is completed, start the browser [ ] in the Home screen to connect to the Internet. ※ If the LAN cable is connected and the Ethernet configuration is completed, the LAN connection has a priority over the WiFi connection. If the dhcp is set to ON, the system will connect the network automatically. -
Page 72: Displaying The External Input Image
Displaying the external input image „ The image being input to the HDMI IN port can be output from the HDMI OUT port. For information about switching the image source from the camera image, refer to “Selecting the image source” . The status of the image currently displayed on the monitor will be indicated by the External input LED.[ ] Status... -
Page 73: Displaying Enlarged Images Using A Microscope
3-5 Displaying enlarged images using a microscope By attaching the separately sold microscope attachment lens to a microscope, you can display the enlarged image through the document camera lens. Microscope mode operations When the Microscope icon [ ] in the menu displayed by pressing the MENU button [ on the remote control or the operating panel is selected while the camera image or the playback... -
Page 74: Procedure
Procedure „ ① Change the setting of the product for using a microscope. Press the [ ] button. Press [ ② Set the microscope. Place a subject you want to view, such as a prepared slide, on the microscope and then look into the microscope to adjust the focus and brightness. -
Page 75: Exiting The Microscope Mode
④ Adjust the angle of the microscope and the product to fit each other. ⑤ Adjust the brightness. Adjust the brightness with the mirror or the light on the microscope. ⑥ Adjust the display range. ⑦ Adjust the display range. Adjust the focus. -
Page 76: List Of Error Messages
LIST OF ERROR MESSAGES Error item Error message Possible cause ・The file is broken. ・The file extensions not supported. Could not play SD card ・The SD card was removed. file. Check if the file is broken. Check if the file extension is supported by the product. - Page 77 Error item Error message Possible cause ・The content item is not supported. ・The file is broken. ・The file size is too large. Playback of Could not play Check if the file is broken. content item content item Check if the file extension is supported by the product.
-
Page 78: Trouble Shooting
TROUBLE SHOOTING 5-1 Symptoms and Confirmation Check the following items. If any abnormality is found, consult the dealer from whom you purchased this product or our nearest branch/office. Symptom Possible cause/remedy No image is • The cable is not correctly connected. displayed. - Page 79 Symptom Possible cause/remedy The image is • This may be interference fringes between dots of printed striped. matter and TV scanning lines or CMOS pixels. Changing the shooting range may improve the problem. • Vertical stripes may appear on an LCD projector image. Manually adjusting the dot clock at the projector side may improve the problem.
-
Page 80: Other Useful Information
・Using some functions together (such as UVC function and recording function) may adversely affect the performance of the product. Check the performance in advance. ・We do not guarantee proper operation with all possible combinations of other products and PC software (including ELMO’ s products). Check the performance in advance. - Page 81 ・When you execute a function such as recording, CPU usage or memory usage may increase, resulting in performance degradation in some cases. Do not execute functions continuously. Confirm the operation before executing functions continuously. ・When multiple apps are running, performance may degrade or app may stop due to insufficient memory.
-
Page 82: Specifications
SPECIFICATIONS 6-1 General Item Specifications Power source 12VDC (AC adapter AC100 - 240V) Power 16.2W consumption W355 × D373.5 × H426.5[mm] (When setup) Outside dimensions W195 × D294 × H469[mm] (When folded) Weight Approx. 3.2kg (Main body only) Input selection Main/External (x1) RGB output Mini Dsub 15P connector, female x 1 Output terminal HDMI output terminal x 1... -
Page 83: Main Camera
6-2 Main Camera Item Specifications Lens f=4.0mm ~ 48.0mm(12x zoom lens) F3.2 ~ F3.6 Frame rate 30fps From lens surface Limit of focus 50mm ~∞(f=4.0mm - 23.4mm) adjustment 200mm ~∞(f=23.4mm and higher) Optical zoom Digital zoom Focus Auto Image pick-up 1/2.3"... -
Page 84: Trademarks And Licenses
6-4 Trademarks and licenses is a trademark or registered trademark of ELMO Co., Ltd. SD, SDXC, SDHC and logo are trademarks SD-3C LLC. HDMI, logo and High-Definition Multimedia interface are trademarks or registered trademarks of HDMI Licensing LLC. QR code is a registered trademark of DENSO WAVE INCORPORATED. - Page 85 株式会社エルモ社 OVERSEAS SUBSIDIARY COMPANIES ELMO USA CORP. 〒457-0078 名古屋市南区塩屋町一丁目3番地4 □Headquarters Web:https://www.elmo.co.jp 6851 Jericho Turnpike Suite 145 製品のお問い合わせは、下記営業所へ Syosset, NY 11791 Tel. (516) 501-1400 □ 東日本営業所 Fax.(516) 501-0429 E-mail: elmo@elmousa.com □ 北海道オフィス Web:https://www.elmousa.com/ 〒001-0021 札幌市北区北 21 条西 8 丁目 3 番 8 号...
Need help?
Do you have a question about the L-12W and is the answer not in the manual?
Questions and answers