Tektronix VM700T User Manual
Video measurement set option 01 (ntsc) & option 11 (pal)
Hide thumbs
Also See for VM700T:
- Service manual (360 pages) ,
- Programmer's manual (277 pages) ,
- User manual (207 pages)
Table of Contents
Advertisement
Quick Links
Advertisement
Table of Contents

Related Manuals for Tektronix VM700T


Summary of Contents for Tektronix VM700T
- Page 1 Artisan Technology Group is your source for quality new and certified-used/pre-owned equipment SERVICE CENTER REPAIRS WE BUY USED EQUIPMENT • FAST SHIPPING AND DELIVERY Experienced engineers and technicians on staff Sell your excess, underutilized, and idle used equipment at our full-service, in-house repair center We also offer credit for buy-backs and trade-ins •...
- Page 2 User Manual VM700T Video Measurement Set Option 01 (NTSC) & Option 11 (PAL) 070-9647-08 This document supports firmware version 2.10 and above. www.tektronix.com Artisan Technology Group - Quality Instrumentation ... Guaranteed | (888) 88-SOURCE | www.artisantg.com...
- Page 3 Copyright © Tektronix, Inc. All rights reserved. Licensed software products are owned by Tektronix or its suppliers and are protected by United States copyright laws and international treaty provisions. Use, duplication, or disclosure by the Government is subject to restrictions as set forth in subparagraph (c)(1)(ii) of the Rights in Technical Data and Computer Software clause at DFARS 252.227-7013, or subparagraphs (c)(1) and (2) of the...
- Page 4 Tektronix, with shipping charges prepaid. Tektronix shall pay for the return of the product to Customer if the shipment is to a location within the country in which the Tektronix service center is located.
- Page 5 Artisan Technology Group - Quality Instrumentation ... Guaranteed | (888) 88-SOURCE | www.artisantg.com...
-
Page 6: Table Of Contents
........2- - 11 VM700T Option 01 (NTSC) & Option 11 (PAL) User Manual Artisan Technology Group - Quality Instrumentation ... Guaranteed | (888) 88-SOURCE | www.artisantg.com... - Page 7 ......3- - 14 VM700T Option 01 (NTSC) & Option 11 (PAL) User Manual Artisan Technology Group - Quality Instrumentation ... Guaranteed | (888) 88-SOURCE | www.artisantg.com...
- Page 8 ........C- - 2 Index VM700T Option 01 (NTSC) & Option 11 (PAL) User Manual Artisan Technology Group - Quality Instrumentation ... Guaranteed | (888) 88-SOURCE | www.artisantg.com...
- Page 9 ......2- -17 Figure 2- -8: How the VM700T Video Measurement Set gets parameter information .
- Page 10 ... 1- -13 Table 1- -3: VM700T 9-pin to PC 25-pin null modem cable for remote control ..........
- Page 11 Table of Contents VM700T Option 01 (NTSC) & Option 11 (PAL) User Manual Artisan Technology Group - Quality Instrumentation ... Guaranteed | (888) 88-SOURCE | www.artisantg.com...
-
Page 12: General Safety Summary
Do Not Operate in an Explosive Atmosphere. Provide Proper Ventilation. To prevent product overheating, provide proper ventilation. VM700T Option 01 (NTSC) & Option 11 (PAL) User Manual Artisan Technology Group - Quality Instrumentation ... Guaranteed | (888) 88-SOURCE | www.artisantg.com... - Page 13 CAUTION Do Not Use on High Voltage (Earth) Terminal Refer to Manual 120 V Power Lines viii VM700T Option 01 (NTSC) & Option 11 (PAL) User Manual Artisan Technology Group - Quality Instrumentation ... Guaranteed | (888) 88-SOURCE | www.artisantg.com...
-
Page 14: Preface
Here are some additional software packages that may be of interest to you: H VMBKUP. Software to assist in backing up the VM700T user-created files. These files can be reloaded to the same instrument or to another VM700T to generate a common set of configuration files. -
Page 15: Contacting Tektronix
This phone number is toll free in North America. After office hours, please leave a voice mail message. Outside North America, contact a Tektronix sales office or distributor; see the Tektronix web site for a list of offices. VM700T Option 01 (NTSC) & Option 11 (PAL) User Manual... -
Page 16: Getting Started
Getting Started Artisan Technology Group - Quality Instrumentation ... Guaranteed | (888) 88-SOURCE | www.artisantg.com... - Page 17 Artisan Technology Group - Quality Instrumentation ... Guaranteed | (888) 88-SOURCE | www.artisantg.com...
- Page 18 Input signals can be obtained from live TV broadcast or generated by test equipment. The VM700T can be operated by using its front-panel controls or by using one of the rear-panel RS-232C ports, or the GPIB port if Option 48 is installed, to send it commands.
- Page 19 GPIB port. See the VM700T Option 48 GPIB Interface Programmer Manual for information about GPIB remote control. An added display option is available for the VM700T. Option 74 provides a display module with a white phosphor CRT instead of the standard green phosphor when a VM700T is ordered with the option.
-
Page 20: Installation
Installation This section contains information about preparing the VM700T Video Measure- ment Set for operation. Power Requirements The measurement set operates with line frequencies of 50 Hz or 60 Hz, over two line voltage ranges. The nominal setting of the low voltage range is 115 VAC. -
Page 21: Figure 1- 1: Rear-Panel Fuse, Power Connector, On/Off Switch And Line Selector
The line conditioner is for use only with the VM700T when operating the VM700T from a 230 Vac mains source. The Power Line Conditioner provides no benefit when the VM700T is operated from a 120 Vac mains (90- -132 V) source and should NOT be used. -
Page 22: Installing The Power Line Conditioner
(see Figure 1- -2). NOTE. Do not mount the power line conditioning box in any location that blocks the air flow (in or out) of the VM700T or any other product installed in the rack. VM700T... -
Page 23: Power Up Diagnostics
Installation Benchtop Mounting. For a standalone VM700T on a benchtop or for portable use, apply the four adhesive rubber feet provided with the accessory to the bottom of the box at the corners. Place the conditioner box in a convenient location where you can make the power cord connections. -
Page 24: Calibrating The Touch Screen
2. Press and hold the Menu button while turning on the power. 3. After the measurement set beeps twice to acknowledge the startup mode, release the Menu button. The VM700T then initializes directly into the Low Level Diagnostics Interface with the VM700T startup menu as shown in Figure 1- -3. -
Page 25: Figure 1- 4: Touch Screen Calibration (Display)
Installation 6. Follow the written directions. Pressing AUTO aborts the calibration process and returns you to the VM700T startup menu. Pressing any other button stores the setting in NVRAM and brings up the next touch screen calibration menu. After making the adjustment requested and storing the current setting, a second set of instructions are displayed as shown in Figure 1- -5. -
Page 26: Figure 1- 6: Panel Calibration Values
1. Press and hold in the Menu button while turning on the power to display the VM700T Startup menu shown previously in Figure 1- -3. 2. In the VM700T Startup menu, highlight the C in the Diagnostic Configura- tion line and press the Select Line button. This brings up the Diagnostics Configuration menu shown in Figure 1- -7. -
Page 27: Function Playback On Power Up
Figure 1- 8: Set diagnostics power up mode menu Function Playback on If there is a state or measurement mode you want the VM700T to be in or a series of measurements that need to be done after power is either turned on or... -
Page 28: Rs-232C Interface Information
Signal Bits 7 or 8 Stop Bits 1 or 2 Parity Odd, Even, and None 1- 11 VM700T Option 01 (NTSC) & Option 11 (PAL) User Manual Artisan Technology Group - Quality Instrumentation ... Guaranteed | (888) 88-SOURCE | www.artisantg.com... - Page 29 With hardware flow control (CTS/RTS selected), normally RTS connects to the CTS line of a terminal, and the line is active when the VM700T is ready to receive data. When the receive buffers of the VM700T are nearing capacity, RTS goes inactive, indicating to the sending device to stop transmitting data.
-
Page 30: Table 1- 2: Typical Vm700T Rs-232C Cable Connections
Note also that both ends of the DTE to DTE cable are typically female connec- tors. The DTE to DCE cable is female on the VM700T (DTE) end, and typically male on the modem (DCE) end. -
Page 31: Connecting Serial Printers
Communication Setup file, all you need to do now is turn on the VM700T and the printer. If you have changed some factory default values, be sure the file contains the values shown in the following example. -
Page 32: Connecting An Apple Laserwriter
In Configure mode make the following VM700T setups when connecting a serial LaserWriter interface Apple LaserWriter to one of the VM700T serial ports. Set the Copy Port and Report Port to Serial Port 0 or Serial Port 1 as appropriate for the printer that will be used. -
Page 33: Connecting A Serial Interface Hp Laserjet, Deskjet, Or Thinkjet
Setting up the HP LaserJet, ThinkJet, or DeskJet with Serial Interface. Set the baud rate to the same as the VM700T. Refer to the appropriate user manual for the printer setups. Connect the serial printer cable between the VM700T and the printer. -
Page 34: Connecting An Ascii Printer
Making Your Own Serial Printer Cable. Table 1- -6 lists the wiring connections for making a cable to use with an HP LaserJet, ThinkJet, or DeskJet printer/plotter. The cable must have a female DB-9 connector on the VM700T end and a male DB-25 connector on the printer/plotter end. -
Page 35: Configuring The Vm700T For Parallel Printers
VM700T. VGA Output Connector The output permits viewing the VM700T display on a VGA monitor. The VGA Video output connector provides drive signals to provide a VGA copy of the display of the VM700T screen to an external monitor. Use the Display and Graticule brightness controls for the VM700T display to set contrast between those two areas of the display. -
Page 36: Operating Basics
Operating Basics Artisan Technology Group - Quality Instrumentation ... Guaranteed | (888) 88-SOURCE | www.artisantg.com... - Page 37 Artisan Technology Group - Quality Instrumentation ... Guaranteed | (888) 88-SOURCE | www.artisantg.com...
-
Page 38: Front Panel Operation
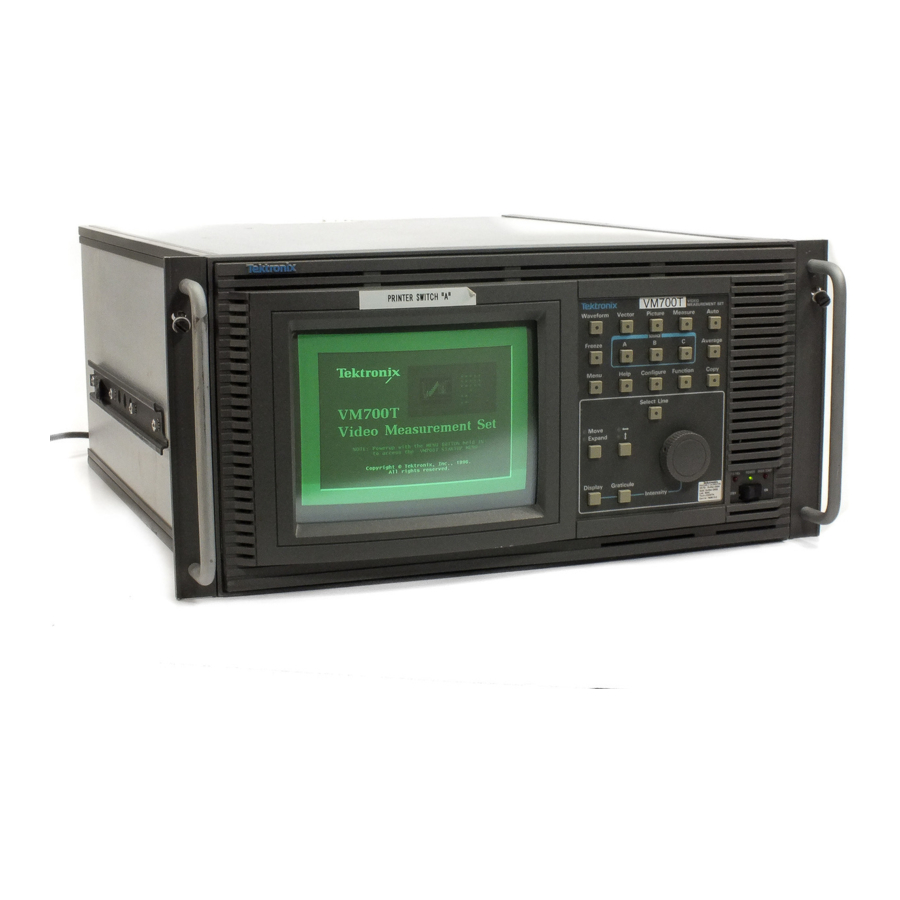
Figure 2- 1: VM700T front panel Touch Screen The display (CRT) area of the VM700T is also a touch screen for user input. The screen displays input waveform signals, the digital vectorscope, a low-resolution television picture of the input signal, graphic measurement displays, and automatic measurement results. -
Page 39: Figure 2- 2: Vm700T Keypad
The top row of buttons shown in Figure 2- -2 controls the operational modes (the Operational Mode Buttons major functions). The VM700T has five operational modes: four “manual” modes and Auto mode. The manual modes are Waveform, Vector, Picture, and Measure. -
Page 40: Freeze, Source Selection, And Average Functions
For some modes, an input source can be inverted. This feature may be used to invert a positive-sync video signal to obtain the correct polarity for measurement by the VM700T. To invert a single source, press and hold the source button approximately one second, until the instrument beeps. When a source is inverted, the LED on the source button blinks. -
Page 41: Control Knob
Help button a second time. Configure and Function. The Configure button and its usage are discussed in Configuring the VM700T starting on page 2- -7. The Function button and its usage are discussed in the VM700T RS-232 Interface Programmer Manual. -
Page 42: Equipment/Signal Sources Required
Without the correct signal being applied, the displays contain no useful information. Bandwidth The bandwidth of the VM700T is from 0 Hz (DC) to approximately 6.8 MHz. Connecting Inputs and The VM700T has three video loop-through inputs, one external sync loop-... - Page 43 Operating Basics 2- 6 VM700T Option 01 (NTSC) & Option 11 (PAL) User Manual Artisan Technology Group - Quality Instrumentation ... Guaranteed | (888) 88-SOURCE | www.artisantg.com...
-
Page 44: Configuring The Vm700T Video Measurement Set
The Configure button brings up a display (shown in Figure 2- -3) that provides access to utilities that allow you to edit files that control many aspects of the VM700T Video Measurement Set operating environment and information on the firmware installed in your instrument. This section describes the use of these utilities. -
Page 45: Figure 2- 3: Typical Main Configure Menu
This soft key only appears if your measurement set has Option 1S installed. 2- 8 VM700T Option 01 (NTSC) & Option 11 (PAL) User Manual Artisan Technology Group - Quality Instrumentation ... Guaranteed | (888) 88-SOURCE | www.artisantg.com... -
Page 46: Configure Operations
The exact number of directories and their names depends on the installed options. All the directories are given in alphabetical order from left to right, top to bottom. Each of the VM700T option manuals provides details on configuring the files for the options. -
Page 47: Figure 2- 4: Typical Configure Directory
When editing a limits file for the Measure mode named “User’s_Measure~Limits_File,” the path line would read: Editing User’s_Measure~Limits_File 2- 10 VM700T Option 01 (NTSC) & Option 11 (PAL) User Manual Artisan Technology Group - Quality Instrumentation ... Guaranteed | (888) 88-SOURCE | www.artisantg.com... - Page 48 The ~ (tilde) in a directory or file name represents a carriage return, and is used to join the first and second lines of directory, function key, or file names. VM700T Video Measurement Sets equipped with both Option 01, NTSC, and Option 11, PAL (dual-standard) provide a soft key labeled Switch NTSC/PAL in many of the Configure mode menus.
-
Page 49: Figure 2- 5: Creating A New File
Set1 and Set2 are unlocked by touching the same key again or touching the unselected key of the pair. Shift is unlocked by touching Shift again. 2- 12 VM700T Option 01 (NTSC) & Option 11 (PAL) User Manual Artisan Technology Group - Quality Instrumentation ... Guaranteed | (888) 88-SOURCE | www.artisantg.com... -
Page 50: Figure 2- 6: File Naming Keyboard
3. After typing the name, touch Done to complete the creation of the file, or press Cancel to quit the process and not create the file. 2- 13 VM700T Option 01 (NTSC) & Option 11 (PAL) User Manual Artisan Technology Group - Quality Instrumentation ... Guaranteed | (888) 88-SOURCE | www.artisantg.com... -
Page 51: Editing Files
Refer to Diagnostics Selection (File) on page 2- -27 for an example of this type of editing. 2- 14 VM700T Option 01 (NTSC) & Option 11 (PAL) User Manual Artisan Technology Group - Quality Instrumentation ... Guaranteed | (888) 88-SOURCE | www.artisantg.com... - Page 52 Selected (on the left side of the display) or Not Selected (on the right side of the display). 2- 15 VM700T Option 01 (NTSC) & Option 11 (PAL) User Manual Artisan Technology Group - Quality Instrumentation ... Guaranteed | (888) 88-SOURCE | www.artisantg.com...
-
Page 53: Printing Files
3. Touch the icon representing the file to view it on the display. The file cannot be edited, but can be scrolled through using the control knob. 2- 16 VM700T Option 01 (NTSC) & Option 11 (PAL) User Manual Artisan Technology Group - Quality Instrumentation ... Guaranteed | (888) 88-SOURCE | www.artisantg.com... -
Page 54: Setting The Internal Clock
Time display and return to the mode previously in effect. Press Configure again to return to the top Configure display. 2- 17 VM700T Option 01 (NTSC) & Option 11 (PAL) User Manual Artisan Technology Group - Quality Instrumentation ... Guaranteed | (888) 88-SOURCE | www.artisantg.com... -
Page 55: Directory Structure
Configuring the VM700T Video Measurement Set Directory Structure VM700T Video Measurement Set operations are controlled by means of a hierarchy of files and directories that starts with the Video Source file in the /nvramØ/ConfigFiles directory, and extends to other files in sub-directories of /nvramØ/ConfigFiles. - Page 56 Configuring the VM700T Video Measurement Set When the VM700T Video Measurement Set is shipped, all three channel parameters and the Timed Events parameter are set to System Default. For a dual-standard measurement set (those equipped with both Option 01, NTSC, and Option 11, PAL), the Source_Selection~Video file is a little different.
-
Page 57: Source_Selection~Video (File)
Selected Measurements File (Directory) Figure 2- 8: How the VM700T Video Measurement Set gets parameter information 2- 20 VM700T Option 01 (NTSC) & Option 11 (PAL) User Manual Artisan Technology Group - Quality Instrumentation ... Guaranteed | (888) 88-SOURCE | www.artisantg.com... -
Page 58: Video_Source~Files (Directory)
Video Source file. 2- 21 VM700T Option 01 (NTSC) & Option 11 (PAL) User Manual Artisan Technology Group - Quality Instrumentation ... Guaranteed | (888) 88-SOURCE | www.artisantg.com... -
Page 59: Auto_Limit Files (Directory)
2. Touch the limit you wish to change or remove. 2- 22 VM700T Option 01 (NTSC) & Option 11 (PAL) User Manual Artisan Technology Group - Quality Instrumentation ... Guaranteed | (888) 88-SOURCE | www.artisantg.com... - Page 60 NOTE. Option 48, the GPIB Interface option, adds a parallel GPIB port. Any or all of the logical ports may be set to GPIB when the option is installed. Port and Format Assignments. The standard VM700T Video Measurement Set has the following three physical ports:...
- Page 61 Control port. H Remote Control: the port used to connect the measurement set to a modem, terminal, or PC for remote operation. See the VM700T RS-232 Interface Programmer Manual for details on remote operation. Refer to the VM700T GPIB Interface Programmer Manual when using the GPIB port for remote control.
-
Page 62: Communication Setup (File)
4. Press the Update & Exit soft key to save the changes (see Figure 2- -10). 2- 25 VM700T Option 01 (NTSC) & Option 11 (PAL) User Manual Artisan Technology Group - Quality Instrumentation ... Guaranteed | (888) 88-SOURCE | www.artisantg.com... -
Page 63: Figure 2- 10: Communication Setup File After Edit Is Accepted
CTS/RTS (hardware handshaking to control data flow) or NONE (no flow control). H Character Size: can be set to 7 or 8 bits. 2- 26 VM700T Option 01 (NTSC) & Option 11 (PAL) User Manual Artisan Technology Group - Quality Instrumentation ... Guaranteed | (888) 88-SOURCE | www.artisantg.com... -
Page 64: Diagnostic Errors (File)
(above the word Selected). 2- 27 VM700T Option 01 (NTSC) & Option 11 (PAL) User Manual Artisan Technology Group - Quality Instrumentation ... Guaranteed | (888) 88-SOURCE | www.artisantg.com... -
Page 65: Measure_Limit Files (Directory)
(Directory) functions: H they place graphic limit markers on the screen in measurements (where applicable) 2- 28 VM700T Option 01 (NTSC) & Option 11 (PAL) User Manual Artisan Technology Group - Quality Instrumentation ... Guaranteed | (888) 88-SOURCE | www.artisantg.com... -
Page 66: Measurement Locations (Directory)
H when you exit Auto mode (assuming that Auto mode has had time to go through one complete cycle of selected measurements) 2- 29 VM700T Option 01 (NTSC) & Option 11 (PAL) User Manual Artisan Technology Group - Quality Instrumentation ... Guaranteed | (888) 88-SOURCE | www.artisantg.com... - Page 67 DIP switch) to Open. When power is turned on 2- 30 VM700T Option 01 (NTSC) & Option 11 (PAL) User Manual Artisan Technology Group - Quality Instrumentation ... Guaranteed | (888) 88-SOURCE | www.artisantg.com...
-
Page 68: Password (File)
Exit, Rename, Delete, or Create a directory or file (that is, every time you change the contents of nonvolatile memory). 2- 31 VM700T Option 01 (NTSC) & Option 11 (PAL) User Manual Artisan Technology Group - Quality Instrumentation ... Guaranteed | (888) 88-SOURCE | www.artisantg.com... -
Page 69: Selected Measurements (Directory)
Setup file must be set to Port 0, Port 1, or Parallel (not None) for reports to be generated. 2- 32 VM700T Option 01 (NTSC) & Option 11 (PAL) User Manual Artisan Technology Group - Quality Instrumentation ... Guaranteed | (888) 88-SOURCE | www.artisantg.com... - Page 70 2- 33 VM700T Option 01 (NTSC) & Option 11 (PAL) User Manual Artisan Technology Group - Quality Instrumentation ... Guaranteed | (888) 88-SOURCE | www.artisantg.com...
- Page 71 Stopping the disintegration part way through has no effect on the file. 2- 34 VM700T Option 01 (NTSC) & Option 11 (PAL) User Manual Artisan Technology Group - Quality Instrumentation ... Guaranteed | (888) 88-SOURCE | www.artisantg.com...
- Page 72 6. Press Done when you have finished entering the name. From this point, you can define a timed function. The steps for defining a timed function are found in the VM700T RS-232 Interface Programmer Manual. Basically, creating a function is a learn mode operation that records into the named file, all the front-panel button presses, soft key presses, and delay times used to create the function.
- Page 73 The pulse following the start pulse is the least significant bit and the pulse preceding the stop pulse is the most significant bit. 2- 36 VM700T Option 01 (NTSC) & Option 11 (PAL) User Manual Artisan Technology Group - Quality Instrumentation ... Guaranteed | (888) 88-SOURCE | www.artisantg.com...
-
Page 74: Reference
Reference Artisan Technology Group - Quality Instrumentation ... Guaranteed | (888) 88-SOURCE | www.artisantg.com... - Page 75 Artisan Technology Group - Quality Instrumentation ... Guaranteed | (888) 88-SOURCE | www.artisantg.com...
-
Page 76: Waveform Mode
Waveform Mode This section describes the capabilities of the VM700T Video Measurement Set as a waveform monitor and how the user interface controls its operation. It is divided into three topics: H Display features discusses basic characteristics of a Waveform mode display. -
Page 77: Line Identification
Cursors mode, and can be used to get a quick measure of tilt on a bar top. 3- 2 VM700T Option 01 (NTSC) & Option 11 (PAL) User Manual Artisan Technology Group - Quality Instrumentation ... Guaranteed | (888) 88-SOURCE | www.artisantg.com... -
Page 78: Control Knob
8 V full scale. The calibrated graticule scale tracks the waveform as it expands, compresses, or moves, both vertically and horizontally. 3- 3 VM700T Option 01 (NTSC) & Option 11 (PAL) User Manual Artisan Technology Group - Quality Instrumentation ... Guaranteed | (888) 88-SOURCE | www.artisantg.com... -
Page 79: Freeze
The vertical amplitude reference marker positions are reset if the cursor is unlocked. 3- 4 VM700T Option 01 (NTSC) & Option 11 (PAL) User Manual Artisan Technology Group - Quality Instrumentation ... Guaranteed | (888) 88-SOURCE | www.artisantg.com... -
Page 80: Cursors
The amplitude reference markers associated with the cursors are not displayed when both cursors are locked to the waveform. 3- 5 VM700T Option 01 (NTSC) & Option 11 (PAL) User Manual Artisan Technology Group - Quality Instrumentation ... Guaranteed | (888) 88-SOURCE | www.artisantg.com... - Page 81 Changing the signal source also switches the sync to the new signal source. 3- 6 VM700T Option 01 (NTSC) & Option 11 (PAL) User Manual Artisan Technology Group - Quality Instrumentation ... Guaranteed | (888) 88-SOURCE | www.artisantg.com...
- Page 82 NOTE. Calibration is suppressed in Screen Memory mode. 3- 7 VM700T Option 01 (NTSC) & Option 11 (PAL) User Manual Artisan Technology Group - Quality Instrumentation ... Guaranteed | (888) 88-SOURCE | www.artisantg.com...
- Page 83 Clamp Fast: selects fast clamp speed. This removes DC offset, hum, and bounce effects from the signal. DC Coupling: selects DC coupling (no clamping). 3- 8 VM700T Option 01 (NTSC) & Option 11 (PAL) User Manual Artisan Technology Group - Quality Instrumentation ... Guaranteed | (888) 88-SOURCE | www.artisantg.com...
-
Page 84: Select Line
Move/Expand function of the control knob, but it does not disable the Display and Graticule Intensity control functions. 3- 9 VM700T Option 01 (NTSC) & Option 11 (PAL) User Manual Artisan Technology Group - Quality Instrumentation ... Guaranteed | (888) 88-SOURCE | www.artisantg.com... -
Page 85: System Line
The amplitude reference markers are cleared and reset when the Reset Cursors, Center Left, or Center Right soft keys are selected. 3- 10 VM700T Option 01 (NTSC) & Option 11 (PAL) User Manual Artisan Technology Group - Quality Instrumentation ... Guaranteed | (888) 88-SOURCE | www.artisantg.com... -
Page 86: Cursor Status Lines
You can also select Freeze to stabilize the signal. 3- 11 VM700T Option 01 (NTSC) & Option 11 (PAL) User Manual Artisan Technology Group - Quality Instrumentation ... Guaranteed | (888) 88-SOURCE | www.artisantg.com... - Page 87 Note that touching either the Center Left or Center Right soft key will move the corresponding cursor to the center of the display. 3- 12 VM700T Option 01 (NTSC) & Option 11 (PAL) User Manual Artisan Technology Group - Quality Instrumentation ... Guaranteed | (888) 88-SOURCE | www.artisantg.com...
-
Page 88: Figure 3- 3: Left Cursor Locked To 90% Point Of Sync Edge, Right Cursor To 10% Point
Cursors can measure up to one full frame before they wrap around. 3- 13 VM700T Option 01 (NTSC) & Option 11 (PAL) User Manual Artisan Technology Group - Quality Instrumentation ... Guaranteed | (888) 88-SOURCE | www.artisantg.com... -
Page 89: Figure 3- 4: Color Burst Aligned With Horizontal Reference Line
Cursor readout Figure 3- 4: Color burst aligned with horizontal reference line 3- 14 VM700T Option 01 (NTSC) & Option 11 (PAL) User Manual Artisan Technology Group - Quality Instrumentation ... Guaranteed | (888) 88-SOURCE | www.artisantg.com... -
Page 90: Figure 3- 5: Cursors Mode Indicating Color Burst Amplitude
The Vertical delta readout now indicates the absolute amplitude of the waveform. Cursor readout Figure 3- 5: Cursors mode indicating color burst amplitude 3- 15 VM700T Option 01 (NTSC) & Option 11 (PAL) User Manual Artisan Technology Group - Quality Instrumentation ... Guaranteed | (888) 88-SOURCE | www.artisantg.com... - Page 91 Waveform Mode 3- 16 VM700T Option 01 (NTSC) & Option 11 (PAL) User Manual Artisan Technology Group - Quality Instrumentation ... Guaranteed | (888) 88-SOURCE | www.artisantg.com...
-
Page 92: Vector Mode
Vector Mode This section provides a detailed description of the capabilities of Vector mode and tells how to operate the VM700T as a vectorscope. Display Vector mode provides a conventional vector display. Because the display is digitally derived, a single line is displayed with full brightness. The Vector mode has an electronic graticule accompanied by digital readouts of the line selection mode (System Line or Vector Line—refer to page 3- -20), displayed field and line... -
Page 93: Display
Burst in Source Ch. A Ch. B Ch. C Figure 3- 7: Vector mode menu 3- 18 VM700T Option 01 (NTSC) & Option 11 (PAL) User Manual Artisan Technology Group - Quality Instrumentation ... Guaranteed | (888) 88-SOURCE | www.artisantg.com... - Page 94 75% Bar Cal: Rotating the knob in Vector mode changes the gain or phase angle, which can leave the VM700T uncalibrated for angle or amplitude. Touching this soft key returns Vector mode to a default calibrated state, with phase angle set to 0.0 degrees, gain to 1.000 (0.0 dB).
-
Page 95: Select Line
To change the line number, select and hold the soft key to be changed, turn the knob until the new line number is found, and release the soft key. 3- 20 VM700T Option 01 (NTSC) & Option 11 (PAL) User Manual Artisan Technology Group - Quality Instrumentation ... Guaranteed | (888) 88-SOURCE | www.artisantg.com... -
Page 96: Measure Mode
Measure Mode Pressing the Measure button on the front panel puts the VM700T into Measure mode. In this mode, the VM700T provides interactive control of measurement parameters, as well as graphical display and digital readouts of measurement results. Measure Mode Menu Operation... -
Page 97: Video Option Measurement Menu Operation
3- 22 VM700T Option 01 (NTSC) & Option 11 (PAL) User Manual Artisan Technology Group - Quality Instrumentation ... Guaranteed | (888) 88-SOURCE | www.artisantg.com... -
Page 98: Picture Mode
H Size: <picture size>. Touch this soft key to toggle the size of the picture display between Large and Small. 3- 23 VM700T Option 01 (NTSC) & Option 11 (PAL) User Manual Artisan Technology Group - Quality Instrumentation ... Guaranteed | (888) 88-SOURCE | www.artisantg.com... - Page 99 H Readouts: <state>. Touch this soft key to toggle the readout display between On and Off. 3- 24 VM700T Option 01 (NTSC) & Option 11 (PAL) User Manual Artisan Technology Group - Quality Instrumentation ... Guaranteed | (888) 88-SOURCE | www.artisantg.com...
-
Page 100: Auto Mode
The Auto mode measurements are not affected by the sync and clamping parameters set in Waveform mode for the manual measurements. Measurement In Auto mode, the VM700T lists measurement names on the left-hand side of the display. Each name is followed by the measurement result, and a notation of the Identification measurement’s reference where applicable. -
Page 101: Comments Column
Violated Limits Logging The VM700T can be set to log (print) limit violations. A one-line report from the Auto mode display is logged any time a measurement result crosses the Alarm Limit boundary a specified consecutive number of times, both when the measurement goes outside the limit or comes back within the limit. -
Page 102: Setting Alarm Limits
2. Touch the limit you wish to change or remove. 3- 27 VM700T Option 01 (NTSC) & Option 11 (PAL) User Manual Artisan Technology Group - Quality Instrumentation ... Guaranteed | (888) 88-SOURCE | www.artisantg.com... -
Page 103: Defining Measurement Locations
Use the Create File soft key to create a new file you can customize. 3- 28 VM700T Option 01 (NTSC) & Option 11 (PAL) User Manual Artisan Technology Group - Quality Instrumentation ... Guaranteed | (888) 88-SOURCE | www.artisantg.com... -
Page 104: Setting Event Times
The Report Time is entered in 24-hour format. Any file in the Selected Measure- ments directory may be specified at any Report Time. At any Event Time, regardless of what mode it is in, the VM700T screen will blank and display a message indicating that a Timed Event is occurring. You will see the LED in a SOURCE (channel) button light when measurements are being made for a report on that channel. - Page 105 Auto Mode 3- 30 VM700T Option 01 (NTSC) & Option 11 (PAL) User Manual Artisan Technology Group - Quality Instrumentation ... Guaranteed | (888) 88-SOURCE | www.artisantg.com...
-
Page 106: Appendices
Appendices Artisan Technology Group - Quality Instrumentation ... Guaranteed | (888) 88-SOURCE | www.artisantg.com... - Page 107 Artisan Technology Group - Quality Instrumentation ... Guaranteed | (888) 88-SOURCE | www.artisantg.com...
-
Page 108: Appendix A: Specification
1. Timing with respect to sync 2. Clamp pulse width 3. Clamp reference level 4. Clamp time constant A- 1 VM700T Option 01 (NTSC) & Option 11 (PAL) User Manual Artisan Technology Group - Quality Instrumentation ... Guaranteed | (888) 88-SOURCE | www.artisantg.com... -
Page 109: Table A- 2: Digitizer
- - 8 dB with respect to 286 mV nominal sync Composite sync amplitude Maximum 8 V peak-to-peak Composite sync A- 2 VM700T Option 01 (NTSC) & Option 11 (PAL) User Manual Artisan Technology Group - Quality Instrumentation ... Guaranteed | (888) 88-SOURCE | www.artisantg.com... -
Page 110: Physical Characteristics
6A slow blow High Input Range 3 Amp, 250 V, Time Delay Cooling Method Forced-air circulation A- 3 VM700T Option 01 (NTSC) & Option 11 (PAL) User Manual Artisan Technology Group - Quality Instrumentation ... Guaranteed | (888) 88-SOURCE | www.artisantg.com... -
Page 111: Environmental
C (122 ° Non-operating Up to 95% at or below 60 ° C (140 ° A- 4 VM700T Option 01 (NTSC) & Option 11 (PAL) User Manual Artisan Technology Group - Quality Instrumentation ... Guaranteed | (888) 88-SOURCE | www.artisantg.com... -
Page 112: Table A- 7: Emc Compliance
Peak Inrush Current: 35.5 A @ 230 VAC, 50 Hz. VM700T with Power Line Conditioner accessory used on 230 Vac power mains. A- 5 VM700T Option 01 (NTSC) & Option 11 (PAL) User Manual... -
Page 113: Table A- 8: Safety Standards
Centronics-compatible connector and signals Remote Contact Closure Relay (Alarm) Contacts are not debounced Maximum Current 50 mA A- 6 VM700T Option 01 (NTSC) & Option 11 (PAL) User Manual Artisan Technology Group - Quality Instrumentation ... Guaranteed | (888) 88-SOURCE | www.artisantg.com... -
Page 114: Table A- 11: Optional Power Cords
230 V European and United Kingdom power cord options A1 and A2 also require the VM700T Power Line Conditioner box for operation in EU countries. The power line conditioner prevents harmonic emissions from the VM700T power supply from entering the commercial power mains. -
Page 115: Optional Accessory
161-0066-09 Euro 161-0066-10 U.K. See the VM700T Power Requirements in Table A- 5 for the operating voltage range of the VM700T without the Power Line Conditioner box inline. Use the part numbers listed above to order a new power cord for use with the VM700T Power Line Conditioner box. -
Page 116: Table A- 14: Power Line Conditioner Environmental Characteristics
Tektronix Class 5 Shock Test 16 drops, 4 axes, 30 Grms @ 11mS half-sine wave See the VM700T Environmental Characteristics in Table A- 6 for the operating temperature range of the VM700T operating without the Power Line Conditioner box inline. - Page 117 Appendix A: Specification A- 10 VM700T Option 01 (NTSC) & Option 11 (PAL) User Manual Artisan Technology Group - Quality Instrumentation ... Guaranteed | (888) 88-SOURCE | www.artisantg.com...
-
Page 118: Appendix B: Performance Verification
After the diagnostics complete, the measurement set should initialize in the Waveform mode. Check that all tests pass as they run. If a test fails, refer to the VM700T Video Measurement Set Service Manual for further actions you can take to determine which board or boards may be at fault. -
Page 119: Test Equipment Required
Refer to the Minimum Specification column to determine the key specifications needed to verify the accuracy of the VM700T Video Measurement Set. If you do not have the required test equip- ment, you can return your instrument to a Tektronix service center for the accuracy verification. -
Page 120: System Verification Procedures
5. Move the test signal and select the appropriate channel to repeat the check for channel B and channel C. 6. Disconnect the VAC from the measurement set. B- 3 VM700T Option 01 (NTSC) & Option 11 (PAL) User Manual Artisan Technology Group - Quality Instrumentation ... Guaranteed | (888) 88-SOURCE | www.artisantg.com... -
Page 121: Measure Sinewave
8. Set the leveled sine-wave generator for 5.8 MHz; do not change the output level. B- 4 VM700T Option 01 (NTSC) & Option 11 (PAL) User Manual Artisan Technology Group - Quality Instrumentation ... Guaranteed | (888) 88-SOURCE | www.artisantg.com... - Page 122 24. Check that the amplitude is within ±0.5% of the reference level stored in step 4. 25. Repeats steps 1 through 7 for channel B and channel C. B- 5 VM700T Option 01 (NTSC) & Option 11 (PAL) User Manual Artisan Technology Group - Quality Instrumentation ... Guaranteed | (888) 88-SOURCE | www.artisantg.com...
- Page 123 If either channel B or channel C does not pass but channel A does, the Analog input board may need replacement. Check with your nearest Tektronix represen- tative or factory service for assistance and board replacement information. Measure the Burst This procedure checks the calibration of the internal oscillator using a signal source of known frequency.
- Page 124 7. Check that the burst frequency measurement is 0 ± 10 Hz using the internal frequency reference. B- 7 VM700T Option 01 (NTSC) & Option 11 (PAL) User Manual Artisan Technology Group - Quality Instrumentation ... Guaranteed | (888) 88-SOURCE | www.artisantg.com...
- Page 125 Appendix B: Performance Verification B- 8 VM700T Option 01 (NTSC) & Option 11 (PAL) User Manual Artisan Technology Group - Quality Instrumentation ... Guaranteed | (888) 88-SOURCE | www.artisantg.com...
-
Page 126: Appendix C: Adding Options
Ordering an Option Upgrade First you must locate the current option authorization key for your VM700T Video Measurement Set. If your set is not running, turn it on and wait for the system initialization to complete. -
Page 127: Activating The New Options
Appendix C: Adding Options 3. Contact your local Tektronix representative to place your order for the new option. You will be asked for the option authorization key of your measure- ment set as part of the order process. Tektronix Identification #: xxxxxxxx... - Page 128 Appendix C: Adding Options NOTE. As a precaution against the loss of files, you should back up the file system of the measurement set using the Tektronix VMBKUP software accessory. It is not a requirement to do this, only a precaution.
-
Page 129: Figure C- 3: Error Message For Invalid Option Key
This might occur if you have Option Key numbers from previous firmware upgrades. When Continue is pressed, the VM700T Video Measurement Set reconfigures its firmware and files structure to the new option list. Some internal files will have new lines added where needed for the new options. - Page 130 Index Artisan Technology Group - Quality Instrumentation ... Guaranteed | (888) 88-SOURCE | www.artisantg.com...
- Page 131 Artisan Technology Group - Quality Instrumentation ... Guaranteed | (888) 88-SOURCE | www.artisantg.com...
- Page 132 Lock Left, 3- - 11 Baud Rate, 2- - 26 Lock Right, 3- - 11 Index- 1 VM700T Option 01 (NTSC) & Option 11 (PAL) User Manual Artisan Technology Group - Quality Instrumentation ... Guaranteed | (888) 88-SOURCE | www.artisantg.com...
- Page 133 2- - 17 Field Toggle, 3- - 9 inverted source, 2- - 3 Index- 2 VM700T Option 01 (NTSC) & Option 11 (PAL) User Manual Artisan Technology Group - Quality Instrumentation ... Guaranteed | (888) 88-SOURCE | www.artisantg.com...
- Page 134 A1 and A1 power cords, 1- - 4 Menu button, 2- - 3 Index- 3 VM700T Option 01 (NTSC) & Option 11 (PAL) User Manual Artisan Technology Group - Quality Instrumentation ... Guaranteed | (888) 88-SOURCE | www.artisantg.com...
- Page 135 Screen Memory, 3- - 7 Select Line, 2- - 4, 3- - 1, 3- - 9 Index- 4 VM700T Option 01 (NTSC) & Option 11 (PAL) User Manual Artisan Technology Group - Quality Instrumentation ... Guaranteed | (888) 88-SOURCE | www.artisantg.com...
- Page 136 Find Colorbars, 3- - 20 Menu, 3- - 18 zero carrier pulse, 3- - 28 Noise, 3- - 19 Index- 5 VM700T Option 01 (NTSC) & Option 11 (PAL) User Manual Artisan Technology Group - Quality Instrumentation ... Guaranteed | (888) 88-SOURCE | www.artisantg.com...
- Page 137 Index Index- 6 VM700T Option 01 (NTSC) & Option 11 (PAL) User Manual Artisan Technology Group - Quality Instrumentation ... Guaranteed | (888) 88-SOURCE | www.artisantg.com...
- Page 138 Artisan Technology Group is your source for quality new and certified-used/pre-owned equipment SERVICE CENTER REPAIRS WE BUY USED EQUIPMENT • FAST SHIPPING AND DELIVERY Experienced engineers and technicians on staff Sell your excess, underutilized, and idle used equipment at our full-service, in-house repair center We also offer credit for buy-backs and trade-ins •...
Need help?
Do you have a question about the VM700T and is the answer not in the manual?
Questions and answers