Table of Contents
Advertisement
Quick Links
Advertisement
Table of Contents

Related Manuals for Eaton 70160


Summary of Contents for Eaton 70160
-
Page 2: Table Of Contents
Start-up Procedure ....................18 Introduction This manual provides service information for Eaton Models 70160 variable displacement piston pumps. Step by step instructions for the complete disassembly, inspection, and reassembly of the pump are given. The following recommendations should be followed to insure successful repairs. -
Page 3: Identification
Single Pump - Product Number: A - Product Number Description 7 0 1 6 0 - R A A - 02 70160 = Single Piston Pump 78162 = Single Piston Pump with Gear Pump 78161 = Tandem Piston Pumps 78163 = Tandem Piston Pumps with Gear Pump... -
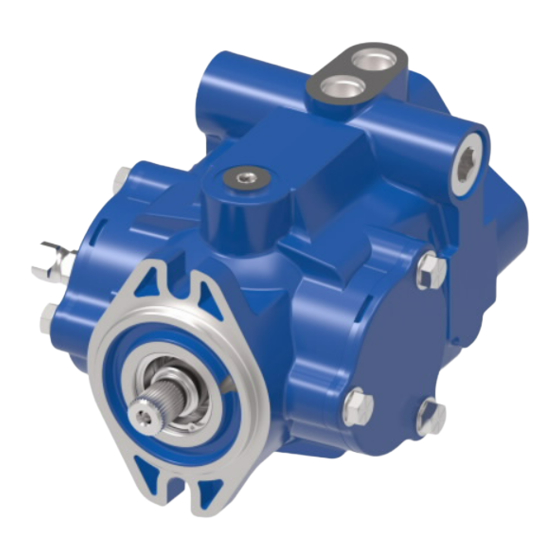
Page 4: Parts Drawing
Model 70160 Parts Drawing Pump drawn below is typical of a righthand rotation pump. Press Fit Port (D1) 50-1 Press Fit into Cover plate Press Fit Press Fit 51-1 Shaft assembly for single pump or front pump Port of tandem. - Page 5 Model 70160 Parts 55-1 Drawing 55-2 49-1 K2-4 55-3 55-4 55-5 K2-3 K1-1 19-1 (K2-2) K2-3 K2-2 (K2-1) 19-1 K4-3 (K3-3) K4-2 (K4-4) (K4-1) 34-1 (K3-2) (K3-1) 55-1 55-2 49-1 55-3 55-4 55-5 19-1 19-1...
-
Page 6: Parts List
Model 70160 Parts List Item Qty. Description Drive Shaft Endcover Assembly Housing Assembly Rotating Kit Assembly Swashplate Washer Retaining Ring Retaining Ring Thrust Bearing Bearing Race + 11 Shaft Seal, Drive Viton Shaft Seal, Drive Spacer + 12 Housing Gasket... - Page 7 Model 70160 Parts List Item Qty. Description Valve Plate Righthand (CW) Rotation Lefthand (CCW) Rotation Plug Assembly 49-1 Plug Assembly + 50-1 O-ring, 1.98 mm Dia. x 11.89 mm ID. [.078 in. Dia. x .468 in. ID.] Plug Assembly + 51-1 O-ring, 1.98 mm Dia.
-
Page 8: Repair Information
Figure 7 Use a 1-1/8 in. socket or end wrench to remove the two high Thoroughly clean the Eaton Model 70160 or 78162 variable pressure relief valves from the displacement pump before any pumps endcover assembly (see repairs are attempted. - Page 9 Model 70160 Repair Information - Disassembly 21 Remove the valve plate from the piston block assembly. 13 When the needle bearing Numbered End Flange Note: This valve plate may have stuck to the endcover assembly is replaced, the assembly that was previously removed.
- Page 10 Model 70160 Repair Information - Disassembly 28 With the retaining ring Figure 25 Figure 31 removed, use a small press to press the shaft seal and input shaft assembly from the housing assembly. Figure 32 29 With the input shaft assembly removed, disassemble the pump housing.
-
Page 11: Reassembly
Model 70160 Repair Information - Reassembly Reassembly ring or shims (see Figure 40). Before reassembling the pump, replace all worn and Lubricate and install the o-ring damaged parts, assemblies, seals and o-rings. Lubricate the seal into counter-bore of housing seals and o-rings with petroleum jelly to help retain them (see Figure 41). - Page 12 Install the cover plate or gear pump and two cap plate with the dowel pin in the screws. Torque cap screws to 36,6 to 40 Nm [27 to 31 lbf•ft]. endcover (see Figure 51). The Model 70160 or 78162 variable displacement pump is now ready for test and reinstallation.
-
Page 13: Fault - Logic Troubleshooting
Model 70160 Fault - Logic Troubleshooting Explanatory This fault - logic troubleshooting guide is a Diagram diagnostic aid in locating transmission problems. Symptom: Match the transmission symptoms with the problem Action statements and follow the action steps shown in the Step box diagrams. - Page 14 Model 70160 Fault - Logic Troubleshooting Symptom: Neutral Difficult or Impossible to Find Inspect Inspect External Control Servo Control Linkage (If used) Defective Defective Repair Repair Replace Replace Symptom: System Operating Hot Inspect Heat Check Inspect Check Exchanger Oil Level in...
- Page 15 Model 70160 Fault - Logic Troubleshooting Symptom: Operates in One Direction Only Inspect Inspect Inspect External Control Servo Control System Relief Linkage (If used) Valves Defective Defective Defective Repair Repair Repair Replace Replace Replace Symptom: System Response Sluggish Check Inspect...
- Page 16 Model 70160 Fault - Logic Troubleshooting Symptom: System Will Not Operate In Either Direction Inspect Pump Check Check External Check Bypass Valve Oil Level in Control Charge Reservoir Linkage (If used) Pressure Below Level Defective Defective Fill to Repair Repair...
- Page 17 * System/Charge Relief Valve Pressure Settings for Eaton’s c. valve held off seat Variable Displacement Controlled Piston Pumps d. damaged valve seat Inlet Vacuum 6 inHg max.
-
Page 18: Start-Up Procedure
3 Fill the reservoir with an approved oil that has been filtered Frequent filter changes are recommended for the first two through a 10 micron filter. Refer to Eaton Hydraulics changes after placing the machine back into operation. Change Technical Data Sheet number 3-401 titled Hydraulic Fluid the first filter in 3-5 hours and the second in approximately 50 Recommendations. - Page 19 Model 70160...
Need help?
Do you have a question about the 70160 and is the answer not in the manual?
Questions and answers