Advertisement
Quick Links
Advertisement

Subscribe to Our Youtube Channel
Related Manuals for 3DHISTECH P1000


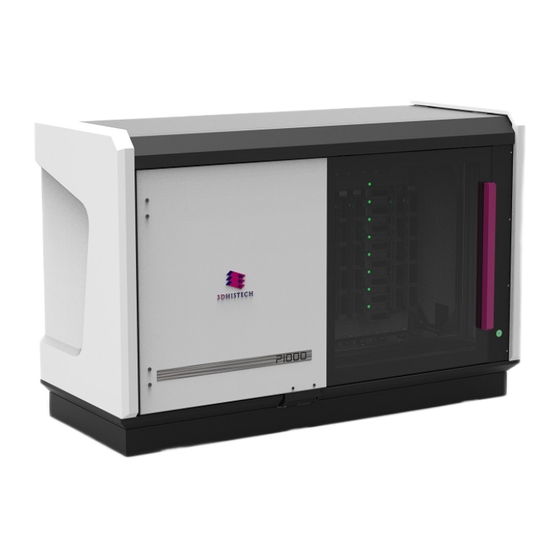
Summary of Contents for 3DHISTECH P1000
- Page 1 P1000 SERVICE SOFTWARE MANUAL ERVICE UIDE JANUARY 13, 2020 3DHISTECH [Cég címe]...
- Page 2 12/042,050; US 77/636,144 and 007502032. Third-party disclaimer The above-mentioned granted patents, granted utility model, 3DHISTECH Ltd. is not liable for damage of whatever nature registered trademarks, pending international and national patent (including, but not limited to, general or specific damage, indirect...
- Page 3 P1000 SERVICE SOFTWARE MANUAL DISCLAIMER Further information For the latest information on 3DHISTECH products and services, please visit our website at the following URL: http://www.3dhistech.com. Company address 3 Öv Street, 1141 Budapest – HUNGARY SERVICE GUIDE...
- Page 4 P1000 SERVICE SOFTWARE MANUAL FONT TYPES AND SYMBOLS [RB1] megjegyzést írt: A Terms and Abbreviation Font Types and Symbols egyelőre teljesen irreleváns fejezet, ezért kivettem. Ha úgy döntünk, hogy szükség van rá és lesz hozzá releváns tartalom, természetesen visszateszem. Example Words or characters that appear on the screen.
-
Page 5: Starting The Service Software
P1000 SERVICE SOFTWARE MANUAL 1. STARTING THE SERVICE SOFTWARE 1. Starting the Service Software 5. Start the .exe file from the folder below: 1. Find the MicroscopeConfiguration.xml file in the folder below: C:\\Program Files\3DHISTECH\SlideScanner\MicroscopeService.exe C:\\ProgramData\3DHISTECH\SideScanner\ 6. Enter the service password 'seristen'. - Page 6 P1000 SERVICE SOFTWARE MANUAL 2. DEFAULT DIRECTIONS OF THE (ROBOTIC) ARM 2. Default Directions of the (Robotic) Arm 1 (R IGURE OBOTIC SERVICE GUIDE...
- Page 7 P1000 SERVICE SOFTWARE MANUAL 2. DEFAULT DIRECTIONS OF THE (ROBOTIC) ARM [FF2] megjegyzést írt: Hiányoznak az irány jelölő nyilak SERVICE GUIDE...
-
Page 8: Main User Interface
P1000 SERVICE SOFTWARE MANUAL 3. MAIN USER INTERFACE 3. Main User Interface Type of current scanner, serial number List firmware of current Save/cancel and CAN bus display scanner settings Enter data window Create new control profile IGURE NTERFACE SERVICE GUIDE... - Page 9 4. USER INTERFACES AND FUNCTIONALITIES OF MOTOR/COMPONENT CONTROL P1000 SERVICE SOFTWARE MANUAL PANELS [FF3] megjegyzést írt: Home fülön a tördelés nem az 4. User Interfaces and Functionalities of Motor/Component Control Panels igazi a 3 pontnál Name of Stepping unit, the distance the motor covers by...
- Page 10 4. USER INTERFACES AND FUNCTIONALITIES OF MOTOR/COMPONENT CONTROL P1000 SERVICE SOFTWARE MANUAL PANELS Resolution slide X, Y, Z navigation of the Arm Current position after navigation Go to position defined in X, Y, Z fields Mark double or single-wide slides...
- Page 11 The components can be navigated using the keyboard, too. Some functionalities have their related buttons. Using a keyboard is useful when the operator must physically approach P1000 as much as software operation is not adequate. It is recommended to use a wireless keyboard for such operations.
- Page 12 P1000 SERVICE SOFTWARE MANUAL 5. COMPONENTS PANE [RT5] megjegyzést írt: Nekem elforgatva jelenik meg. 5. Components Pane SERVICE GUIDE...
- Page 13 P1000 SERVICE SOFTWARE MANUAL 6. SENSORS 6. Sensors 1. When clicking the Initialization button, the software starts to communicate with all sensors. If all sensors reply, initialization is successful. Low level setup Validation/Testing Initialization Save/cancel settings Sensors available for testing...
- Page 14 P1000 SERVICE SOFTWARE MANUAL 6. SENSORS 2. After initialization, click the Validation/Testing button. As Turn on/off sensors does not work currently, activate sensors according to the description below. 3. After validation, click the Step motors menu, and then, the Turn on/off sensors button in the Validation/Sensors menu activates. As a result, the sensors can be controlled manually.
- Page 15 6. Door button 6.1. The door button can be found in the right-bottom corner of P1000. The door cannot be opened until the Arm goes to Arm Safety position. For validation, select in the drop-down menu and turn on the Turn on/off sensors button. Box zero indicates the state of the door button.
- Page 16 P1000 SERVICE SOFTWARE MANUAL 6. SENSORS 7.2. The test procedure requires an interlock pin. The related box signs when the pin is removed. SERVICE GUIDE...
- Page 17 P1000 SERVICE SOFTWARE MANUAL 6. SENSORS 8. Magazine holder 0,1,2,3,4 8.1. You can test the micro switches of the holder here signing either the presence or the lack of the magazines. The tests can be carried out holding the switches.
- Page 18 P1000 SERVICE SOFTWARE MANUAL 6. SENSORS 8.2. Numbers belonging to each magazine: Double Single Magazine Number Magazine Number Magazine Number 9. Validate the results and save. SERVICE GUIDE...
- Page 19 P1000 SERVICE SOFTWARE MANUAL 7. STEP MOTORS 7. Step motors 1. This chapter describes the operation of step motors and the related encoder with which P1000 is equipped. SERVICE GUIDE...
- Page 20 Do not change its state because the system starts finding the sensor or value in zero position the opposite direction which is false operation and P1000 can be seriously damaged! 3. On the Step motors testing page, you can find the functions as illustrated below.
- Page 21 P1000 SERVICE SOFTWARE MANUAL 7. STEP MOTORS 4. On the Step motors low level setup page, the following functions can be found. List of motors to be tested, Speed setting exclamation mark shows untested state Motor acceleration Start motor with default settings...
- Page 22 5.8. Clicking the Test button, the unit will move +500 steps from the test start position and then -500 steps back. 6. Click the Start motor button to wake P1000 up and click Test motor. If the units are correctly set, a green tick appears in the related boxes. The Validate button only activates if all motors have passed the test.
- Page 23 P1000 SERVICE SOFTWARE MANUAL 8. CAMERAS 8. Cameras Camera selection Turning on illumination (steps 1 red, Photo/video mode Setting time of and 2 blue) exposition SERVICE GUIDE...
- Page 24 P1000 SERVICE SOFTWARE MANUAL 8. CAMERAS 1. After initialization, the Camera selection menu and the tools below are activated. 2. You can select two types of cameras: PointGray and Adimec. The PointGray is part of the Preview unit and the Adimec is part of the Microscope unit.
- Page 25 P1000 SERVICE SOFTWARE MANUAL 8. CAMERAS 4. When using Adimec, no live image is displayed due to a driver fault but the communication process behind still takes place. The test is acceptable with a virtual image displayed by the software.
- Page 26 P1000 SERVICE SOFTWARE MANUAL 9. APERTURE 9. Aperture 1. The aperture is an iris where the amount of light through the microscope can be controlled. It is navigated by a step motor. Click the Initialization button. After initialization, the Speed and the Acceleration slide bars become active on the Aperture low level setup window.
- Page 27 P1000 SERVICE SOFTWARE MANUAL 9. APERTURE 2. In the drop-down menu of Aperture motor, all step motors are displayed (due to a driver fault). Caution! Do not select another motor! 3. Click the Aperture high-level setup button. Define aperture Navigates the motor to the...
- Page 28 P1000 SERVICE SOFTWARE MANUAL 9. APERTURE 4. Creating aperture positions 4.1. Create two aperture positions: Position 1 for the 20x and Position 2 for the 40x objective. (The 20x objective needs less light so collapse the iris. The 40x objective needs more light so open the aperture motor. By default, define the amount of light through the 20x objective in Position 1 and 40x in Position 2.)
- Page 29 P1000 SERVICE SOFTWARE MANUAL 9. APERTURE 4.7. Set position values according to the table below. Always navigate the aperture in positive direction to find positions. (False navigation produces an error in the directions, and you will get false values! Aperture value...
- Page 30 P1000 SERVICE SOFTWARE MANUAL 10. ND FILTER 10. ND Filter 1. Fundamentally, the functionality of the ND filter is identical with the aperture’s. To reduce light for the 20x objective, a filter is moved to the beam of light. In case of the 40x objective, no filter is used. For the adjustment procedure, the Pax-lamp must be removed from the unit.
- Page 31 P1000 SERVICE SOFTWARE MANUAL 10. ND FILTER 3. The high-level setup window is the same as the aperture’s. Create three positions and select position one (filtered position). 4. Click the Slice motor position button to activate the motor control panel. Click the Home button.
- Page 32 P1000 SERVICE SOFTWARE MANUAL 11. OBJECTIVE CHANGER 11. Objective Changer 1. P1000 can be equipped with three types of objectives. These are normally as follows: 40X, 20X, 40X immersion. You can see their positions in the figure below: imm. SERVICE GUIDE...
- Page 33 P1000 SERVICE SOFTWARE MANUAL 11. OBJECTIVE CHANGER 2. The illustration below can help understand the operation. The IKO coaches of the three objectives are mounted on the horizontal mount moving together in X direction. Navigation of the unit in X is only allowed if the objective height is already defined in Z, where the Lifting billet does not collide the Support bar, and the objective is already navigated to this position.
- Page 34 P1000 SERVICE SOFTWARE MANUAL 11. OBJECTIVE CHANGER 3. Initialize the unit! After initialization, the settings on the Objective changer high level setup tab are activated. Objective positions Enabling position Objective immersion type (none, water, oil) Objective Objective magnification class 4. Enable the positions that include objectives and set their features. You do not need to set an objective for each position. Leave the empty positions inactive.
- Page 35 P1000 SERVICE SOFTWARE MANUAL 11. OBJECTIVE CHANGER 7. Find the safety Z position to change the objective safely using the control panel of the motor. Place a flat slide on the top of the related objective mount as illustrated below. Do not place the slide on the retaining ring.
- Page 36 P1000 SERVICE SOFTWARE MANUAL 11. OBJECTIVE CHANGER 8. In Manual test menu, you can navigate the selected objective to the active position. 9. Set Test count to 1 or the desired value and validate the unit. SERVICE GUIDE...
- Page 37 P1000 SERVICE SOFTWARE MANUAL 12. SLIDE LOADER 3D 12. Slide Loader 3D 1. The system defines its operating ranges based on these values. It is recommended to use a wireless keyboard to do these adjustments. For more information, see User Interfaces and Functionalities of Motor/Component Control Panels.
- Page 38 P1000 SERVICE SOFTWARE MANUAL 12. SLIDE LOADER 3D 3. Always start the adjustment of hardware limits by finding the minimum position on the Z-axis. This is important, because the Arm can be in a position (for example, in Z maximum) where it may collide with another device during finding the X or Y minimum.
- Page 39 P1000 SERVICE SOFTWARE MANUAL 12. SLIDE LOADER 3D The position displayed in the related field helps. If the value does not change or its change is lower than the adjusted value, the end pin has been reached. Physical hardware limits IKO coach 6.
- Page 40 P1000 SERVICE SOFTWARE MANUAL 12. SLIDE LOADER 3D 7. Next, find the negative end point on the Y-axis. Navigate the unit 110 ±10µm away from the end pin (hardware limit). Click the Save value button. End pin SERVICE GUIDE...
- Page 41 P1000 SERVICE SOFTWARE MANUAL 12. SLIDE LOADER 3D 8. Find the negative end point on the X-axis, navigate the unit in the negative direction until reaching the end pin. Navigate the unit 110 ±10µm away from the end pin (hardware limit). Click the Save value button.
- Page 42 P1000 SERVICE SOFTWARE MANUAL 12. SLIDE LOADER 3D 9. Find the positive end point on the Y-axis. Navigate the unit 110 ±10µm away from the end pin (hardware limit). Click the Save value button. End pin SERVICE GUIDE...
- Page 43 P1000 SERVICE SOFTWARE MANUAL 12. SLIDE LOADER 3D 10. Find the positive end point on the X-axis. Navigate the unit 110 ±10µm away from the end pin (hardware limit). Click the Save value button. End pin SERVICE GUIDE...
- Page 44 P1000 SERVICE SOFTWARE MANUAL 12. SLIDE LOADER 3D After saving, navigate the unit ̴ 6 0.000µm in the negative direction. It is important because you can see the end pin after this movement. SERVICE GUIDE...
- Page 45 P1000 SERVICE SOFTWARE MANUAL 12. SLIDE LOADER 3D 11. Find the positive Z end position. This pin has a good visibility. Navigate the unit 110 ±10µm away from the end pin (hardware limit). Click the Save value button. IKO coach...
- Page 46 P1000 SERVICE SOFTWARE MANUAL 12. SLIDE LOADER 3D 12. The minimal lengths, which each unit must be able to travel, are pre-defined in micrometer in the software. If the resulted travel length is over the pre-defined range, it normally refers to a service/measurement fault. In case of a fault, the actual row is signed with red under Relative hardware limits.
- Page 47 P1000 SERVICE SOFTWARE MANUAL 12. SLIDE LOADER 3D 13. Safety Z position defines Z position of the Arm during X and Y movement. This field is filled in automatically. Its value is equal with the Z negative end position +500µm. If the difference is less than 500µm, the software signs the error with red color.
- Page 48 P1000 SERVICE SOFTWARE MANUAL 12. SLIDE LOADER 3D Navigate until slightly touching the pin and set 110±10 µm-t distance. You can use a 0,1mm gauge plate for setting. Place the plate between the pin and the rack and touch the plate with the rack. The plate must not tighten between the units...
- Page 49 P1000 SERVICE SOFTWARE MANUAL 12. SLIDE LOADER 3D There are Relative hardware limits of this unit, too. The travel length defined by the settings must be within this interval. If the value is acceptable, the value row turns green. 15. In the below settings of the Gripper, the values to grab and drop slides must be defined.
- Page 50 P1000 SERVICE SOFTWARE MANUAL 12. SLIDE LOADER 3D 16. Click the Gripper single open button. Define this value by setting the two Gripper shoes to 31mm far from each other. Set this value by using a caliper. Caution! Do not tighten but only touch the caliper with the shoes!
- Page 51 P1000 SERVICE SOFTWARE MANUAL 12. SLIDE LOADER 3D 17. From the data above, the software calculates the Gripper single open stage value. Click its button, navigate to the required position by clicking Go to II and click on the side panel to set this value.
- Page 52 P1000 SERVICE SOFTWARE MANUAL 13. STAGE 13. Stage 1. Before use, initialize the unit clicking the Initialize button. Find the end stops as described in the previous chapters. Before starting the adjustments, find the axis zero positions clicking the Home button in this order: Z, Y, X. This way, you can avoid collisions.
- Page 53 P1000 SERVICE SOFTWARE MANUAL 13. STAGE 2. Click the X-axis button in Hardware Limit min menu. Find the negative end position. There is clear visibility of the two end stop pins from the back. First, navigate the unit as close as touching the pin, and then move it away 110 ±10 µm. Click the Home button to set the Stage back to X zero.
- Page 54 P1000 SERVICE SOFTWARE MANUAL 13. STAGE 4. Repeat steps in 13.2 and 13.3 in Y direction, too. Note that the end stop pins in Y are not visible. In this case, the sound of the collision and the changing value in the Pos field help find the end positions. At the end position, both opening arms must have minimal room for maneuver. If any of the arms is in contact, you must place a shim for a proper setting.
- Page 55 P1000 SERVICE SOFTWARE MANUAL 13. STAGE 5.2. To find the negative end position, navigate the unit in negative direction until the motor behaves as described in step 5. Press stop, and move [FF7] megjegyzést írt: Nem miután megállt, hanem minus 200µm in positive direction. This is the negative end position, click on the side panel to set this value.
- Page 56 P1000 SERVICE SOFTWARE MANUAL 14. SLIDE LOADING UNITS 14. Slide Loading Units 1. The setup interface of the slide loading unit is the most complex one in the software. In the middle of the user interface, there is a zoomable image to help you with the setting.
- Page 57 P1000 SERVICE SOFTWARE MANUAL 14. SLIDE LOADING UNITS Here, the system already uses the end stops and does not run the units out of scope (does not collide them to the end stop pin). It determines its working areas that will require fine tuning later. However, there are positions where we can easily cause collision or damage. For example, in Z axis position, the Gripper arm can easily collide with the side of the microscope unit or the magazine compartments.
- Page 58 P1000 SERVICE SOFTWARE MANUAL 14. SLIDE LOADING UNITS 2. Initialize the unit. [FF9] megjegyzést írt: Robotkar becsült helye a kék kerszténl hiányzik Stage unit setup Preview Sensor setup unit setup Magazine position setup Area setup Expected position of the Gripper...
- Page 59 P1000 SERVICE SOFTWARE MANUAL 14. SLIDE LOADING UNITS 3. Click the Area button in the Setup selection menu. 3.1. Center X This coordinate defines where the Arm must be located on the X-axis to safely apply the slide on the Y-axis to take a preview image. The movement of the Arm is illustrated below.
- Page 60 P1000 SERVICE SOFTWARE MANUAL 14. SLIDE LOADING UNITS Open the Gripper on the Slide loader 3D panel (scroll bar) for a double wide slide (see User Interfaces and Functionalities of Motor/Component Control Panels). This is the widest possible state of the unit. Using the keyboard, adjust the distance by moving the Arm to the pre-recording unit until it reaches the Brightfield illumination unit.
- Page 61 P1000 SERVICE SOFTWARE MANUAL 14. SLIDE LOADING UNITS 3.2. A Preview through Y This value defines the position of the Gripper on the Z-axis, where it can safely navigate over the preview unit. On the Y-axis, set the Gripper 1mm over the position of the stop pin which is the highest point of the preview unit. Make the adjustment with a gauge plate.
- Page 62 P1000 SERVICE SOFTWARE MANUAL 14. SLIDE LOADING UNITS SERVICE GUIDE...
- Page 63 P1000 SERVICE SOFTWARE MANUAL 14. SLIDE LOADING UNITS 3.3. Stage slide X To make this adjustment, mark the center of the Stage and the granite slab. The center of the table/Stage is considered the center of the distance between the clamping IKO rails of the two slides. The center of the granite block is considered the center of the distance between the two Stage opener bumpers.
- Page 64 P1000 SERVICE SOFTWARE MANUAL 14. SLIDE LOADING UNITS In the right bar, click the Stage control panel. Move the Stage to a position so that the Stage and the granite slab markings are aligned as illustrated above. Click the Stage slide X button again. Move the Arm to the Z-axis minimum to avoid possible collisions. Move the Arm on into a position so that the longitudinal mark in the center of the slide is aligned with the mark on the Stage and the slab.
- Page 65 P1000 SERVICE SOFTWARE MANUAL 14. SLIDE LOADING UNITS 3.4. Stage slide start Y This is the position where the Gripper does not yet collide with the highest point of the Stage. This part is the tension spring. The bottom of the Gripper must be +1 mm from the spring in Y.
- Page 66 P1000 SERVICE SOFTWARE MANUAL 14. SLIDE LOADING UNITS Once the coordinates have been defined, the icons next to Go to areas will be activated. We can send the Arm to the area defined. Magazine area Preview image area Stage area...
- Page 67 P1000 SERVICE SOFTWARE MANUAL 14. SLIDE LOADING UNITS 4.1. Open the Gripper for a double-wide slide and then manually approach Magazine A1. The magazine must be empty. Push the Gripper in Z- direction so that there is a 1mm distance between the magazine and the shoes, using a gauge plate. This is the Slide approach pos Z coordinate, click on the side panel to set this value.
- Page 68 This coordinate is used by the system at initialization to detect slides after starting up. To adjust this coordinate, we use two P1000 Gripper positioning slides. One slide is placed in the middle magazine of the column to be set and the other one is placed in the Gripper Click the Sensor pos X button.
- Page 69 P1000 SERVICE SOFTWARE MANUAL 14. SLIDE LOADING UNITS 4.4. The Top slide position means the X and Y coordinates of the top slide in the current magazine. The X value is identical with the Sensor pos X value. Prepare five single-wide magazines with slides in the positions 1, 18, 19, 20. In case of a double-wide one, insert slides to positions 1,3,4,5.
- Page 70 P1000 SERVICE SOFTWARE MANUAL 14. SLIDE LOADING UNITS SERVICE GUIDE...
- Page 71 P1000 SERVICE SOFTWARE MANUAL 14. SLIDE LOADING UNITS As soon as the height is set, save the coordinates. After saving, the Slide operations buttons are activated, and the adjusted magazine is marked green. Slide back Remove slide manually Slide out Slide out and back Click the Slide out button.
- Page 72 P1000 SERVICE SOFTWARE MANUAL 14. SLIDE LOADING UNITS Back end pin Front end pin SERVICE GUIDE...
- Page 73 P1000 SERVICE SOFTWARE MANUAL 14. SLIDE LOADING UNITS Here, you can do slide adjustments. If the slide in the magazine is not inserted until resistance and it sticks out too much, its sensor signs and the user must insert the slides correctly. In case of a minor sticking out, there is no sign. To accord the preview image and the microscope image, the position of the slide in the Gripper must be defined precisely.
- Page 74 P1000 SERVICE SOFTWARE MANUAL 14. SLIDE LOADING UNITS 5.2. Preview adjust pos Y This value defines the Y positioning of the slide between the two stop pins. During navigation, the slide must be locked between the two pins: it must be placed to the middle of the pins approximately. Click on the side panel to set this value.
- Page 75 P1000 SERVICE SOFTWARE MANUAL 14. SLIDE LOADING UNITS 5.3. Preview adjust pos Z On the Z-axis, the slide can be placed between the two pins so that it will not stall on them. Place the slide 1mm far from the back-pin setting with a gauge plate.
- Page 76 P1000 SERVICE SOFTWARE MANUAL 14. SLIDE LOADING UNITS 5.5. Back adjust pos Z This value sets the adjustment to the back pin. The slide must touch the stop pin, but it must not move in the Gripper. When set, navigate +2500µm in Z direction.
- Page 77 P1000 SERVICE SOFTWARE MANUAL 14. SLIDE LOADING UNITS 6. Select Stage settings in the Setup selection menu to accord the Slide and the Gripper. Insert the earlier marked double-wide slide to the magazine. Stage positions Arm positions SERVICE GUIDE...
- Page 78 P1000 SERVICE SOFTWARE MANUAL 14. SLIDE LOADING UNITS 6.1. Stage load center pos This position defines where the Stage can house/receive the slide. Navigate the objective to Safety Z position (the Z coordinate earlier set in step 5.3). Align the mark on the Stage with the mark on the granite slab: this defines the X coordinate. Navigate the Stage to -Y end position minus 100µm: this defines the Y coordinate.
- Page 79 P1000 SERVICE SOFTWARE MANUAL 14. SLIDE LOADING UNITS 6.3. Slide load left X This value defines the X coordinate of the Slide’s left-hand position. Mostly, the software calculates this value precisely. Click Slide load left X and click Go to II to navigate the unit to the calculated position. It is correct if the front-left arm collides and opens but the front-right arm avoids the pin.
- Page 80 P1000 SERVICE SOFTWARE MANUAL 14. SLIDE LOADING UNITS Caution! The software version P1000v200, 2.0.0.102326 contains an error! Before clicking Slide to stage area, save your work and exit the software. Find the MicroscopeConfiguration.xml file on the path below: C:\\ProgramData\3DHISTECH\SideScanner\ Manually, insert the StageSlidePosStartZ parameter in subsection <StagePositions> in section <SlideLoadingUnit>. Add here the ZMotor HWLimitMin value (or slighly more) in section <SlideLoader3DDriver>.
- Page 81 P1000 SERVICE SOFTWARE MANUAL 14. SLIDE LOADING UNITS 6.6. Stage slide X Setting this parameter, you can navigate the Arm. In Slide to stage area, select the position of the marked, double-wide slide and send it to the stage area. The Stage must be in fully open position as defined in step 6.5. If not so, open it. The markings of the Stage and the granite slab must be aligned with the bi-sectioning line on the slide in the Arm, this has already been set in step 3.3.
- Page 82 P1000 SERVICE SOFTWARE MANUAL 14. SLIDE LOADING UNITS Note! If the sequence on the setting side is not correct, adjust Slide end pos Y first and Slide end pos Z afterwards! 6.8. Slide end pos Y In this position, the slide must lie completely flat on the Stage with no tension. Gradually, navigate the Arm in Y. When you reach the correct position, click on the side panel to set this value.
- Page 83 P1000 SERVICE SOFTWARE MANUAL 14. SLIDE LOADING UNITS 6.9. Slide end pos Z This value is calculated automatically from the Start pos Z value. Click the Go to II button, to insert the slide under the support lath. Click on the side panel to set this value. Navigate the unit -1000µm-t in Z direction. Click Slide back in the Slide operations menu.
- Page 84 P1000 SERVICE SOFTWARE MANUAL 14. SLIDE LOADING UNITS 7. Click the Setting sensors button. In this menu, you can fine tune the Slide edge sensor and the Slide out sensor. Also, you can define the position of the Safety container here.
- Page 85 P1000 SERVICE SOFTWARE MANUAL 14. SLIDE LOADING UNITS Select a simple magazine in Magazine selection and click the Start magazine detection button. The figure below shows the detection of an already adjusted sensor. Raw data read by the sensor Detected...
- Page 86 P1000 SERVICE SOFTWARE MANUAL 14. SLIDE LOADING UNITS The figure below shows the detection of a faulty adjustment. The detected slides appear on the left side scale. Adjusting Sensor read offset slide bar, you can define the expected position of the slides displayed as narrow lines on the right side.
- Page 87 P1000 SERVICE SOFTWARE MANUAL 14. SLIDE LOADING UNITS To set the decision limit, click the icon next to the Slide edge label at the component control panel and then click the Turn on button below the icon. The display of the sensor is activated. Navigate the Arm with the Approach the slide button to a position where the magazine does not include a slide.
- Page 88 P1000 SERVICE SOFTWARE MANUAL 14. SLIDE LOADING UNITS 7.3. Safety container position SERVICE GUIDE...
- Page 89 P1000 SERVICE SOFTWARE MANUAL 14. SLIDE LOADING UNITS Functioning properly, the system automatically ’drops’ the scanned slides that the Arm cannot place back to the magazines and takes them back to the Safety container. After maximum 10 drops, the software cancels the scanning procedure and displays an error message.
- Page 90 P1000 SERVICE SOFTWARE MANUAL 15. SLIDE PREVIEW UNIT 15. Slide Preview Unit In this menu, the slide preview position can be defined. Photo/Live image recording Label/barcode area SERVICE GUIDE...
- Page 91 P1000 SERVICE SOFTWARE MANUAL 15. SLIDE PREVIEW UNIT 1. Adjusting the unit 1.1. Initialize the unit. 1.2. Select the sample area at the Grab image section, then click the Live view button. 1.3. Click the Slide to preview grab pos button to move the labeled slide under the camera.
- Page 92 P1000 SERVICE SOFTWARE MANUAL 15. SLIDE PREVIEW UNIT 1.9. Check the adjustments both with single- and double-wide slides. Each of these types must be located within the area marked with border lines. Go to Validation page and validate the settings.
- Page 93 P1000 SERVICE SOFTWARE MANUAL 16. OBJECTIVE CHANGER UNIT 16. Objective Changer Unit In this setup window, the objective, aperture and ND filter positions can be synchronized. For proper operation, synchronize the settings of the objectives first. Note! The Objective change position value is identical with the objective position already set in...
- Page 94 P1000 SERVICE SOFTWARE MANUAL 16. OBJECTIVE CHANGER UNIT Caution! The set value overrides the value set for Focus motor position! 3. Select the objective you want to setup under the Objective selection menu. Adjust each of the objectives based on the following table. These settings include basic values that must be fine-tuned later.
Need help?
Do you have a question about the P1000 and is the answer not in the manual?
Questions and answers