
Subscribe to Our Youtube Channel
Related Manuals for HBM FIT 7A


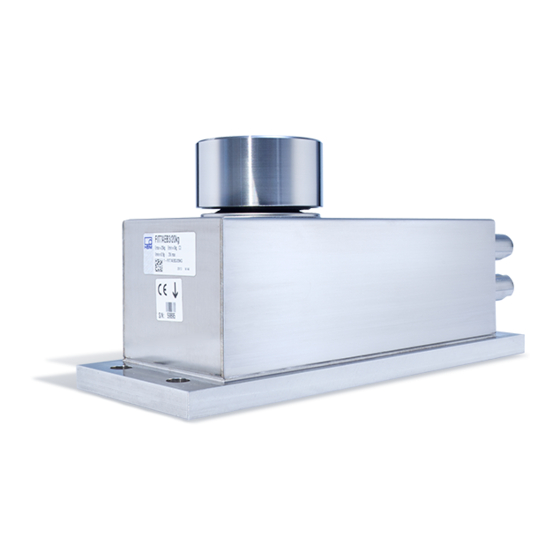
Summary of Contents for HBM FIT 7A
- Page 1 Operating Manual | Bedienungsanleitung | Manuel d'emploi | Istruzioni per l'uso English Deutsch Français Italiano ®...
- Page 2 Tel. +49 6151 803-0 Fax +49 6151 803-9100 info@hbm.com www.hbm.com Mat.: 7-2004.3924 DVS: A3924-1.1 HBM: public 09.2015 E Hottinger Baldwin Messtechnik GmbH. Subject to modifications. All product descriptions are for general information only. They are not to be understood as a guarantee of quality or durability.
- Page 3 Operating Manual | Bedienungsanleitung | Manuel d'emploi | Istruzioni per l'uso English Deutsch Français Italiano ®...
-
Page 4: Table Of Contents
Connection of several load cells to a PC via RS-485 ... . Connection to a PC with an RS‐232 interface via the HBM interface converter .......... - Page 5 ..........® A3924-1.1 HBM: public...
-
Page 6: Safety Instructions
Operating conditions S Please observe the permissible maximum values stated in the specifications for: - Limit load - Limit load at max. eccentricity - Limit lateral loading - Breaking loads - Temperature limits ® A3924-1.1 HBM: public... - Page 7 S Knowledge of the safety concepts of measurement and automation technology is a requirement and as project personnel, they must be familiar with these concepts. S As measurement or automation plant operating per sonnel, they have been instructed how to handle the ® A3924-1.1 HBM: public...
- Page 8 S After making settings and carrying out activities that are password-protected, ensure that any controls that may be connected remain in a safe condition until the switching performance of the device has been tested. ® A3924-1.1 HBM: public...
- Page 9 General dangers of failing to follow the safety instructions The transducer corresponds to the state of the art and is reliable. The transducer may give rise to residual dangers if it is inappropriately installed or operated. ® A3924-1.1 HBM: public...
-
Page 10: Markings Used
The CE mark enables the manufacturer to guarantee that the product complies with the requirements of the rele vant EC directives (the Declaration of Conformity can be found on the HBM website (www.hbm.com) under HBMdoc). The marking used in this document Important instructions for your safety are specifically identified. - Page 11 This marking draws your attention to important in formation about the product or about handling the Important product. Emphasis Italics are used to emphasize and highlight text and See … identify references to sections, diagrams, or external documents and files. ® A3924-1.1 HBM: public...
-
Page 12: Conditions On Site
The sealing element for load application comprises a soft bellows made from silicone rubber. Substances that could attack this material must not be used. Deposits Dust, dirt and other foreign matter must not be allowed to accumulate sufficiently to divert some of the measuring ® A3924-1.1 HBM: public... - Page 13 Do not use hard or pointed objects when cleaning the gap between the load application thrust piece and the housing. Be very careful during cleaning, making sure that you do not damage the silicone rubber bellows. ® A3924-1.1 HBM: public...
-
Page 14: Mechanical Installation
If there is a risk that this might happen, you must provide a suitable low-ohm connection to electrically bypass the transducer. HBM provides the highly flexible EEK ground cable for this purpose, for example, that is screwed on above and below the transducer. -
Page 15: Mounting And Load Application
Socket 2 Version E only Mounting plate flatness <0.02 mm Fig. 4.1 Load application and installation Important The flatness of the mounting plate surface to which the load cell is attached must be better than 0.02 mm. ® A3924-1.1 HBM: public... -
Page 16: Connection For Pressure Compensation
Connect the valve coupling plug with a suitable hose that leads into a dry area. If you use a number of load cells, you can interconnect them in a pressure compensation loop. ® A3924-1.1 HBM: public... -
Page 17: Electrical Connection
The standard version of the load cell comes with an 8-pin device socket. The extended version E has a second 8-pin device socket. Device sockets 1 and 2 Fig. 5.1 M12 device socket, 8‐pin ® A3924-1.1 HBM: public... - Page 18 Blue Blue For digital load cells, HBM recommends two cable types, 1-KAB165 or 1-KAB173, depending on the application. Detailed information about these cables is available in data sheet B3643, which can be found under "Product Data Sheet & Literature" on our website http://www.hbm.com/fit7a...
- Page 19 Blue Blue For digital load cells, HBM recommends two cable types, 1-KAB165 or 1-KAB173, depending on the application. Detailed information about these cables is available in data sheet B3643, which can be found under "Product Data Sheet & Literature" on our website http://www.hbm.com/fit7a...
-
Page 20: Interfaces
FIT7A_1 = Slave 01 FIT7A_89 = Slave 89 Fig. 6.1 Bus connection via RS‐485 Up to 89 load cells can be connected via the RS‐485 interface to a common bus line, the total length of which ® A3924-1.1 HBM: public... -
Page 21: Converter
RA = R- RB = R+ Fig. 6.2 Connection to a PC via the HBM interface converter Connection to a CANopen interface The interface is set up using the CANopen standard DS301. The load cell address on delivery is 63. -
Page 22: Connection To A Devicenet Interface
500 Ω 500 Ω T/RB T/RA 500 Ω 500 Ω TxD on/off RxD TxD on/off RxD TxD on/off RxD PC = Master FIT7A_1 = Slave 01 FIT7A_31 = Slave 31 Fig. 6.3 Connecting the diagnostic interface ® A3924-1.1 HBM: public... -
Page 23: Inputs And Outputs
Stable level at trigger input used. The other wire must be at low level or not connected. Debouncing is dependent on the function set (IMD command), but not on the input used (device socket 1 or 2). ® A3924-1.1 HBM: public... -
Page 24: Outputs
. Both multipole and individual leads are suitable for this. However, the individual leads must not take different routes, they must be close together. The total length of a conductor must not exceed 10 m (Fig. 7.1). ® A3924-1.1 HBM: public... - Page 25 Block 1, communication, U Fig. 7.1 Connecting GND potentials in separate function blocks When mounting all the function blocks inside a control cabinet (Fig. 7.2 on Page 24), make sure that the GND potentials of both blocks are connected. ® A3924-1.1 HBM: public...
- Page 26 Block 2, digital I/O Ground (GND) of block 1 and block 2 must be connected. Shield extensively applied in each case. Block 1, communication, U Fig. 7.2 Connecting GND potentials for a mounting inside a control cabinet ® A3924-1.1 HBM: public...
-
Page 27: Operation Via Software
Packaging The original HBM packaging is made from recyclable material and can be sent for recycling. Store the packaging for at least the duration of the warranty. -
Page 28: Specifications
Specifications Specifications The latest data sheet can be found on the HBM Website at: www.hbm.com/HBMdoc. Dimensions Dimensions in mm (1 mm = 0.03937 inches) −0.2 15.5 7 mm deep ∅9 40±0.2 200±0.2 220±0.2 ® A3924-1.1 HBM: public... - Page 29 Operating Manual | Bedienungsanleitung Manuel d'emploi | Istruzioni per l'uso English Deutsch Français Italiano ®...
- Page 30 ..........® A3924-1.1 HBM: public...
- Page 31 ..........® A3924-1.1 HBM: public...
-
Page 32: Sicherheitshinweise
Betrieb setzt sachgemäßen Transport, fachgerechte Lagerung, Aufstellung und Montage sowie sorgfältige Bedienung voraus. Betriebsbedingungen S Beachten Sie insbesondere die in den technischen Daten angegebenen maximal zulässigen Werte für: - Grenzlast - Grenzlast bei max. Exzentrizität - Grenzquerbelastung ® A3924-1.1 HBM: public... - Page 33 über die ihrer Tätigkeit entspre chende Qualifikationen verfügen. Dazu zählen Personen, die mindestens eine der drei fol genden Voraussetzungen erfüllen: S Ihnen sind die Sicherheitskonzepte der Mess‐ und Automatisierungstechnik bekannt und sie sind als Projektpersonal damit vertraut. ® A3924-1.1 HBM: public...
- Page 34 Betätigung ausreichend geschützt bzw. verriegelt sind (z. B. Zugangskontrolle, Passwort schutz o. Ä.). S Bei Geräten, die in Netzwerken arbeiten, müssen hard‐ und softwareseitig Sicherheitsvorkehrungen ge troffen werden, damit ein Leitungsbruch oder andere Unterbrechungen der Signalübertragung nicht zu ® A3924-1.1 HBM: public...
- Page 35 Im Fehlerfall müssen entsprechende Vorkeh rungen einen sicheren Betriebszustand herstellen. Allgemeine Gefahren bei Nichtbeachten der Sicherheitshinweise Der Aufnehmer entspricht dem Stand der Technik und ist betriebssicher. Von dem Aufnehmer können Restgefah ren ausgehen, wenn er unsachgemäß eingesetzt oder bedient wird. ® A3924-1.1 HBM: public...
-
Page 36: Verwendete Kennzeichnungen
CE-Kennzeichnung Mit der CE‐Kennzeichnung garantiert der Hersteller, dass sein Produkt den Anforderungen der relevanten EG‐Richtlinien entspricht (die Konformitätserklärung finden Sie auf der Website von HBM (www.hbm.com) unter HBMdoc). In dieser Anleitung verwendete Kennzeichnungen Wichtige Hinweise für Ihre Sicherheit sind besonders ge... - Page 37 Diese Kennzeichnung weist auf wichtige Informa tionen zum Produkt oder zur Handhabung des Pro Wichtig duktes hin. Hervorhebung Kursive Schrift kennzeichnet Hervorhebungen im Siehe … Text und kennzeichnet Verweise auf Kapitel, Bilder oder externe Dokumente und Dateien. ® A3924-1.1 HBM: public...
-
Page 38: Bedingungen Am Einbauort
Die dadurch auftretende Korrosion kann zum Ausfall des Aufnehmers führen. Sehen Sie in diesem Fall entspre chende Schutzmaßnahmen vor. Das Abdichtelement zur Lasteinleitung besteht aus einem weichen Faltenbalg aus Silikonkautschuk. Es dürfen keine Stoffe verwendet werden, die dieses Mate rial angreifen könnten. ® A3924-1.1 HBM: public... -
Page 39: Ablagerungen
Gehäuse umleiten und dadurch den Messwert verfälschen (Kraftnebenschluss). Verwenden Sie beim Reinigen des Spalts zwischen Lasteinleitungsdruckstück und Gehäuse keine harten oder spitzen Gegenstände. Gehen Sie beim Reinigen sehr vorsichtig vor, damit der Faltenbalg aus Silikonkau tschuk nicht beschädigt wird. ® A3924-1.1 HBM: public... -
Page 40: Mechanischer Einbau
Sollte diese Gefahr bestehen, so müssen Sie den Aufnehmer mit einer geeigneten niederohmigen Verbindung elektrisch überbrücken. Hierzu bietet z. B. HBM das hochflexible Erdungskabel EEK an, das oberhalb und unterhalb des Aufnehmers ange schraubt wird. S Stellen Sie sicher, dass der Aufnehmer nicht überlastet werden kann. -
Page 41: Montage Und Lasteinleitung
Schrauben und Anzugsmomente: Befestigung Gewinde Min. Festigkeitsklasse Anzugsmoment An Montageplatte 10.9 25 N⋅m Für Lasteinleitung 10.9 14 N⋅m Richtwert für die angegebene Festigkeitsklasse. Zur Auslegung von Schrauben beachten Sie bitte entsprechende Informationen der Schraubenhersteller. ® A3924-1.1 HBM: public... -
Page 42: Anschluss Für Den Druckausgleich
Anschluss für den Druckausgleich Das Gehäuse der Wägezelle ist mit einem Anschluss für den Druckausgleich ausgestattet. Wichtig Änderungen des Luftdrucks verändern auch das Mess ergebnis, wenn Sie den Ventilkupplungsstecker nicht anschließen (die Wägezelle ist dann verschlossen). ® A3924-1.1 HBM: public... - Page 43 Feuchtigkeit in die Wägezelle gelangen kann. Verbinden Sie den Ventilkupplungsstecker mit einem passenden Schlauch, der in einen trockenen Raum mündet. Falls Sie mehrere Wägezellen verwenden, können Sie diese untereinander mit einer Ringleitung für den Druckausgleich verbinden. ® A3924-1.1 HBM: public...
-
Page 44: Elektrischer Anschluss
Sie daher statische Aufladungen von sich ab, bevor Sie die Anschlussstecker berühren. Die Wägezelle wird in der Standardversion mit einer 8‐poligen Gerätebuchse ausgeliefert. Die erweiterte Aus führung E verfügt über eine zweite 8‐polige Geräte buchse. Gerätebuchsen 1 und 2 Abb. 5.1 Gerätebuchse M12, 8‐polig ® A3924-1.1 HBM: public... - Page 45 Schwarz CAN‐High OUT Blau Blau Für digitale Wägezellen empfiehlt HBM - je nach Anwendung - die beiden Kabeltypen 1-KAB165 oder 1-KAB173. Detailinformationen über diese Kabel finden Sie im Datenblatt B3643 - abrufbar unter "Technische Dokumentation" auf unserer Internetseite http://www.hbm.com/de/fit7a Der Triggereingang bezieht sich auf den GND von Pin 1.
- Page 46 Schwarz OUT1 Blau Blau Für digitale Wägezellen empfiehlt HBM - je nach Anwendung - die beiden Kabeltypen 1-KAB165 oder 1-KAB173. Detailinformationen über diese Kabel finden Sie im Datenblatt B3643 - abrufbar unter "Technische Dokumentation" auf unserer Internetseite http://www.hbm.com/de/fit7a Für U kann entweder die gleiche Spannungsquelle wie für U...
-
Page 47: Schnittstellen
FIT7A_1 = Slave 01 FIT7A_89 = Slave 89 Abb. 6.1 Busanschluss über RS‐485 Über die Schnittstelle RS‐485 können bis zu 89 Wäge zellen an eine gemeinsame Busleitung angeschlossen werden, die bis zu 1000 m Gesamtlänge erreichen darf. ® A3924-1.1 HBM: public... -
Page 48: Anschluss An Einen Pc Mit Rs-232-Schnittstelle Über Den
Das Prinzip der Busverkabelung für den 4DrahtBetrieb zeigt Abb. 6.1. Beachten Sie, dass viele PCs nicht über eine RS‐485‐Schnittstelle verfügen. In diesem Fall ist ein Schnittstellenkonverter nötig, z. B. der HBM‐Konverter (siehe Abschnitt 6.2). Anschluss an einen PC mit RS‐232‐Schnittstelle über den HBM‐Schnittstellenkonverter... -
Page 49: Anschluss An Canopen-Schnittstelle
+5 V 500 Ω 500 Ω T/RB T/RA 500 Ω 500 Ω TxD on/off RxD TxD on/off RxD TxD on/off RxD PC = Master FIT7A_1 = Slave 01 FIT7A_31 = Slave 31 Abb. 6.3 Diagnose‐Schnittstelle anschließen ® A3924-1.1 HBM: public... -
Page 50: Ein- Und Ausgänge
Übergang von Hoch‐ zu Hoch‐Pegel, entprellt Tief‐Pegel Stabiler Pegel am verwendeten Triggereingang. Die andere Leitung muss auf Tief‐Pegel oder unbeschaltet sein. Die Entprellung ist abhängig von der eingestellten Funktion (IMD‐Befehl), nicht vom verwendeten Eingang (Gerätebuchse 1 oder 2). ® A3924-1.1 HBM: public... -
Page 51: Ausgänge
Abschirmungen beider Leitungen als auch das GND‐Potenzial mit je einer Leitung mit einem Mindest querschnitt von 1,5 mm verbunden sind. Dafür sind sowohl mehrpolige als auch einzelne Leitungen geeignet. Einzelne Leitungen dürfen jedoch nicht auf unterschiedli ® A3924-1.1 HBM: public... - Page 52 Block 1, Kommunikation, U Abb. 7.1 Verbindung der GND‐Potenziale bei getrennten Funktionsblöcken Stellen Sie bei einer Montage aller Funktionsblöcke innerhalb eines Schaltschranks (Abb. 7.2 auf Seite 25) sicher, dass die GND‐Potenziale der beiden Blöcke ver bunden sind. ® A3924-1.1 HBM: public...
- Page 53 Ein‐ und Ausgänge Schaltschrank Block 2, digital I/O Masse (GND) von Block 1 und Block 2 müssen verbunden sein. Schirm jeweils flächig aufgelegt. Block 1, Kommunikation, U Abb. 7.2 Verbindung der GND‐Potenziale bei Montage innerhalb eines Schaltschranks ® A3924-1.1 HBM: public...
-
Page 54: Bedienung Über Software
Bedienung über Software Bedienung über Software Laden Sie bei Bedarf die Software zur Parametrierung und Visualisierung von der Website von HBM herunter: www.hbm.com/support (Bereich „FIT Digitale Wägezellen & AED Wägeelektroniken“). ® A3924-1.1 HBM: public... -
Page 55: Entsorgung Und Umweltschutz
Art von Entsorgung oder Recycling in Ihrem Land vorgeschrieben ist. Verpackungen Die Originalverpackung von HBM besteht aus recycle barem Material und kann der Wiederverwertung zuge führt werden. Bewahren Sie die Verpackung jedoch mindestens für den Zeitraum der Gewährleistung auf. -
Page 56: Technische Daten
Technische Daten Technische Daten Das aktuelle Datenblatt finden Sie auf der Website von HBM unter: www.hbm.com/HBMdoc. Abmessungen Abmessungen (in mm) -0,2 15,5 7mm tief ∅9 40±0,2 200±0,2 220±0,2 ® A3924-1.1 HBM: public... - Page 57 Operating Manual | Bedienungsanleitung | Manuel d'emploi | Istruzioni per l'uso English Deutsch Français Italiano ®...
- Page 58 ........... ® A3924-1.1 HBM: public...
- Page 59 ..........® A3924-1.1 HBM: public...
-
Page 60: Consignes De Sécurité
Conditions de fonctionnement S Respectez notamment les valeurs maximales admissibles indiquées dans les caractéristiques techniques pour : - la charge limite, - la charge limite pour l'excentricité maxi., ® A3924-1.1 HBM: public... - Page 61 Sont considérées comme personnel qualifié les personnes familiarisées avec l'installation, le montage, la mise en service et l'exploitation du produit, et disposant des qualifications correspondantes. En font partie les personnes remplissant au moins une des trois conditions suivantes : ® A3924-1.1 HBM: public...
- Page 62 (contrôle d'accès, protection par mot de passe ou autres, par exemple). S Pour les appareils fonctionnant dans des réseaux, des mesures de sécurité doivent être prises côté matériel et côté logiciel, afin d'éviter qu'une rupture de ® A3924-1.1 HBM: public...
- Page 63 Risques généraux en cas de non-respect des consignes de sécurité Le capteur est conforme au niveau de développement technologique actuel et présente une parfaite sécurité de fonctionnement. Le capteur peut présenter des dangers résiduels s'il est utilisé de manière non conforme. ® A3924-1.1 HBM: public...
-
Page 64: Marquages Utilisés
Le marquage CE permet au constructeur de garantir que son produit est conforme aux exigences des directives européennes correspondantes (la déclaration de conformité est disponible sur le site Internet de HBM (www.hbm.com) sous HBMdoc). Marquages utilisés dans le présent document Les remarques importantes pour votre sécurité... - Page 65 Important sont fournies. Mise en valeur Les caractères en italique mettent le texte en valeur Voir … et signalent des renvois à des chapitres, des illus trations ou des documents et fichiers externes. ® A3924-1.1 HBM: public...
-
Page 66: Conditions Environnantes À Respecter
Dans ce cas, il faut prévoir des mesures de protection appropriées. L'élément d'étanchéité pour la mise en charge est constitué d'un soufflet souple en caoutchouc de silicone. Ne pas utiliser de substances qui pourraient attaquer ce matériau. ® A3924-1.1 HBM: public... -
Page 67: Dépôts
(shunt). Pour nettoyer l'espace entre la pièce de mise en charge et le boîtier, ne pas utiliser d'objets durs ou pointus. Nettoyer avec beaucoup de précaution pour ne pas endommager le soufflet en caoutchouc de silicone. ® A3924-1.1 HBM: public... -
Page 68: Montage Mécanique
Si cela risque de se produire, le capteur doit être shunté électriquement à l'aide d'une liaison de basse impédance appropriée. À cet effet, HBM propose par ex. le câble de mise à la terre très souple EEK vissé au-dessus et au-dessous du capteur. -
Page 69: Montage Et Application De Charge
Uniquement sur la version E Planéité de la plaque de montage <0,02 mm Fig. 4.1 Application de charge et montage Important Les surfaces de la plaque de montage sur laquelle le peson doit être installé doivent présenter une planéité supérieure à 0,02 mm. ® A3924-1.1 HBM: public... -
Page 70: Raccord Pour La Compensation De Pression
Raccorder la fiche d'accouplement à soupape à un flexible adapté débouchant dans une pièce sèche. En cas d'utilisation de plusieurs pesons, il est possible de les relier les uns aux autres pour la compensation de pression à l'aide d'une conduite en circuit fermé. ® A3924-1.1 HBM: public... -
Page 71: Raccordement Électrique
En version standard, le peson est livré avec un connecteur femelle à 8 broches. La version étendue E comprend un second connecteur femelle à 8 broches. Connecteurs femelles 1 et 2 Fig. 5.1 Connecteur femelle M12, 8 broches ® A3924-1.1 HBM: public... - Page 72 Rouge Rouge Pour les pesons numériques, HBM recommande, en fonction de l'application, les deux types de câble 1-KAB165 ou 1-KAB173. Pour plus de détails sur ces câbles, reportez-vous aux caracté ristiques techniques B3643, consultables sur notre site Internet sous "Documentation technique" : http://www.hbm.com/fr/fit7a...
- Page 73 Rouge Rouge Pour les pesons numériques, HBM recommande, en fonction de l'application, les deux types de câble 1-KAB165 ou 1-KAB173. Pour plus de détails sur ces câbles, reportez-vous aux caracté ristiques techniques B3643, consultables sur notre site Internet sous "Documentation technique" : http://www.hbm.com/fr/fit7a...
-
Page 74: Interfaces
à une même ligne de bus qui peut atteindre une longueur de fil totale de 1 000 m. Le principe de câblage du bus pour le mode 4 fils est illustré à la Fig. 6.1. ® A3924-1.1 HBM: public... -
Page 75: D'interface Hbm
Interfaces Noter que de nombreux PC ne disposent pas d'interface RS‐485. Dans ce cas, il faut mettre en œuvre un convertisseur d'interface, par ex. le convertisseur HBM (voir paragraphe 6.2). Raccordement à un PC avec interface RS‐232 via le convertisseur d'interface : 10 …... -
Page 76: Raccordement À L'interface Devicenet
500 Ω 500 Ω T/RB T/RA 500 Ω 500 Ω TxD on/off RxD TxD on/off RxD TxD on/off RxD PC = maître FIT7A_1 = esclave 01 FIT7A_31 = esclave 31 Fig. 6.3 Raccordement de l'interface de diagnostic ® A3924-1.1 HBM: public... -
Page 77: Entrées Et Sorties
Niveau stable à l'entrée trigger utilisée. L'autre ligne doit être au niveau Bas ou ne pas être branchée. La caractéristique anti-rebond dépend de la fonction réglée (commande IMD), mais pas de l'entrée utilisée (connecteur femelle 1 ou 2). ® A3924-1.1 HBM: public... -
Page 78: Sorties
GND sont chacun reliés par une ligne d'une section minimale de 1,5 mm . Ces lignes peuvent comporter un ou plusieurs conducteurs. Les lignes à un seul conducteur doivent cependant être ® A3924-1.1 HBM: public... - Page 79 Raccordement des potentiels GND en cas de blocs fonctionnels séparés En cas de montage de tous les blocs fonctionnels dans une même armoire électrique (Fig. 7.2 page 24), s'assurer que les potentiels GND des deux blocs sont reliés. ® A3924-1.1 HBM: public...
- Page 80 Les masses (GND) des blocs 1 et 2 doivent être reliées. Blindage à chaque fois posé en nappe. Bloc 1, communication, U Fig. 7.2 Raccordement des potentiels GND en cas de montage dans une même armoire ® A3924-1.1 HBM: public...
-
Page 81: Commande Par Logiciel
Commande par logiciel Commande par logiciel Le cas échéant, télécharger le logiciel de paramétrage et de visualisation disponible sur le site Internet de HBM : www.hbm.com/support (sous Téléchargement Software / “ Firmware - FIT Digital Load Cells & AED Weighing “... -
Page 82: Caractéristiques Techniques
Pour des raisons écologiques, il est préférable de ne pas nous renvoyer les emballages vides. Caractéristiques techniques Les caractéristiques techniques actuelles sont disponibles sur le site Internet de HBM, sous : www.hbm.com/HBMdoc. ® A3924-1.1 HBM: public... -
Page 83: Dimensions
Dimensions Dimensions Dimensions (en mm) −0,2 15,5 Profondeur 7 mm ∅9 40±0,2 200±0,2 220±0,2 ® A3924-1.1 HBM: public... - Page 84 Dimensions ® A3924-1.1 HBM: public...
- Page 85 Operating Manual | Bedienungsanleitung | Manuel d'emploi | Istruzioni per l'uso English Deutsch Français Italiano ®...
- Page 86 Collegamento ad un PC con interfaccia RS‐232 mediante il Convertitore di Interfaccia HBM ......
- Page 87 ..........® A3924-1.1 HBM: public...
-
Page 88: Note Sulla Sicurezza
Condizioni di esercizio S In particolare si devono rispettare i limiti dei massimi valori di carico consentiti specificati nei dati tecnici: - Carico limite - Carico limite alla max. eccentricità ® A3924-1.1 HBM: public... - Page 89 Sono considerati personale qualificato coloro che abbiano esperienza nell'installazione, montaggio, messa in funzione e conduzione di tali prodotti e che, per la loro attività, abbiano ricevuto la relativa qualifica. Ciò comprende il personale che soddisfi almeno una delle tre seguenti condizioni: ® A3924-1.1 HBM: public...
- Page 90 (ad esempio adottando controlli di accesso, parole d'ordine, od accorgimenti simili). S Per gli strumenti che operano in rete, si devono pren dere precauzioni di sicurezza concernenti hardware e ® A3924-1.1 HBM: public...
- Page 91 Rischi generali per la non osservanza dei regolamenti di sicurezza ’ Il trasduttore è costruito allo stato dell arte ed è di fun zionamento sicuro. Tuttavia, l'installazione o l'impiego non conforme da parte di personale non addestrato, comporta dei rischi residui. ® A3924-1.1 HBM: public...
-
Page 92: Simboli Utilizzati In Questo Documento
Con il marchio CE il costruttore garantisce che il proprio prodotto è conforme ai requisiti imposti dalle pertinenti Direttive CE (la Dichiarazione di Conformità si trova nel sito HBM (www.hbm.com) sotto HBMdoc). Simboli utilizzati in questo documento Le note importanti concernenti la vostra sicurezza sono particolarmente evidenziate. - Page 93 Questo simbolo segnala informazioni importanti sul prodotto o sul suo maneggio. Importante Evidenziazione Il corsivo evidenzia il testo rimandando a capitoli, Vedere … paragrafi, figure oppure a documenti e file esterni. ® A3924-1.1 HBM: public...
-
Page 94: Condizioni Del Luogo Di Installazione
Tale tipo di corrosione potrebbe causare il guasto dei trasduttori. In questo caso attuare le adeguate misure di protezione. L'elemento di tenuta per l'introduzione del carico è costituito da un flessibile soffietto di gomma al silicone. Non utilizzare sostanze che potrebbero attaccare questo materiale. ® A3924-1.1 HBM: public... -
Page 95: Sedimenti
(shunt di forza). Pulendo lo spazio fra il pezzo d'introduzione del carico e la custodia, non utilizzare oggetti duri od appuntiti. Durante la pulizia procedere con molta attenzione per non danneggiare il soffietto di gomma al silicone. ® A3924-1.1 HBM: public... -
Page 96: Installazione Meccanica
Esistendo tale pericolo, si deve cavallottare il trasduttore con un idoneo conduttore a bassa resistenza. A tal scopo usare ad esempio la flessibile trecciola di terra EEK della HBM, fissandola sopra e sotto il trasduttore. S Assicurarsi che il trasduttore non possa venir sovraccaricato. -
Page 97: Montaggio Ed Introduzione Del Carico
Coppia di resistenza serraggio sulla piastra di montaggio 10.9 25 N⋅m per l'introduzione del carico 10.9 14 N⋅m Valore indicativo della classe di resistenza data. Per il montaggio delle viti seguire le informazioni fornite dal loro produttore. ® A3924-1.1 HBM: public... - Page 98 Solo con la Versione E Planarità della piastra di basamento <0,02 mm Fig. 4.1 Introduzione del carico ed installazione Importante Le superfici della piastra di basamento delle celle di carico devono avere planarità migliore di 0,02 mm. ® A3924-1.1 HBM: public...
-
Page 99: Attacco Per La Compensazione Della Pressione
Connettere la spina di ventilazione con un idoneo tubetto flessibile che conduca in un ambiente asciutto. Nel caso si utilizzino più celle di carico, si possono collegare fra loro a stella unendole poi al dispositivo di compensazione della pressione. ® A3924-1.1 HBM: public... -
Page 100: Connessione Elettrica
La versione standard della cella di carico viene fornita con presa fissa ad 8 poli. La versione estesa E dispone di una seconda presa fissa ad 8 poli. Prese fisse 1 e 2 Fig. 5.1 Presa fissa M12, 8 poli ® A3924-1.1 HBM: public... - Page 101 (rd) rosso (rd) A seconda dell'applicazione, per le celle digitali la HBM consiglia l'impiego di ambedue i tipi di cavo 1-KAB165 od 1-KAB173. Informazioni dettagliate su questi cavi si trovano nel prospetto dati B3643 disponibile nella pagina "Documentazione Tecnica" del nostro sito Web http://www.hbm....
- Page 102 (rd) rosso (rd) A seconda dell'applicazione, per le celle digitali la HBM consiglia l'impiego di ambedue i tipi di cavo 1-KAB165 od 1-KAB173. Informazioni dettagliate su questi cavi si trovano nel prospetto dati B3643 disponibile nella pagina "Documentazione Tecnica" del nostro sito Web http://www.hbm....
-
Page 103: Interfacce
Tramite l'interfaccia RS‐485 si possono collegare fino ad 89 celle di carico ad una linea bus comune, la cui lunghezza complessiva può raggiungere i 1000 m. Il principio di cablaggio per bus a 4-fili è mostrato in Fig. 6.1. ® A3924-1.1 HBM: public... -
Page 104: Collegamento Ad Un Pc Con Interfaccia Rs-232 Mediante Il
Interfacce Notare che molti PC non dispongono di interfaccia RS‐485. In questo caso è necessario un convertitore di interfaccia, ad esempio il Convertitore HBM (vedere il paragrafo 6.2). Collegamento ad un PC con interfaccia RS‐232 mediante il Convertitore di Interfaccia HBM : 10 …... -
Page 105: Collegamento Dell'interfaccia Canopen
T/RB T/RA 500 Ω 500 Ω TxD on / offRxD TxD on / off RxD TxD on / off RxD PC = Master FIT7A_1 = Slave 01 FIT7A_31 = Slave 31 Fig. 6.3 Collegamento dell'interfaccia Diagnostica ® A3924-1.1 HBM: public... -
Page 106: Ingressi Ed Uscite
Livello High, antirimbalzo High al livello Low Livello stabile all'ingresso Trigger utilizzato. L'altra linea deve essere a livello Low o non collegata. L'antirimbalzo dipende dalla funzione impostata (comando IMD), non dall'ingresso utilizzato (presa fissa 1 o 2). ® A3924-1.1 HBM: public... -
Page 107: Uscite
GND siano collegati ad un conduttore avente una sezione di almeno 1,5 mm . A tal scopo sono idonei sia cavi multipolari che cavetti singoli. Tuttavia i cavetti singoli non devono avere percorsi diversi, bensì essere riuniti collocandoli uno vicino ® A3924-1.1 HBM: public... - Page 108 Fig. 7.1 Collegamento del potenziale GND per i blocchi funzione separati Montando tutti i blocchi funzione all'interno di un armadio (Fig. 7.2 a pagina 25) assicurarsi che sia collegato il potenziale GND di ambedue i blocchi. ® A3924-1.1 HBM: public...
- Page 109 Le masse (GND) del Blocco 1 e del Blocco 2 devono essere collegate insieme. Collegare ogni schermo in modo Blocco 1, Comunicazione, U piatto ed avvolgente. Fig. 7.2 Collegamento del potenziale GND per il montaggio all'interno di un armadio ® A3924-1.1 HBM: public...
-
Page 110: Comandi Tramite Software
Comandi tramite Software Comandi tramite Software Se necessario, scaricare il software per la parametrizzazione e visualizzazione dal sito web della „ HBM, da: www.hbm.com/support (pagina Celle di carico “ digitali FIT ed Elettronica di pesatura AED ® A3924-1.1 HBM: public... -
Page 111: Smaltimento Rifiuti E Tutela Dell'ambiente
L'imballaggio originale degli strumenti HBM è di materiale riciclabile e può pertanto essere riutilizzato. Comunque, conservare l'imballaggio per almeno tutto il tempo di validità della garanzia. Per ragioni ecologiche, si prega di non restituire alla HBM gli imballaggi vuoti. ® A3924-1.1 HBM: public... -
Page 112: Dati Tecnici
Dati tecnici Dati tecnici Il prospetto dati corrente si trova nel sito web della HBM sotto: www.hbm.com/HBMdoc. ® A3924-1.1 HBM: public... -
Page 113: Dimensioni
Dimensioni Dimensioni Dimensioni (in mm) -0,2 15,5 prof. 7 mm ∅9 40±0,2 200±0,2 220±0,2 ® A3924-1.1 HBM: public... - Page 114 Dimensioni ® A3924-1.1 HBM: public...
- Page 115 Dimensioni ® A3924-1.1 HBM: public...
- Page 116 HBM Test and Measurement Tel. +49 6151 803-0 Fax +49 6151 803-9100 info@hbm.com measure and predict with confidence...
Need help?
Do you have a question about the FIT 7A and is the answer not in the manual?
Questions and answers