Table of Contents
Advertisement
Quick Links
Instructions for Assembly and Operation for sprayer models:
2681022, 26810011, 2681201, 2681101, 26812101,
Outdoor agriculture sprayer attachment used to convert NorthStar spot sprayers
READ and UNDERSTAND the Owner's Manual completely before using this item.
Assemble, test, and use only in accordance with the Owner's Manual instructions.
READ and FOLLOW chemical safety instructions. Pesticides are hazardous chemicals.
KNOW emergency procedures BEFORE handling chemicals. Sprayer leaks, bodily
chemical contact, poisoning, and spills require immediate response.
AVOID inhaling, ingesting, or coming into contact with any chemicals.
WEAR personal protective gear when operating, cleaning, and servicing the sprayer.
KEEP pump and spray materials away from children and pets. Pesticides are especially
toxic to them.
DO NOT TURN ON POWER to sprayer until ready to spray in order to avoid
unintentional spray release.
ALWAYS keep a fire extinguisher rated "ABC" nearby.
Improper use of the sprayer or handling of chemicals could result in serious injury or
illness to the operator or nearby persons/animals, or could cause damage to the
environment.
** This conversion kit is recommended for use in spraying non-flammable liquids such as pesticides,
water for plants/trees or dust control, ice control chemicals, or water-based non-flammable sealants
or stains for outdoor wood surfaces. However, WE RECOMMEND THAT THE CONVERSION
KIT NOT BE USED FOR OTHER PURPOSES ONCE IT HAS BEEN USED FOR SPRAYING
PESTICIDES. Any chemical will leave some residual in the conversion kit, even after the
conversion kit has been properly cleaned. These residual chemicals can have unexpected effects on
future uses. For example, spraying water or other liquids that are contaminated with residual
pesticide may result in unforeseen hazards to plant or animal life.
Any Questions, Comments, Problems, or Parts Orders
Call NorthStar Product Support 1-800-270-0810
Owner's Manual
2287182, 99916, 99917
Boom Conversion Kit:
to broadcast sprayers.
WARNING
M94996A.1
ITEM NUMBER: 94996
SERIAL NUMBER: __________
Advertisement
Table of Contents

Related Manuals for North Star 2681022


Summary of Contents for North Star 2681022
- Page 1 ITEM NUMBER: 94996 SERIAL NUMBER: __________ Owner’s Manual Instructions for Assembly and Operation for sprayer models: 2681022, 26810011, 2681201, 2681101, 26812101, 2287182, 99916, 99917 Boom Conversion Kit: Outdoor agriculture sprayer attachment used to convert NorthStar spot sprayers to broadcast sprayers.
- Page 2 Hazard Signal Word Definitions...
-
Page 3: Table Of Contents
Chemical Applicator Safety Chemical Accident Procedures Unpacking and Sprayer Identification ....................7 Installation 2681022 ............................10 26810011 and 2681201 ......................... 12 2681101 and 26812101 ......................... 14 2287182 ............................17 99916 and 99917 ........................... 20 Operation Preparing the Regulator for Each Use ..................22 Using the Regulator Step One: Assess wind conditions and clear work area ............ -
Page 4: Intended Use
Intended Use The product is intended for use in spraying agricultural pesticides and other non- flammable liquids. SPRAYING PESTICIDES: Pesticides are hazardous chemicals that must be handled with caution as directed throughout this manual and on the pesticide label. Pesticides are regulated by the United States Environmental Protection Agency (EPA) and defined as: Any substance or mixture of substances intended for preventing, destroying, repelling, or mitigating any pest. -
Page 5: Summary Of Important Safety Information
Summary of Important Information WARNING Read and understand this owner’s manual completely before using the conversion kit. Read each chemical label’s instructions before handling the chemical. Improper use of the conversion kit or handling of chemicals could result in serious injury or illness for the operator or nearby persons/animals, or cause damage to the environment. -
Page 6: Chemical Accident Procedures
Summary of Important Information EXERCISE EXTRA CAUTION when spraying near areas accessible to children and pets. CLEAN up spills immediately per instructions on the chemical label. TURN OFF power to sprayer, and RELIEVE system pressure before leaving sprayer unattended. ... -
Page 7: Unpacking And Sprayer Identification
Unpacking and Sprayer Identification Unpack and inspect parts If you have damaged components: Contact the freight company that delivered the unit to report the damage. Then, contact NorthStar Product Support at 1-800-270-0810. If you have missing components: Contact NorthStar Product Support at 1-800-270-0810. Grommet Screw, #10-24"... - Page 8 Unpacking and Sprayer Identification Drill Template Sheet Use the four circle template when drilling the pump mounting holes on the sprayer tank. The position of the holes needed for each sprayer model is indicated by an X on the template.
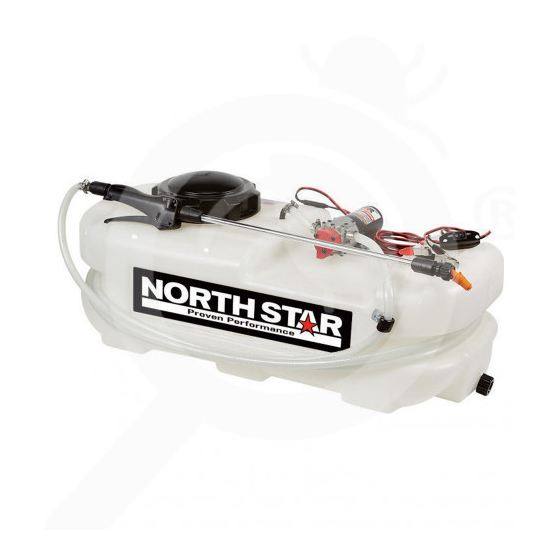
- Page 9 Sprayer Page Flow Tank size Defining features Model Number Rate 2681022 10 Gallon Spot spray gun only 26810011 16 Gallon Spot spray gun only 2681201 26 Gallon Spot spray gun only...
-
Page 10: Installation 2681022
Installation—2681022 Step One: Disconnect pump from power supply Step Two: Disconnect inlet and outlet fittings from pump Remove steel clips from inlet and outlet ports of the pump. Pull inlet and outlet fittings out of the pump. Do not disconnect hoses from fittings. - Page 11 Installation—2681022 Step Seven: Install rubber grommet (784519) into hole in tank Apply soap to rubber grommet. Press grommet into the 9/16" hole in the sprayer tank. Ensure the bottom lip of the grommet is fully through the hole, and the top lip is flush with the top of the tank.
-
Page 12: 26810011 And 2681201
Installation—26810011 and 2681201 Step One: Disconnect pump from power supply Step Two: Disconnect inlet and outlet fittings from pump Slide red QC clips open on the inlet and outlet ports of the pump. Pull inlet and outlet fittings out of the pump. ... - Page 13 Installation—26810011 and 2681201 Step Seven: Install rubber grommet (784519) into hole in tank Apply soap to rubber grommet. Press grommet into the 9/16" hole in the sprayer tank. Ensure the bottom lip of the grommet is fully through the hole, and the top lip is flush with the top of the tank.
-
Page 14: 2681101 And 26812101
Installation—2681101 and 26812101 Step One: Disconnect pump from power supply Step Two: Disconnect inlet and outlet fittings from pump Slide red QC clips open on the inlet and outlet ports of the pump. Pull inlet and outlet fittings out of the pump. ... - Page 15 Installation—2681101 and 26812101 Step Seven: Install rubber grommet (784519) into hole in tank Apply soap to rubber grommet. Press grommet into the 9/16" hole in the sprayer tank. Ensure the bottom lip of the grommet is fully through the hole, and the top lip is flush with the top of the tank.
- Page 16 Installation—2681101 and 26812101 Step Ten: Remove broadcast lance from sprayer Fig06565 Sprayer is now ready for boom kit installation. See manual that came with boom kit for further instructions. Note: Sprayer will be rotated on ATV to face opposite direction for boom kits.
- Page 17 Installation—2287182 Step One: Disconnect pump from power supply Step Two: Disconnect inlet and outlet fittings from pump Slide red QC clips open on the inlet and outlet ports of the pump. Pull inlet and outlet fittings out of the pump. ...
- Page 18 Installation—2287182 Using a 9/16" drill bit (not included) drill a hole through the top of the tank in the marked position. Remove plastic debris from inside the tank (if chemicals have been used inside the tank, refer to pg. 25 step 4 for personal decontamination after removing debris).
- Page 19 Installation—2287182 Step Ten: Reinstall hoses Install inlet hose onto inlet fitting in the inlet port of the pump. To insert quick connect fittings, lubricate O-ring with water and twist fitting while inserting into pump port. Secure with hose clamp. ...
-
Page 20: 99916 And 99917
Installation—99916 and 99917 Step One: Disconnect pump from power supply Step Two: Disconnect inlet and outlet fittings from pump Slide red QC clips open on the inlet and outlet ports of the pump. Pull inlet and outlet fittings out of the pump. ... - Page 21 Installation—99916 and 99917 Step Seven: Install rubber grommet (784519) into hole in tank Apply soap to rubber grommet. Press grommet into the 9/16" hole in the sprayer tank. Ensure the bottom lip of the grommet is fully through the hole, and the top lip is flush with the top of the tank.
-
Page 22: Preparing The Regulator For Each Use
Operation – Using the Regulator If the regulator has been used previously, it must be prepared BEFORE EACH SUBSEQUENT USE. WARNING Read instructions below carefully for inspecting and preparing the regulator. Damaged or clogged equipment could result in leaks or uncontrolled spray. Leaks could result in injury to the operator or bystanders from chemical exposure, or cause damage to the environment. -
Page 23: Step One: Assess Wind Conditions And Clear Work Area
Operation – Using the Regulator Step One: Assess wind conditions and clear work area Before you decide to spray, you must determine whether wind conditions are suitable. You must also restrict access to the work area to ensure the safety of bystanders. WARNING Do not spray if wind speeds are greater than 4 MPH or if there are bystanders in the intended spray area. - Page 24 Operation – Using the Regulator The pump will build pressure until the shut off pressure is reached. Once the 4. Turn pump shut off pressure is reached, the pump motor will turn off. 5. Begin Actuate the spray gun trigger or open the valve(s) to the boom nozzles. Adjust spray gun nozzle to desired spray pattern and/or spraying make sure the boom nozzles are free of debris.
-
Page 25: Step Three: Clean Regulator And Decontaminate After Use
Operation – Using the Regulator Step Three: Clean regulator and decontaminate after use When done using the regulator, it is important to clean the regulator and decontaminate yourself. Do not store the regulator when saturated with chemicals, as it is unsafe and could also result in damage to the equipment. -
Page 26: Storage
Storage Prepare the regulator for end-of-season storage by running RV antifreeze through the system. This will keep internal parts lubricated, protect against corrosion, and keep the unit from freezing. CAUTION The regulator may be damaged if it freezes. Protect the regulator from freezing during storage by following the instructions below. Preparing for storage: Pour RV antifreeze into the pump system. -
Page 27: Specifications
Specifications Ports Inlet………………………………………………... Quick connect, ¾" male Outlet……………………………………………… Quick connect, ¾" female Bypass……………………………………………... Quick connect, ¾" female Gauge (2)…………………………………………... NPT, ¼" female Maximum pressure…………………………………….. 100 psi (7 bar) Maximum flow………………………………………….7.0 GPM (27 LPM) Maximum fluid temperature…………………………… 120°F (50°C) Component materials* ... -
Page 28: Limited Warranty
Limited Warranty Dear Valued Customer: The NorthStar Product you just purchased is built with the finest material and craftsmanship. Use this product properly and enjoy the benefits from its high performance. By purchasing a NorthStar product, you show a desire for quality and durability. Like all mechanical equipment this unit requires a due amount of care. - Page 29 This page is intentionally left blank...
- Page 30 Northern Tool + Equipment Co., Inc. Burnsville, MN 55306 NorthernTool.com Made in China...
Need help?
Do you have a question about the 2681022 and is the answer not in the manual?
Questions and answers