Advertisement
Quick Links
®
HEALTH
If you have a problem, question, or request, call
your local dealer, or Steelcase Line 1 at
888.STEELCASE (888.783.3522)
for immediate action by people who want to help you.
(Outside the U.S.A., Canada, Mexico, Puerto Rico,
and the U.S. Virgin Islands, call: 1.616.247.2500)
Or visit our website: www.steelcase.com
©
2014 Steelcase Inc.
Grand Rapids, MI 49501
U.S.A.
Printed in U.S.A.
Regard
Recommended Sequence of Assembly
1) FRAMES
2) POWER
3) CABINET
4) TABLE
5) BACKS
6) SEATS
7) TRIM
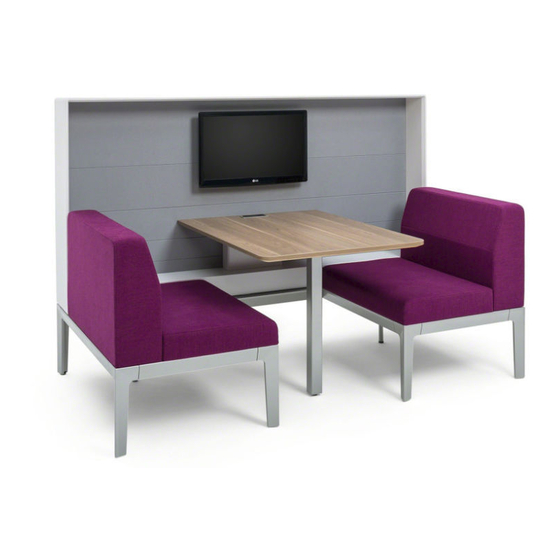
Booth with Table
™
#2 Phillips Bit
with Extension
1/4"
Protective Covering
Page 1 of 18
939599301 Rev B
Advertisement

Related Manuals for Steelcase Regard Booth with Table


Summary of Contents for Steelcase Regard Booth with Table
- Page 1 Extension 1/4” Recommended Sequence of Assembly If you have a problem, question, or request, call your local dealer, or Steelcase Line 1 at 1) FRAMES 888.STEELCASE (888.783.3522) 2) POWER for immediate action by people who want to help you.
- Page 2 ® HEALTH EXTENSION FRAME Base Frame Assembly for Booth LINK Remove packaged aluminum trim and set aside. SEAT BASE FRAMES Trim will be assembled later. Place the Extension Frame and Link on a clean surface adjacent to the mating Seat Base Frames. Remove attachment bolts from top of all legs.
- Page 3 ® POWER MODULE HEALTH MOUNTING NOTE: Orient with power BRACKET cord on top as shown Mounting Corded Power Module to the Base Frame It is preferred to do this before installing components on the top of the Base Frame for easier access.
- Page 4 ® HEALTH All electrical installations should be done by a qualified person in accordance with codes and regulations applicable at the installation site. Locating Power on the Base Frame 8-1/4” Note: These steps should be completed prior to installation of seats, backs and cabinets for easier access.
- Page 5 MOUNTING ® BRACKET HEALTH 4-CIRCUIT POWER MODULE POWER MODULE IN-LINE CONNECTOR 4-CIRCUIT POWER MODULE All electrical installations should be done by a qualified person in accordance with codes and regulations applicable at the installation site. POWER MODULE CLIP Mounting Modular Power on a Base Frame If electrical layout calls for dual power modules, assemble these using the in-line connector provided.
- Page 6 ® HEALTH 6” All electrical installations should be done by a qualified person in accordance with codes and regulations applicable at the installation site. 6” Mounting Hardwired Power to the Base Frame If local code requires hardwired power, the electri- cian should use code-compliant junction boxes and Darkened areas of rails shown locate them as shown in the illustration.
-
Page 7: Wiring Schematic
® HEALTH Hardwire harness All electrical installations should be done by a qualified person in accordance with codes and regulations applicable at the installation site. Connection of the building power to the Base Power-In harness The electrician first locates the building interface and determines the appropriate harness length. - Page 8 ® HEALTH Slotted channel SEAT BASE FRAME (example) All electrical installations should be done by a qualified person in accordance with codes and BASE POWER-IN regulations applicable at the installation site. Attaching the Base Power-In Harness to the Base Frame STRAIN RELIEF BRACKET Measure the distance from the power source...
- Page 9 ® HEALTH POWER MODULE All electrical installations should be done by a qualified person in “H” BASE POWER-IN accordance with codes and CONNECTOR regulations applicable at the installation site. Per the electrical layout, connect the “H” base power-in connector(s) to the appropriate power module as shown. Make sure this connection is secure.
- Page 10 ® HEALTH Booth Cabinet Assembly Place cabinet unit on a clean surface with front facing down. Remove both shipping brackets from the bottom of the cabinet. (Requires two people) Align and place unit on top of base frame. From under the Base Frame, install the clamp brackets, making sure each bracket is fully engaged with the frame and tighten securely with fasteners.
- Page 11 ® HEALTH Install top plate to worksurface column support with four (4) fasteners provided and tighten securely. Align and install worksurface column support to the underside of the worksurface with four (4) fasteners provided and tighten securely. WORKSURFACE COLUMN SUPPORT TOP PLATE WORKSURFACE (UNDERSIDE)
- Page 12 ® HEALTH TABLE TAB Install worksurface by inserting both tabs into corresponding slots in the front of the back panel of the cabinet (8a). To secure worksurface from behind the cabinet, install two (2) wedge blocks into the the slots from the bottom, gently tapping them up until tight (8b).
- Page 13 ® HEALTH Mounting Power Module to the Booth Worksurface Pass power cord through opening in the worksurface. Fully extend clamp brackets. Tighten thumb screws on the underside of the worksurface making sure that the faceplate of the power module is properly aligned in the opening. Install wire cover by snapping four tabs into the vertical panel of the cabinet directly below the worksurface.
- Page 14 ® HEALTH Seat Back Assembly Place back on a clean surface. The clamp brackets are attached to the mounting uprights on the bottom of the unit, remove both and set aside. Align and place unit on top of base frame. From under the Base Frame, install the two clamp brackets with fasteners from Step 2, making sure each bracket is fully engaged with the frame and tighten securely.
- Page 15 ® HEALTH Seat Assembly Place the four seat cushions on top of the base frames in their approximate locations. Raise the front of each seat slightly and engage the tabs at the rear of the attachment bracket with the corresponding slots in the base frame.
- Page 16 ® HEALTH Base Trim Assembly Insert one end of trim onto one leg (1a) and on the other end, use a flat-bladed screwdriver to depress the spring-loaded plastic plunger of that leg using bottom slots provided (1b). Note: There is a balance point when the screwdriver is fully seated, so excessive force is not needed to depress.
- Page 17 ® HEALTH Base Trim Assembly (continued) 26-1/2” LONG TAPERED-END TRIM Apply left- and right-seat trims to the inner-facing frames to lock in the seats. Apply tapered-end trim between the seats. Secure all trim with self-drilling (silver) screws provided using pre-drilled holes. Make sure trim has securely retained cabinet and seats by lifting on the front edges.
- Page 18 ® HEALTH Task Light Assembly (optional) 3" Recommended location of Task Light #2 Back Panel holes Refer to Assembly Directions included with the Jumper cord entry hole for light #2 task lights. Route power cord through holes provided in the back panel. Note: If finished back Back Panel holes Jumper cord exit hole to light #2 panel is already installed, remove it before this...
Need help?
Do you have a question about the Regard Booth with Table and is the answer not in the manual?
Questions and answers