
Subscribe to Our Youtube Channel
Related Manuals for Samsung AC RXAD G Series


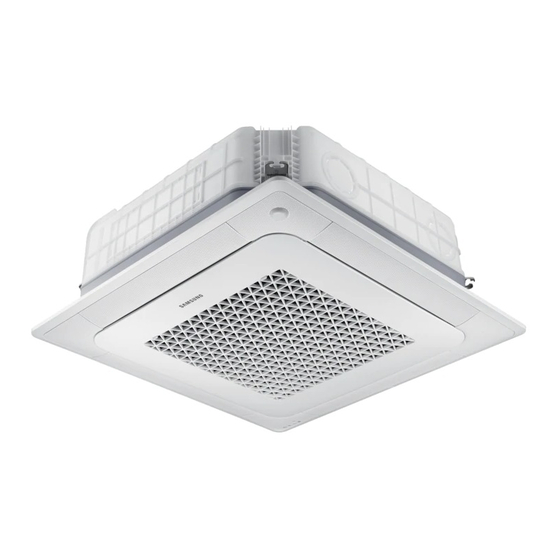
Summary of Contents for Samsung AC RXAD G Series
- Page 1 Air conditioner Installation manual AC***RXAD*G • Thank you for purchasing this Samsung air conditioner. • Before operating this unit, please read this manual carefully and retain it for future reference.
-
Page 2: Table Of Contents
Contents Safety Information General information Installing the unit Power supply line, fuse or circuit breaker Installation Procedure Step 1 Choosing the installation location Step 2 Fixing the outdoor unit in place Step 3 Connecting the power cables, communication cable, and controllers Step 4 Optional: Extending the power cable Step 5 Connecting the refrigerant pipe Step 6 Optional: Cutting and flaring the pipes... - Page 3 Business users should contact their supplier and check the terms and conditions of the purchase contract. This product and its electronic accessories should not be mixed with other commercial wastes for disposal. For information on Samsung’s environmental commitments and product-specific regulatory obligations, e.g. REACH, WEEE, Batteries, visit: www.samsung.com/uk/aboutsamsung/sustainability/environment/our-commitment/data/...
-
Page 4: Safety Information
This manual explains how to install an indoor unit with a injured if protective equipment is not properly equipped. split system with two SAMSUNG units. The use of other • Do not use means to accelerate the defrost operation or to types of units with different control systems may damage clean, other than those recommended by Samsung. -
Page 5: Installing The Unit
• For use in Europe: This appliance can be used by children • For this reason, when provisions of the installation aged from 8 years and above and persons with reduced manual are not complied with, the cost required to physical, sensory or mental capabilities or lack of experience access and repair the units (in SAFETY CONDITIONS, and knowledge if they have been given supervision or... -
Page 6: Power Supply Line, Fuse Or Circuit Breaker
Safety Information • Make sure that the work area is safe from flammable • Never directly touch any accidental leaking substances. refrigerant. It could result in severe wounds caused by frostbite. • To purge air in the refrigerant, be sure to use a vacuum pump. -
Page 7: Installation Procedure
200 mm Minimum required room area – Air Guide Duct (This product is not provided by Samsung) • IMPORTANT: it’s mandatory to consider either the • Install the unit at a height where its base can be table 1 or taking into consideration the local law firmly fixed in place. - Page 8 R-Pro – Install the outdoor unit in a place (such as near supplied by SAMSUNG (Code: MOK-220SA) or buildings etc.) where it can be prevented from sea commercial water repellent grease and wax, etc., breeze.
- Page 9 Minimum clearances for the outdoor unit When installing 1 outdoor unit (Unit: mm) or more or more or more or more 300 or more 300 or more 2000 300 or 600 or or more more more CAUTION or more • The outdoor unit must be installed according to the specified distances in order to permit accessibility from each side, to guarantee correct operation, maintenance, and repair of the unit.
-
Page 10: Step 2 Fixing The Outdoor Unit In Place
Installation Procedure Moving the outdoor unit with wire rope CAUTION • Install a drain outlet at the lowest end around the 1 Before carrying the outdoor unit, fasten two wire base for outdoor unit drainage ropes of 8 m or longer, as shown in the figure. •... -
Page 11: Step 3 Connecting The Power Cables, Communication Cable, And Controllers
Step 3 Connecting the power cables, Air conditioning system examples communication cable, and controllers When using earth leakage circuit breaker (ELCB) for a single phase You must connect the following three electrical cables to the outdoor unit: Communication cable Main power •... - Page 12 Installation Procedure Connecting the main power cable When using ELB for 1 phase and 3 phase 1-phase Electrical component box Power supply 1(L) 2(N) MCCB Cable tie Outdoor-to- Main power Communication cable indoor power cable cable 3-phase 1(L) 2(N) L1(R) L2(S) L3(T) The appearance of the unit may be...
- Page 13 Main power terminal block specifications • 1-phase terminal block specifications • 3-phase terminal block specifications (Unit: mm) (Unit: mm) AC100/120/140RXADKG AC100/120/140RXADNG 1(L) 2(N) 1(L) 2(N) L1(R) L2(S) L3(T) 10.1 10.1 16.3 11.4 14.2 11.4 Main power cable specifications The power cable is not supplied with air conditioner. •...
- Page 14 Installation Procedure 3-phase Model Outdoor unit Input current (A) Power supply Voltage range (V) Outdoor unit Indoor unit Outdoor unit Indoor unit Total MCA (A) MFA (A) Rated Min. Max. Cooling Heating AC100RN4DKG 17.1 17.1 17.1 AC100RN4PKG 17.6 17.6 17.6 AC100RNMDKG AC100RXADNG 18.6...
- Page 15 Silence mode controller wiring diagram 3-phase Outdoor unit Indoor Unit Outdoor Unit ASSY Control out 1(L) 2(N) L1(R) L2(S) L3(T) Cable tie Outdoor-to-indoor 3-phase 4-wire main Communication Non-voltage contact power cable (AC 380V) power cable cable Connecting the outdoor-to-indoor power cable NOTE and the communication cable •...
- Page 16 Installation Procedure Outdoor-to-indoor power terminal specifications • Connect the cables to the terminal board using the compressed ring terminal. • Cover a solderless ring terminal and a connector part of the power cable and then connect it. Silver solder Norminal Norminal dimensions dimensions...
-
Page 17: Step 4 Optional: Extending The Power Cable
Outdoor-to-indoor power and communication Step 4 Optional: Extending the power cables specifications cable 1 Prepare the following tools. Indoor power supply Power supply Max/Min (V) Indoor power cable Tools Spec Shape 1ø, 220-240V, ±10% 1.5 mm² , 3 wires 50 Hz Crimping pliers MH-14 Communication cable... - Page 18 Installation Procedure 3 Insert both sides of core wire of the power cable into 5 Wrap it with the insulation tape twice or more and the connection sleeve. position your contraction tube in the middle of the insulation tape. • Method 1: Push the core wire into the sleeve from both sides.
-
Page 19: Step 5 Connecting The Refrigerant Pipe
Step 5 Connecting the refrigerant pipe Maximum allowable length Items Single Installation DPM Installation AC100RXAD*G AC100RXAD*G Applicable outdoor unit models AC140RXAD*G AC140RXAD*G AC120RXAD*G AC120RXAD*G Total pipe length (L1+…+Ln+1+a+b) 50 m 75 m Main pipe (L1) 50 m 75 m 30 m 50 m Max. -
Page 20: Step 6 Optional: Cutting And Flaring The Pipes
Installation Procedure Step 6 Optional: Cutting and flaring the CAUTION pipes • Be sure to use C1220T-1/2H (Semi-hard) pipe for more than Ø19.05 mm. If you use C1220T-O (Soft) 1 Make sure that you have the required tools available. pipe for Ø19.05 mm, the pipe may be broken, which (pipe cutter, reamer, flaring tool, and pipe holder) can result in an injury. -
Page 21: Step 7 Installing Oil Traps
5 Check that the flaring is correct, referring to the • Never install a dryer to this unit in order to guarantee illustrations below for examples of incorrect flaring. its lifetime. • If the pipes require brazing ensure that OFN(Oxygen Free Nitrogen) is flowing through the system. -
Page 22: Step 8 Connecting Up And Removing Air In The Circuit
Installation Procedure Step 8 Connecting up and removing air 3 Connect the charging hose of low pressure side of manifold gauge to the packed valve having a service in the circuit port as shown at the figure. CAUTION CAUTION • The designs and shape are subject to change •... -
Page 23: Step 9 Adding Refrigerant (R-32)
8 Check for gas leakage. 1 Check if the stop valve is closed completely. • At this time, especially check for gas leakage from 2 Charge the refrigerant through the service port of the the 3-way valve’s stem nuts(A port), and from the liquid stop valve. - Page 24 Installation Procedure Please fill in the following with indelible ink on the (Unit: g) refrigerant charge label supplied with this product and Model on this manual. AC100RXAD*G • : The factory refrigerant charge of the product. 3700 2700 1000 AC120RXAD*G •...
- Page 25 Calculating the quantity of refrigerant to add The quantity of additional refrigerant is variable according to the installation situation. Thus, make sure the outdoor unit situation before adding refrigerant. This operation can only be performed by a qualified refrigeration specialist. Single installation outdoor unit Interconnection pipe length (m) Model...
-
Page 26: Step 10 Performing The Gas Leak Test
Installation Procedure Connecting communication line and wired remote Instruction for installation and operation controller • You should install the DPM according to the above • In case of 2 indoor units connection installation specification and eliminate the factors that give electrical load to the both indoor units when F1/F2 F1/F2 F1/F2... -
Page 27: Step 11 Connecting The Drain Hose To The Outdoor Unit
5 Be sure to plug the rest of drain holes not connected with drain plugs using drain caps. Drain cap (3EA) Drain plug (1EA) A(Gas) B(liquid) • When installing the product, make sure that the rack is not placed under the drain hole. •... -
Page 28: Step 13 Checking The Earthing
Installation Procedure Step 13 Checking the earthing CAUTION If the power distribution circuit does not have a earthing • When insulating the pipe, use non-slit insulator. or the earthing does not comply with specifications, an 2 Select the insulation of the refrigerant pipe. earthing electrode must be installed. -
Page 29: Step 14 Performing Final Check And Trial Operation
5 Carefully check the installation by measuring the Defrost test mode earthing resistance with a earth resistance tester. If Condition 1: The outdoor temperature is below 10°C. the resistance is above the required level, drive the Condition 2: All the temperature conditions should meet electrode deeper into the ground or increase the the defrost conditions. - Page 30 Installation Procedure 6 View mode: When the K4 switch is pressed, you can see information about our system state as below. short Display contents SEG1 SEG2 SEG3 SEG4 Unit push Order frequency Hundreds digit Tens digit Units digit Current frequency Hundreds digit Tens digit Units digit...
- Page 31 7 Setting outdoor unit option switch and address • After selecting the function for options, press and manually hold the K2 switch for 2 seconds. Edited value of the option will be saved when entire segments a Setting the option blinks and tracking mode begins.
-
Page 32: Extra Procedures
Extra Procedures Extra Procedures Pumping down refrigerant Relocating the indoor and outdoor units WARNING 1 Pump down refrigerant. See Pumping down • After installing the product, be sure to perform leak refrigerant on page 32. tests on the piping connections. After pumping down 2 Remove the power cord. -
Page 33: Using The Stop Valve
Using the stop valve NOTE • Do not apply excessive force to the stop valve and always use special instruments. Otherwise, the Opening the stop valve stopping box can be damaged and the back sheet can leaks. 1 Open the cap and turn the stop valve anticlockwise •... -
Page 34: Maintence Procedures
Maintenance Procedures Maintenance Procedures Performing the gas leak tests for repair Decommissioning In case of repair of the refrigerant circuit, the following The following requirements must be fulfilled before and procedure must be kept to consider flammability. while taking the decommissioning procedure: •... -
Page 35: Appendix
Appendix Troubleshooting The table below list the self-diagnostic routines. For some of error codes, you must contact an authorized service centre. If an error occurs during the operation, it is displayed on the outdoor unit PCB LED, both MAIN PCB and INVERTER PCB. -
Page 36: Technical Specifications
Appendix No. Error Code Meaning Remarks E458 Fan speed error FAN1 ERROR E461 Error due to operation failure of inverter compressor E462 System stop due to full current control E463 Over current trip / PFC over current error Check OLP sensor 1. -
Page 37: Commission Delegated Regulation (Eu) No 626/2011
COMMISSION DELEGATED REGULATION (EU) No 626/2011 PRODUCT FICHE (ENERGY LABELLING OF AIR CONDITIONERS) Supplier's name Samsung Electronics Co,, Ltd, AC100RN4DKG/ AC100RN4DKG/ AC120RN4DKG/ AC120RN4DKG/ AC100RN4PKG/ AC100RN4PKG/ Model name (Indoor/Outdoor) AC100RXADKG AC100RXADNG AC120RXADKG AC120RXADNG AC100RXADKG AC100RXADNG Sound Power Level (Indoor/Outdoor) dB(A) 61 / 69... - Page 38 Appendix COMMISSION DELEGATED REGULATION (EU) No 626/2011 PRODUCT FICHE (ENERGY LABELLING OF AIR CONDITIONERS) Supplier's name Samsung Electronics Co., Ltd, AC120RN4PKG/ AC120RN4PKG/ AC100RNMDKG/ AC100RNMDKG/ AC120RNMDKG/ AC120RNMDKG/ Model name (Indoor/Outdoor) AC120RXADKG AC120RXADNG AC100RXADKG AC100RXADNG AC120RXADKG AC120RXADNG Sound Power Level (Indoor/Outdoor) dB(A)
- Page 39 COMMISSION DELEGATED REGULATION (EU) No 626/2011 PRODUCT FICHE (ENERGY LABELLING OF AIR CONDITIONERS) Supplier's name Samsung Electronics Co., Ltd, AC100RNCDKG/ AC100RNCDKG/ AC120RNCDKG/ AC120RNCDKG/ AC100RNTDKG/ AC100RNTDKG/ Model name (Indoor/Outdoor) AC100RXADKG AC100RXADNG AC120RXADKG AC120RXADNG AC100RXADKG AC100RXADNG Sound Power Level (Indoor/Outdoor) dB(A) 60 / 69...
- Page 40 Appendix [ESPAÑOL-ES] [FRANÇAIS-FR] [ITALIANO-IT] [PORTUGUÊS-PT] Nombre del proveedor Nom du fournisseur Nome del Fornitore Nome do fornecedor Nombre del modelo Nom du modèle Nome del Modello Nome do modelo (unidad interior/exterior) (intérieur/extérieur) (Unità Interna/Unità Esterna) (interior/exterior) Nivel de potencia acústica Niveau de puissance acoustique Livello della potenza sonora Nível de potência sonora (interior/...
- Page 41 [DEUTSCH-DE] [NEDERLANDS-NL] [POLSKI-PL] Name des Lieferanten Naam van de leverancier Nazwa dostawcy Modellbezeichnung Nazwa modelu Modelnaam (binnen/buiten) (Innen-/Außengerät ) (Wewnętrzny/zewnętrzny) Poziom mocy akustycznej Schallleistungspegel (innen/außen) Geluidsniveau (binnen/buiten) (Wewnętrzna/zewnętrzna) Name des Kältemittels Koelmiddel Nazwa środka chłodzącego SEER SEER SEER SEER Energieeffizienzklasse (SEER) Enegie-efficiencyklasse (SEER) Klasa energetyczna (SEER) (Kühlperiode)
- Page 42 Appendix [MAGYAR-HU] [ČEŠTINA-CS] [SLOVENČINA-SK] [ROMÂNĂ-RO] Forgalmazó neve Název dodavatele Názov dodávateľa Numele furnizorului Názov modelu Numele modelului Modellnév (Beltéri/kültéri) Název modelu (vnitřní/venkovní) (vnútorné/vonkajšie) (interior/exterior) Hladina akustického výkonu Hladina akustického výkonu Nivel de putere acustică Zajszint (Beltéri/kültéri) (vnitřní/venkovní) (vnútorná/vonkajšia) (interior/exterior) Hűtőközeg neve Název chladiva Chladivo Numele agentului frigorific...
- Page 43 [HRVATSKI-HR] [SLOVENČINA-SL] [DANSK-DA] Naziv dobavljača Názov dodávateľa Leverandørens navn Názov modelu Naziv modela (unutarnji/spoljni) Modelnavn (indendørs/udendørs) (vnútorné/vonkajšie) Razina zvučne snage Hladina akustického výkonu Lydeffektniveau (u zatvorenom/otvorenom) (vnútorná/vonkajšia) (indenfor/udenfor) Naziv rashladnog sredstva Chladivo Navnet på køleelementet SEER SEER SEER SEER Razred energetske učinkovitosti Trieda energetickej účinnosti Energieffektivitetsklasse (SEER) (SEER)
- Page 44 Appendix [SVENSKA-SV] [SUOMI-FI] [EESTI-ET] [LATVIEŠU-LV] Leverantörens namn Tavarantoimittajan nimi Tarnija nimi Piegādātāja nosaukums Mudeli nimi Modeļa nosaukums Modellnamn (inomhus/utomhus) Mallin nimi (sisä/ulko) (sisetingimused/välistingimused) (iekštelpu/ārtelpu) Helivõimsuse tase Skaņas intensitātes līmenis Ljudnivå (inomhus/utomhus) Äänitehotaso (sisä/ulko) (sisetingimused/välistingimused) (iekštelpu/ārtelpu) Köldmedium Kylmäaineen nimi Jahutusaine nimi Aukstumaģenta nosaukums SEER SEER...
- Page 45 [LIETUVIŲ KALBA-LT] [SRPSKI-SR] Tiekėjo pavadinimas Modelio pavadinimas (naudojamo patalpose / lauke) Garso galios lygis (patalpose / lauke) Šaldalo pavadinimas SEER SEER Energijos suvartojimo efektyvumo klasė (SEER) (vėsinimo sezonas) Pdesignc Pdesignc SCOP (vidutinis klimatas) Energijos suvartojimo efektyvumo klasė SCOP (vidutinis klimatas) šildymo sezonas (vidutinis klimatas) Projektinė...
- Page 46 Appendix [ESPAÑOL-ES] 1 Las fugas de refrigerante contribuyen al cambio climático. Cuanto mayor sea el potencial de calentamiento global (GWP) de un refrigerante, más contribuirá a dicho calentamiento su vertido a la atmósfera. Este aparato contiene un líquido refrigerante con un GWP igual a [675]. Esto significa que, si pasara a la atmósfera 1 kg de este líquido refrigerante, el impacto en el calentamiento global sería, a lo largo de un periodo de 100 años, [675] veces mayor que si se vertiera 1 kg de CO .
- Page 47 [DEUTSCH-DE] 1 Der Austritt von Kältemittel trägt zum Klimawandel bei. Kältemittel mit geringerem Treibhauspotenzial tragen im Fall eines Austretens weniger zur Erderwärmung bei als solche mit höherem Treibhauspotenzial. Dieses Gerät enthält Kältemittel mit einem Treibhauspotenzial von [675]. Somit hätte ein Austreten von 1 kg dieses Kältemittels [675] Mal größere Auswirkungen auf die Erderwärmung als 1 kg CO , bezogen auf hundert Jahre.
- Page 48 Appendix [MAGYAR-HU] 1 A hűtőközeg-szivárgás fokozza az éghajlatváltozást. Az alacsonyabb globális felmelegedési potenciállal (GWP) rendelkező hűtőközegek kevésbé járulnak hozzá a globális felmelegedéshez, ha a légkörbe jutnak, mint a magasabb együtthatójú típusok. A berendezés [675] értékű globális felmelegedési potenciállal (GWP) rendelkező, folyékony halmazállapotú hűtőközeget tartalmaz.
- Page 49 [HRVATSKI-HR] 1 Istjecanje rashladnih sredstava doprinosi klimatskim promjenama. U slučaju ispuštanja u atmosferu rashladno sredstvo s nižim potencijalom globalnog zagrijavanja (GWP) manje bi utjecalo na globalno zagrijavanje od rashladnog sredstva s višim GWP-om. Taj uređaj sadrži rashladnu tekućinu s GWP-om jednakim [675]. To znači da bi u slučaju istjecanja 1 kg te rashladne tekućine u atmosferu, njezin utjecaj na globalno zagrijavanje bio [675] puta veći od utjecaja 1 kg CO tijekom razdoblja od 100 godina.
- Page 50 Appendix [SVENSKA-SV] 1 Läckande köldmedium bidrar till klimatförändringen. Köldmedier med lägre global uppvärmningspotential (GWP) bidrar mindre till den globala uppvärmningen än köldmedier med högre GWP-värde, om de skulle läcka ut i atmosfären. Den här enheten innehåller ett köldmedium med ett GWP-värde som är lika med [675]. Detta innebär att om 1 kg av detta köldmedium skulle läcka ut i atmosfären skulle köldmediets påverkan på...
- Page 51 [LATVIEŠU-LV] 1 Aukstumaģenta noplūde veicina klimata pārmaiņas. Aukstumaģents ar zemāku globālās sasilšanas potenciālu (GWP) globālo sasilšanu veicina mazākā mērā nekā aukstumaģents ar augstāku GWP, ja notiek noplūde atmosfērā. Šajā iekārtā izmantots aukstumaģenta šķidrums, kura GWP atbilst [675]. Tas nozīmē, ka gadījumā, ja atmosfērā noplūstu 1 kg šī aukstumaģenta šķidruma, ietekme uz globālo sasilšanu 100 gadu laika posmā...
- Page 52 SAMSUNG 107, Hanamsandan 6beon-ro, Gwangsan-gu, Gwangju-si, Korea 62218 Samsung, PO Box 12987, Blackrock, Co. Dublin. Ireland or Blackbushe Business Park, Yateley, GU46 6GG. UK This appliance is filled with R-32.
Need help?
Do you have a question about the AC RXAD G Series and is the answer not in the manual?
Questions and answers