Table of Contents
Advertisement
L2 Repair Document
Note: this manual is non-contractual and TCL Communication Ltd. can modify it without prior
notice on the characteristics of described equipments.
Rev.
1.0
All rights reserved. Transfer, copy, use or communication of this file is prohibited without authorization.
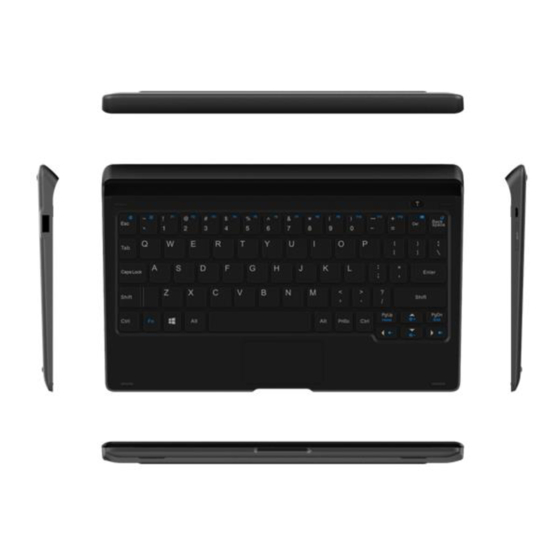
Plus 10 WIFI
2 IN 1 Tablet
Normal Keyboard
8085+KB8085
ONETOUCH 8085+KB8085
TCL
Level 2 Repair Document
Communication Ltd.
Page
1/51
Advertisement
Table of Contents

Related Manuals for TCL Alcatel Plus 10 WIFI


Summary of Contents for TCL Alcatel Plus 10 WIFI
- Page 1 L2 Repair Document Communication Ltd. Plus 10 WIFI 2 IN 1 Tablet Normal Keyboard 8085+KB8085 Note: this manual is non-contractual and TCL Communication Ltd. can modify it without prior notice on the characteristics of described equipments. Rev. Page 1/51 ONETOUCH 8085+KB8085 Level 2 Repair Document All rights reserved.
- Page 2 L2 Repair Document Communication Ltd. Final Version Jane Chen Keira Xie Rev. Date Modification description Prepared By Checked By Approved By Rev. Page 2/51 ONETOUCH 8085+KB8085 Level 2 Repair Document All rights reserved. Transfer, copy, use or communication of this file is prohibited without authorization.
-
Page 3: Table Of Contents
L2 Repair Document Communication Ltd. Content Level 2 repair process ....................4 Warranty Check and Visual Inspection ..............5 2.1 Warranty confirmation of L1..................5 2.2 Visual mechanical check ..................7 2.3 Pretest ........................8 Battery ........................13 3.1 Battery information ....................13 3.2 Battery test ...................... -
Page 4: Level 2 Repair Process
L2 Repair Document Communication Ltd. 1 Level 2 repair process Start Visual Inspection Warranty Check Pretest & Failure confirm Back up user data System firmware install IMT tool test Disassembly L2 Repair PCBA Replace Retest Reassembly Retest Delete the IMT tool in tablet Restore User Information Note: If the device can’t power on, Record in BIG... -
Page 5: Warranty Check And Visual Inspection
L2 Repair Document Communication Ltd. 2 Warranty Check and Visual Inspection 2.1 Warranty confirmation of L1 SN sticker check: If the SN sticker on the back cover or in the SD card cover is not lost: We should make sure that the SN number MUST be the same with the one on the SN sticker; if not, it’s out of warranty policy. - Page 6 L2 Repair Document Communication Ltd. There are two positions of humidity sensitive sticker Position A: Position B: Rev. Page 6/51 ONETOUCH 8085+KB8085 Level 2 Repair Document All rights reserved. Transfer, copy, use or communication of this file is prohibited without authorization.
-
Page 7: Visual Mechanical Check
L2 Repair Document Communication Ltd. 2.2 Visual mechanical check Mechanical warranties check items: Corrosion Corrosion on the USB connector and other metal surfaces。 Hole (diameter > 1mm) Holes on any surface, including the front casing, furnished frame, battery cover, touch Lens, keypad…... -
Page 8: Pretest
L2 Repair Document Communication Ltd. Bend, twisted or crushed on the h/s, cover/casing or connectors, etc. Broken Touch broken, casing/cover broken, etc. Dropped Keypad tear off, touch lens, connectors dropped, etc. External physical damage relating to abnormal use, like front case and frame opened Others ... - Page 9 L2 Repair Document Communication Ltd. Step 2: Double click to open the “Customer” folder and double click to run the IMT tool “TestConsole” . Rev. Page 9/51 ONETOUCH 8085+KB8085 Level 2 Repair Document All rights reserved. Transfer, copy, use or communication of this file is prohibited without authorization.
- Page 10 L2 Repair Document Communication Ltd. Step3: Select “Auto” to start the auto test, or select “MANU” to do the IMT tool test manually. If you select “Auto”, the test items will be tested step by step. If one of the tests failed during “Auto” test mode, it will display “Test fail, restart?”...
- Page 11 L2 Repair Document Communication Ltd. II. Press “pass” key to continue. System Info It display “System Info Testing”, and then will display “Pass” or “Fail”. Battery Info I. It will display the battery temp and battery power; II. It will display “Pass” or “Fail”. ...
- Page 12 L2 Repair Document Communication Ltd. I. Press Volume up and Volume down key, then the key turn green on the screen; II. It will display “Pass” or “Fail”. Camera Front I. Touch the camera icon to take a picture; II.
-
Page 13: Battery
L2 Repair Document Communication Ltd. IV. You will hear a sound from right if it functions well; V. Press “Right Pass” to continue; It will record the sound around and then play the sound; Press “Pass” to continue; Tablet OTG Insert the TABLET USB according to the instruction. - Page 14 L2 Repair Document Communication Ltd. 1) Battery picture Battery feature Model Element Capacity Battery Li Lithium 5830mAh Battery life The bellowing table shows the nominal battery life respectively in standby mode. These typical values are expressed in normal temperature with battery initially full charged and under good ratio coverage. Rev.
-
Page 15: Battery Test
L2 Repair Document Communication Ltd. Battery range depends on the network characteristics, the ambient temperature and particularly on movement. 8085 Plus10 Power pack Talking time Standby time (hours) 200hours Power pack Lithium * Pmin: minimum transmission power ** DTX: no transmission during period of silence Battery charge time For a normally discharged battery which has not been stored for long time, the charge time listed as below table. - Page 16 L2 Repair Document Communication Ltd. Display lights up and following battery icon displayed: During charging Sequential icon flashing: Following fixed battery icon display : After charging (charger connected) Table - Battery charge status on handset 2) If the display does not light on or battery icon does not flash when the charger or the tablet’s charge function is defective with mechanical or electronics.
-
Page 17: Battery Specification
L2 Repair Document Communication Ltd. 3.3 Battery specification Rev. Page 17/51 ONETOUCH 8085+KB8085 Level 2 Repair Document All rights reserved. Transfer, copy, use or communication of this file is prohibited without authorization. -
Page 18: Note Of Battery
L2 Repair Document Communication Ltd. 3.4 Note of Battery Potential for fire or burning. Do not puncture, crush, or heat the battery. Strictly avoid using sharp tool to pry up battery. Fire extinguisher is needed for emergency. 4 Software download It is authorized to install system firmware for the tablet which needs to be updated. - Page 19 L2 Repair Document Communication Ltd. Step 3: Right click the “01_Plus10_afuFlash”, and press “Run as administrator”. Step 4: It will display “The BIOS will be flashed to this machine”. Press any key to continue. Step 5: It will run for a while and then will display “Press any key to reboot the windows!” Update finish. Rev.
-
Page 20: Os Install Process
L2 Repair Document Communication Ltd. 4.3 OS install process Step 1: You should provide a USB disk first, the size should more than 8 GB, format the USB flash disk to the NTFS type. Then rename it as “WINPE”. Step 2: Download the OS firmware from TS website and unzip it. Copy the OS firmware to the root directory of USB disk. - Page 21 L2 Repair Document Communication Ltd. Step 2: Insert the U disk into the tablet PC on power off mode. Then you should set the OS startup from USB Disk, We have two ways to achieve it. Way 1: When the tablets is on bring up, constantly press Fn+F7 at the same time when the alcatel logo pops up before the system enter the OS, you will see the BIOS Pop-up prompt box, select it to “UEFI:USB Flash Disk”...
- Page 22 L2 Repair Document Communication Ltd. Way 2: When the tablets is on bring up, constantly press Delete when the alcatel logo pops up before the system enter the OS, tablet will enter the BIOS setup interface. Press the direction key move BIOS to Boot page, and then move the cursor to “Boot option #1”,enter, select the “UEFI: MultipleCard Reader”...
- Page 23 L2 Repair Document Communication Ltd. Move to Save & Exit page, select “Save change and Exit” press yes and the tablet will restart. OS installing will be start automatic when tablet restart. Rev. Page 23/51 ONETOUCH 8085+KB8085 Level 2 Repair Document All rights reserved.
-
Page 24: Check Bios And Os Version
L2 Repair Document Communication Ltd. 4.4 Check BIOS and OS version After installing BIOS and OS, check whether the BIOS and OS version in device is newest or not. Check BIOS version Way 1: Step 1: Press and R key at the same time. Step 2: Input “cmd”... - Page 25 L2 Repair Document Communication Ltd. Way 2: Step 1: Input “msinfo32” in Cortana search bar. Step 2: Press Enter key, and then the information will pop up. Rev. Page 25/51 ONETOUCH 8085+KB8085 Level 2 Repair Document All rights reserved. Transfer, copy, use or communication of this file is prohibited without authorization.
- Page 26 L2 Repair Document Communication Ltd. Way 3: Input “cmd” in Cortana search bar -> press Enter -> Input “systeminfo” -> press ENTER (similar with way1). Check OS version -> “File Explorer” -> “This PC” -> “Local Disk (C:)” ->”Windows” -> “System Info” -> “System Info” Note: If the BIOS and OS versions in the device are all newest, and the IMT tool test result is pass, there is no need to reinstall the system firmware.
-
Page 27: Disassembly And Assembly 8085
L2 Repair Document Communication Ltd. 5 Disassembly and assembly 8085 5.1 ESD Safety Please wear static loop or static glove 5.2 Disassembly tool You may use the following tools during the disassembly and reassembly procedure: Tweezers Hot wind gun Plastic Flake Pry bar Screwdriver Soldering iron... -
Page 28: Disassembly Process
L2 Repair Document Communication Ltd. 5.3 Disassembly process The steps of disassembly 8085 are as below. Step1: Take off the back cover by using plastic flake. Note: disassembly the back cover along the direction of the arrow. Be careful not to damage the side key FPC. - Page 29 L2 Repair Document Communication Ltd. Step2: Disconnect the side key FPC, main camera, Dock pin FPC, battery, TP FPC and LCD FPC with tweezers. Remove the front camera conduct fabric, speakers and high temperature from PCBA. Rev. Page 29/51 ONETOUCH 8085+KB8085 Level 2 Repair Document All rights reserved.
- Page 30 L2 Repair Document Communication Ltd. Step3: Take off the 26 screws on the tablet. There are two kinds of screws as below. Description Part number Screw,PM(Machine),1.4*0.3*2.5,FlatHead,2.6*0.5,+type,+1.4F1, BMA1425263C1 WithNylok,SWCH18A,HV400--550,PlatingWhiteZN,N/A,SEOUL Screw,PM(Machine),1.4×0.3×1.3mm,FlatHead,3.2×0.3mm,+type,0, WithThreadLock,SWCH18A,HV380- BMA1413300C3 480,PlatingBlackZN,N/A,XIANGJIAN Rev. Page 30/51 ONETOUCH 8085+KB8085 Level 2 Repair Document All rights reserved.
- Page 31 L2 Repair Document Communication Ltd. Step4: Pry up the battery with the pry bar. Step 5: Remove the Dock pin FPC and Dock pin PCBA. Rev. Page 31/51 ONETOUCH 8085+KB8085 Level 2 Repair Document All rights reserved. Transfer, copy, use or communication of this file is prohibited without authorization.
- Page 32 L2 Repair Document Communication Ltd. Step6: Pry up the PCBA with plastic flake. Rev. Page 32/51 ONETOUCH 8085+KB8085 Level 2 Repair Document All rights reserved. Transfer, copy, use or communication of this file is prohibited without authorization.
- Page 33 L2 Repair Document Communication Ltd. Step 7: Remove the main camera, side key FPC and TP FPC. Step 8: Remove the Middle Frame with plastic flake. Rev. Page 33/51 ONETOUCH 8085+KB8085 Level 2 Repair Document All rights reserved. Transfer, copy, use or communication of this file is prohibited without authorization.
- Page 34 L2 Repair Document Communication Ltd. Step 9: Reverse to separate the LCD from Furnished Front Casing & TP. Step 10: Disconnect the front camera, speakers and Dock pin FPC from the PCBA. (Temperature: Lead-free technology 330℃±10℃, time: 5-6s) Rev. Page 34/51 ONETOUCH 8085+KB8085 Level 2 Repair Document...
-
Page 35: Reassembly Process
L2 Repair Document Communication Ltd. Step 11: Disassembly complete. 5.4 Reassembly process Please make reference to the disassembly process for assembly reverse an order of the disassembly steps. Attention: When assembling front camera, make sure the Front Camera Conduct Fabric is pasted back. Rev. -
Page 36: Disassembly Process Evaluation
L2 Repair Document Communication Ltd. When assembling battery, make sure the High temperature tape is pasted back and pay attention to the positive electrode. When assembling speakers and Dock pin cables, pay attention to the positive electrode and negative electrode. -
Page 37: Disassembly Complete
L2 Repair Document Communication Ltd. Time for Jigs for Spare part Difficulty Class Remark disassembly disassembly Furnished battery cover Plastic flake Class 2 Screws Screwdriver Class 1 Tweezers Main PCBA Class 2 Plastic Flake Screwdriver Main camera Class 1 Plastic Flake Front Camera Plastic Flake Class 1... - Page 38 L2 Repair Document Communication Ltd. Charging failure Check whether the voltage of the battery is 0V and Charge for 15 R e p l a c e minutes, check whether it is ok keyboard when charge from keyboard c h e c k w h e t h e r i t i s o k w h e n charge from tablet replace battery Check whether battery is good...
- Page 39 L2 Repair Document Communication Ltd. Display failure Check whether the connection Reassemble LCD b e t w e e n LCD a n d LCD connector is good C h e c k w h e t h e r LCD i s Change LCD n o r m a l (...
- Page 40 L2 Repair Document Communication Ltd. Touch function failure Check whether the connection Reassemble TP between TP and TP connector is good C h e c k w h e t h e r T P i s Change FURFRONT n o r m a l ( i n t e r c h a n g e method) CASING&TP Reweld or replace TP...
- Page 41 L2 Repair Document Communication Ltd. T F c a r d c a n ’ t b e recognized Check whether the TF card is Change TF card good C h e c k w h e t h e r t h e T F c a r d connector is good Change TF card connector and see if problem can be solved...
- Page 42 L2 Repair Document Communication Ltd. Main camera function failure Check whether the connection Reassemble main camera between main camera and Main camera connector is good Check whether main camera is Replace main camera normal C h e c k w h e t h e r M a i n c a m e r a Reweld or replace Main connector is normal camera connector...
- Page 43 L2 Repair Document Communication Ltd. Sub camera function failure Sub camera function failure Check whether the connection Reassemble sub camera between sub camera and sub camera connector is good Check whether sub camera is Replace sub camera normal C h e c k w h e t h e r s u b c a m e r a R e w e l d o r r e p l a c e s u b connector is normal camera connector...
- Page 44 L2 Repair Document Communication Ltd. Power on failure Charge for 15 minutes, check whether can power on Reassemble the back Check whether back cover is assembled cover well R e a s s e m b l e t h e Check whether the connection between battery battery and battery connector is good...
-
Page 45: Pcba Exchange
L2 Repair Document Communication Ltd. N o s o u n d o r s o u n d isn’t normal Check whether left speaker or Change speakers right speaker is normal Check whether contact of PCBA Clean the contact of is clean PCBA Replace PCBA... -
Page 46: Function Test
L2 Repair Document Communication Ltd. Furnished Front Casing & TP Speakers Camera Other related mechanical components Please follow the detail steps 5.3 (Disassembly and assembly process). But need to be very careful to handle the components with related special tool or jig (especially replacing new components) It is better to handle it with plastic tools (plastic tweezers and wedge etc.). - Page 47 L2 Repair Document Communication Ltd. Swap PCBA 1. RCs collect defective PCBAs Visual inspection according to appearance problem and with Part 1 send to RSH. 2. RSH keep the PCBAs. Packing the PCBAs according to Part 2 Send back L3 PCBAs ...
- Page 48 L2 Repair Document Communication Ltd. × × × × Rev. Page 48/51 ONETOUCH 8085+KB8085 Level 2 Repair Document All rights reserved. Transfer, copy, use or communication of this file is prohibited without authorization.
- Page 49 L2 Repair Document Communication Ltd. × 3) Symptom sticker, high temperature adhesive or nonstandard label on PCBA; Note: a. Nonstandard label means broken label, label with handwriting, dirty label, label pasted in the wrong place, etc. b. L2E label, IMEI label and BSN sticker are acceptable to be kept on PCBA only under the condition that these labels are intact, clean and smoothly pasted in the right place) ×...
- Page 50 L2 Repair Document Communication Ltd. × 4) PCBA with liquid or mildew. × Packing requirements a) Wrap PCBA with anti-static bag Note: please keep the anti-static bag clean and intact, especially not to paste any label on it. × √...
- Page 51 Pisco 862387010987343 (eg.) 2AYGES1 power on If you have any question or problem, please feel free to contact us Thanks for your cooperation. TCL Communication Ltd. Global Customer Service TS Dept. April 21 , 2016 Rev. Page 51/51 ONETOUCH 8085+KB8085 Level 2 Repair Document All rights reserved.
Need help?
Do you have a question about the Alcatel Plus 10 WIFI and is the answer not in the manual?
Questions and answers