Grandstream Networks WP820 Application Note
Wi-fi roaming
Hide thumbs
Also See for WP820:
- Quick start manual ,
- User manual (125 pages) ,
- Administration manual (78 pages)
Table of Contents
Advertisement
Quick Links
Advertisement
Table of Contents

Subscribe to Our Youtube Channel
Related Manuals for Grandstream Networks WP820


Summary of Contents for Grandstream Networks WP820
- Page 1 Grandstream Networks, Inc. WP820 Wi-Fi Roaming Application Note...
-
Page 2: Table Of Contents
Table of Contents OVERVIEW ........................7 WP820 WI-FI FREQUENCY AND CHANNEL ..............7 WP820 WI-FI ROAMING ....................7 DEPLOYMENT REQUIREMENTS.................. 8 IMPORTANT WI-FI PARAMETERS ON AP..............9 Beacon Interval ......................9 DTIM ..........................9 Unicast Mode and Multicast Mode .................10 WMM (Wi-Fi Multimedia) ....................10... - Page 3 HUAWEI CLOUD ......................36 Wireless Configuration ....................36 EZMASTER ........................39 Wireless Configuration ....................39 Band Steering ........................41 CLOUDTRAX ........................ 43 Wireless Configuration ....................43 TP-LINK ........................46 Wireless Configuration ....................46 Band Steering ........................48 P a g e WP820 Wi-Fi Roaming Application Note...
- Page 4 Figure 32: Huawei Cloud – Radio Parameters ................... 38 Figure 33: ezMaster – Add Device ......................39 Figure 34: ezMaster – Create New Project ....................40 Figure 35: ezMaster – Device Configuration ....................40 P a g e WP820 Wi-Fi Roaming Application Note...
- Page 5 Figure 41: TP-Link – Add Wireless Network ....................46 Figure 42: TP-Link – Add SSID ........................47 Figure 43: TP-Link – Configure Advanced Wireless Parameters ............... 47 Figure 44: TP-Link – Band Steering ......................48 P a g e WP820 Wi-Fi Roaming Application Note...
- Page 6 Table of Tables Table 1: WP820 Wi-Fi Frequency and Channel .................... 7 Table 2: WP820 Wi-Fi Roaming Options ...................... 8 Table 3: Important Wi-Fi Parameters ......................11 Table 4: GWN7000 Wi-Fi Parameters ......................14 Table 5: Huawei Cloud SSID Configuration Parameters ................36...
-
Page 7: Overview
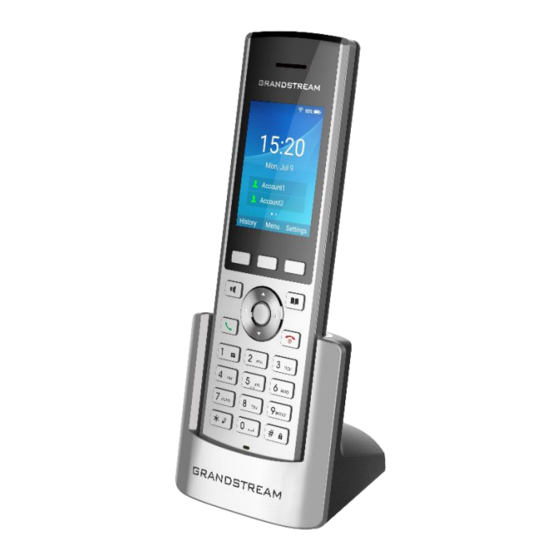
OVERVIEW The WP820 is a portable Wi-Fi phone designed to suit a variety of enterprises and vertical market applications, including retail, logistics, medical and security. This powerful, portable Wi-Fi phone comes equipped with integrated dual-band 802.11a/b/g/n Wi-Fi support, advanced antenna design and roaming support, and integrated Bluetooth for pairing with headsets and mobile devices. -
Page 8: Deployment Requirements
WP820, the device will try to look for a nearby AP with better RSSI. To avoid switchover back and forth due to unstable RSSI, the WP820 will only switch over when the new AP’s RSSI is at least 8 dB higher than the currently connected AP. -
Page 9: Important Wi-Fi Parameters On Ap
During deployment, the cell edge for each AP should be designed to -67dBm and there should be 20% - 30% overlap between adjacent APs at that signal level. Otherwise, WP820 might encounter packet loss or blind area at the cell edge and it cannot hold the signal long enough to complete seamless switchover. To ensure seamless roaming, it’s recommended that WP820 can always receive RSSI -67dBm or higher from the access point. -
Page 10: Unicast Mode And Multicast Mode
IP Precedence, Diff-Serv or MPLS. The default setting is 46 which is equivalent to the DSCP name constant CS6. WP820 will convert the QoS value to the corresponding WMM value/level so the packets can be differentiated and handled properly by other network devices. -
Page 11: Table 3: Important Wi-Fi Parameters
√ UBIQUITI UNIFI √ √ √ √ MIST √ √ √ HUAWEI √ √ √ √ √ CLOUD EZMASTER √ √ CLOUDTRAX √ √ TP-LINK √ √ √ √ √ √ P a g e WP820 Wi-Fi Roaming Application Note... -
Page 12: Gwn7600
4. When using GWN7600 as Master Access Point, users have the ability to create different SSIDs and adding GWN7600 Slave Access Points. The GWN7600 can support up to 16 SSIDs. Click on Edit to edit the SSID. P a g e WP820 Wi-Fi Roaming Application Note... -
Page 13: Figure 3: Gwn7600 Ssid Configuration
Figure 3: GWN7600 SSID Configuration Figure 4: GWN7600 Edit SSID 5. When editing or adding a new SSID, users will have to configure Wi-Fi. Please refer to below table for Wi- Fi tab options. P a g e WP820 Wi-Fi Roaming Application Note... -
Page 14: Table 4: Gwn7000 Wi-Fi Parameters
Wi-Fi connection to the LAN ports transparently. Client Time Policy Select a time policy to be applied to all clients connected to this SSID. Use MAC Filtering Choose Blacklist/Whitelist to specify MAC addresses to be excluded/included P a g e WP820 Wi-Fi Roaming Application Note... -
Page 15: Band Steering
5G in priority, the dual client will be led to the 5G band with more abundant spectrum resources as far as possible Balance, access to the balance between these 2 bands according to the spectrum utilization rate of 2.4G and 5G. P a g e WP820 Wi-Fi Roaming Application Note... -
Page 16: Figure 5: Gwn7600 Band Steering - 1
Figure 5: GWN7600 Band Steering - 1 Figure 6: GWN7600 Band Steering - 2 P a g e WP820 Wi-Fi Roaming Application Note... -
Page 17: Cisco Meraki
Figure 7: Cisco Meraki – Add AP 3. Make any additional configuration changes under the Configure section of Dashboard network. Please make sure to review SSIDs, Access Control, Firewall & Traffic Shaping configuration pages. P a g e WP820 Wi-Fi Roaming Application Note... -
Page 18: Band Steering
Figure 8: Cisco Meraki – Additional Configurations Band Steering Go to Wireless->Access control->Wireless options. Figure 9: Cisco Meraki – Band Steering P a g e WP820 Wi-Fi Roaming Application Note... - Page 19 Dual band operation with Band Steering: Band Steering detects clients capable of 5 GHz operation and steers them to that frequency, while leaving 2.4 GHz available for legacy clients. P a g e WP820 Wi-Fi Roaming Application Note...
-
Page 20: Aruba Central
3. On the left navigation pane, click Wireless Networks. The Wireless Networks page opens. 4. To create a new SSID profile, click the + icon. The Create a New Network pane opens. P a g e WP820 Wi-Fi Roaming Application Note... -
Page 21: Figure 11: Aruba Central - Create New Ssid
The default value is 1, which means the client checks for buffered data on the Instant AP at every beacon. You can also configure a higher DTIM value for power saving. P a g e WP820 Wi-Fi Roaming Application Note... -
Page 22: Figure 12: Aruba Central - Dtim
From the group selector, select a group or a device. c. On the left navigation pane, click RF. The RF page opens. d. Click Radio. e. Under 2.4 GHz, 5 GHz, or both, configure the parameters. P a g e WP820 Wi-Fi Roaming Application Note... -
Page 23: Band Steering
2. From the group selector, select a group or a device. 3. On the left navigation pane, click RF. The RF page opens. 4. Under Adaptive Radio Management (ARM), click Client Control. 5. For Band Steering Mode, configure the parameters. P a g e WP820 Wi-Fi Roaming Application Note... -
Page 24: Figure 14: Aruba Central - Band Steering
Figure 14: Aruba Central – Band Steering P a g e WP820 Wi-Fi Roaming Application Note... -
Page 25: Ruijie Cloud
RUIJIE CLOUD Wireless Configuration Create new network & add APs. Figure 15: RuiJie Cloud – Create New Network P a g e WP820 Wi-Fi Roaming Application Note... -
Page 26: Figure 16: Ruijie Cloud - Create New Ap
All AC device information under the current account can be viewed in the monitoring - device -AC to see whether the device is online and whether the configuration status of the device is synchronized. Figure 17: RuiJie Cloud – AP List P a g e WP820 Wi-Fi Roaming Application Note... -
Page 27: Figure 18: Ruijie Cloud - Wireless Configuration
Figure 18: Ruijie Cloud – Wireless Configuration If the roaming function is turned on, users can achieve seamless roaming within the network scope. Figure 19: RuJjie Cloud – Roaming Configuration P a g e WP820 Wi-Fi Roaming Application Note... -
Page 28: Band Steering
5G priority: after 5G priority is turned on, AP will guide the wireless terminals supporting 5G to have priority access to 5G frequency band, reducing the pressure of 2.4g frequency band. Figure 20: RuiJie Cloud – Band Steering P a g e WP820 Wi-Fi Roaming Application Note... -
Page 29: Ubiquiti Unifi
Figure 21: UNIFI – Wireless Network Settings 2. Add or Edit a WLAN Group. Name: Enter or edit a descriptive name for the WLAN group. Mobility: To enable seamless roaming (Zero Handoff), select the checkbox. P a g e WP820 Wi-Fi Roaming Application Note... -
Page 30: Figure 22: Unifi - Create New Wlan Group
Enabled: Select this option to make the network active. Security: Select the type of security to use on your wireless network. Figure 23: UNIFI – Edit a Wireless Network P a g e WP820 Wi-Fi Roaming Application Note... -
Page 31: Band Steering
Figure 24: UNIFI – DTIM Band Steering The Devices screen displays a list of UniFi devices discovered by the UniFi Controller. You can click any of the column headers to change the list order. P a g e WP820 Wi-Fi Roaming Application Note... -
Page 32: Figure 25: Unifi - Band Steering
Figure 25: UNIFI – Band Steering P a g e WP820 Wi-Fi Roaming Application Note... -
Page 33: Mist
Claim button to add the AP. After that, click to select the new AP in the list and enter a name in the Name field. Figure 26: Mist – Claim APs 2. Setting up a WLAN Click on Networks on the left-hand navigation bar, then select WLANs. Select appropriate options for WLAN Status. P a g e WP820 Wi-Fi Roaming Application Note... -
Page 34: Figure 27: Mist - New Wlan
ENABLED). When selected, this option will ALLOW mDNS packets to transmitted through the specified interface. This includes IPv4 and IPv6 mDNS. If Not selected, then the Broadcast/Multicast filter will treat mDNS frames just like any other broadcast/multicast frame, and block them. P a g e WP820 Wi-Fi Roaming Application Note... -
Page 35: Band Steering
Enable Band steering under Network -> WLANs. Make sure both 2.4GHz and 5GHz radios are enabled on your WLAN to be able to use Band Steering mode. Figure 29: Mist – Band Steering P a g e WP820 Wi-Fi Roaming Application Note... -
Page 36: Huawei Cloud
By default, this function is enabled. The band steering function enables an AP (5Gprioritized) to steer STAs to the 5 GHz frequency band first,which reduces load and interference on the 2.4 GHz frequency band. User experience is therefore P a g e WP820 Wi-Fi Roaming Application Note... -
Page 37: Figure 31: Huawei Cloud - Ssid Configuration
(Optional) Expand Advanced Settings and adjust radio calibration parameters as needed. (Optional) On the Channel Planning area, find the target AP, click Edit for 2.4 GHz/5 GHz radio, and manually configure radio parameters. P a g e WP820 Wi-Fi Roaming Application Note... -
Page 38: Figure 32: Huawei Cloud - Radio Parameters
Figure 32: Huawei Cloud – Radio Parameters P a g e WP820 Wi-Fi Roaming Application Note... -
Page 39: Ezmaster
In order to start managing and monitoring Neutron devices, these devices must first be added to a project. Make sure that your Neutron device is connected to a network with a DHCP server and can access the Internet. Click on the Project icon to create a new project. P a g e WP820 Wi-Fi Roaming Application Note... -
Page 40: Figure 34: Ezmaster - Create New Project
Once the AP is online (green), to configure your AP, click on the Device Name link of your AP to bring up the configuration menu. Figure 35: ezMaster – Device Configuration P a g e WP820 Wi-Fi Roaming Application Note... -
Page 41: Band Steering
Note: For Band Steering to take effect, both 2.4GHz and 5GHz SSIDs must have the same SSID and security settings. Wireless clients must be in both 2.4GHz and 5GHz wireless coverage zone when authenticating with the AP for the Band Steering algorithm to take effect. P a g e WP820 Wi-Fi Roaming Application Note... -
Page 42: Figure 37: Ezmaster - Band Steering
Figure 37: ezMaster – Band Steering P a g e WP820 Wi-Fi Roaming Application Note... -
Page 43: Cloudtrax
Network Type: This gives us an idea how you are using CloudTrax so we can find more ways to improve. P a g e WP820 Wi-Fi Roaming Application Note... -
Page 44: Figure 39: Cloudtrax - Add Access Point
LAN resources and other clients. When we created your network, we set the first SSID to be public and the second SSID to be private, but you can adjust these any way you wish. P a g e WP820 Wi-Fi Roaming Application Note... -
Page 45: Figure 40: Cloudtrax - Edit Ssid
Figure 40: CloudTrax – Edit SSID P a g e WP820 Wi-Fi Roaming Application Note... -
Page 46: Tp-Link
Select a band frequency and click + to add a WLAN group. Figure 41: TP-Link – Add Wireless Network 2. Add an SSID to the specific WLAN group, Configure the parameters in the following window. P a g e WP820 Wi-Fi Roaming Application Note... -
Page 47: Figure 42: Tp-Link - Add Ssid
3. Configure Advanced Wireless Parameters The advanced wireless parameters consist of Beacon Interval, DTIM Period, RTS Threshold, Fragmentation Threshold and Airtime Fairness. Go to Wireless Settings->Advanced Setting. Figure 43: TP-Link – Configure Advanced Wireless Parameters P a g e WP820 Wi-Fi Roaming Application Note... -
Page 48: Band Steering
5GHz frequency band which supports higher transmission rates and more client devices, and thus to greatly improve the network quality. Go to Wireless Settings > Band Steering. Figure 44: TP-Link – Band Steering P a g e WP820 Wi-Fi Roaming Application Note...
Need help?
Do you have a question about the WP820 and is the answer not in the manual?
Questions and answers