
Related Manuals for Measurement Computing USB-DIO24H/37


Summary of Contents for Measurement Computing USB-DIO24H/37
- Page 1 USB-DIO24H/37 24-Channel Digital I/O USB Device User's Guide May 2019. Rev 4 © Measurement Computing Corporation...
- Page 2 Other product and company names mentioned herein are trademarks or trade names of their respective companies. © 2019 Measurement Computing Corporation. All rights reserved. No part of this publication may be reproduced, stored in a retrieval system, or transmitted, in any form by any means, electronic, mechanical, by photocopying, recording, or otherwise without the prior written permission of Measurement Computing Corporation.
-
Page 3: Table Of Contents
What you will learn from this user's guide ......................4 Conventions in this user's guide ......................... 4 Where to find more information ......................... 4 Chapter 1 Introducing the USB-DIO24H/37 ......................5 Overview: USB-DIO24H/37 features ......................... 5 Functional block diagram ........................... 5 Chapter 2 Installing the USB-DIO24H/37 ...................... -
Page 4: Preface
What you will learn from this user's guide This user's guide explains how to install, configure and use the USB-DIO24H/37 digital I/O board. This user's guide also refers you to related documents available on our web site and to technical support resources. -
Page 5: Introducing The Usb-Dio24H/37
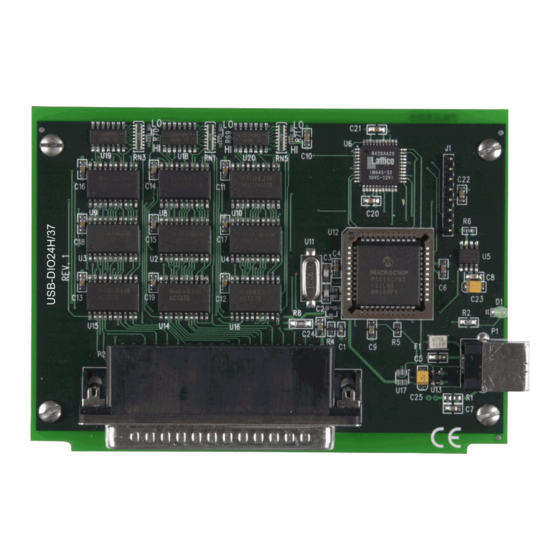
Introducing the USB-DIO24H/37 Overview: USB-DIO24H/37 features This manual explains how to install, configure and use the USB-DIO24H/37 digital I/O board. You can use this board in a variety of digital applications to control logic devices such as switches, gauges, relays, pumps, and sensors. -
Page 6: Installing The Usb-Dio24H/37
If the USB LED turns off If the USB LED is on but then turns off, the computer has lost communication with the USB-DIO24H/37. To restore communication, disconnect the USB cable from the computer, and then reconnect it. This should restore communication, and the USB LED should turn back on. -
Page 7: Field Wiring, Signal Termination And Conditioning
General information regarding signal connection and configuration is available in the Guide to DAQ Signal Connections (available for download from www.mccdaq.com/support/DAQ-Signal-Connections.aspx.) The red stripe identifies pin # 1 Figure 3. C37FF-x cable Field wiring, signal termination and conditioning Refer to the product page at www.mccdaq.com/usb-data-acquisition/USB-DIO24-Series.aspx for compatible products to use with the USB-DIO24H/37. -
Page 8: Functional Details
The counter can count frequencies of up to 1 MHz. The six ground ( ) pins are identical and provide a common ground for all USB-DIO24H/37 functions. The two power pins ( ) draw power from the USB connector. Each pin is a +5 volt output that is supplied by... -
Page 9: Usb Connector
5 V. No external power supply is required. The LED indicates the communication status of the USB-DIO24H/37. It uses up to 5 mA of current and cannot be disabled. The table below explains the function of the USB-DIO24H/37 LED. -
Page 10: Output (Source) Current Limits
Output (sink) current limits Each USB-DIO24H/37 DIO output can sink up to 64 mA. For an individual line, this is not a problem. But if you were to apply this maximum load to all 24 DIO lines, you would damage the USB-DIO24H/37 because the total amount of current is well over the maximum for the USB supply. -
Page 11: Specifications
If your laptop is constrained to the 100 mA maximum, the USB-DIO24H/37 is not guaranteed to work. In order to use the product you will need to purchase a self-powered hub. -
Page 12: Counter
This is the total (no load) current requirement for the USB-DIO24H/37. Note 6: Bus-powered hubs can provide downstream USB power as low as 4.4 V. Although the USB-DIO24H/37 will typically function at this 4.4 V minimum, guaranteed performance requires a minimum power supply voltage of 4.75 V. -
Page 13: General
USB-DIO24H/37 User's Guide Specifications General Table 5. General specifications Parameter Conditions Specification USB controller clock error 25 °C ±30 ppm max 0 to 70 °C ±50 ppm max Device type USB 1.1 low-speed Device compatibility USB 1.1, USB 2.0 Environmental Table 6. - Page 14 USB-DIO24H/37 User's Guide Specifications Table 9. Connector pinout Signal name Signal name Port B Bit 7 Port C Bit 7 Port B Bit 6 Port C Bit 6 Port B Bit 5 Port C Bit 5 Port B Bit 4...
-
Page 15: Declaration Of Conformity
Norton, MA 02766 Category: Electrical equipment for measurement, control and laboratory use. Measurement Computing Corporation declares under sole responsibility that the product USB-DIO24H/37 to which this declaration relates is in conformity with the relevant provisions of the following standards or other... - Page 16 Measurement Computing Corporation NI Hungary Kft 10 Commerce Way H-4031 Debrecen, Hátar út 1/A, Hungary Norton, Massachusetts 02766 Phone: +36 (52) 515400 (508) 946-5100 Fax: +36 (52) 515414 Fax: (508) 946-9500 http://hungary.ni.com/debrecen E-mail: info@mccdaq.com www.mccdaq.com...
Need help?
Do you have a question about the USB-DIO24H/37 and is the answer not in the manual?
Questions and answers