Sign In
Upload
Download
Table of Contents
Contents
Add to my manuals
Delete from my manuals
Share
URL of this page:
HTML Link:
Bookmark this page
Add
Manual will be automatically added to "My Manuals"
Print this page
×
Bookmark added
×
Added to my manuals
Manuals
Brands
Life Fitness Manuals
Fitness Equipment
Studio Barbell
Owner's manual
Life Fitness Studio Barbell Owner's Manual
Rack
Hide thumbs
1
2
3
4
Table Of Contents
5
6
7
8
9
10
11
12
13
14
15
16
17
18
19
20
21
22
23
24
25
26
27
28
29
30
31
page
of
31
Go
/
31
Contents
Table of Contents
Bookmarks
Table of Contents
Corporate Headquarters
Table of Contents
Safety
Safety Information
Access Control
Installation
Proper Usage
Inspection
Operating Warnings
Plate Loaded, Free Weight, and Body Weight Systems
Warning Labels
Overview Barbell Rack
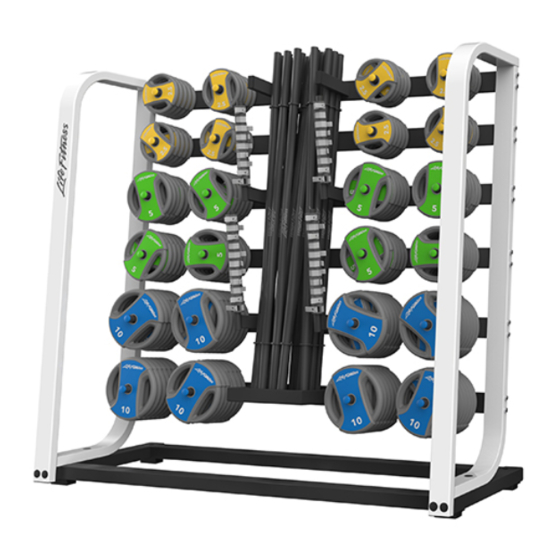
Dumbbell Rack
Kettlebell Rack
Service and Technical Data Maintenance Schedule
Clean
Wax
Inspect
Approved and Compatible Cleaners
Remove of Paint, Marking Pen, and Labels
Assembly
Barbell Rack Assembly
Dumbbell Rack Assembly
Kettlebell Rack Assembly
Warranty What Is Covered
Who Is Covered
Who Pays Transportation and Insurance for Service
What We will Do to Correct Covered Defects
What Is Not Covered
Owners Manual
Exclusive Warranty
Changes in Warranty Not Authorized
Effects of State Laws
Our Pledge to You
Warranty Coverage
How to Obtain Product Service
Advertisement
Quick Links
1
Plate Loaded, Free Weight, and Body Weight Systems
2
Dumbbell Rack
3
Overview Barbell Rack
Download this manual
Studio Collection
Barbell, Dumbbell, & Kettlebell Rack
Owner's Manual
1008743-0001 REV AB
Table of
Contents
Previous
Page
Next
Page
1
2
3
4
5
Advertisement
Table of Contents
Need help?
Do you have a question about the Studio Barbell and is the answer not in the manual?
Ask a question
Questions and answers
Related Manuals for Life Fitness Studio Barbell
Fitness Equipment Life Fitness Fitness Equipment Parts Manual
Life fitness fitness equipment user manual (8 pages)
Fitness Equipment Life Fitness Fitness Electronics Operation Manual
Rear drive total body cross-trainers (25 pages)
Fitness Equipment Life Fitness Studio Dumbbell Owner's Manual
Rack (31 pages)
Fitness Equipment Life Fitness Integrity SL Service Manual
(156 pages)
Fitness Equipment Life Fitness X9 User Manual
Total-body elliptical cross-trainer (48 pages)
Fitness Equipment Life Fitness SC95 Service Manual
Independent stairclimbers (126 pages)
Fitness Equipment Life Fitness Lifecycle 9500HR Operation Manual
Aerobic trainer (38 pages)
Fitness Equipment Life Fitness x3 Assembly & Operation Manual
X series (67 pages)
Fitness Equipment Life Fitness X3 Assembly & Parts List
X series (14 pages)
Fitness Equipment Life Fitness Insignia Series Owner's Manual
(50 pages)
Fitness Equipment Life Fitness Lifecycle 9100R Operation Manual
Aerobic trainer (32 pages)
Fitness Equipment Life Fitness CLUB Series Service Manual
Integrity cross-trainer (35 pages)
Fitness Equipment Life Fitness M051-00K61-A132 Operation Manual
Integrity series cross-trainer (42 pages)
Fitness Equipment Life Fitness X8 Assembly And User Instructions Manual
Total-body elliptical cross-trainer (47 pages)
Fitness Equipment Life Fitness MJACO-STA Owner's Manual
Multi-jungle (63 pages)
Fitness Equipment Life Fitness 90X-0XXX-01 Parts Manual
Life fitness cross trainer parts manual (14 pages)
This manual is also suitable for:
Studio dumbbell
Studio kettlebell
Table of Contents
Print
Rename the bookmark
Delete bookmark?
Delete from my manuals?
Login
Sign In
OR
Sign in with Facebook
Sign in with Google
Upload manual
Upload from disk
Upload from URL


Need help?
Do you have a question about the Studio Barbell and is the answer not in the manual?
Questions and answers