Advertisement
Available languages
Available languages
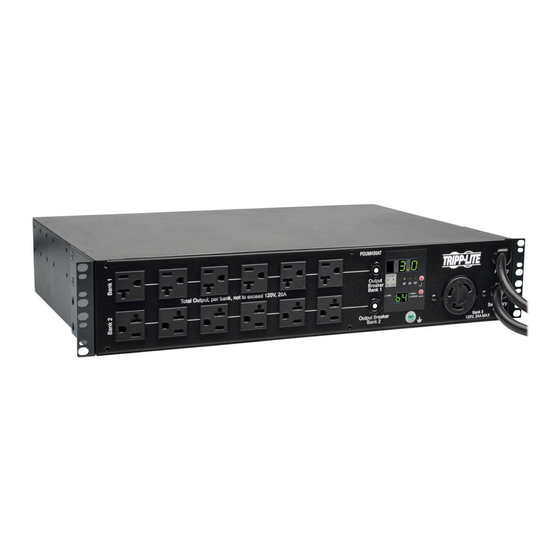
Single-Phase PDUs with
Automatic Transfer Switch
PDUMH30AT, PDUMH30ATNET, PDUMH30HVAT, PDUMH30HVATNET,
AGAC8033 • AGAC8034 • AGAC8110 • AGAC8073 • AG-0150 • AG-0151
PROTECT YOUR INVESTMENT!
Register your product for quicker service
and ultimate peace of mind.
You could also win an
ISOBAR6ULTRA surge protector-
www.tripplite.com/warranty
1111 W. 35th Street, Chicago, IL 60609 USA • www.tripplite.com/support
18-11-326-93323D.indb 1
Owner's Manual
PDUMH32HVAT, PDUMH32HVATNET
Agency Model Numbers:
a $100 value!
Copyright © 2019 Tripp Lite. All rights reserved.
Models:
1
2
3
3
6
7
12
16
16
19
20
21
41
61
81
2/26/2019 3:08:17 PM
Advertisement
Chapters

Related Manuals for Tripp Lite PDUMH30AT


Summary of Contents for Tripp Lite PDUMH30AT
-
Page 1: Table Of Contents
You could also win an ISOBAR6ULTRA surge protector— a $100 value! www.tripplite.com/warranty 1111 W. 35th Street, Chicago, IL 60609 USA • www.tripplite.com/support Copyright © 2019 Tripp Lite. All rights reserved. 18-11-326-93323D.indb 1 2/26/2019 3:08:17 PM... -
Page 2: Important Safety Instructions
Important Safety Instructions SAVE THESE INSTRUCTIONS This manual contains instructions and warnings that should be followed during the installation, operation and storage of this product. Failure to heed these instructions and warnings may affect the product warranty. • The PDU provides the convenience of multiple outlets, but DOES NOT provide surge or line noise protection for connected equipment. -
Page 3: Installation
Installation Mounting the PDU The PDU supports 2U rack mounting or surface mounting (e.g. on a wall, on a desk or under a counter). Note: The user must determine the fitness of hardware and procedures before mounting. The PDU and included hardware are designed for common rack and rack enclosure types and may not be appropriate for all applications. - Page 4 Installation continued Wall Mounting (not applicable to series AG-0151 for PDUMH32HVAT & PDUMH32HVATNET) Attach one of the supplied mounting brackets to the wall with user supplied screws. Make sure screws and any other hardware are appropriate for the surface type. Attach a mounting bracket to the PDU with the included screws.
- Page 5 Installation continued Surface Mounting Attach the included mounting brackets to the sides of the PDU with the included screws. Note: If you need to change the orientation of the PDU to match the mounting surface, rotate the mounting brackets in 90° increments as required before attaching.
-
Page 6: Connecting The Pdu
AC power (120V for PDUMH30AT & PDUMH30ATNET; 200-240V for PDUMH30HVAT, To UPS PDUMH30HVATNET, PDUMH32HVAT & PDUMH32HVATNET), such as a Tripp Lite SmartOnline UPS System. Under ® normal operating conditions, the PDU will distribute AC power from the Primary input source. -
Page 7: Features
Features PDUMH30AT Bank 1 Bank 1 Bank 1 Bank 2 Bank 2 Bank 2 PDUMH30HVAT PDUMH32HVAT Primary Input Primary Primary Input Input Bank Bank Bank Secondary Input Secondary Secondary Input Input Bank Bank Bank Output Breaker Output Breaker Output Breaker... - Page 8 Features continued PDUMH30ATNET Bank 1 Bank 2 PDUMH30HVATNET PDUMH32HVATNET Output Breaker Output Breaker Bank 1 Bank 2 Config Port 18-11-326-93323D.indb 8 2/26/2019 3:08:28 PM...
- Page 9 Features continued Primary Input Cord The cord is permanently attached to the PDU and has a NEMA L5-30P (PDUMH30AT & PDUMH30ATNET) or NEMA L6-30P (PDUMH30HVAT & PDUMH30HVATNET) twist-lock plug or IEC309 32A (PDUMH32HVAT & PDUMH32HVATNET) plug. Secondary Input Cord The cord is permanently attached to the PDU and has a NEMA L5-30P (PDUMH30AT &...
- Page 10 Features continued Digital LED Display and Load Meter (Ammeter) 3-Digit Display: Shows measured or calculated amperage, kilowatt or voltage values. Enter Button: Scroll through ACTIVE INPUT DISPLAY and CONFIGURATION options using this button. While in VOLT PRIMARY SECONDARY DISPLAY mode, a short press switches the display between AMPS, KW and VOLTS.
- Page 11 ENVIROSENSE Port (PDUMH30ATNET, PDUMH30HVATNET & PDUMH32HVATNET): Use this port to connect a Tripp Lite ENVIROSENSE environmental sensor to provide remote temperature/humidity monitoring and a dry contact interface to control and monitor alarm, security and telecom devices.
-
Page 12: Led Diagrams
LED Diagrams Display Modes Primary Source Measurements Auto Scroll Secondary Source Measurements Items (See Note 6) Bank Measurements Number of Banks Available (Varies by Model) To Next Screen Note 1: Press Mode button to go to the next Display mode (vertical movement on this document). Note the Amps, kW, or Volt sub-Mode will be remembered. - Page 13 LED Diagrams Display Modes Temperature Display Mode (Only Available if Envirosense Connected) Number of Sensors Depends on Envirosense Model Used Humidity Display Mode (Only Available if Envirosense Connected) Number of Sensors Depends on Envirosense Model Used To Previous Screen Note 1: Press Mode button to go to the next Display mode (vertical movement on this document). Note the Amps, kW, or Volt sub-Mode will be remembered.
- Page 14 LED Diagrams IP Address Display Note 1: IP Address display: the top 3 digit display will show “IP “. The bottom right 2 digit display will show one IP address digit at a time separated by blanks to identify each digit. Decimal points and colons will be shown as hyphens. (Note this display supports IPv4 AND IPv6 addresses.) Note 2: The display will automatically transition back to whatever mode it came from after displaying the IP address.
- Page 15 LED Diagrams Control Modes Celsius or Fahrenheit Configuration (Only Shown if Envirosense Connected) HOLD HOLD Auto Scroll Enable/Disable HOLD HOLD LED Brightness HOLD HOLD HOLD HOLD LED Test Control HOLD TIME OUT Note 1: Press Mode button to go to the next Display mode (vertical movement on this document). Note the Amps, kW, or Volt sub-Mode will be remembered.
-
Page 16: Configuration And Operation
Configuration and Operation Automatic Transfer Switch When the Primary and Secondary inputs are both connected to Tripp Lite UPS Systems, the PDU operates as an Automatic Transfer Switch, providing redundant input power for high availability applications. Under normal operating conditions, the PDU will distribute power from the Primary input source, switching to the Secondary input source under certain conditions. - Page 17 Configuration and Operation continued Quick Test After installing the PDU and connecting equipment, you may test the Automatic Transfer Switch function by temporarily shutting down the UPS system connected to the Primary AC input. When the Primary input UPS is no longer supplying AC power, the PDU will switch from the Primary input to the Secondary input, and the Secondary Active Input...
- Page 18 Configuration and Operation continued Remote Monitoring and Control Models PDUMH30ATNET, PDUMH30HVATNET and PDUMH32HVATNET provide remote monitoring, outlet control and more via Web browser, telnet and SNMP-based Network Management Systems. For more information about configuration and operation of the PDU via the PowerAlert Web browser interface, refer to the SNMPWEBCARD Installation Manual, downloadable at tripplite.com/support.
-
Page 19: Service
Service Your Tripp Lite product is covered by the warranty described in this manual. A variety of Extended Warranty and On-Site Service Programs are also available from Tripp Lite. For more information on service, visit www.tripplite.com/support. Before returning your product for service, follow these steps: 1. -
Page 20: Warranty And Product Registration
Service under this Warranty can only be obtained by your delivering or shipping the product (with all shipping or delivery charges prepaid) to: Tripp Lite, 1111 W. 35th Street, Chicago, IL 60609 USA. Seller will pay return shipping charges. -
Page 21: Español
Interruptor de transferencia automatic Servicio técnico Garantía English Français Русский Deutsch 1111 W. 35th Street, Chicago, IL 60609 USA • www.tripplite.com/support Copyright © 2019 Tripp Lite. Todos los derechos reservados. SmartOnline es una marca comercial de Tripp Lite. 18-11-326-93323D.indb 21 2/26/2019 3:08:33 PM... -
Page 22: Instrucciones De Seguridad Importantes
Instrucciones de seguridad importantes GUARDE ESTAS INSTRUCCIONES Este manual contiene instrucciones y advertencias que deben seguirse durante la instalación, operación y almacenamiento de este producto. De no seguirlas, se anulará la garantía del producto. • El PDU proporciona la conveniencia de múltiples tomacorrientes, pero NO proporciona protección contra sobretensión o ruido en la línea para los equipos conectados. -
Page 23: Instalación
Instalación Montaje de la PDU La PDU soporta montaje en rack de 2U o en superficie (Ej. . en una pared o escritorio o bajo un mostrador). Nota: El usuario debe determinar la idoneidad de los materiales y accesorios así como de los procedimientos antes del montaje. - Page 24 Instalación continuación Instalación en pared (no se aplica a la serie AG-0151 para PDUMH32HVAT y PDUMH32HVATNET) Instale una de las ménsulas de instalación, suministradas, en la pared con tornillos suministrados por el usuario. Cerciórese que los tornillos y cualquier otro accesorio sean adecuados para el tipo de superficie.
- Page 25 Instalación continuación Montaje Superficial Acople los soportes de montaje incluidos a los costados de la PDU con los tornillos incluidos. Nota: Si necesita cambiar la orientación de la PDU para coincidir con la superficie de montaje, antes de acoplar gire los soportes de montaje en incrementos de 90°...
-
Page 26: Conexión De La Pdu
CA desde la fuente de entrada Primaria. Conecte la clavija de entrada Secundaria a una fuente alterna de Alimentación de CA conectada a tierra (120 V para PDUMH30AT y Al UPS PDUMH30ATNET; 200-240 V para PDUMH30HVAT, PDUMH30HVATNET, PDUMH32HVAT y PDUMH32HVATNET),... -
Page 27: Características
Características PDUMH30AT Bank 1 Bank 1 Bank 1 Bank 2 Bank 2 Bank 2 PDUMH30HVAT PDUMH32HVAT Primary Primary Input Input Bank Bank Primary Input Secondary Secondary Input Input Bank Bank Secondary Bank Input Bank Output Breaker Output Breaker Output Breaker... - Page 28 Características continuación PDUMH30ATNET Bank 1 Bank 2 PDUMH30HVATNET PDUMH32HVATNET Output Breaker Output Breaker Bank 1 Bank 2 Config Port 18-11-326-93323D.indb 28 2/26/2019 3:08:42 PM...
- Page 29 Cable de La Entrada Primaria El cable está conectado permanentemente al PDU y tiene una clavija de seguridad NEMA L5-30P (PDUMH30AT y PDUMH30ATNET) o NEMA L6-30P (PDUMH30HVAT y PDUMH30HVATNET) o una clavija IEC309 de 32A (PDUMH32HVAT y PDUMH32HVATNET). Cable de La Entrada Secundaria El cable está...
- Page 30 Características continuación Pantalla LED Digital y Medidor de Carga (Amperímetro) Pantalla de 3 Dígitos: Muestra los valores de amperaje, kilowatts o voltaje medidos o calculados. Botón Enter: Usando este botón, ACTIVE INPUT cambie entre opciones de DISPLAY y CONFIGURATION [Pantalla y VOLT PRIMARY SECONDARY Configuración].
- Page 31 Puerto ENVIROSENSE (PDUMH30ATNET, PDUMH30HVATNET y PDUMH32HVATNET): Use este puerto para conectar el sensor ambiental ENVIROSENSE de Tripp Lite para monitorear la temperatura y humedad en forma remota y una interfaz de contacto seco para controlar y monitorear los dispositivos de alarma, seguridad y telecomunicaciones.
-
Page 32: Diagramas De Led
Diagramas de LED Modos de Pantalla Mediciones de La Fuente Primaria Opciones Desplaza- miento Auto- Mediciones de La Fuente Secundaria mático de Pantalla (Ver Nota 6) Mediciones de Banco Número de Bancos Disponibles (Varía según Modelo) Al Siguiente Pantalla Nota 1: Oprima el botón Mode para ir al siguiente modo de pantalla (movimiento vertical en este documento). Tenga en cuenta que se recordará... - Page 33 Diagramas de LED Modos de Pantalla Modo de Pantalla de Temperatura (Disponible solamente si está conectado Envirosense) El Número de Sensores Depende del Modelo de Envirosense Usado Modo de Pantalla de Humedad (Disponible solamente si está conectado Envirosense) El Número de Sensores Depende del Modelo de Envirosense Usado Al Anterior Pantalla Nota 1: Oprima el botón Mode para ir al siguiente modo de pantalla (movimiento vertical en este documento).
- Page 34 Diagramas de LED Pantalla de Dirección IP Nota 1: Pantalla de Dirección IP: la pantalla superior de 3 dígitos mostrará “IP “. La pantalla de 2 dígitos inferior derecha mostrará un dígito a la vez de la dirección IP separado por espacios para identificar cada dígito. Los puntos decimales y comas se mostrarán como guiones. (Tenga en cuanta que esta pantalla soporta direcciones IPv4 E IPv6).
- Page 35 Diagramas de LED Modos de Control Configuración Celsius o Fahrenheit (Se Muestra Solamente si Envirosense está Conectado) HOLD HOLD Activar/Desactivar Desplazamiento Automático de Pantalla HOLD HOLD Brillo del LED HOLD HOLD HOLD HOLD Control de Prueba de LEDs HOLD TIME OUT Nota 1: Oprima el botón Mode para ir al siguiente modo de pantalla (movimiento vertical en este documento).
-
Page 36: Configuración Y Operación
Red pública A Red pública B secundaria de la PDU se conectan al UPS de Tripp Lite separado que está conectado Circuito de la Circuito de la instalación instalación a fuentes separadas de energía de la red. - Page 37 Configuración y operación continuación Prueba rápida Después de instalar el PDU y conectar el equipo, usted puede probar la función del Switch de Transferencia Automático apagando temporalmente el Sistema UPS conectado a la alimentación Primaria de CA. Cuando el UPS de alimentación Primaria deje de suministrar energía CA, el PDU conmutará...
- Page 38 Configuración y operación continuación Monitoreo y Control Remoto Los modelos PDUMH30ATNET, PDUMH30HVATNET y PDUMH32HVATNET proporcionan monitoreo remoto, control de tomacorriente y mucho más por medio de un navegador de red, telnet y Sistemas de Administración de Red basados en SNMP . Para obtener más información sobre la configuración y operación del PDU mediante la interfaz del navegador de red PowerAlert, consulte el manual de instalación de SNMPWEBCARD proporcionado en tripplite.com/support.
-
Page 39: Servicio Técnico
(directo, indirecto, especial o consecuencial) del producto que ocurra durante el envío a Tripp Lite o a un centro de servicio técnico de Tripp Lite autorizado. Los productos enviados a Tripp Lite o a un centro de servicio técnico de Tripp Lite autorizado deben tener prepagos los cargos de transporte. -
Page 40: Garantía
Sólo puede obtenerse servicio bajo esta garantía, entregando o despachando el producto (con todos los cargos de despacho o entrega pagados por adelantado) a: Tripp Lite, 1111 W. 35th Street, Chicago, IL 60609 USA. El vendedor pagará los cargos de despacho del retorno. Llame al Servicio al cliente de Tripp Lite al (773) 869-1234 antes de enviar algún equipo para reparación. -
Page 41: Français
Commutateur de transfert automatique Entretien Garantie English Español Русский Deutsch 1111 W. 35th Street, Chicago, IL 60609 USA • www.tripplite.com/support Copyright © 2019 Tripp Lite. Tous droits réservés. SmartOnline est une marque déposée de Tripp Lite. 18-11-326-93323D.indb 41 2/26/2019 3:08:45 PM... -
Page 42: Importantes Consignes De Sécurité
Importantes consignes de sécurité CONSERVER CES DIRECTIVES Ce manuel contient des instructions et des mises en garde que vous devez respecter durant l’installation, l’utilisation et l’entreposage de ce produit. Le non-respect de ces instructions et mises en garde annulera la garantie du produit. •... -
Page 43: Installation
Installation Montage de l’unité de distribution d’alimentation (PDU) L’unité de distribution d’alimentation (PDU) peut être montée sur un bâti 2U ou sur une surface (p. ex. sur un mur, sur un bureau ou sous un comptoir). Remarque : L ’utilisateur doit déterminer la compatibilité de la quincaillerie et les procédures avant d’effectuer l’installation. - Page 44 Installation suite Montage mural (pas applicable à la série AG-0151 pour PDUMH32HVAT et PDUMH32HVATNET) Fixez un des support de montage inclus au mur au moyen de vis fournies par l'utilisateur. Assurez- vous que les vis et tout autre quincaillerie utilisées sont appropriées à...
- Page 45 Installation suite Support extérieur Fixez les supports de montage inclus aux côtés de l’unité PDU à l’aide des vis fournies. Remarque : Si vous devez changer l’orientation de l’unité PDU afin qu’elle corresponde à la surface de montage, tournez les supports de montage en incréments de 90 °...
-
Page 46: Connexion De L'unité De Distribution D'alimentation (Pdu)
CA depuis la source d'entrée principale. Brancher la fiche d'entrée secondaire dans une source alternative d'alimentation Vers le système CA mise à la terre (120 V pour PDUMH30AT et PDUMH30ATNET; 200 à 240 V pour PDUMH30HVAT, PDUMH30HVATNET, PDUMH32HVAT et PDUMH32HVATNET). -
Page 47: Caractéristiques
Caractéristiques PDUMH30AT Bank 1 Bank 1 Bank 1 Bank 2 Bank 2 Bank 2 PDUMH30HVAT PDUMH32HVAT Primary Primary Input Input Bank Primary Bank Input Bank Secondary Secondary Input Input Secondary Input Bank Bank Bank Output Breaker Output Breaker Output Breaker... - Page 48 Caractéristiques suite PDUMH30ATNET Bank 1 Bank 2 PDUMH30HVATNET PDUMH32HVATNET Output Breaker Output Breaker Bank 1 Bank 2 Config Port 18-11-326-93323D.indb 48 2/26/2019 3:08:54 PM...
- Page 49 Cordon de l'entrée principale Le cordon est attaché en permanence à la PDU et comporte une fiche à verrouillage par rotation NEMA L5-30P (PDUMH30AT et PDUMH30ATNET) ou NEMA L6-30P (PDUMH30HVAT et PDUMH30HVATNET) ou une fiche IEC309 32A (PDUMH32HVAT et PDUMH32HVATNET).
- Page 50 Caractéristiques suite Écran numérique à DEL et Indicateur de charge (ampèremètre) Écran numérique à 3 chiffres : affiche les valeurs de l'intensité de courant, kilowatt ou tension ACTIVE INPUT mesurées ou calculées. Bouton Enter (saisir) : Ce bouton VOLT permet de défiler à travers les PRIMARY SECONDARY options DISPLAY (affichage) et CONFIGURATION.
- Page 51 Port ENVIROSENSE (PDUMH30ATNET, PDUMH30HVATNET et PDUMH32HVATNET) : Utiliser ce port pour connecter un capteur environnemental ENVIROSENSE de Tripp Lite de façon à fournir une surveillance à distance de la température et de l’humidité et une interface à...
-
Page 52: Diagrammes Des Voyants À Del
Diagrammes des voyants à DEL Modes d'affichage Mesures de la source principale Articles à défilement Mesures de la source secondaire auto- matique (voir la note 6) Mesures des bancs Nombre de bancs disponibles (Varie selon le modèle) Vers Next (suivant) Écran Note 1 : Appuyer sur le bouton Mode pour passer au mode d'affichage suivant (movement vertical sur le présent document). - Page 53 Diagrammes des voyants à DEL Modes d'affichage Mode d'affichage de la température (Disponible uniquement si Envirosense est connecté) Le nombre de capteurs dépend du modèle d'Envirosense utilisé. Mode d'affichage de l'humidité (Disponible uniquement si Envirosense est connecté) Le nombre de capteurs dépend du modèle d'Envirosense utilisé. Vers Previous (précédent) Écran...
- Page 54 Diagrammes des voyants à DEL Affichage de l'adresse IP Note 1 : Affichage de l'adresse IP : les trois chiffres du haut vont afficher « IP ». Les 2 chiffres dans le coin inférieur droit vont afficher un chiffre de l'adresse IP à la fois séparé par des espaces blancs pour identifier chaque chiffre. Les virgules décimales et les deux-points seront affichés sous forme de traits d'union.
- Page 55 Diagrammes des voyants à DEL Modes de contrôle Configuration en Celsius ou en Fahrenheit (Affichée uniquement si Envirosense est connecté) HOLD HOLD Auto Scroll (défilement automatique) activé/désactivé HOLD HOLD Luminosité des voyants à DEL HOLD HOLD HOLD HOLD Commande de l'essai de voyants à DEL HOLD TIME OUT Note 1 : Appuyer sur le bouton Mode pour passer au mode d'affichage suivant (movement vertical sur le présent document).
-
Page 56: Configuration Et Fonctionnement
Utilité A Utilité B la PDU sont connectées à des systèmes d’onduleur Tripp Lite eux-mêmes connectés Circuit utilitaire Circuit utilitaire à des sources séparées d’alimentation de secteur. Pour une disponibilité maximale, Tripp Lite recommande d’utiliser les... - Page 57 Configuration et fonctionnement suite Test rapide Suite à l’installation de la PDU et au branchement de l’équipement, vous pouvez vérifier la fonction du commutateur de transfert automatique en fermant temporairement le système UPS branché à la tension primaire d’entrée CA. Lorsque l'onduleur de l'entrée principale ne fournit plus d'alimentation CA, la PDU va passer de l'entrée principale à...
- Page 58 Configuration et fonctionnement suite Surveillance et contrôle à distance Les modèles PDUMH30ATNET, PDUMH30HVATNET et PDUMH32HVATNET offrent la surveillance à distance, le contrôle des prises de courant et davantage via un navigateur Web, Telnet ou des systèmes de gestion de réseau SNMP . Pour plus d'information au sujet de la configuration et du fonctionnement de la PDU via l'interface du navigateur Web PowerAlert, se reporter au manuel d'installation de la SNMPWEBCARD qui peut être téléchargé...
-
Page 59: Entretien
(direct, indirect, spécial ou fortuit) survenu au produit pendant le transport à Tripp Lite ou à un centre de service autorisé Tripp Lite est exclu de la garanti. Les produits expédiés à Tripp Lite ou à un centre de service autorisé doivent être prépayés. -
Page 60: Garantie
à sa discrétion. Vous pouvez obtenir un service selon cette garantie seulement en livrant ou en expédiant le produit (avec les frais d›expédition et de livraison prépayés) à : Tripp Lite, 1111 W. 35th Street, Chicago, IL 60609 USA. -
Page 61: Русский
Порядок настройки и эксплуатации Автоматический ввод резерва (АВР) Техническое обслуживание Гарантийные обязательства English Español Français Deutsch 1111 W. 35th Street, Chicago, IL 60609 USA • www.tripplite.com/support Охраняется авторским правом © 2019 Tripp Lite. Перепечатка запрещается. 18-11-326-93323D.indb 61 2/26/2019 3:08:57 PM... -
Page 62: Важные Указания По Технике Безопасности
Важные указания по технике безопасности СОХРАНИТЕ НАСТОЯЩИЕ УКАЗАНИЯ В настоящем руководстве содержатся указания и предупреждения, которые необходимо соблюдать в процессе установки, эксплуатации и хранения данного изделия. Игнорирование этих указаний и предупреждений может привести к потере гарантии на изделие. • Блок распределения питания (PDU) оснащен несколькими удобными розетками, но НЕ обеспечивает защиту подключенного... -
Page 63: Установка
Установка Монтаж PDU PDU подходит для монтажа в стойку размером 2U или поверхностного монтажа (например, на стене, на столе или под прилавком). Примечание. Пользователь должен установить пригодность оснастки и предполагаемых процедур до начала монтажа. Блок распределения питания (PDU) и входящая в его комплект оснастка предназначены для обычных типов шкафов и могут не подходить для всех целей применения. - Page 64 Установка (продолжение) Настенный монтаж (неприменимо для мод. PDUMH32HVAT и PDUMH32HVATNET серии AG-0151) Прикрепите один из поставляемых в комплекте монтажных кронштейнов к стене с помощью винтов (в комплекте не поставляются). Убедитесь в том, что винты и вся остальная оснастка подходят для данного типа...
- Page 65 Установка (продолжение) Поверхностный монтаж Прикрепите входящие в комплект монтажные кронштейны по бокам PDU при помощи винтов, также поставляемых в комплекте. Примечание. В случае необходимости изменения ориентации PDU в соответствии с монтажной поверхностью поверните монтажные кронштейны перед креплением в нужное положение (с шагом 90°).
-
Page 66: Подключение Pdu
питания переменного тока. Подключение входных разъемов PDU: подключите основной входной разъем к предпочтительному источнику питания переменного тока с заземлением (120 В для мод. PDUMH30AT и PDUMH30ATNET; К 200-240 В для мод. PDUMH30HVAT, PDUMH30HVATNET, PDUMH32HVAT и PDUMH32HVATNET), напр. ИБП Tripp Lite SmartOnline . -
Page 67: Функциональные Возможности
Функциональные возможности PDUMH30AT Bank 1 Bank 1 Bank 1 Bank 2 Bank 2 Bank 2 PDUMH30HVAT PDUMH32HVAT Primary Input Primary Primary Input Input Bank Bank Bank Secondary Input Secondary Secondary Input Input Bank Bank Bank Output Breaker Output Breaker Output Breaker... - Page 68 Функциональные возможности (продолжение) PDUMH30ATNET Bank 1 Bank 2 PDUMH30HVATNET PDUMH32HVATNET Output Breaker Output Breaker Bank 1 Bank 2 Config Port 18-11-326-93323D.indb 68 2/26/2019 3:09:06 PM...
- Page 69 Функциональные возможности (продолжение) Шнур основного входа Этот шнур, постоянно прикрепленный к PDU, имеет разъем NEMA L5-30P (для мод. PDUMH30AT и PDUMH30ATNET), разъем с поворотным замком NEMA L6-30P (для мод. PDUMH30HVAT и PDUMH30HVATNET) или разъем IEC309 32A (PDUMH32HVAT и PDUMH32HVATNET). Шнур резервного входа...
- Page 70 Функциональные возможности (продолжение) Цифровой светодиодный дисплей и измеритель нагрузки (амперметр) 3-разрядный дисплей: отображает измеряемые и расчетные значения тока (А), мощности (кВт) и напряжения (В). Кнопка ввода: данная кнопка обеспечивает ACTIVE INPUT прокрутку доступных опций отображения (DISPLAY) и настройки (CONFIGURATION). При VOLT кратковременном...
- Page 71 обеспечивают надежную фиксацию шнуров подключенного оборудования в точках крепления. Порт ENVIROSENSE (для мод. PDUMH30ATNET, PDUMH30HVATNET и PDUMH32HVATNET): используйте этот порт для подключения датчика состояния окружающей среды Tripp Lite ENVIROSENSE с целью обеспечения дистанционного контроля температуры и уровня влажности, а также интерфейса с сухими...
-
Page 72: Схемы Расположения Светодиодных Индикаторов
Схемы расположения светодиодных индикаторов Режимы отображения Измеряемые параметры основного входа Параметры, охватываемые Измеряемые параметры резервного входа автоматической прокруткой (см. Примечание 6) Измеряемые параметры групп Количество имеющихся групп (различается в зависимости от модели) К следующему экрану Примечание 1. Для перехода в следующий режим отображения (вертикальное перемещение по данному документу) нажмите кнопку Mode. Следует иметь в виду, что подрежим... - Page 73 Схемы расположения светодиодных индикаторов Режимы отображения Режим отображения температуры (доступен только при подключенном устройстве EnviroSense) Количество датчиков зависит от используемой модели устройства EnviroSense Режим отображения влажности (доступен только при подключенном устройстве EnviroSense) Количество датчиков зависит от используемой модели устройства EnviroSense К...
- Page 74 Схемы расположения светодиодных индикаторов Отображение IP-адреса Примечание 1. Отображение IP-адреса: на верхнем 3-разрядном дисплее отображается "IP". На 2-разрядном дисплее, расположенном внизу справа, отображается по одной цифре IP-адреса с интервалами, достаточными для ее восприятия. Десятичные точки и двоеточия будут отображаться в виде дефиса. (Данный дисплей поддерживает...
- Page 75 Схемы расположения светодиодных индикаторов Режимы управления Настройка "Цельсий/Фаренгейт" (отображается только при подключенном устройстве EnviroSense) HOLD HOLD Включение/отключение функции автоматической прокрутки HOLD HOLD Яркость СИД HOLD HOLD HOLD HOLD Управление тестированием светодиодных индикаторов HOLD TIME OUT Примечание 1. Для перехода в следующий режим отображения (вертикальное перемещение по данному документу) нажмите кнопку Mode. Следует иметь в виду, что подрежим Amps, kW или Volt сохраняется...
-
Page 76: Порядок Настройки И Эксплуатации
Порядок настройки и эксплуатации Автоматический ввод резерва (АВР) В тех случаях, когда к ИБП Tripp Lite подключены и основной, и резервный входные источники, PDU работает в качестве средства автоматического ввода резерва, обеспечивая резервное входное электропитание для систем высокой доступности. При обычных условиях эксплуатации PDU обеспечивает распределение электропитания, поступающего... - Page 77 Порядок настройки и эксплуатации (продолжение) Быстрая проверка После установки PDU и подключения оборудования вы можете проверить действие функции автоматического ввода резерва путем временного отключения ИБП, подключенного к основному входу переменного тока. После прекращения подачи электропитания с основного входного ИБП PDU переключится...
- Page 78 Порядок настройки и эксплуатации (продолжение) Дистанционный контроль и управление Модели PDUMH30ATNET, PDUMH30HVATNET и PDUMH32HVATNET обеспечивают дистанционный контроль, управление розетками и прочее через веб-браузер, протокол telnet и системы сетевого управления на основе протокола SNMP. Дополнительные сведения о конфигурации и режимах работы PDU через веб-интерфейс PowerAlert см.
-
Page 79: Техническое Обслуживание
обстоятельствами), связанные с транспортировкой изделия в адрес компании Tripp Lite или ее уполномоченного сервисного центра, действие гарантии не распространяется. Стоимость транспортировки изделий в адрес компании Tripp Lite или ее уполномоченного сервисного центра должна быть оплачена авансом. Номер RMA должен быть указан на внешней стороне упаковки. Если возврат изделия... -
Page 80: Гарантийные Обязательства
или замену данного изделия исключительно по своему усмотрению. Обслуживание по настоящей Гарантии производится только при условии доставки или отправки вами бракованного изделия (с предварительной оплатой всех расходов по его транспортировке или доставке) по адресу: Tripp Lite, 1111 W. 35th Street, Chicago, IL 60609 USA. -
Page 81: Deutsch
Montage der PDU Anschließen der PDU Funktionen LED-Diagramme Konfiguration und Betrieb Automatischer Transferschalter Service Garantie English Español Français Русский 1111 W. 35th Street, Chicago, IL 60609 USA • www.tripplite.com/support Copyright © 2019 Tripp Lite. Alle Rechte vorbehalten. 18-11-326-93323D.indb 81 2/26/2019 3:09:10 PM... -
Page 82: Wichtige Sicherheitshinweise
Wichtige Sicherheitshinweise BITTE BEWAHREN SIE DIESE ANLEITUNG AUF Das vorliegende Benutzerhandbuch enthält Anweisungen und Warnhinweise, die bei Installation, Betrieb und Lagerung des hierin beschriebenen Produkts befolgt werden sollten. Die Nichtbeachtung dieser Anweisungen und Warnungen kann die Garantie beeinträchtigen. • Die PDU bietet den Komfort mehrerer Ausgänge, bietet jedoch KEINEN Schutz vor Überspannung oder Leitungsgeräuschen für angeschlossene Geräte. -
Page 83: Installation
Installation Montage der PDU Die PDU kann auf einem 2-HE-Rack oder einer Oberfläche montiert werden (z. B. an einer Wand, auf einem Schreibtisch oder unter einer Theke). Hinweis: Der Benutzer hat vor der Montage des Geräts sicherzustellen, dass die verwendete Hardware und die Verfahren dafür geeignet sind. - Page 84 Installation (Fortsetzung) Wandmontage (gilt nicht für Series AG-0151 für PDUMH32HVAT & PDUMH32HVATNET) Befestigen Sie eine der beiliegenden Montagehalterungen mit benutzerseitig bereitgestellten Schrauben an der Wand. Achten Sie darauf, dass die Schrauben und übrigen Eisenwaren für die jeweilige Oberflächenart geeignet sind. Befestigen Sie eine Halterung mit den mitgelieferten Schrauben an der PDU.
- Page 85 Installation (Fortsetzung) Oberflächenmontage Befestigen Sie die mitgelieferten Halterungen mit den mitgelieferten Schrauben seitlich an der PDU. Hinweis: Wenn Sie die Ausrichtung der PDU ändern und an die Montageoberfläche anpassen möchten, drehen Sie die Halterungen nach Bedarf in 90°-Schritten und befestigen Sie sie. Montieren Sie die PDU auf einer stabilen Oberfläche.
-
Page 86: Anschließen Der Pdu
Wechselstromquelle an (120V für PDUMH30AT & PDUMH30ATNET; 200-240V für PDUMH30HVAT, Zu USV PDUMH30HVATNET, PDUMH32HVAT & PDUMH32HVATNET), z. B. ein Tripp Lite SmartOnline ® USV-System. Unter normalen Betriebsbedingungen wird die PDU Wechselstrom über die primäre Versorgungsquelle beziehen. Schließen Sie den sekundären Eingangsstecker... -
Page 87: Funktionen
Funktionen PDUMH30AT Bank 1 Bank 1 Bank 1 Bank 2 Bank 2 Bank 2 PDUMH30HVAT PDUMH32HVAT Primary Input Primary Primary Input Input Bank Bank Bank Secondary Input Secondary Secondary Input Input Bank Bank Bank Output Breaker Output Breaker Output Breaker... - Page 88 Funktionen (Fortsetzung) PDUMH30ATNET Bank 1 Bank 2 PDUMH30HVATNET PDUMH32HVATNET Output Breaker Output Breaker Bank 1 Bank 2 Config Port 18-11-326-93323D.indb 88 2/26/2019 3:09:18 PM...
- Page 89 Funktionen (Fortsetzung) Primäres Versorgungskabel Das Kabel ist dauerhaft mit der PDU verbunden und verfügt über einen NEMA L5-30P (PDUMH30AT & PDUMH30ATNET)- oder einen NEMA L6-30P (PDUMH30HVAT & PDUMH30HVATNET)-Steckverbinder oder einen IEC309 32A (PDUMH32HVAT & PDUMH32HVATNET)-Stecker. Sekundäres Versorgungskabel Das Kabel ist dauerhaft mit der PDU verbunden und verfügt über einen NEMA L5-30P (PDUMH30AT &...
- Page 90 Funktionen (Fortsetzung) Digitale LED-Anzeige und Ladungsmessgerät (Ammeter) 3-stellige Anzeige: Zeigt den gemessenen oder berechneten Stromstärken-, Kilowatt- oder Spannungswert an. ACTIVE INPUT Eingabetaste: Mit dieser Taste können Sie durch die ANZEIGE- und KONFIGURATIONS-Optionen scrollen. Im VOLT PRIMARY SECONDARY ANZEIGE-Modus können Sie durch kurzes Drücken zwischen AMPERE, KW und VOLT wechseln.
- Page 91 Befestigungspunkte für abgeschlossene Gerätestromkabel. ENVIROSENSE-Port (PDUMH30ATNET, PDUMH30HVATNET & PDUMH32HVATNET): Über diesen Port können Sie einen Tripp Lite ENVIROSENSE-Umgebungssensor anschließen, um Temperatur bzw. Luftfeuchtigkeit aus der Ferne zu überwachen und Alarm- , Sicherheits- und Telekommunikationsgeräte über eine Trockenkontaktschnittstelle zu steuern und zu überwachen.
-
Page 92: Led-Diagramme
LED-Diagramme Anzeigemodi Primäre Quellmessungen Automatische Scroll- Elemente Sekundäre Quellmessungen (siehe Hinweis 6) Bankmessungen Anzahl der verfügbaren Banken (variiert je nach Modell) Hinweis 1: Drücken Sie die Modus-Taste, um zum nächsten Anzeigemodus zu gehen (vertikale Bewegung auf diesem Dokument). Bitte beachten Sie, dass der Ampere-, kW- oder Volt-Submodus gespeichert wird. - Page 93 LED-Diagramme Anzeigemodi Temperaturanzeigemodus (nur bei angeschlossenem Envirosense verfügbar) Die Anzahl der Sensoren hängt von dem verwendeten Envirosense-Modell ab Luftfeuchtigkeitsanzeigemodus (nur bei angeschlossenem Envirosense verfügbar) Die Anzahl der Sensoren hängt von dem verwendeten Envirosense-Modell ab Zurück Hinweis 1: Drücken Sie die Modus-Taste, um zum nächsten Anzeigemodus zu gehen (vertikale Bewegung auf diesem Dokument). Bitte beachten Sie, dass der Ampere-, kW- oder Volt-Submodus gespeichert wird.
- Page 94 LED-Diagramme Anzeige der IP-Adresse Hinweis 1: Anzeige der IP-Adresse: oben auf der 3-stelligen Anzeige wird „IP“ angezeigt. Rechts unten auf der 2-stelligen Anzeige wird jeweils eine Stelle der IP-Adresse angezeigt. Die einzelnen Stellen werden dabei durch Leerzeichen getrennt. Dezimalpunkte und Doppelpunkte werden als Bindestriche angezeigt. (Bitte beachten Sie, dass diese Anzeige sowohl IPv4- als auch IPv6- Adressen unterstützt.) Hinweis 2: Nach der Anzeige der IP-Adresse wechselt die Anzeige automatisch wieder in den jeweiligen vorherigen Modus.
- Page 95 LED-Diagramme Kontrollmodi Celsius- oder Fahrenheit-Konfiguration (wird nur bei angeschlossenem Envirosense angezeigt) HOLD HOLD Automatisches Scrollen aktivieren/deaktivieren HOLD HOLD LED-Helligkeit HOLD HOLD HOLD HOLD LED-Test-Steuerung HOLD TIME OUT Hinweis 1: Drücken Sie die Modus-Taste, um zum nächsten Anzeigemodus zu gehen (vertikale Bewegung auf diesem Dokument). Bitte beachten Sie, dass der Ampere-, kW- oder Volt-Submodus gespeichert wird.
-
Page 96: Konfiguration Und Betrieb
Konfiguration und Betrieb Automatischer Transferschalter Wenn der Primär- und Sekundäreingang beide mit Tripp Lite USV-Systemen verbunden sind, agiert die PDU als automatischer Transferschalter, der redundanten Eingangsstrom für Anwendungen mit hoher Verfügbarkeit liefert. Unter normalen Betriebsbedingungen bezieht die PDU Wechselstrom über die primäre Versorgungsquelle und wechselt unter bestimmten Bedingungen zur sekundären Versorgungsquelle. - Page 97 Konfiguration und Betrieb (Fortsetzung) Schnelltest Nach dem Installieren der PDU und dem Anschließen von Geräten können Sie die automatische Transferschalterfunktion testen, indem Sie das mit dem primären Wechselstromeingang verbundene USV- System vorübergehend abschalten. Wenn die primäre Eingangs-USV keinen Wechselstrom mehr liefert, wechselt die PDU vom Primäreingang zum Sekundäreingang und die LED-Leuchte „Eingang aktiv“...
- Page 98 Konfiguration und Betrieb (Fortsetzung) Überwachung und Steuerung aus der Ferne Die Modelle PDUMH30ATNET, PDUMH30HVATNET und PDUMH32HVATNET bieten Fernüberwachung, Ausgabekontrolle und mehr über Webbrowser, Telnet und SNMP-basierte Netzwerkverwaltungssysteme. Weitere Informationen zu Konfiguration und Betrieb der PDU über die PowerAlert-Webbrowser-Schnittstelle finden Sie im SNMPWEBCARD-Installationshandbuch, das auf tripplite.com/support heruntergeladen werden kann.
-
Page 99: Service
Service Ihr Tripp Lite Produkt wird von der Garantie abgedeckt, die in diesem Handbuch beschrieben wird. Tripp Lite bietet außerdem verschiedene Pläne für die Garantieverlängerung und Vor-Ort- Service an. Weitere Informationen zum Service finden Sie unter www.tripplite.com/support. Bevor Sie Ihr Produkt zur Reparatur zurücksenden, führen Sie die folgenden Schritte aus: 1. -
Page 100: Garantie
Verkäufer diese Fehler nach eigenem Ermessen beheben oder das Produkt ersetzen. Reparatur unter dieser Garantie wird nur geleistet, wenn das Produkt (mit Vorauszahlung aller Versand- oder Zustellgebühren) an folgende Adresse gesendet wird: Tripp Lite, 1111 W. 35th Street, Chicago, IL 60609 USA. Der Verkäufer zahlt die Rücksendungsgebühren. Besuchen Sie www.tripplite.com/ support, bevor Sie Ausstattung zur Reparatur zurücksenden.
Need help?
Do you have a question about the PDUMH30AT and is the answer not in the manual?
Questions and answers