Table of Contents
Advertisement
Advertisement
Table of Contents

Subscribe to Our Youtube Channel
Related Manuals for IFM LMT 0 Series


Summary of Contents for IFM LMT 0 Series
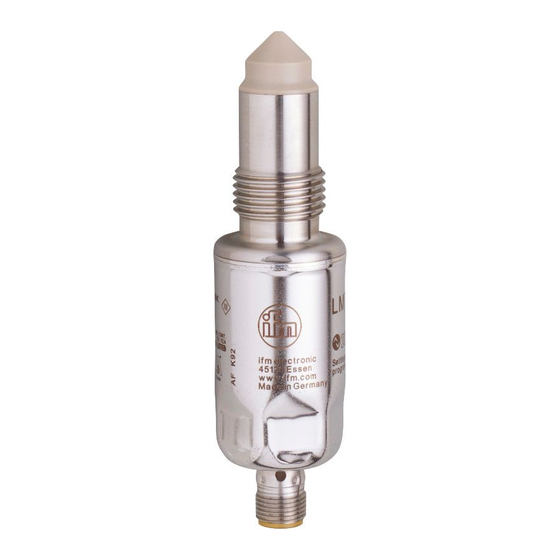
- Page 1 Operating instructions Binary level sensor LMTx0x LMTx1x LMTx2x...
-
Page 2: Table Of Contents
Contents 1 Preliminary note ���������������������������������������������������������������������������������������������������3 1�1 Explanation of symbols ����������������������������������������������������������������������������������3 2 Safety instructions �����������������������������������������������������������������������������������������������4 3 Functions and features ����������������������������������������������������������������������������������������4 3�1 Applications ���������������������������������������������������������������������������������������������������5 3�2 Restriction of the application area �����������������������������������������������������������������7 4 Function ���������������������������������������������������������������������������������������������������������������7 4�1 Measuring principle ���������������������������������������������������������������������������������������7 4�2 Other features of the unit �������������������������������������������������������������������������������8 4�3 Application examples �������������������������������������������������������������������������������������8 4�3�1 Application examples for unit types with short probe ����������������������������8 4�3�2 Application examples for unit types with long probe �����������������������������9... -
Page 3: Preliminary Note
10 Maintenance, repair and disposal ��������������������������������������������������������������������23 11 Notes on the regulation (EC) 1935/2004 ���������������������������������������������������������24 12 Factory setting �������������������������������������������������������������������������������������������������24 1 Preliminary note Technical data, approvals, accessories and further information at www�ifm�com 1.1 Explanation of symbols ► Instructions > Reaction or result […]... -
Page 4: Safety Instructions
• The device and the accessories (e�g� cable) must be effectively protected against damage� The sensor is supplied without installation / connection accessories� ► Only use accessories from ifm electronic� Available accessories: www�ifm�com The optimum function is not ensured when using components from other manufacturers�... -
Page 5: 3�1 Applications
3.1 Applications • Food and hygienic areas • Detection of almost all media • Available process connections: G1/2, G3/4 and G1 • Different probe lengths for various mounting positions and for temperature decoupling (→ 4.3.2)� Type Factory setting Sensitivity Probe Process connection EHEDG 3A length... - Page 6 In the following table you can find a selection of tested media and the corresponding recommended unit type� A complete list of media is available at www�ifm�com� Medium LMTx0x LMTx1x LMTx2x Alcohol (40 % vol�) ● ○ ● Beer ●...
-
Page 7: 3�2 Restriction Of The Application Area
3.2 Restriction of the application area • Not suitable for abrasive media (e�g� quartz sand) and heavy bulk material� • Not suitable for ozonised water� • For use in aggressive media (acids and alkali): ► Check the compatibility of the product materials beforehand (→... -
Page 8: 4�2 Other Features Of The Unit
4.2 Other features of the unit • Defined position of the cable entry for angled sockets for use of ifm welding adapters • Streamlined sensor geometry, no blockage of the pipe when unit types with short probe are used, no pressure loss •... -
Page 9: 4�3�2 Application Examples For Unit Types With Long Probe
4.3.2 Application examples for unit types with long probe Installation from the top: 1: Maximum level Fig� 5-4: For monitoring the maximum level (1) or as overflow protection� Different probe lengths enable different response levels� Lateral installation: Fig� 5-5: Since the probe tip is installed further into the tank, strongly adhesive and viscous residues can be suppressed�... -
Page 10: 4�3�3 Application Example Installation In Existing Tuning Fork Adapters
The variable clamp fitting (accessory) allows variable mounting for unit types LMT1x4 and LMT1x5� This enables e�g� high-precision adjustment of the response point� Moreover, these types can be thermically decoupled from the process� This also makes applications with higher process temperature and/or with the risk of heat accumulation possible (e�g�... -
Page 11: Installation
For use of process connections from other manufacturers: ► Ensure mechanical compatibility� As a rule, ifm does not assume any responsibility for ingress resistance, hygiene and function, in particular with non-existing compatibility and incorrect installation�... -
Page 12: 5�2 Installation Process
5.2 Installation process The unit is installed by means of an adapter: ► Ensure cleanliness of the sealing areas� Remove protective packaging only just before mounting� In case of damaged sealing areas replace the unit or the adapter� 5.2.1 Installation LMT1x0, LMT1x1 and LMT1x2 ►... -
Page 13: 5�2�2 Installation Lmt1X4 And Lmt1X5
5.2.2 Installation LMT1x4 and LMT1x5 The seal is formed by the flush front of the metal cone (2), fig� 6-3� As an option, a PEEK sealing ring (3), fig� 6-4, is available� If the welding adapter is slightly warped or the sealing surface slightly damaged, the use of the PEEK sealing ring is recommended�... -
Page 14: 5�2�3 Installation Lmt2X2 And Lmt3X2 In Existing Tuning Fork Adapters
Installation using the PEEK sealing ring, fig. 6-3 ► Replace the green flat seal (1) with the black flat seal (4)� The flat seal (4) is supplied with the article� ► Slide the PEEK seal (3) onto the sensor tip until the end stop (cone)� ►... -
Page 15: 5�3 Notes On 3A Compliant Installation
Fig. 6-5 Fig. 6-6 1: Green flat seal 1: Hexagon AF 27 2: Hexagon LMT2x2 AF32/LMT3x2 AF36 3: End stop Max� tightening torque for the hexagon AF 27 (1), fig� 6-6: 35 Nm! ► After installation check the tank / pipe for ingress resistance� 5.3 Notes on 3A compliant installation Some versions of the unit have a 3A approval (→... -
Page 16: Electrical Connection
► Disconnect power� ► Connect the unit as follows: Normal operation Teach operation factory setting Connection Core colours for ifm sockets brown blue 2 (OUT2) pnp / npn switching signal white • pnp / npn switching signal 4 (OUT1) •... -
Page 17: Interfaces
The IODDs necessary for the configuration of the unit, detailed information about process data structure, diagnostic information, parameter addresses and the necessary information about the required IO-Link hardware and software are available at www�ifm�com� 8 Parameter setting When a suitable unit has been selected, the presence of certain media is detected, deposits or foam are suppressed�... -
Page 18: 8�1 Parameter Setting Via Pc And Io-Link Interface
8.1 Parameter setting via PC and IO-Link interface The interface connects sensors with IO-Link capability to a PC and provides the following options via the IO-Link interface: • Reading of the current parameter setting� • Parameter setting of the sensor� •... -
Page 19: 8�4 Parameters
8.4 Parameters: Name Description SP1/SP2 Set points [SP1] / [SP2] and reset points [rP1] / [rP2]� rP1/rP2 [SPx] must be higher than [rPx]� If [SPx] is set to a value below [rPx], this is rejected� The values for [SPx]/[rPx] are set in per cent of the maximum process value �... -
Page 20: 8�5 System Commands
8.5 System commands: tSP1 Teach switch point 1 to medium 1 • Full adjustment to the medium 1 to be detected, automatically sets the switching thresholds SP1/rP1 for OUT1� tSP2 Teach switch point 2 to medium 2 • Full adjustment to the medium 2 to be detected, automatically sets the switching thresholds SP2/rP2 for OUT2�... -
Page 21: 8�8 Parameter Setting Via The Teach Input
8.8 Parameter setting via the teach input The teach input must be activated� This requires previous configuration via IO-Link (→ 8.4), parameter [ou2] = [tch]� Output OUT2 must be configured as hysteresis function (Hnc or Hno)� If the window function is set, an error during teaching results (→... -
Page 22: 8�8�3 Fault During The Teach Operation
8.8.3 Fault during the teach operation The teach operation is cancelled in case of a fault: > LEDs are flashing green/yellow with 8 Hz� > The unit returns to the operating mode with unchanged settings� Possible faults: • Time error (teach time too long / too short) •... -
Page 23: 9�2 System Results Io-Link
9.2 System results IO-Link Code Type Description 20480 d / 50 00 h Error Hardware error in the unit� ► Replace device 25376 d / 63 20 h Error Parameter fault ► Verify the data sheet and the values 30480 d / 77 10 h Error Short circuit ►... -
Page 24: Notes On The Regulation (Ec) 1935/2004
► In case of returns ensure that the unit is free from soiling, especially of dangerous and toxic substances� For transport only use appropriate packaging to avoid damage of the unit� 11 Notes on the regulation (EC) 1935/2004 The following components of the product are designed for permanent contact with food according to the regulation (EC) 1935/2004: - Sensor tip made of PEEK - Sealing ring made of PEEK (→... - Page 25 More information at www�ifm�com...
Need help?
Do you have a question about the LMT 0 Series and is the answer not in the manual?
Questions and answers