Crestron 3 Series Do Manual
Control system with wireless gateway
Hide thumbs
Also See for 3 Series:
- Reference manual (68 pages) ,
- Operation manual (48 pages) ,
- Supplemental manual (22 pages)
Advertisement
DO
GUIDE
MC3
3-Series
Control System with Wireless Gateway
®
DO
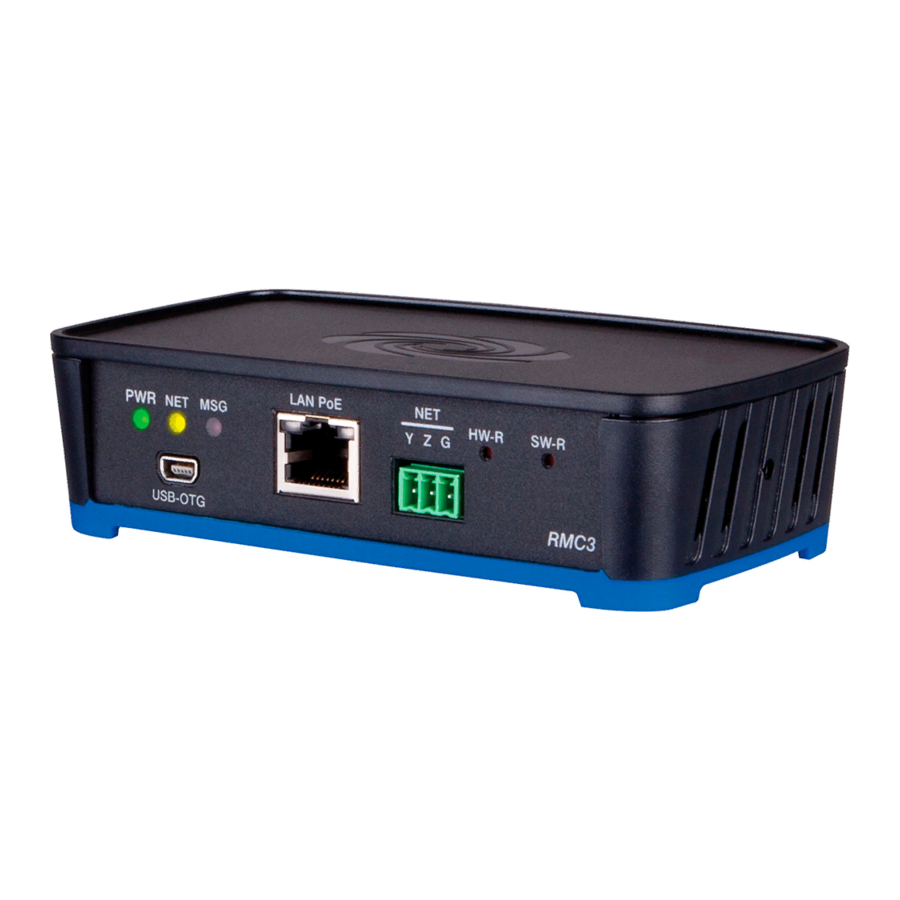
Install the Device
The MC3 is designed to be placed onto a flat surface.
DO
Make Connections
Make the necessary connections as called out in the diagrams
below. Connect power last.
When making connections to the MC3, note the following:
• Use Crestron
power supplies for Crestron equipment.
®
• The included cable(s) cannot be extended.
COM 1–2:
To RS-232 Device
To USB HID Device
or USB Mass
Storage Device
AUDIO OUT (L R):
AUDIO IN (L R):
To OSD Device or
From Audio Source
Associated Amplifier
VIDEO OUT
VIDEO OUT (Y Pb Pr):
(COMPOSITE):
To OSD Device
To OSD Device
NOTE:
Ensure the unit is properly grounded by connecting the
chassis ground lug to an earth ground (building steel).
NOTE:
The MC3 can be powered via the Cresnet
or with the (included) 24-Vdc power pack.
RELAY 1–2:
LAN:
10/100 Base-T
To Controllable
Ethernet to LAN
Devices
Ground
INPUT:
From Control
Devices
24 Vdc:
USB 1–2:
From Power
NET (24 Y Z G):
Supply
To Cresnet Network
IR 1–5:
To IR Controlled
Devices
IR IN:
From IR
Device
DO
Check the Box
QTY PRODUCT
1
Connector, 3-Pin
2
Connector, 4-Pin
1
Antenna, 2.4 GHz, 1/4 Wave, Reverse Polarity, Female
1
Power Pack, 24 Vdc, 2.5 A, 100-240 Vac
1
Power Cord, 5' 10" (1.78 m)
1
Cable, USB 2.0, A-B, 6' (1.83 m)
connection
®
COM 1 - 2 Connections
PIN
DESCRIPTION
2
RXD - Receive Data
3
TXD - Transmit Data
5
SG - Signal Ground
7
RTS - Request To Send
8
CTS - Clear To Send
• Use with a standard DB9 straight
through cable.
• Pins 1, 4, 6, and 9 are not used but may
be connected.
COLOR
Green
Green
Black
Black
Black
Black
DO
Configure the Control System
The MC3 can be configured using Crestron Toolbox™ software
and the built-in, web-based setup tool.
1. Use Crestron Toolbox to set the time zone. For details,
refer to the Crestron Toolbox help file.
2. Use the Internet Explorer
web browser to navigate to
®
http://xxx.xx.xx.xxx/setup, where xxx.xx.xx.xxx is the
IP address of the control system. The control system's
welcome screen is displayed.
NOTE:
The web-based setup tool is accessible only from
Internet Explorer.
If a security warning is displayed, click Install to
NOTE:
continue.
PART NUM.
2003575
2003576
2001016
2045873
2042043
2014966
Advertisement
Table of Contents

Related Manuals for Crestron 3 Series


Summary of Contents for Crestron 3 Series
- Page 1 ® or with the (included) 24-Vdc power pack. When making connections to the MC3, note the following: 1. Use Crestron Toolbox to set the time zone. For details, refer to the Crestron Toolbox help file. • Use Crestron power supplies for Crestron equipment.
- Page 2 (1) this device may not cause interference and (2) this device must accept any interference, including interference that may cause may be used in this document to refer to either the entities claiming the marks and names or their products. Crestron disclaims any proprietary interest in the marks and names of others.
Need help?
Do you have a question about the 3 Series and is the answer not in the manual?
Questions and answers