Risco Agility 4 Quick Installation Manual
Hide thumbs
Also See for Agility 4:
- Installer manual (182 pages) ,
- User manual (52 pages) ,
- Quick user manual (8 pages)
Table of Contents
Advertisement
Advertisement
Table of Contents

Related Manuals for Risco Agility 4


Summary of Contents for Risco Agility 4
- Page 1 Agility 4 Quick Installation Guide...
-
Page 2: Table Of Contents
EVICE LLOCATION AT THE ANEL Table of Device Transmissions ..............................6 PROGRAMMING AGILITY 4 WITH THE LCD/PANDA KEYPAD .......... 7 ACCESSING INSTALLER MENU ..................... 7 SETTING THE SYSTEM CLOCK ...................... 7 MEASURING AND DEFINING THE NOISE LEVEL THRESHOLD ........8 ............................ -
Page 3: Introduction
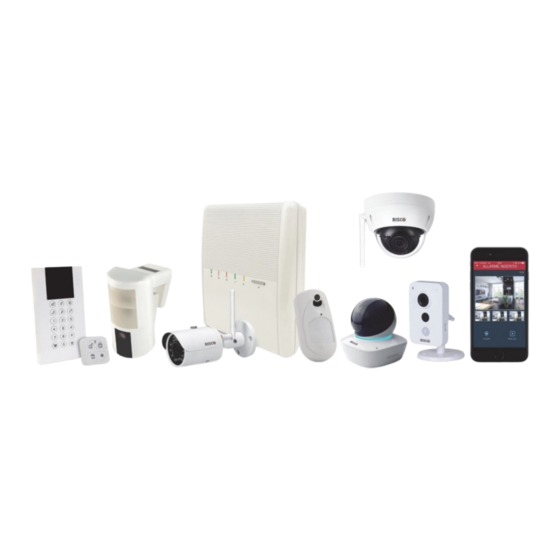
This quick installation guide describes the main steps for installing the main panel and programming the Agility 4 using the 2-way wireless LCD or Panda keypad. The Agility 4 includes multi-socket communication modules (IPC2, GSM 2G or GSM 3G) that provide multiple, simultaneous communication channels for direct communication, and for communication via the Cloud. -
Page 4: Lcd Keypad Allocation And Language Selection
3. In the displayed language menu, select the system language (and customer default) settings and then press NOTE: If the keypad goes into “sleep mode” before finishing language selection, restore the system language selection on the keypad by simultaneously pressing * and 9. Agility 4 Quick Installation Guide... -
Page 5: Wireless Device Allocation
(for example, “Detector, zone 1”). : For future use, it is recommended to write down for the customer the device description, NOTE zone number, and installation location of each allocated device. Agility 4 Quick Installation Guide... -
Page 6: Table Of Device Transmissions
Press the button for at least 7 seconds. Transmitter 4. When all the devices have been enrolled, short-press the main panel button to exit Learn mode; the unit beeps once and the LEDs stop flashing. Agility 4 Quick Installation Guide... -
Page 7: Programming Agility 4 With The Lcd/Panda Keypad
Programming Agility 4 with the LCD/Panda Keypad This section describes system programming from the 2-way wireless LCD keypad. You can also program the Agility 4 system via the Configuration Software or PTM module. Refer to the CS documentation and the Full Installation Manual, respectively, for details. -
Page 8: Measuring And Defining The Noise Level Threshold
From the Installer menu, go to: 2)Testing > 2)Zone [or instead] 3)Keyfob, 4)Keypad, or 5)Siren] > 1)Communication Test > 2. Scroll with to a zone to perform the test, a number (percentage) appears representing the signal strength the panel received from the device: Agility 4 Quick Installation Guide... -
Page 9: Programming And Testing Zones (Detectors)
5) Advanced: Depending on the detector type, includes chime, supervision, forced arm enabled, and additional parameters for 2-way detectors. 4. Perform a Comm. Test (see Performing a Communication Test, page 8). Agility 4 Quick Installation Guide... -
Page 10: Programming And Testing Keyfobs
2) Instant Stay (Arm): Have Stay / Home (partial) arming without Exit Delay. 3) Disarm + Code: Relevant only if user code is defined using only digits 1–4 (corresponding to the numbered keyfob buttons 1–4). 6. Perform a Comm. Test (see Performing a Communication Test, page 8). Agility 4 Quick Installation Guide... -
Page 11: Programming Keypads
3) Volume: Set volume produced from the siren during alarm, squawk or exit/entry time. 4) Strobe: Set the strobe operation of the external wireless siren. 3. Perform a Comm. Test (see Performing a Communication Test, page 8). Agility 4 Quick Installation Guide... -
Page 12: Defining Communication Channels
(1—3). 15. Defining Follow-Me Destinations Now that you have set up the methods for Agility 4 to communicate with the monitoring station and the customer, you can define the destinations to which Follow Me reports (event notifications) will be sent. - Page 13 NOTE: The actual destinations (telephone numbers, email addresses) are defined outside of the Installer Programming menu, or can be done by the Grand Master from the User menus. NOTE: Additional Follow-Me e-mail notifications can be assigned in the RISCO Cloud Agility 4 Quick Installation Guide...
-
Page 14: Setting System Parameters (Controls)
16. Setting System Parameters (Controls) There are several system-wide parameters that define how the Agility 4 system works. They are collected under the System menu. All these parameters are set with default values that apply for most installations. If you wish to make a change, go through the menus to program any other system parameter. -
Page 15: Connecting To The Cloud
19. Connecting to the Cloud Agility 4 can be configured to be constantly connected to the RISCO Cloud, an application server that handles all communication between the system, service providers and Smartphone/Web users. The Cloud enables remote monitoring and control of the system, sending event notifications, and viewing real-time video clips via VUPoint IP cameras –... -
Page 16: Pir Setup
20. PIR Setup PIR-based camera detectors perform detection with advanced still image capabilities. Up to eight PIR cameras can be used in the Agility 4 system. For the physical installation of PIR cameras, refer to the product instructions. To set up PIR cameras: 1. -
Page 17: Installer Responsibilities For Assisting The Customer
2. Instruct the user how to define user codes, proximity tags, and Follow-Me destinations. 3. For RISCO Cloud connected communication, instruct users with Smartphones to download the iRISCO App from the Apple App store or Android Play Store, and ensure that the connection between the app and the system is established. -
Page 18: Standard Limited Product Warranty ("Limited Warranty")
RISCO, for a period of (i) 24 months from the date of delivery of the Product (the “Warranty Period”). This Limited Warranty covers the Product only within the country where the Product was originally purchased and only covers Products purchased as new. -
Page 19: Red Compliance Statement
RISCO in conjunction with the Product (with or without the RISCO brand), including, but not limited to system software, as well as P2P services or any other service made available by RISCO in relation to the Product, are not covered under this Limited Warranty. Refer to the Terms of Service https://riscocloud.com/ELAS/WebUI/UserLogin/License for details of your rights and obligations with respect to the use of such applications, software or any service. - Page 20 Contacting RISCO Group RISCO Group is committed to customer service and product support. You can contact us through our website www.riscogroup.com or via the following: Australia France Spain Tel: + Tel: +33-164-73-28-50 Tel: +34-91-490-2133 1800 support-au@riscogroup.com support-fr@riscogroup.com support-es@riscogroup.com Belgium (Benelux)
Need help?
Do you have a question about the Agility 4 and is the answer not in the manual?
Questions and answers