Table of Contents
Advertisement
Advertisement
Table of Contents

Related Manuals for Molift Air 300


Summary of Contents for Molift Air 300
- Page 1 Molift Air EN - Technical manual TM16101 Rev A 2013-11-14...
-
Page 2: Table Of Contents
Checklist after IRC (In rail charging) ........28 service and repair. Propulsion ..........28 Documenting the Service ......29 Periodic Inspection Checklist Molift Air ..30 Safety checklist after Service and Repair ...31 Service Log ..........32 Installation ..........33 Notes ............33... -
Page 3: General
5 years if the service counter not Battery and Service indicator has displayed red yet. The lifter has two indicator lights. Authorised service personnel can use the Molift Service Tool to take readings of the lift’s data and number og lifts. Wrench symbol / Service light... -
Page 4: How To Open
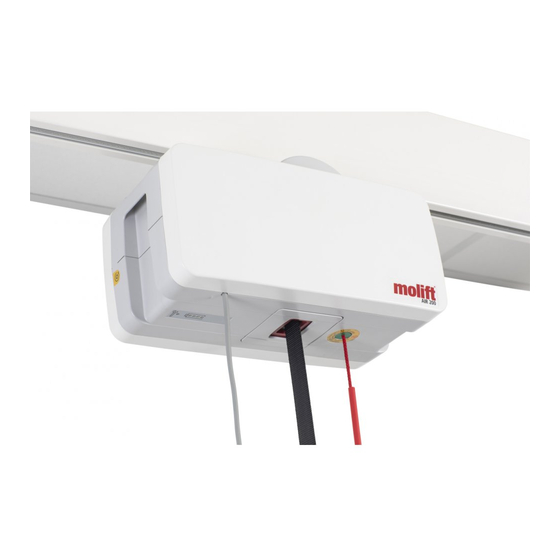
Molift Air / www.molift.com How to open Emergency Stop Remove sidecovers Sidecovers are snap-on and can be released by pushing down the two buttons on top of the lifter Activate emergency stop before and pulling the sidecover outwards. opening side covers. -
Page 5: Molift Service Tool
Cable for Molift Service Tool (13 pin DIN - USB) 1. Remove hand control cover. 2. Unplug hand control and and insert service tool cable. 3. Refer to User Manual for Molift Service Tool for instructions on how to use the Molift Service Tool software. -
Page 6: Technical Description
2520002 Trolley IRC 2501220 Molift Air 205 IRC Propulsion 2520006 Trolley IRC Propulsion 2501320 Molift Air 300 IRC Propulsion 2520006 Trolley IRC Propulsion Trolley for other Rail Systems: 2520001 Trolley Basic Type G+I 2520004 Trolley Basic Type L+N 2520005 Trolley Basic Type M... -
Page 7: Measurements
Molift Air / www.molift.com Measurements Dimensions: see table under (Hoist height from connection point to CSP) L x W x H (Length, Width, Height without trolley) 249 mm 360 x 190 x 195 mm (Wheeltrack inside rail to under rail H62) -
Page 8: Air Components
Molift Air / www.molift.com Air Components Air Basic Exploded Drawing 20-001 Rev. K... - Page 9 Offlead Angle Sensor 2510007 Micro Switch Article no. Description 2510008 Bottom plate 2500000 Air Basic 2510078 Prod. Label 2 Molift Air 300 2510035 Label. Emergency Stop 1100303 Label: Safety Check 2510011 Label Molift Air 300 2510060 Label: Battery & Service...
- Page 10 Molift Air / www.molift.com Air IRC Basic Exploded Drawing 20-012 Rev. E...
- Page 11 Offlead Angle Sensor Article no. Description 2510007 Micro Switch 2500001 Air Basic IRC 2510008 Bottom plate 2510078 Prod. Label 2 Molift Air 300 2510011 Label Molift Air 300 2510035 Label. Emergency Stop 1100303 Label: Safety Check 0440002 Hand Control 2 button 2510060 Label: Battery &...
- Page 12 Molift Air / www.molift.com Air Motor Exploded Drawing 20-011 Rev. D 2510001 Motor Assy Molift Air 1220194 Extension Spring 1220155 Axle for Guiding Drum Pos Article no. Description 1220158 Guiding Drum Gear Box 1220313 Circlip 0920072 Molex Plug Axle 0920078...
-
Page 13: Spare Part List
Spare part list Recommended spare parts to keep in stock for Service personnel. Article no. 1240100 Charger Nomad/AIR 2510023 Battery 26,4 V NiMH Molift Air 2510063 Lifting Belt Molift Air 2017002 Hand Control 2 buttons with charg- ing probes 2510005... -
Page 14: Labels
Molift Air / www.molift.com Labels CONTROL 12 Month Labels 2510011 Cover label 300 2510080 Main label 205 Pos Article no. Description 2510078 Main label 300 2510035 Emergency stop/lowering Serial number label 2510060 Service/battery 2510079 Manual Emergency lowering NB!! Contact Etac Supply Gjøvik for barcode label... -
Page 15: Battery
Molift Air / www.molift.com Battery Battery Molift Air has a 26.4 V NiMH battery pack. The battery has a life expectancy of approx. 500 charge cycles. Batteries must be fully charged and depleted completely a couple of times before it achieves full capac- ity. -
Page 16: Covers
Molift Air / www.molift.com Covers Remove Upper cover The lifter has 6 covers. 2 identical side covers, Hand control cover, Bottom plate, Upper cover and Remove both sidecovers, disconnect battery lower cover. Remove Side covers Push in Quick release button for trolley, and remove the M2,5 setscrew. - Page 17 Molift Air / www.molift.com Remove Bottom Plate 13. Cut the wire for LED lights and remove cover. 14. Pull wires for Led lights and microswitch through the new cover, and solder wires. Use heat shrink tube to isolatee on all wires.
-
Page 18: Hand Control
1. Unscrew both screws (Torx 20) and remove cover 2017002 Hand Control 2 buttons w/charging 2019004 Hand Control 4 buttons w/charging 0440002 Hand Control 2 buttons Hand Control 4 buttons 0440004 Replaceable hook for Molift hand controls 2. Unplug hand control... -
Page 19: Angle Sensor/Ens Sensor
Molift Air / www.molift.com Angle Sensor / End sensor Change angle sensor microswitch The hoist has a directional safety feature that prevents lifting if angle on lifting band is to steep. 1. Open sidecover and disconnect battery 2. Remove bottom cover (see “Remove bottom plate”... -
Page 20: Suspension Coupling
Molift Air / www.molift.com Suspension coupling Change suspension coupling Checklist after installation Make sure cap is properly fastened and doesn’t slide of. Make sure the sviwel rotates freely Perform and fill out Safety checklist after service and repair Suspension Coupling Parts Article no. -
Page 21: Emergency Stop/Lowering
Molift Air / www.molift.com Emergency Stop/Lowering Remove Emergency stop relay and button Check after installation 1. Activate emergency stop Activate emergency stop by pulling cord. 2. Remove both side covers and disconnect Make sure it is not possible to run lifter battery with emergency stop activated. -
Page 22: Replacing Lifting Band
Molift Air / www.molift.com Replacing Lifting Band Remove lifting band 1. Run the lifter until the lifting band is run out completely. Pull the band while pushing down button (the band must be tensioned or band slack sensor activates) 2. Open sidecover 3. -
Page 23: Brake
Molift Air / www.molift.com Brake Change brake Check after installation 1. Open both sidecovers Test the electric emergency lowering 2. Disconnect battery Test lifter with one lifting cycle with SWL, 3. Remove batteryclamp (hex key 5mm) and take the brake should not slip out battery 4. -
Page 24: Lifting Motor/Gear House
Molift Air / www.molift.com Lifting Motor/Gear House Remove lifting motor/gearhouse. 1. Activate emergency stop 2. Remove both side covers 3. Disconnect Battery power cable and tempera- ture sensor, remove battery clamp. 4. Disconnect Power cable to motor from PCB. 5. Remove both Quick release buttons for trolley. -
Page 25: Microswitches
Drive the band completely out, the lifter 1. Activate emergency stop should stop when band is completely out. 2. Open sidecover Microswitch for drum sensor: Use Molift 3. Disconnect battery power cable Service tool, and the the function “Live 4. Cut both wires close to microswitch. -
Page 26: Pcb (Printed Circut Board)
3. Temperature battery Install new PCB 4. Brake 5. Emergency lowering 1. Molift Service Tool must be used to copy set- 6. DIN 13 contact (Hand control) tings from old Card to the new card. 7. LED/DIN 2. Use molift Service tool and install factory set- 8. -
Page 27: Electric Diagram
Molift Air / www.molift.com Electric Diagram... -
Page 28: Trolley
Molift Air / www.molift.com Trolley Change wheels Wheels are held in place by a circlip. Remove with cirlcip plyer to change wheels. Axle is locked in place (centered) with Loctite 2701. Wheels Article no. 1109514 Wheel 1120706 Circlip DIN 471 ø10x1... -
Page 29: Irc (In Rail Charging)
Molift Air / www.molift.com IRC (In rail charging) If the lifter is equipped with IRC (In rail charging) it has a trolley with a cable connected to a contact in the upper cover. The charger unit is mounted inside the lifter, and the hand control has no charging probes. -
Page 30: Documenting The Service
When performing a periodic inspection, the inspector shall fill out the inspection report for Service Log Molift Air. The reports should be retained by the person(s) responsible for servicing the hoist. If The service manual has a table for logging the inspection reveals defects and damages, the of repair and work done on the lifter. -
Page 31: Periodic Inspection Checklist Molift Air
Date/Place: ................... Service light displays green Signature: Hoist is less then 5 years old ................... Etac Molift Service ID (6 digits): Physical examination ................... Approved without faults Test FUNCTION and check for wear. Approved after repair. All checkpoints must be checked of Lifter is marked with “out of order”... -
Page 32: Safety Checklist After Service And Repair
................... Suspension coupling (change of suspension, Signature: QR pin, rotation and swivel funktion) ................... Both Quick release couplings (connect to Etac Molift Service ID (6 digits): trolley) ................... Angle sensor (pull band sideways) Charger/Battery Accessories (t.ex: Scale, Propulsion, IRC): ................... -
Page 33: Service Log
Molift Air / www.molift.com Service Log Periodic inspection and Service/Repair logbook. Defects and damage of importance to the safety of the hoist which have occurred between inspections and have already lead to corrective actions should be entered in the logbook. A record of the date of inspection of the hoist and inspection result should be noted in the logbook together with the signature of the inspector. -
Page 34: Installation
Molift Air / www.molift.com Installation Lifter installation Assembly and installation The hoist is marked with Safe Working Load Mounting of Lifter on trolley. No tools required. (SWL), this should not exceed rail systems SWL The lifter has two connection points. -
Page 35: Notes
Molift Air / www.molift.com Notes... - Page 36 Find your distributor visit www.molift.com Etac AS Etac Supply Gjøvik Hadelandsveien 2, 2816 Gjøvik, Norway Tel +47 4000 1004 molift@etac.com www.molift.com...
Need help?
Do you have a question about the Air 300 and is the answer not in the manual?
Questions and answers