Table of Contents
Advertisement
Available languages
Available languages
Quick Links
Advertisement
Table of Contents

Related Manuals for Dovre 2530GA


Summary of Contents for Dovre 2530GA
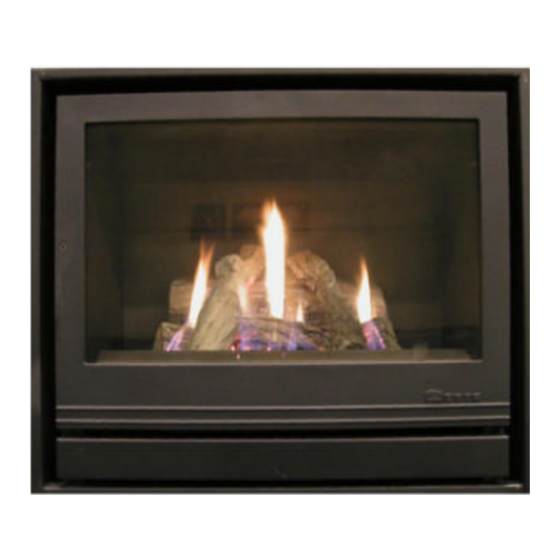
- Page 1 GASHAARD / FOYER A GAZ GAS FIREPLACE / GASOFEN 2530GA(P) INSTALLATIEVOORSCHRIFTEN EN GEBRUIKSAANWIJZING INSTALLATION ET MODE D’EMPLOI INSTALLATION INSTRUCTIONS AND OPERATING MANUAL EINBAUANLEITUNG UND GEBRAUCHSANWEISUNG - 1 - 2530GA(P) 03.27603.000...
-
Page 2: Table Of Contents
5.4. Utilisation de la commande à distance (option) ..........25 5.5. Ventilateur ......................27 6. Entretien ........................27 7. Pannes possibles et remèdes ..................29 Annexe 1 : Données techniques ..................56 Annexe 2 : Dimensions ....................57 - 2 - 2530GA(P) 03.27603.000... - Page 3 5.2. Regelung des Gasdurchflusses und Flammenhöhe ........50 5.3. Ausmachen ......................50 5.4. Fernbedienung (Option) ..................51 5.5. Bedienung des Ventilators .................53 6. Wartung ........................53 7. Diagnoseplan ......................55 Anlage 1 : Technischen Daten ..................56 Anlage 2 : Abmessungen ....................57 - 3 - 2530GA(P) 03.27603.000...
-
Page 4: Voorwoord
De minimale veilige afstand bedraagt 100 cm. Het is raadzaam, na installatie van de haard, deze enige uren op de hoogste stand te stoken en daarbij tevens goed te ventileren, zodat het beschermingsvet dat zich op - 4 - 2530GA(P) 03.27603.000... -
Page 5: Algemene Voorschriften
Het toestel moet hermetisch worden aangesloten op een goed werkende schoor- steen, voldoende afgeschermd zijn van brandbare materialen (vloer en wanden), in een ruimte met voldoende verluchting. - 5 - 2530GA(P) 03.27603.000... -
Page 6: De Schoorsteen
Het buitendaks gedeelte van de schoorsteen moet steeds geïsoleerd zijn. • De schoorsteen dient voldoende hoog te zijn (minimum 2,5 meter), en uitmo n- den in een zone die niet verstoord wordt door omliggende gebouwen, nabij- staande bomen of andere hindernissen. - 6 - 2530GA(P) 03.27603.000... -
Page 7: Ventilatie Van Het Lokaal
Aansluiting op het schoorsteenkanaal De aansluitkraag moet hermetisch met de schoorsteen worden verbonden. Gebruik eventueel het “Dovre bajonet”-systeem (in optie): Monteer eerst op de schroeven op de topplaat van het toestel een moer, een rondel en dan weer een moer (links en rechts van de aansluitkraag). Onde r deze rondellen komt later de sleutel vast zitten. -
Page 8: Gasaansluiting
230 V met aarding. Dit kan gebeuren via ste k- ker of vaste aansluiting. Elektrische ontkoppeling kan achteraf steeds gebeuren door loskoppelen van de stekkerverbinding die in het toestel is ingebouwd. 1 ventilator 2 AMP-stekker 3 schakelaar 4 testdrukknop 5 thermostaat - 8 - 2530GA(P) 03.27603.000... -
Page 9: Plaatsing Van De Imitatie Houtblokken
In bepaalde gevallen kan het nodig zijn de verspreiding van de askorreltjes lichtjes aan te passen door bv. enkele branderpoorten gedeel- telijk vrij te maken om aldus een beter verdeeld vlammenbeeld te bekomen. - 9 - 2530GA(P) 03.27603.000... -
Page 10: Installatie Van De Afstandsbediening (Optie)
4.8. Afwerking Sluit de glasdeur en ontsteek het toestel en ga na of het naar behoren werkt. 4.9. Verpakkingsmaterialen De verpakkingsmaterialen moeten op verantwoorde wijze en conform de overheids- bepalingen worden afgevoerd. - 10 - 2530GA(P) 03.27603.000... -
Page 11: Gebruik
Om het toestel volledig te doven, druk knop A in en draai verder tot positie 1, de waakvlam gaat uit. Alleen als het thermokoppel voldoende afgekoeld is, kan men de waakvlam opnieuw aansteken. • Wordt het toestel voor langere tijd niet gebruikt, draai dan ook de gasafsluitkraan in de gastoevoerleiding dicht. - 11 - 2530GA(P) 03.27603.000... -
Page 12: Gebruik Van De Afstandsbediening (Optie)
“q” voor minuutinstelling. • Druk TIMER, P1» verschijnt (periode 1, verwarmingscyclus uit). • Stel de eindtijd van de eerste verwarmingsperiode in. • Druk opnieuw TIMER voor het instellen van de tweede verwarmingsperiode (P2ã aan en P2» uit). - 12 - 2530GA(P) 03.27603.000... - Page 13 Vooraleer in te stellen op AUTO of TIMER mode, is het raadzaam eerst in de MAN mode na te gaan of de signalen van de handset inderdaad ontvangen wor- den (knoppen p of q, lichtje op ontvanger moet branden, knop B op gasblok moet draaien). - 13 - 2530GA(P) 03.27603.000...
-
Page 14: Bediening Van De Ventilator
Zuiver maken en controleren van het hoofdspuitstuk. • Demontage en zuiver maken van waakvlams puitstuk en thermokoppel. • Dichtheidscontrole van de gasleidingen. • Werkingstest : ontsteking waakvlam, ontsteking hoofdbrander, controle van de goede werking van de veiligheidselementen. - 14 - 2530GA(P) 03.27603.000... - Page 15 • Indien de ventilator moet vervangen worden, let op de juiste verbinding (zie nummeraanduiding). - 15 - 2530GA(P) 03.27603.000...
-
Page 16: Storingen En Oplossingen
(*) schoorsteentrek toestel ondicht lekken opsporen en dichten (*) stof op verbrandingskamer afstoffen batterijen vervangen eventueel slecht contact opsporen en bedrading naar gasblok verhelpen zender of ontvanger stuk vervangen - 16 - 2530GA(P) 03.27603.000... -
Page 17: Préface
élevée et de bien ventiler pour faire évaporer la graisse de protection qui pourrait se trouver sur certaines parties intérieures du foyer et faire sécher la laque réfractaire. Il peut se former un dépôt blanc sur la vitre - 17 - 2530GA(P) 03.27603.000... -
Page 18: Prescriptions Générales
Finalement, prenez note des spécifications techniques en annexe du présent manuel avant d’entamer l’installation. Le poêle doit être raccordé à une cheminée correcte, suffisamment éloigné et/ou protégé de matériaux combustibles (sol, parois), et ce dans un local suffisamment aéré ou ventilé. - 18 - 2530GA(P) 03.27603.000... -
Page 19: La Cheminée
La partie hors du toit doit toujours être isolée. • Le conduit de fumée doit être suffisamment haut (minimum 2,5 m), et débou- cher dans une zone non perturbée par des bâtiments, arbres ou autres obstacles avoisinants. - 19 - 2530GA(P) 03.27603.000... -
Page 20: Ventilation Du Local
Raccordement au conduit de cheminée Le collier de raccordement de l’appareil doit être relié à la cheminée de façon étan- che, au moyen d’une buselure résistante à la corrosion. Le Dovre “baîonnette- système”: Vissez d’abord sur les tiges filettées un écrou, une rondelle et encore un écrou (à... -
Page 21: Raccordement Au Gaz
1 mètre, à raccorder au circuit de 230 V avec mise à la terre. Ce raccordement peut être par fiche ou fixe, le débranchement pouvant toujours se faire grâce au connecteur situé à haute ur du raccordement gaz 1 ventilateur 2 AMP-connection 3 sélecteur 4 bouton 5 thermostate - 21 - 2530GA(P) 03.27603.000... -
Page 22: Placement Des Büches D'imitation
Il peut être nécessaire, dans certains cas, de dégager partiellement quelques trouées du brûleur pour obtenir ainsi un plus bel aspect de flammes. - 22 - 2530GA(P) 03.27603.000... -
Page 23: Installation De La Commande À Distance (Option)
Fermez la porte vitrée et serrez la vis de blocage de la poignée. Allumez l'appareil et vérifiez s'il fonctionne correctement. 4.9. Emballage Les matériaux d’emballage doivent être liquidés de façon justifiée et conformément aux réglementations d’application. - 23 - 2530GA(P) 03.27603.000... -
Page 24: Mode D'emploi
1, la veilleuse s'éteint. Un nouvel allumage ne pourra se faire qu’après que le thermocouple soit suffisamment refroidi. • Si l'appareil n'est pas utilisé pendant une assez longue période, fermez le robinet d'arrêt du gaz dans la conduite d'arrivée de gaz. - 24 - 2530GA(P) 03.27603.000... -
Page 25: Utilisation De La Commande À Distance (Option)
Appuyez de nouveau TIMER pour le choix du deuxième cycle de chauffe (P2ã allumage, P2» extinction). • Confirmez les deux cycles en ré-appuyant TIMER. • Si vous ne désirez qu’un cycle de chauffe, entrez pour P2ã et P2» la même heure. - 25 - 2530GA(P) 03.27603.000... - Page 26 • Dans de rares cas il se peut que le bouton B vient à se bloquer en fin de course. Il peut facilement être débloqué en le tournant légèrement à la main. - 26 - 2530GA(P) 03.27603.000...
-
Page 27: Ventilateur
Démontage et nettoyage de l'injecteur de veilleuse et du thermocouple. • Contrôle d'étanchéité des conduites de gaz. • Test de fonctionnement : allumage de la veilleuse, allumage du brûleur principal, contrôle du bon fonctionnement des éléments de sécurité. - 27 - 2530GA(P) 03.27603.000... - Page 28 Si le ventilateur doit être remplacé, veillez à ce qu’il y ait un raccordement opti- mal (voir indication de numéro). - 28 - 2530GA(P) 03.27603.000...
-
Page 29: Pannes Possibles Et Remèdes
Remédier à la fuite (*) Poussière sur le corps de chauffe Dépoussiérer Batteries plates ou défectueuses Remplacer Contrôler et remédier à un éventuel faux Câblage entre récepteur et bloc gaz contact Émetteur ou récepteur défectueux remplacer - 29 - 2530GA(P) 03.27603.000... -
Page 30: Foreword
This is to ensure that the protective oil on the interior of the fireplace has the opportunity to evapo- rate, and that the heat resistant paint has the chance to cure. Some white residue - 30 - 2530GA(P) 03.27603.000... -
Page 31: General Prescriptions
(floor and walls) at a distance, and should be installed in a room with sufficient ventilation. Please inform about national or local norms and regulations concerning this subject. Your distributor will give y ou the necessary advice. - 31 - 2530GA(P) 03.27603.000... -
Page 32: The Chimney
• The chimney should be high enough (at least 2,5 metres) and should end in a zone that is clear of nearby buildings, trees or other obstacles. - 32 - 2530GA(P) 03.27603.000... -
Page 33: Ventilation
The connection collar must be hermetically connected to the chimney by means of a corrosion resistant pipe. You might want to use the 'Dovre bayonet' system (optional). First attach a nut, a washer, and then another nut to the screws on the top plate of the appliance (to the left and to the right of the connection collar). -
Page 34: Gas Connection
Power can afterwards be removed by disconnecting the plug connection that has been built into the appli- ance. 1 fan 2 AMP plug 3 switch 4 test push button 5 thermostat - 34 - 2530GA(P) 03.27603.000... -
Page 35: Placing Of The Imitation Logd And Ashes
In certain cases it may be necessary to adjust the distribution of the ashes slightly by, e.g., partially uncovering a few of the burner open- ings in order to obtain a more even flame appearance. - 35 - 2530GA(P) 03.27603.000... -
Page 36: Installing The Remote Control (Option)
Close the glass door and secure the handle with the small loc king screw. Light the unit and check to see that it is working satisfactorily. 4.9. Packaging materials Packaging materials should be disposed of in a responsible way and in accordance with governmental regulations. - 36 - 2530GA(P) 03.27603.000... -
Page 37: Operating Instructions
To turn the unit completely off, turn knob A further to position 1; the pilot light goes out. • If the unit will not be used for an extended period, close the gas shut-off cock in the gas line. - 37 - 2530GA(P) 03.27603.000... -
Page 38: Operating The Remote Control (Option)
Press TIMER again to set the second heating period P2ã (heat on) and P2» (heat off). • Store both heating periods by pressing TIMER again. • If only one heating period is desired, program the same time for P2ã and P2» - 38 - 2530GA(P) 03.27603.000... - Page 39 In very rare cases, the motor can get blocked when the knob B on the gas con- trols reaches the end points of its turning radius. The knob must then be turned manually to free the blockage. - 39 - 2530GA(P) 03.27603.000...
-
Page 40: Operating The Fan
Minor paint damage can be touched up with spray paint and enamelled surface damage can be touched up with coloured repair kits. Both products are available from your Dovre Dealer. During the first use after paint spraying your unit may give off a slight odour. This will quickly disappear. - Page 41 In the event that the fan needs to be replaced, make sure that the connections are correct (see number indication). . - 41 - 2530GA(P) 03.27603.000...
-
Page 42: Troubleshooting
Blocked chimney, too low chimney draught Control and clean (*) Appliance is leaking Look up and rectify (*) Dust on appliance Remove dust Batteries Replace Wiring from receiver to gas block Check for eventuel bad contact and repair Sender or receiver broken Replace - 42 - 2530GA(P) 03.27603.000... -
Page 43: Vorwort
Möbel oder andere brennbare Materialen in die Nähe des Ofens. Der minimale Sicherheitsabstand beträgt 100 cm. Es wird empfohlen, nach der Installation des Ofens, diesen einige Stunden auf der höchsten Stufe zu betreiben und dabei gut zu lüften. Das zum Schutz an der - 43 - 2530GA(P) 03.27603.000... -
Page 44: Algemeine Richtlinien
Sie sich auch mit den technischen Spezifikationen in der Anlage dieser Gebrauchsanleitung vertraut, bevor Sie mit der Montage beginnen. Der Ofen muss in einem Raum mit ausreichender Entlüftung hermetisch an einen gut funktionierenden Schornstein angeschlossen, und ausreichend von brennbaren Materialien (Fußboden, Wände) abgeschirmt werden. - 44 - 2530GA(P) 03.27603.000... -
Page 45: Der Schorstein
Dach befindet, muss immer isoliert sein. • Der Schornstein muss ausreichend hoch sein ( m indestens 2,5 Meter), und in einen Bereich münden, der nicht durch umliegende Gebäude, nahe gelegene Bäume oder andere Hindernisse gestört wird. - 45 - 2530GA(P) 03.27603.000... -
Page 46: Lüftung Des Räumes
Anschluss zum Schornsteinkanal Der Anschlusskragen muss hermetisch mit dem Schornstein über ein korrosions-beständiges Verbindungsstück verbunden werden. Benutzen Sie eventuell das "Dovre bajonet"-System (Option): montieren Sie zuerst auf die Schrauben der Oberplat- te des Geräts eine Mutter, eine Unterlegscheibe und wieder eine Mutter (links und rechts der Anschlußmuffe). -
Page 47: Gasanschluss
Stromnetz. Dies geschieht via einen Stecker oder einen festen Anschluß. Elektri- sche Abkoppelung kann nachher stattfinden, indem die in dem Gerät eingebaute Steckerverbindung losgekoppelt wird. 1 Ventilator 2 AMP Stecker 3 Schalter 4 Testdruckknopf 5 Thermostat - 47 - 2530GA(P) 03.27603.000... -
Page 48: Einbau Der Holzscheitimitate
F ä l l e n k a n n erforderlich sein, die Aschekrümel geringfügig anders zu streuen und bspw. einige Brenneröffnungen teilweise freizulegen, um so ein besser verteiltes Flammenbild zu erzielen. - 48 - 2530GA(P) 03.27603.000... -
Page 49: Einbau Der Fernbedienung (Option)
Schließen Sie die Glastüre und verriegeln Sie den Griff mit der dazu bestimmten Schraube. Zünden Sie das Gerät an und prüfen Sie die ordnungsgemäße Funktionsweise des Geräts. 4.9. Verpackungsmaterialien Die Verpackungsmaterialien müssen auf verantwortungsvolle Art und Weise und gemäss den amtlichen Bestimmungen entsorgt werden. - 49 - 2530GA(P) 03.27603.000... -
Page 50: Betrieb
• Um den Ofen ganz auszumachen, drehen Sie Knopf A weiter bis zur Position 1, die Sparflamme erlischt. • Wenn das Gerät längere Zeit nicht genutzt wird, schließen Sie bitte auch den Gasabschlusshahn der Gaszufuhrleitung. - 50 - 2530GA(P) 03.27603.000... -
Page 51: Fernbedienung (Option)
Zündflamme zu stellen (kurzes Drücken ermöglicht eine schrittweise Änderung der Flammenhöhe). Bei jedem Drücken dieser Tasten erscheint das Sendesymbol l i nks oben. Ist Knopf B des Ventils an den Endanschlägen, dann blinkt die LED des Empfängers. - 51 - 2530GA(P) 03.27603.000... - Page 52 EIN-AUS Zyklen bis sich ein Optimum einstellt. Ist die Kleinstellung ausreichend für die Erwärmung des Raumes, dann wird der Heizer zwischen Kleinstellung und AUS wechseln, wodurch langere Einschaltzeiten und eine gleichmässigere Temperatur errreicht werden. - 52 - 2530GA(P) 03.27603.000...
-
Page 53: Bedienung Des Ventilators
Materialien benutzen und nicht mit Druckluft absprühen! • Sauber machen und Kontrolle der Hauptdüse. • Demontage und säubern von Sparflammendüse und Thermoelement. • Dichtigkeitskontrolle der Gasleitungen. • Betriebstest : Zünden Sparflamme, Zünden Hauptbrenner, Kontrolle der Sicherheitselementen. - 53 - 2530GA(P) 03.27603.000... - Page 54 Gaseinheit (Gasblock, Leitungen, Hauptinjektor, Zündflamme, Ventilator) in seiner Ganzheit aus dem Gerät geholt werden, nachdem man zwei Schrau- ben auf dem Boden der Brennkammer losdreht. Wenn der Ventilator ersetzt werden soll, achten Sie auf die richtige Verbin- dung (siehe Nummerangabe). - 54 - 2530GA(P) 03.27603.000...
-
Page 55: Diagnoseplan
Schornstein überprüfen und reinigen (*) Ofen undicht Undichte Stelle aufsuchen und abdichten (*) Staub auf Brennkammer Abstauben Batterie Defekt Ersetzen Eventuelle falsches Kontakt aufsuchen und Elektrische Kabel zu Gasblock reparieren Sender oder Empfänger defekt Ersetzen - 55 - 2530GA(P) 03.27603.000... -
Page 56: Bijlage 1 : Technische Gegevens
- 56 - 2530GA(P) 03.27603.000... -
Page 57: Bijlage 2 : Afmetingen
Bijlage 2 : Afmetingen Annexe 2 : Dimensions Annex 2 Dimensions Anlage 2 : Abmessungen - 57 - 2530GA(P) 03.27603.000... - Page 58 - 58 - 2530GA(P) 03.27603.000...
- Page 59 - 59 - 2530GA(P) 03.27603.000...
- Page 60 Im Rahmen kontinuerlicher Produktverbesserung, können Specifikationen des geliefe rtes Produktes von den Beschreibungen in dieser Broschure abweichen. DOVRE N.V. Tel : +32 (0) 14 65 91 91 Nijverheidsstraat 18 Fax : +32 (0) 14 65 90 09 B-2381 Weelde E-mail : info@dovre.be ___________________________________________________________ 03.27603.000 0420 - 60 - 2530GA(P) 03.27603.000...
Need help?
Do you have a question about the 2530GA and is the answer not in the manual?
Questions and answers