
Related Manuals for Walkin’ Pets Wheels Medium


Summary of Contents for Walkin’ Pets Wheels Medium
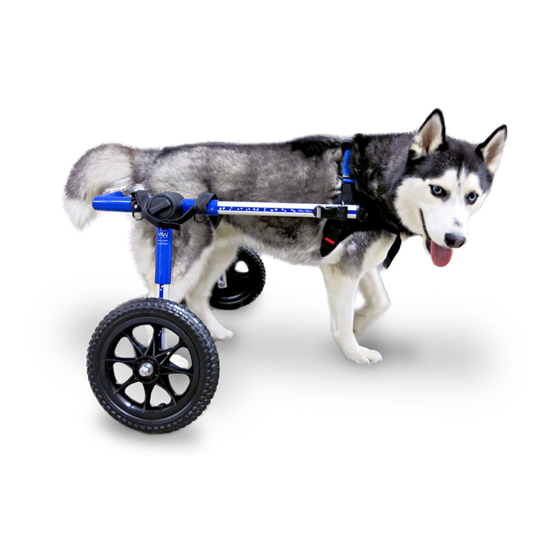
- Page 1 Owner’s Manual MEDIUM FRAME with Optional Full Support Front Wheel Attachment Cheyeanne THE PROVEN LEADER IN PET MOBILITY...
-
Page 2: Table Of Contents
Thank you for purchasing a Walkin’ Wheels Medium dog wheelchair. ® Questions or comments? Call us at: (603) 577-8854 or email us at: HelpMe@WalkinPets.com Contents Quick Start Guide ................3 Parts of the Walkin’ Wheels Rear Medium Wheelchair ......4 ® Teach Your Dog How to Use Walkin’... -
Page 3: Quick Start Guide
Quick Start Guide 1. Set up wheelchair length (p.9), height (p.10), and width (p.10) 2. Attach Leg Rings to wheelchair (pp.11-12) 3. Put on Front Harness on dog (p.13) 4. Put dog in wheelchair: Now that your dog is wearing the front harness, he/she is ready to get started. -
Page 4: Parts Of The Walkin' Wheels Rear Medium Wheelchair
Parts of the Walkin’ Wheels ® Rear Medium Wheelchair 15" 6" 26" 9" Aluminum Width Connectors. The Length Extenders. wheelchair frame; Width 6" connector is already The 15" extenders are Connector installed installed in the frame. installed in the frame. Extra 9"... -
Page 5: Teach Your Dog How To Use Walkin' Wheels
Teach Your Dog How to Use Walkin’ Wheels ® We created the Walkin’ Wheels® with the intention that you will adjust the wheelchair, put your pet in it, and in a few moments watch him or her running and playing again. It can happen that way, but it doesn’t always. - Page 6 1. When starting this process we suggest that you use the dog’s favor- ite treats to reward your dog for walking forward. You won’t need to keep using these treats every day, just in the beginning of the train- ing process. A hungry dog is a motivated dog! Work with your dog before you have fed him a meal.
-
Page 7: Setting Up The Dog Wheelchair
Setting up the Dog Wheelchair Adjusting the Knuckle The frame is shipped flat. Take out of box with sticker saying "THIS SIDE UP" showing. Set the legs perpendicular to the frame by turning the dial caps counter-clockwise to loosen the knuckle assem- bly. -
Page 8: Use Snap Buttons To Adjust Length, Width, And Height
Angle the leg Normally, the wheels are set straight up and down as shown on the black dog. Setting the wheels back slightly, like the tan and white dog, will offer a bit more stability for stronger, more active dogs, or dogs who are shifting their weight back toward their hindquarters. -
Page 9: Adjusting The Length
Adjusting the Length Note: If you have the Front Wheel Attachment, remove the extenders and skip to p.18. 15" Extenders 26" Extenders The extenders are for length adjustments. The kit comes with one set. To adjust the extenders, depress the snap button and move to desired length. -
Page 10: Adjusting The Width
Adjusting the Width Use the snap buttons on the width connector to adjust the wheel- chair to the proper width. There should be at least ½" on each side of the hips. The width adjustment will be determined by the widest part of the dog which is usually the chest. -
Page 11: Clip The Leg Rings To The Wheelchair
Rear Support Leg Rings The Leg Rings support the dog’s hindquar- Legs go inside each ring ters. They will take the weight off the legs while still allowing the dog to use its legs to maintain muscle mass. The Leg Rings should hang no lower than 3"... -
Page 12: Stirrups
Clip the Leg Rings to the Wheelchair, Continued The excess Velcro strapping will cross over the dog's back, or ® Velcro together to form handles (see photos below). ® The Velcro center connector can be moved forward or backward to ®... -
Page 13: Front Harness Attachment
Front Harness Attachment Adjust the extenders so they reach the harness clips on the front har- ness. The extender ends will go through each D-Ring and then clip into the front harness. The D-Rings should be positioned just behind the shoulder blades. Note: If the D-ring prong breaks, you can call for replacement or order Medium D-Ring online: www.walkinpets.com/wheelchair-dring-clip/ Blue... - Page 14 Before starting, observe which direction the prongs are facing on the D-Ring. They should always face the rear end of dog. Parts: (B) Top of (C) D-Ring Slide Clip Step 1: Remove (2) screws Step 2: Push out (B) top piece from (B) top Slide Clip which holds (C) D-Ring screws...
-
Page 15: Is The Wheelchair Adjusted Properly
Is the Wheelchair Adjusted Properly? Check the items above to make sure the wheelchair is fitted properly. When the wheelchair is adjusted properly, the dog stands in a natural position. Here is what to check: Knuckle should be in line with hips and leg rings dropped down about 3"... -
Page 16: Optional Set Screws For Noise Reduction
Optional Set Screws for Noise Reduction Using the set screws will tighten up your wheelchair and reduce any rattling noises. The set screws also keep the wheelchair tight after it has been adjusted for your dog. When you tighten up the wheelchair, the side arms, called extenders, will be able to move up and down as your pet turns corners. -
Page 17: Wheel Options
Figure A Figure B Figure C A. Take the side with the tri-glide and put the extender through the end of the loop. B. Take the rope and put inside the harness clip on the extender (B). Then, attach the front harness to the harness clip in order to secure the rope. -
Page 18: Foam Wheels
Foam Wheels vs Air Tires Comparison Chart: Foam Wheels: 12" and 16" Air Tires: 12" and 16" • Lightweight, high density foam • For active dogs that do off-road hiking material that offers a smooth ride • Offer more shock absorbency •... -
Page 19: In The Package
In the Package The Front Wheel Attachment is easy to assemble and snap into the wheelchair. You will need a Phillips head screwdriver. The package contains: Left and right extenders (2) Struts and caster wheels (2) Legs (2) Chin bar & extension pieces (3) Optional Allen key for leg screws Chin bar screws... - Page 20 Step 2: Length Extenders Remove the existing Length Extenders from your rear Walkin’ Wheels ® and snap in the left and right Front Extenders (A). Step 3: Insert the Strut and Caster Assembly (B) into the Leg (C) These are marked with “L” and “R.” It is very important that they are installed on the correct sides.
- Page 21 The Chin Bar attachment only has threads on one side of the bar. You will notice that the bar with the large holes has no thread. That is the side the screw needs to feed through. Attach the extension piece to the outside of the Chin Bar using the included screws and washers.
-
Page 22: Putting Your Dog Into The Fully Supportive (Quad) Wheelchair
Step 5: Clip on the Front Leg Rings (H) the same ways you at- tached the rear leg rings, except make the front a little bit lower than the rear leg rings according to your dog's chest size. Putting Your Dog into the Fully Supportive (Quad) Wheelchair There are many ways to get your dog into the Fully Supportive wheelchair. -
Page 23: Wear, Maintenance, Liability & Guarantee
With proper use and maintenance, the wheelchair is designed to last a lifetime. When you need replacement parts for the wheels, harnesses, and other wear- and-tear items, they may be purchased at: WalkinPets.com/spare-parts. The wheelchair frame will not rust. If dirt or sand gets inside the wheelchair, you can hose it off. -
Page 24: Optional Items And Accessories
Optional Items and Accessories Walkin’ Lift Combo Harness ® www.WalkinPets.com/walkin-lift-combo-harness The Walkin’ Lift Combo Harness provides com- ® plete lifting assistance and mobility support for a dog’s front and rear legs. Fully compatible with the Walkin’ Wheels dog wheelchair. Front and ®... - Page 25 Walkin’ Belly Support ® www.WalkinPets.com/walkin-belly-support The Walkin’ Belly Support helps provide ad- ® ditional support for your pet’s back while in the Walkin’ Wheels wheelchair. Made of lightweight ® but strong neoprene fabric, the Belly Support helps raise the middle of the pet’s body to relieve undue stress on back.
- Page 26 Walkin’ Wheelchair Leash ® www.WalkinPets.com/walkin-wheelchair-leash The Walkin’ Wheelchair Leash attaches easily to Walkin’ Wheels wheelchairs to help control and guide your dog. It may also be used to walk two dogs at the same time (without wheelchairs). Walkin’ Scooter ® www.WalkinPets.com/walkin-scooter ®...
-
Page 27: Handicapped Pets Foundation, License Plate, & Miracle Dogs Book
Handicapped Pets Foundation www.hpets.org The Handicapped Pets Foundation is a 501(c)3 nonprofit corporation dedi- cated to the health and well-being of elderly, disabled, and injured pets. Its mission is to extend the life of pets by helping them move so that they can get the exercise they need to live long, happy, healthy lives;... - Page 28 Luna Buster BE MOVING BE HAPPY Joni Mitchell Panthana BE AMAZED BE TOGETHER MIRACLES IN MOTION 105 Rt 101A, Suite 18 • Amherst, NH 03031 • (888) 253-0777 www.WalkinPets.com Patents: US 7549398 • Japan 5385584 • Canada 2641092 • EPO 2 050 418 Trademarks: Walkin’...
Need help?
Do you have a question about the Wheels Medium and is the answer not in the manual?
Questions and answers