
Related Manuals for Anser U2 PRO


Summary of Contents for Anser U2 PRO
- Page 1 U2 PRO/DIESEL/SMART USER MANUAL ANSER CODING INC. www.anser-u2.com Initial version: 2014.10.01 Reversion: 2015.11.12 ANSER CODING INC.
-
Page 2: Table Of Contents
CONTENTS Specification ......................4 Description ...................... 4 INstallation ..................... 5 Operation......................5 Introduction ......................6 Device Overview ....................6 IR-remote keypad .................... 6 Home page ..................... 7 printing guide ....................7 Menu tree ....................... 8 System Settings ....................9 general ......................9 print head ...................... -
Page 4: Specification
SPECIFICATION DESCRIPTION Printer Display 3.5” LCD with LED backlight User Interface Simple and easy-to-use operating system Input Device Pocket-sized IR remote keypad Compact 7’ tablet PC with multi-touch (optional) Available Language Chinese (Traditional and Simplify), English, German, Spanish, Portuguese, Russian, Japanese and Korean LED Indicators Alarm, Ink low, print, run, remote on/off Electrical Requirements... -
Page 5: Installation
INSTALLATION 1. Make sure all screws are tightened and use anti-shock mechanism is necessary. Otherwise, any external damages such as box shocking isn’t covered by warranty. 2. Please load and unload cartridge in 15 degree angle. 3. The installation of an UPS is highly recommended because it helps to avoid the damage that may be caused by power loss. -
Page 6: Introduction
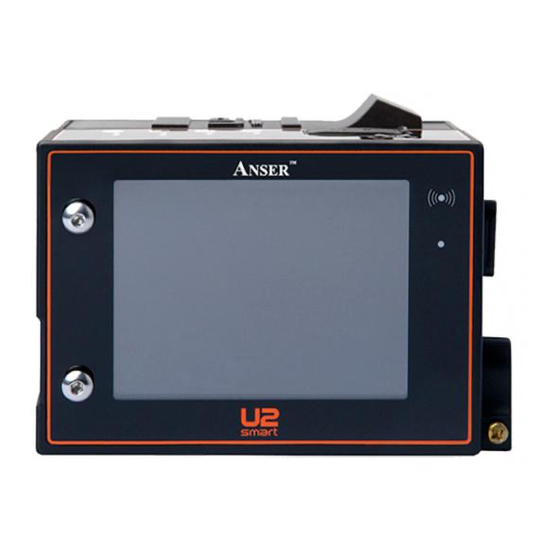
INTRODUCTION This section describes: printer device, remote keypad and menu tree. DEVICE OVERVIEW IR Switch (Long press to shutdown) IR Receiver IR Indicator Ink Cartridge LCD Panel USB Port Extension Port Power Connector IR-REMOTE KEYPAD Below is key function description. Printing key Print On: start to print... -
Page 7: Home Page
HOME PAGE In home page, select [Browser] by [◄][ ►] as below, then press [Enter]. USB slot indicator (Support: flash/keyboard) Indicates external encoder: not enable. Red roulette rotates Indicates external photocell: not enable. while printing. Ink cartridge: not exist Message Preview Browse message Shortcut function Configuration settings... -
Page 8: Menu Tree
MENU TREE Below is the printer’s menu tree. Home System Settings Dash Editor Editor Settings Print General Devices Display Sounds Printer List Head Cartridge Language Counter Print Edit Delay Copy Delete Source Alarm Trigger Keypad Tone Unit Printing Encoder Password Move Delete Edit... -
Page 9: System Settings
SYSTEM SETTINGS GENERAL LANGUAGE: Supported 12 languages which include: Chinese, simplified Chinese, Japanese, Korean, English, German, Portuguese, Spanish, Russian, French, Italian and Turkish. UNIT OF MEASUREMENT: Switch unit of measurement to metric (mm) or imperial (inch). PASSWORD: Once this function enabled, every time will ask for password to get into system. System could setup 5 groups of user password at most. - Page 10 TIME SET TIME Set the system clock. (YYYY/MM/DD hh:mm:ss) DAYLIGHT SAVING Set up daylight saving mode. SPEC\Time Start European The last Sunday in March, time The last Sunday in October, time shift at 01:59:59→03:00:00. shift at 01:59:59→01:00:00. American The 2 Sunday in March, time The 1...
- Page 11 RESET TO DEFAULT Following is the factory default value. Language English Photocell Source Internal Measurement Metric Global Delay 0 mm Password Encoder and Encoder: Off Conveyor Print Mode Arial Conveyor speed: 76m/min Dots/inch Resolution 50*300 Daylight Saving Screen Brightness Maximum Channel Single channel Screen Saver...
-
Page 12: Print Head
PRINT HEAD NOZZLE SWITCH U2 Diesel/Smart supports dual channel printing. Channel mode: single nozzle switch: left/right NOZZLE/NOZZLE SWITCH In single channel mode, you can select left or right channel manually. PRINT DIRECTION ABC→: Print from left to right, ←ABC: Print from right to left. RESOLUTION (DPI) Encoder range is between 50~600 DPI. -
Page 13: Photocell Devices
PRE-PURGE Once you enable this function, you can set up the Pre-purge humidity (1~5), higher the environment temperature, higher the humidity value. REPEAT PRINT Following table describes how to setup initial delay and gap value for repeat print. Setting\Condition Repeat several Repeat print continuously Repeat print times after triggered... -
Page 14: Display
DISPLAY BRIGHTNESS Set screen brightness, rang is 10%~100%. SCREEN SAVING Screen saving time, range is 1~60min. DIAGNOSTIC After start testing, LCD will display red, green, blue and white for 1 sec sequentially. SOUNDS Turn on/off the alarm for counter, remote keypad and printing beep. -
Page 15: Editor Settings
EDITOR SETTINGS SHIFT Shift table divides a day into 5 periods, each represent a working shift. Shift object will use current time to match proper shift name and then print it out. Ex: Now is 09:14, so the shift name is ‘AAA’. STRING Setup the string number (1~5) of string object. -
Page 16: Editor
EDITOR This page includes 2 functions: [Create new message] and [Message list]. CREATE NEW MESSAGE (ADD OBJECT) Message Print Select [Edit] Message Delay Copy Delete Press [New Message], you will get into [Add Object] page as below. Type of objects could be text, time, expire, counter, shift, logo and string. - Page 17 TIME/EXPIRE [Time/Expire]→[Format]: It allows user to edit 20 types of custom time format. Remote keypad: Press [0~9] to input the number (T9 keyboard for input letter), ‘└┘’ key could input space. Please input alphanumeric and symbols here [Day7]: What day of week [JJJ365]: What day of year [#+/]: Symbol window [Week52]: What week of year...
- Page 18 COUNTER There are 3 types of counter, general counter, box counter and lot counter. Each type has 4 parameters, which are max, min, start (current) step value. Each counter will reset to its minimum value when current value exceeds its maximum value.
- Page 19 BARCODE This function only supports barcode with static content. For example, a CODE128 barcode with content ‘text’ is below. For the dynamic barcode, you can use the PC software (Message Pro). All types of barcode: Name1 Name2 Description EAN8 EAN13 EAN14 EAN128 UPCA...
- Page 20 MOVE OBJECT Final stage of add new message is [Move Object] page. After add the object, you can get into the move object page, initial position of the new object will be the end (most right edge) of message. Direction key [▲][▼][◄][►] could move object. Notes: [◄◄][►►] could fast move left/right of object.
-
Page 21: Preview List (Select Message)
PREVIEW LIST (SELECT MESSAGE) In this page, there are 5 function buttons for message, which are print, edit, delay, copy and delete. PRINT Start printing process, the printer will print once gets the trigger signal. EDIT MESSAGE OBJECT (Next section for more detail) DELAY There are 3 types delay in the system, which includes repeat print delay, global delay and message delay. -
Page 22: Modify Message Object
COPY Copy a message from one to another. Default message# is 1 empty message#. Assume current message directory have message 2, 3 and 4. If you want to copy [MSG 2], default target is [MSG 5]. (1 empty number) Press [YES], [MSG 2] will be copied to [MSG 5]. Delete User could change target Press [Delete] could delete message selected now. - Page 23 MODIFY OBJECT Please reference [New Message (Add Object)] function above. MOVE OBJECT After add new object, get into move object preview page, you could adjust object position by direction keys [▲][▼][◄][►]. DELETE OBJECT Select the object and press [Enter], it will be deleted. MODIFY SHIFT/STRING TABLE Select [Home]→[Shortcut]→[Setting]→[Modify Shift/String] to edit.
-
Page 24: Dashboard
DASHBOARD Press keypad [Tools] under home page. SYSTEM Display printer’s serial number, version of software and hardware etc. Display ink cartridge capacity. CARTRIDGE Show the ink’s type and printing information. ALARM Show system error. -
Page 25: Usb Sync
USB SYNC Printer must display on first Page. Please insert USB flash drive (or USB disk) to printer in advance if it is never used. System will query [Do you want to format* USB?], Press [Yes] to format USB. Note: * this format operation is to save the machine specific information on the USB disk, it doesn’t mean REALLY format (empty) USB disk. -
Page 26: About Ink Saving Pro
ABOUT INK SAVING PRO Ink Saving PRO is a software platform, where customer can customize font, it will make the printer quality and ink consumption at the best balance. Customize font brings you: More appropriate font style More effective print performance The custom font is optional, please contact with your dealer if necessary.
Need help?
Do you have a question about the U2 PRO and is the answer not in the manual?
Questions and answers