Table of Contents
Advertisement
Quick Links
About SunFounder
SunFounder is a technology company focused on Raspberry Pi and Arduino open source
community development. Committed to the promotion of open source culture, we strive to
bring the fun of electronics making to people all around the world and enable everyone to be a
maker. Our products include learning kits, development boards, robots, sensor modules and
development tools. In addition to high quality products, SunFounder also offers video tutorials to
help your own project. If you have interest in open source or making something cool, welcome
to join us! Visit
www.sunfounder.com
About the Kit
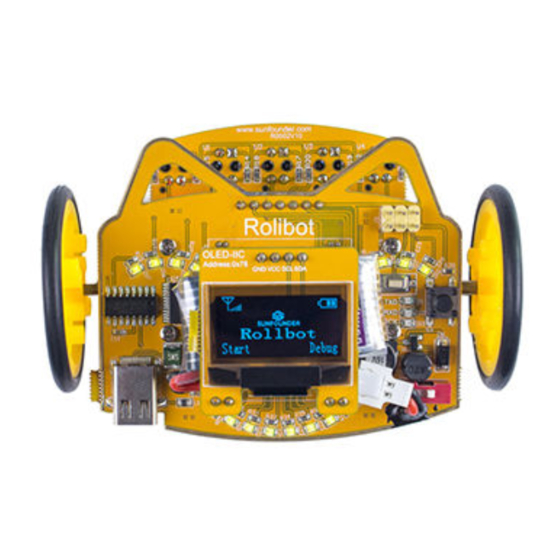
The RollbotMicro kit is a very interesting and suitable learning tool for Arduino and robot
hobbyists. It has a simple structure and adopts PCB as the main structure. Based on the Arduino
platform, we can learn programming from easy to difficult so as to control the robot. With the
help of the mobile APP, we can play different games! It can follow lines on a maze map by
programming and you can also control it through an Android APP
play games similar to the Chinese aeroplane chess and Ludo with your friends!
You will enjoy learning how all this work. You may visit our website
download the related code and view the user manual on
related videos under
https://github.com/sunfounder/SunFounder_Rollbot
You are welcome to pull requests and issue posts on our page on Github.
Free Support
If you have any TECHNICAL questions, add a topic under FORUM section on our website
and we'll reply as soon as possible.
For NON-TECH questions like order and shipment issues, please
service@sunfounder.com. You're also welcomed to share your projects on FORUM.
for more!
VIDEO,
or clone the code on our page of github.com at
Preface
Rollman.
In addition, you can
www.sunfounder.com
LEARN -> Get Tutorials
send an email to
to
and watch
Advertisement
Table of Contents

Related Manuals for SunFounder RollbotMicro


Summary of Contents for SunFounder RollbotMicro
- Page 1 About the Kit The RollbotMicro kit is a very interesting and suitable learning tool for Arduino and robot hobbyists. It has a simple structure and adopts PCB as the main structure. Based on the Arduino platform, we can learn programming from easy to difficult so as to control the robot. With the...
-
Page 2: Table Of Contents
2.3 Tools ............................... 5 Software Operation ............................ 6 3.1 Get the Code ..........................6 3.1.1 Install Arduino IDE ......................6 3.1.2 Connecting RollbotMicro to Your Computer .............. 6 3.2 Add libraries ..........................7 Assembling ..............................9 4.1 Main Board+ N20 Gear Motors ....................10 4.2 N20 Gear Motor + Wheels ......................11... - Page 3 Kind Reminder Kids can seek help from their parents or teacher if there're difficulties.
-
Page 4: Introduction
Introduction 1.1Overview RollbotMicro kit is a very interesting and suitable learning tool for Arduino and robot hobbyist. It has simple structure and runs PCB as the main structure of the robot. As it is based on the Arduino platform, we can learn programming from easy to difficult so as to achieve the control of the robot. -
Page 5: Components List
ROLLBOTMICRO Components list 2.1 Mechanical Fasteners Component Name Quantity M2*10 Screw M2 Nut M2.5*12 Screw M2.5 Nut 3*4-6 Spacer... -
Page 6: Electronic Components
ROLLBOTMICRO 2.2 Electronic Components Component Name Quantity N20 Gear Motor N20 Motor Mount Main Board OLED Screen Infrared Sensor Universal Wheel... - Page 7 ROLLBOTMICRO Wheel Battery 3.7V USB Charger for Li-Po Battery USB Type-C Cable Double-sided Tape OLED Cover...
-
Page 8: Tools
ROLLBOTMICRO Test card Black Tape Marker Pen Guide Card 2.3 Tools Accessory Name Quantity Screw driver... -
Page 9: Software Operation
After installing, you will see Arduino icon on your desk and double click to open it. 3.1.2 Connecting RollbotMicro to Your Computer Use a USB Type-C cable (equipped in the kit) to connect the RollbotMicro to the computer. Once you’ve plugged in, the LEDs on the board will light, the computer will install the necessary driver automatically. -
Page 10: Add Libraries
1) Libraries are a collection of code that makes it easy for you to connect to a sensor, display, module, etc. In this kit ,you will need to add two libraries to the Arduino libraries folder: FlexiTimer2 and RollbotMicro 2) Select Sketch -> Import Library -> Add Library. Find the MsTimer2 library under the Library... - Page 11 ROLLBOTMICRO 3) Here you should see the Library has been added to your libraries. Check it by Sketch -> Include Library 4) Import the Rollbot library from the libraries folder in the same way. 5) Here you should see Library added to your libraries.
-
Page 12: Assembling
ROLLBOTMICRO Assembling You can see the general assembling procedures through the exploded view. On a whole, the assembling is easy. -
Page 13: Main Board+ N20 Gear Motors
ROLLBOTMICRO 4.1 Main Board+ N20 Gear Motors 1. Align the N20 gear motor with the areas 2. Put the gear motor to the corresponding in the lines of the mainboard (the car area of the main board and align the body). -
Page 14: N20 Gear Motor + Wheels
ROLLBOTMICRO 7. Similarly, plug another screw into the nut 8. Now back to the first screw and tighten on the mount and fasten it. 9. Fasten the other motor in the same way. 10. Connect the anti-reverse cable of the... -
Page 15: Main Board + Universal Wheel
ROLLBOTMICRO 3. Insert the other wheel in the same way. 4. The completed assembly should be as shown below. 4.3 Main Board + Universal Wheel 1. Align two M2.5*12 screws with the holes 2. Insert the screw across the board and of the board. -
Page 16: Main Board + Battery
ROLLBOTMICRO 5. Align the fixed holes of the universal 6. Put the universal wheel onto the spacers. wheel with the screws. So the screws go through the holes of the board, gaskets, and holes of the universal wheel. 7. Put two M2.5 nuts into the screws. Screw 8. -
Page 17: Main Board +Screen
ROLLBOTMICRO 4.5 Main Board +Screen 1. Align the pins of the screen with the 2. Insert the pins and press them tightly. headers of the main board. 4.6 Main Board+ Infrared Sensor 1. Align the pins on the infrared sensor with 2. -
Page 18: Rollbot + Covers
You can use the double-sided tape to stick the fruit and flower covers on the OLED screen of the RollbotMicro. It'll just feel like the cute bot is carrying an apple, a watermelon (hmm, seems too heavy, LOL…), or a blossoming flower. The robot wearing the covers would seem most fit when... - Page 19 ROLLBOTMICRO Pretty cute, right? What makes it more interesting is the DIY part - You can design different "clothes" for the Rollbotmicro and welcome to share by post forums on our website www.sunfounder.com/.
-
Page 20: Gameplay
To start the program, especially in the line following function. Reset button: To reset the master board. Open the RollbotMicro folder downloaded and unzipped previously in Chapter 3 Software Operation. You can see the following folders inside: 5.1 Display the Sensor Signal Intensity on OLED This experiment is to display the collected sensor data on the OLED screen. - Page 21 ROLLBOTMICRO And then, click Tools -> Port, select COM7(depending on your actual situation). 3) Click Compile button to compile the code, click upload to upload the code to the board. (or directly, skip Compile). Compile Upload...
- Page 22 ROLLBOTMICRO 4) Wait for a moment until the following information appears at the bottom of the window, which indicates it is uploaded successfully. 5) Remove the USB cable, switch on the power. Put the test card under the sensor module of the robot.
-
Page 23: Motor Testing
We will introduce how to distinguish the cases then. Left Motor Right Motor First, find MotorTest.ino under RollbotMicro\Arduino Code\MotorTest and upload to the RollbotMicro and observe the robot. NOTE: Please remember... -
Page 24: Magic Forest
5.2. It’s 0 by default. Speed_Dir Then upload the RollbotMicroFollower1.ino to the RollbotMicro. 2) Take out the map and put it on a smooth surface like a table. Turn on the robot and place it with the middle detector over the black line on the map. -
Page 25: Diy Map
Marker pen. 1) Open RollbotMicroFollower2.ino under Rollbot\Arduino Code\Rollbot\Red Rollbot\ RollbotMicroFollower2. Note: You need to modify the value according to the test in 5.2. It’s 0 by default. Then Speed_Dir upload the RollbotFollower2.ino to the RollbotMicro. - Page 26 You can try more possibilities such as using a white chalk to draw maps on a dark smooth surface like the floor, set a gift at the end, and then wait for the RollbotMicro to discover the mysteries. The program for using chalk to draw the map is not provided in our data package.
-
Page 27: Hardware Introduction
ROLLBOTMICRO Hardware Introduction 6.1 Overview The schematic diagram is mainly shown for several modules: main control, boost/step-up convertor, power selector, USB interface, motor driver, LED indicator, signal collection and OLED display. 6.2 Main Control Pin A0, A1, A2, A3, &A7: Connect the infrared sensor module. Apply PID algorithm to achieve the line following function of the robot by distinguishing the black and white surfaces. - Page 28 ROLLBOTMICRO Other Controls These are the major control sections of the RollbotMicro. You may check the circuit diagrams below by module names in different colors.
-
Page 29: Usb Interface Module
ROLLBOTMICRO 6.3 USB Interface Module 6.4 LED Display Module... - Page 30 ROLLBOTMICRO 6.5 OLED Display Module For more information about the circuit diagram of the rest modules, please refer to the WIKI page on our official website www.sunfounder.com...
-
Page 31: Program Explanation
ROLLBOTMICRO Program Explanation Through the explanation previously, you should already have a general understanding of the robot. Next we will come to the most important part - theory and program. Most of the programs provided are compiled as libraries and you just need to call them in the Arduino IDE. So in the following let's focus on how to compile them. -
Page 32: Line Following
ROLLBOTMICRO /*********OLED data writing***********/ void RollbotOLED::WriteData(unsigned int dat) Wire.beginTransmission(0x78 >> 1);//0x78 >> 1 Wire.write(0x40);//0x40 Wire.write(dat); Wire.endTransmission(); Next, the function for positions on the OLED screen: SetPos(). With this function, you can locate the specific point of the OLED display. void RollbotOLED::IIC_SetPos(unsigned int... - Page 33 ROLLBOTMICRO /*********Read data of the sensors***********/ void RollbotReadSensor::Read_Data() data[0] = analogRead(A0); data[1] = analogRead(A1); data[2] = analogRead(A2); data[3] = analogRead(A3); data[4] = analogRead(A7); OLED_Flag[0] = map(data[0], 50, 500, 3, 6); OLED_Flag[1] = map(data[1], 50, 500, 3, 6); OLED_Flag[2] = map(data[2], 50, 500, 3, 6);...
- Page 34 MotorSpeed = P * SignalValue + D * (SignalValue - LastError) SignalValue is the gap between the position of RollbotMicro detected and that of the black line. LastError is the error value accumulated till the last time. SignalValue – LastError means the rate of change of the relative position.
- Page 35 2) If the robot keeps spinning itself, check whether the wire of one motor is loose. Q3. I drew a map myself but the RollbotMicro just cannot follow the line on it. 1) Check whether the line is wide enough. Please follow the instructions on the guide card.
-
Page 36: Afterword
ROLLBOTMICRO Afterword Congrats! You've completed all the assembly and debugging of the RollbotMicro and should be playing with it happily now. The code part may be a little bit difficult to understand and welcome to ask technical questions under FORUM on our website www.sunfounder.com.
Need help?
Do you have a question about the RollbotMicro and is the answer not in the manual?
Questions and answers