Table of Contents
Advertisement
Quick Links
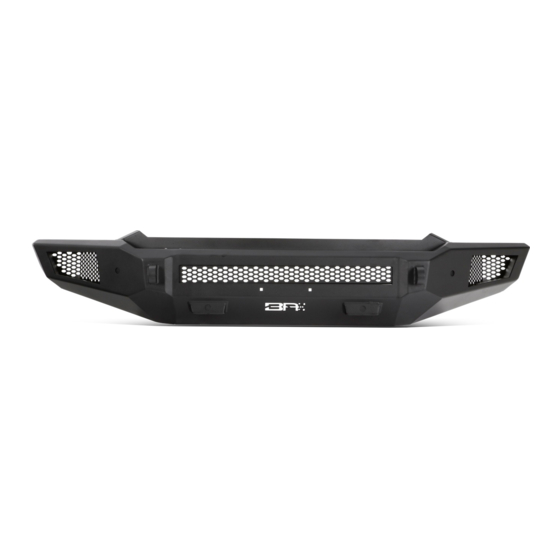
2019-2020 DODGE RAM 1500 AMBUSH SERIES FRONT BUMPER (NON-WINCH)
PARTS LIST:
1
Front Bumper
1
Mesh Fill Panel
1
Driver/left Frame Bracket
1
Passenger/right Frame Bracket
1
Driver/left Frame Support Bracket
1
Passenger/right Frame Support Bracket
2
LED "L" Brackets
2
License Plastic Plugs
2
Ram Sensor Wire Harness Extensions
6
Sensor Hole Plugs
6
Sensor Retaining Clips
6
Sensor Foam Spacer Washers
6
Sensor Foam Front Seals
1
Sensor Cover Kit
2
14-1.50mm "Fine Thread" x 50mm Hex Bolts
2
14mm x 44mm x 3mm Flat Washer
2
14mm Lock Washer
Passenger/right
Frame Bracket
Passenger/right
Support Bracket
(2) Wire Harness Extensions
PROCEDURE:
REMOVE CONTENTS FROM BOX. VERIFY ALL PARTS ARE PRESENT. READ INSTRUCTIONS
CAREFULLY BEFORE STARTING INSTALLATION. BUMPER IS HEAVY, ASSISTANCE IS HIGHLY
RECOMMENDED TO AVOID POSSIBLE INJURY OR DAMAGE TO THE VEHICLE.
INSTALLATION INSTRUCTIONS
PART #DG-19343
Mesh Fill Panel
(2) Plastic Plugs
2
12mm Triple Bolt Plates
6
12-1.75mm x 45mm Hex Bolts
18
12mm x 32mm x 3mm Flat Washers
12
12mm Nylon Lock Nuts
4
10-1.5mm x 30mm Hex Bolts
4
10mm x 30mm x 2.5mm Flat Washers
4
10mm Lock Washers
4
8-1.25mm x 25mm Hex Bolts
2
8-1.25mm x 16mm Hex Bolts
8
8mm x 24mm x 2mm Flat Washers
4
8mm Lock Washers
4
8mm Hex Nuts
12
4-0.75mm x 10mm Button Head Allen Bolts
1
4mm Wrench
1
2.5mm Wrench
10
Nylon Wire Ties
(2) 10mm Triple
Bolt Plates
(6) Sensor Retaining Clips
(6) Sensor Foam Spacers
(6) Sensor Front Foam Seals
Page 1 of 8
(2) L/R Light
"L" Brackets
(6) Sensor Plugs
Driver/left
Frame Bracket
Driver/left
Support Bracket
Advertisement
Table of Contents

Related Manuals for Body Armor 4x4 AMBUSH Series


Summary of Contents for Body Armor 4x4 AMBUSH Series
- Page 1 INSTALLATION INSTRUCTIONS 2019-2020 DODGE RAM 1500 AMBUSH SERIES FRONT BUMPER (NON-WINCH) PART #DG-19343 PARTS LIST: Front Bumper 12mm Triple Bolt Plates Mesh Fill Panel 12-1.75mm x 45mm Hex Bolts Driver/left Frame Bracket 12mm x 32mm x 3mm Flat Washers Passenger/right Frame Bracket...
- Page 2 INSTALLATION INSTRUCTIONS 1. Remove the license plate and bracket. Models with active automatic air dam, unplug and remove air dam from bottom of frame. 2. On the driver/left side of the bumper, remove the (2) factory bolts attaching the inner plastic cover to the side of the frame, (Figure 1).
- Page 3 INSTALLATION INSTRUCTIONS c. Follow light manufacturer’s instructions to properly wire light once bumper has been installed. 8. Center Fill Panel installation (no center light installed). d. Select the “L” Brackets, (Figure 11). Attach the Brackets to the top of the (2) mounting tabs welded onto the back of the bumper with the included (2) 8mm x 25mm Hex Bolts, (4) 8mm Flat Washers, (2) 8mm Lock Washers and (2) 8mm Hex Nuts.
- Page 4 INSTALLATION INSTRUCTIONS Driver/left Side Installation Pictured Unplug wire harness Front Front (Fig 1) Remove the inner plastic cover attached to the outer end of the bumper and outside of the frame (Driver/left side pictured) (Fig 2) Remove flange nuts attaching the bumper assembly to the end of the frame (driver/left side pictured from behind bumper) Front...
- Page 5 INSTALLATION INSTRUCTIONS Driver/left Side Installation Pictured Front L-shaped Z-shaped sensors sensor (Fig 5) Insert Plug into mount on back of bumper Front (Fig 6) Models equipped with parking sensors, note the type and location of all sensors before removing from bumper. Driver/left side sensor location pictured with factory bumper Black #2 “L”...
- Page 6 INSTALLATION INSTRUCTIONS Driver/left Side Installation Pictured Retaining Clip Front Foam Spacer (Fig 9) Remove factory sealing washer from sensor and place (1) Foam Washer over the sensor (Inner Z-shaped sensor pictured) Front Seal 8mm x 25mm Hex Bolt (2) 8mm Flat Washers 8mm Lock Washer 8mm Hex Nut (Fig 10) Insert sensors into the corresponding...
- Page 7 INSTALLATION INSTRUCTIONS Driver/left Side Installation Pictured (3) 12mm x 45mm Hex Bolts (6) 12mm Flat Washers (3) 12mm Nylon Lock Nuts Front (Fig 13) Remove outer light screens, if necessary Front (Fig 14) Attach passenger/right Frame Bracket to end of frame Front (Fig 15) Passenger/right Frame Bracket installed Factory body bolt...
- Page 8 INSTALLATION INSTRUCTIONS Driver/left Side Installation Pictured Front Factory body bolt 14mm Hex Bolt 14mm Lock Washer 14mm Flat Washer Front (Fig 18) Passenger/right Brackets installed Factory body bolt (Fig 19) Passenger/right Brackets installed 10mm Triple Bolt Plate (3) 10mm Flat Washers (3) 10mm Nylon Lock Nuts Front (Fig 20) Insert 10mm Bolt Plate into back of...
Need help?
Do you have a question about the AMBUSH Series and is the answer not in the manual?
Questions and answers