Table of Contents
Advertisement
Advertisement
Table of Contents

Related Manuals for Ubiquiti airFiber 60


Summary of Contents for Ubiquiti airFiber 60
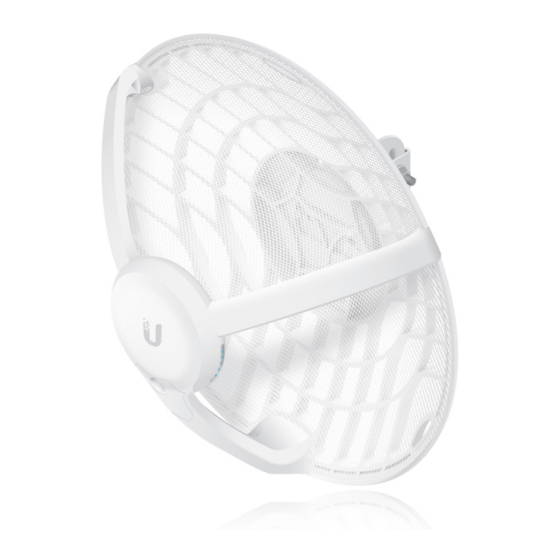
- Page 1 airFiber 60 GHz Radio ® with 5 GHz Backup Model: AF60...
- Page 2 • Package Contents • Installation Requirements • Hardware Overview • Installation Overview • airFiber 60 Configuration • UNMS Management • Alignment • Installer Compliance Responsibility • Specifications • Safety Notices • Electrical Safety Information • Limited Warranty • Compliance • Online Resources...
-
Page 3: Package Contents
Package Contents Dish Main Arm Support Arms (Qty. 2) Mounting Screw U-Clamp Bracket Flange Nuts Gigabit PoE (24V, 0.5A) Power Cord (Qty. 2) with Mounting Bracket... -
Page 4: Installation Requirements
Installation Requirements • Clear line of sight between airFiber AP and station • Clear view of the sky for proper GPS operation • Vertical mounting orientation • Mounting point: • At least 1 m below the highest point on the structure •... -
Page 5: Hardware Overview
Hardware Overview LEDs State Status The LED will light blue when the GPS signal strength is sufficient. This Blue requires a minimum of four GPS satellite connections. The LED will light blue when the Blue 60 GHz link is active. The LED will light blue when the Blue 5 GHz link is active. - Page 6 State Status Flashing Bootup in progress. White Ready for use, not connected to Ubiquiti® Network Management White System (UNMS ). See “UNMS ™ Management”. Blue Ready for use, connected to UNMS. Steady Ready for use, unable to connect Blue with...
-
Page 7: Installation Overview
Ports PoE IN Gigabit PoE port for handling all user traffic and powering the device. Default IP address: 192.168.1.20. Reset Button To reset to factory defaults, press and hold the Reset button for more than 10 seconds while the device is powered on. - Page 8 60 Configuration Connecting Power over Ethernet...
-
Page 9: Configuring The Settings
Configuring the Settings 2. Configure the Ethernet adapter on your computer with a static IP address on the 192.168.2.x subnet. 3. Launch your web browser. In the address field, type: http://192.168.1.20 Then press enter (PC) or return (Mac). http://192.168.1.20 4. Enter ubnt in the Username and Password fields. Select your Country and Language. - Page 10 IP Address setting on the other radio. The fallback IP address is: 192.168.1.20 c. Click Save Changes. Repeat the instructions in the “airFiber 60 Configuration” section on the other airFiber radio. UNMS Management You can manage your device using UNMS, which lets you configure, monitor, upgrade, and back up your devices using a single application.
-
Page 11: Installation
Installation... - Page 14 Note: The AF60 can mount on either side of the pole. This section shows the AF60 mounted on the left; the procedure for mounting on the right is similar. Left Right...
- Page 15 Note: Rotate the Mounting Bracket clockwise until it locks into position.
- Page 17 (Pole not shown)
-
Page 20: Connecting Power
Connecting Power WARNING: The switch port must comply with the power specifications listed in “Specifications”. (Optional) - Page 21 Alignment Tips • To accurately align the airFiber radios for best performance, you MUST align only one end of the link at a time. • You may need to use additional hardware to compensate for issues such as the improper orientation of a mounting pole or significant elevation differences between airFiber radios.
- Page 22 Adjust the elevation: Note: Do NOT make simultaneous adjustments on the AP and Station. Station Visually aim the Station at the AP. To adjust the Station’s position, adjust the azimuth and elevation as described in step 1. 3. Open the Configuration Interface. Select Tools and then select Align Antenna.
- Page 23 Aim the AP at the Station to achieve the strongest signal level on the Station. 7. Repeat steps 4 and 5 until you achieve an optimal link. This ensures the best possible data rate between the airFiber radios. 8. Lock the alignment on both airFiber radios by tightening all the nuts and bolts.
-
Page 24: Installer Compliance Responsibility
Installer Compliance Responsibility Devices must be professionally installed and it is the professional installer’s responsibility to make sure the device is operated within local country regulatory requirements. Antenna The 5GHz Output Power field is provided to the professional installer to assist in meeting regulatory requirements. -
Page 25: Specifications
Specifications AF60 Dimensions 413 x 413 x 320 mm (16.26 x 16.26 x 12.60") Weight 1.3 kg (2.87 lb) Enclosure Aluminum, UV-stabilized Polycarbonate Antenna Gain 5 GHz 11 dBi 60 GHz 38 dBi Networking Interface (1) 10/100/1000 Mbps Ethernet Port Max. - Page 26 Radio Max. Conducted TX Power 5/60 GHz Combined 25 dBm Channel Bandwidth 60 GHz 2160 MHz 5 GHz 20/40/80 MHz Management Radio (MHz) US/CA 2412 - 2462 Worldwide 2412 - 2472 Operating Frequency (GHz) U-NII-1 U-NII-3 5.150 - 5.250 5.725 - 5.850 US/CA 57 - 66 5.180 - 5.875...
-
Page 27: Safety Notices
Safety Notices Read, follow, and keep these instructions. Heed all warnings. Only use attachments/accessories specified by the manufacturer. WARNING: Do not use this product in a location that can be submerged by water. WARNING: Avoid using this product during an electrical storm. -
Page 28: Radiation Exposure Statement
Compliance FCC / CAN ICES-3(A)/NMB-3(A) Changes or modifications not expressly approved by the party responsible for compliance could void the user’s authority to operate the equipment. This device complies with Part 15 of the FCC Rules and ISED Canada licence-exempt RSS standard(s). Operation is subject to the following two conditions. -
Page 29: Australia And New Zealand
• Lors de l’installation et de la mise en fonctionnement de l’équipement, assurez-vous qu’il y ait une distance minimale de 40 cm entre l’élément rayonnant et vous. • Cet émetteur ne doit être installé à proximité d’aucune autre antenne ni d’aucun autre émetteur, et ne doit être utilisé conjointement à aucun autre de ces appareils. - Page 30 RoHS/WEEE Compliance Statement English European Directive 2012/19/EU requires that the equipment bearing this symbol on the product and/or its packaging must not be disposed of with unsorted municipal waste. The symbol indicates that this product should be disposed of separately from regular household waste streams.
-
Page 31: Declaration Of Conformity
EU izjave o sukladnosti dostupan je na sljedećoj internetskoj adresi: ui.com/compliance Čeština [Czech] UBIQUITI tímto prohlašuje, že toto AF60 zařízení, je ve shodě se základními požadavky a dalšími příslušnými ustanoveními směrnic 2014/53/EU, 2014/30/EU, 2014/35/EU. Úplné znění EU prohlášení o shodě je k dispozici na této internetové adrese: ui.com/compliance... - Page 32 Az EU‑megfelelőségi nyilatkozat teljes szövege elérhető a következő internetes címen: ui.com/compliance Íslenska [Icelandic] Hér, UBIQUITI, því yfir að þetta AF60 tæki er í samræmi við grunnkröfur og önnur viðeigandi ákvæði tilskipana 2014/53/ESB, 2014/30/ESB, 2014/35/ESB. Fullur texti ESB samræmisyfirlýsing er að finna á eftirfarandi netfangi: ui.com/compliance Italiano [Italian] Con la presente, UBIQUITI, dichiara che questo dispositivo AF60, è...
-
Page 33: Online Resources
685 Third Avenue, 27th Floor New York, NY 10017 ©2019 Ubiquiti Networks, Inc. All rights reserved. Ubiquiti, the Ubiquiti U logo, the Ubiquiti beam logo, airFiber, and airOS, are trademarks or registered trademarks of Ubiquiti Inc. in the United States and in other countries. All other trademarks are the property of their respective owners.
Need help?
Do you have a question about the airFiber 60 and is the answer not in the manual?
Questions and answers