Table of Contents
Advertisement
Advertisement
Table of Contents

Related Manuals for Venue Tetra 6


Summary of Contents for Venue Tetra 6
- Page 1 6 RGBA LED Compact Wash Light www.venuelightingeffects.com...
-
Page 2: Table Of Contents
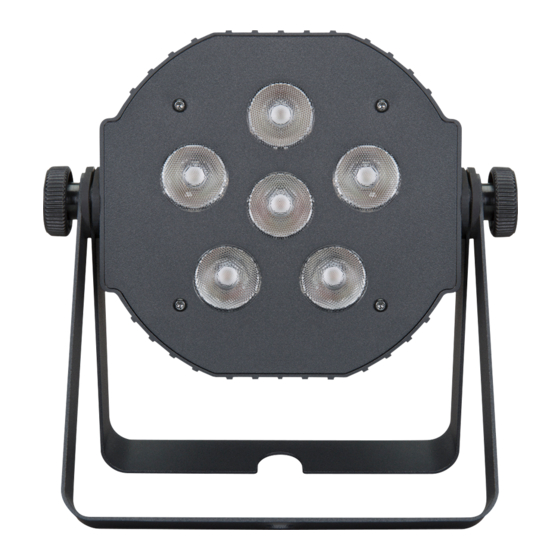
INTRODUCTION The Venue Tetra 6 is a compact, yet rugged wash lighting fixture designed for mobile DJs, active bands, and venue installations. This lightweight and durable fixture is built with extra-bright 4-watt RGBA LEDs, for detailed and vibrant color mixing. This unit can be used as a standalone fixture in sound-activated mode, or controlled via DMX controller. -
Page 3: Before You Begin
BEFORE YOU BEGIN What Is Included • Power Cord • Tetra 6 • User Manual • Mounting Yokes Unpacking Instructions Carefully unpack the carton, then check the contents to ensure that all parts are present and have been received in good condition. Notify the shipper immediately and retain packing material for inspection if any parts appear damaged from shipping, or the carton itself shows signs of mishandling. -
Page 4: Safety Instructions
• Never disconnect the power cord by pulling or tugging on the cord. • Never carry the fixture directly from the cord. Always use the hanging/mounting bracket. • Avoid direct eye exposure to the light source while it is on. Venue Tetra 6 Manual... -
Page 5: Introductions
• Built-in automated programs via master/slave or DMX with variable speed • Built-in sound activated programs via master/slave or DMX • 3, 4, 5, and 6 channel DMX-512 operation • Seamless integration with the Venue Tetra Control Additional Features • Power linking: 62 units @ 120V, 10A circuit max •... -
Page 6: Setup
The maximum quantity of fixtures that may be linked is 62 units @ 120V, 10A circuit max. An IEC connection cable or male IEC adapter is required for power-linking features Product Product Product Venue Tetra 6 Manual... -
Page 7: Mounting
Mounting The Tetra 6 includes a dual-yoke mounting system and safety loop for stable aiming from lighting stands, trusses and floors. Before mounting the product, read and follow the safety recommendations indicated in the Safety Notes Orientation The Tetra 6 may be mounted in any position; however, make sure adequate ventilation is provided around the product. -
Page 8: Signal Linking
Scrolls through the current operating mode, as well as back out <Menu> of the current menu option <UP> Selects increasing advancement in the value <DOWN> Selects decreasing advancement in the value Selects a value and stores it to memory <ENTER> Venue Tetra 6 Manual... -
Page 9: Control Panel Menu Selections
The Control Display shows the current state of the unit. It is used to select the operating mode, as well as the sub-features. For detailed functions, please see the section below. Control Panel Menu Selections MAIN FUNCTION SUB-FUNCTION INSTRUCTION Select between 3-channel, 4-channel, 5-channel, Identity and 6-channel DMX modes. - Page 10 Control Panel Menu Selections (Continued) MAIN FUNCTION SUB-FUNCTION INSTRUCTION Select pre-programmed switching chases 0-9 Patterns/Chases Select pre-programmed fading chases 0-9. Select sound-active switching chases 0-9. Audio/Sound-Active Programs Select sound-active fading chases 0-9. Venue Tetra 6 Manual...
-
Page 11: Standalone Operation
Control Panel Menu Selections (Continued) MAIN FUNCTION SUB-FUNCTION INSTRUCTION Audio/Sound-Active Select sound-active fading chases 0-9. Programs Enable strobe, and select strobe color. Reference static colors above for corresponding Flash/Strobe 1-14 numbers. Strobe speed can be adjusted using the speed (“S”) parameter. DMX Address 1-512 Select starting DMX address. -
Page 12: Sound-Active (Audio)
3. Using <UP> and <DOWN>, select the desired level for the red LEDs (r0-255) 4. Repeat steps 2-3 for green, blue, and amber (G0-255, b0-255, o0-255) until the desired color is obtained. 5. Press <ENTER> after all color selections to exit back to the main menu. Venue Tetra 6 Manual... -
Page 13: Dmx Operation
DMX OPERATION This is the operating mode which will allow for an external DMX controller. You must set the starting address for this mode. If this is your first time using DMX, then it is recommended that you refer to the “DMX Primer”... -
Page 14: Dmx Parameters
6 CH 0-255 0~100% Green 0-255 0~100% Blue 0-255 0~100% Amber 0-255 0~100% 0-127 Master dimmer Dimmer/Strobe 128-227 Strobe (128=slow / 227=max. speed, 23Hz) 228-255 Master dimmer at 100%, Strobe off Dimmer 0-255 0~100% Strobe 0-255 0~100% Venue Tetra 6 Manual... -
Page 15: Appendix
APPENDIX DMX PRIMER There are 512 channels in a DMX connection. Channels may be assigned in any manner. A fixture capable of receiving DMX will require one or a number of sequential channels. The user must assign a starting address on the fixture that indicates the first channel reserved in the controller. There are many different types of DMX controllable fixtures and they all may vary in the total number of channels required. -
Page 16: Fixture Linking
Test cables with an Ohm meter to verify correct polarity and to make sure the pins are not grounded or shorted to the shield or each other. Venue Tetra 6 Manual... -
Page 17: 3-Pin To 5-Pin Conversion Chart
3-Pin To 5-Pin Conversion Chart If you use a controller with a 5-pin DMX output connector, you will need to use a 5-pin to 3-pin adapter. The chart below details a proper cable conversion: 3-PIN TO 5-PIN CONVERSION CHART Conductor 3-Pin Female (Output) 5-Pin Male (Input) Ground/Shield... -
Page 18: Technical Specifications
62 units @ 120V, 10A circuit max Light Source LEDs x6 (4-watt, RGBA) Lux @ 2m 1,400 Beam Angle 15° Field Angle 30° DMX Channels 3/4/5/6 DMX Connectors 3-pin XLR Thermal Maximum ambient temperature 104° F (40° C) Cooling Convection Venue Tetra 6 Manual... -
Page 19: Warranty
Venue® products. This guarantee gives you specific legal rights. You may have other legal rights which vary from state to state. Some states do not allow limitations on how long an implied warranty lasts, so the above limitation may not apply to you. - Page 20 www.venuelightingeffects.com...
Need help?
Do you have a question about the Tetra 6 and is the answer not in the manual?
Questions and answers
How do i turn it on?