Advertisement
Table of Contents
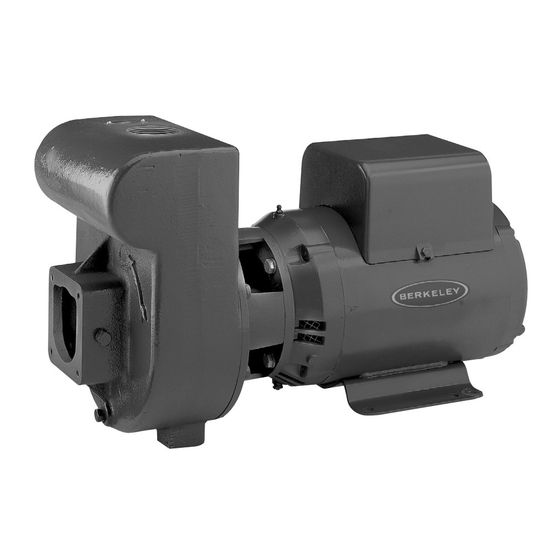
owner's Manual
Self-Priming
Centrifugal Pumps
"LT" Series
1362 1111
Installation/Operation/Parts
For further operating, installation, or maintenance assistance:
Call 1-888-782-7483
293 WRIGHT STREET, DELAVAN, WI 53115 WWW.BERKELEYPUMPS.COM
PH: 888-782-7483
BE976 (Rev. 02/22/13)
© 2013 Pentair, Ltd. All Rights Reserved.
Advertisement
Table of Contents

Related Manuals for Pentair Berkeley LT Series


Summary of Contents for Pentair Berkeley LT Series
- Page 1 Manual Self-Priming Centrifugal Pumps “LT” Series 1362 1111 Installation/Operation/Parts For further operating, installation, or maintenance assistance: Call 1-888-782-7483 293 WRIGHT STREET, DELAVAN, WI 53115 WWW.BERKELEYPUMPS.COM PH: 888-782-7483 BE976 (Rev. 02/22/13) © 2013 Pentair, Ltd. All Rights Reserved.
-
Page 2: Important Safety Instructions
Safety Important Safety Instructions General Safety Risk of burns. Do not touch an operating SAVE THESE INSTRUCTIONS - This manual contains motor. Motors can operate at high temperatures. To important instructions that should be followed during avoid burns when servicing pump, allow it to cool for installation, operation, and maintenance of the product. -
Page 3: Limited Warranty
Warranty Limited Warranty BERKELEY warrants to the original consumer purchaser (“Purchaser” or “You”) of the products listed below, that they will be free from defects in material and workmanship for the Warranty Period shown below. Product Warranty Period Water Systems: whichever occurs first: Water Systems Products —... -
Page 4: Installation
Installation Priming Plug Offset suction flange adapter keeps suction water level above impeller eye to aid priming. Important: Discharge All connections must to service be air tight Union Support suction pipe Support discharge Gate as required pipe as required Valve Solid, level Straight run, short as Some models have top... -
Page 5: Installation / Electrical
Installation / Electrical Location Of Unit Wiring Locate the pump as near the liquid source as possible, 1. Install, ground, wire and maintain this pump in using a short, direct suction pipe. Keep the static suction ac cordance with your local electrical code and all lift (vertical distance between the center line of the pump other codes and ordinances that apply. -
Page 6: Electrical Service
Electrical • Service Maintenance Priming The Pump A tee installed in the discharge opening of the pump, Little or no maintenance to pump is required other than and provided with a priming plug at the top position, possible replacement of shaft seal after a reasonable will enable you to fill the pump with liquid. -
Page 7: Pump Storage
Service Pump Storage 7. Use two screwdrivers (Figure 4) or bearing puller to carefully separate motor from adapter/seal plate, Drain pump to prevent freezing. bringing rotating half of seal (Ref. No. 10) off with Keep motor dry and loosely covered. Do not wrap with adapter/seal plate. - Page 8 Service Installing New Seal 6. Dispose of cardboard washer and recheck seal face to be sure it is free of dirt, foreign particles, scratches 1. NOTICE: Seal faces are highly polished and lapped. and grease. Handle with care. Any mar, nick or scratch on seal 7.
-
Page 9: Repair Parts
Repair Parts 1362 1094 3 HP, LTM-3 5 HP, LTM-5 3 HP, LTH-3 5 HP, LTH-5 Ref. Description Qty. S40099 S40100 S40102 S40103 S40093 S40094 S40097 S40096 Motor - 60 Cycle - 230V, Single Phase C218-177 C218-180 C218-177 C218-180 Motor - 60 Cycle - 230/460V, Three Phase C218-179BD C218-182BD C218-179BD... - Page 10 Repair Parts 1238 0894 Ref. Description Qty. Part Number Valve Plate C61-5SS Gasket - Flange C20-15 Valve Washer C43-15SS Machine Screw 1/4-20 x 1/2” Pipe Plug - 1/4” NPT Sq. Hd. Suction Flange 2” NPT C3-22A Suction Flange 2-1/2” NPT C3-74 Suction Flange 3”...
- Page 11 This page intentionally left blank...
Need help?
Do you have a question about the Berkeley LT Series and is the answer not in the manual?
Questions and answers