
Related Manuals for Peco Z Trimmer ZT-3000

Summary of Contents for Peco Z Trimmer ZT-3000
- Page 1 P P P P P P ZT-3000 PECO PECO PECO PECO PECO TRIM AND EDGE WITHOUT LEAVING YOUR SEAT OPERATOR’S MANUAL ASSEMBLY OPERATION MAINTENANCE MANUAL PART#: Q0447 Rev.6 - Feb 2020...
-
Page 2: Table Of Contents
GRASS COLLECTION SYSTEM TABLE OF CONTENTS SECTION PAGE SECTION PAGE Safety - - - - - - - - - - - - - - - - - - - - - - - - - 2 III Mounting Instructions - - - - - - - - - - - - - - - - - - - 10 Safety Alert Symbols - - - - - - - - - - - - - - - - - 3 IV Operating Instructions - - - - - - - - - - - - - - - - - - - 10 Warranty - - - - - - - - - - - - - - - - - - - - - - - - 4... -
Page 3: Safety Alert Symbols
SAFETY WARNING! NEVER operate the mower unless the discharge guard and either the deflector assembly or the vacuum collector adapter are fastened securely in place. WARNING! Do not work around the mower deck boot or the blower area until you are certain that the mower blades and the blower impeller have stopped rotating. -
Page 4: Warranty
6. REMEDIED EXCLUSIVE: The only remedies the purchaser has in connection with the breach or performance of any warranty on New PECO, Inc. consumer products are set forth above. In no event will New PECO, Inc. be liable for special incidental or consequential damages. -
Page 5: Introduction
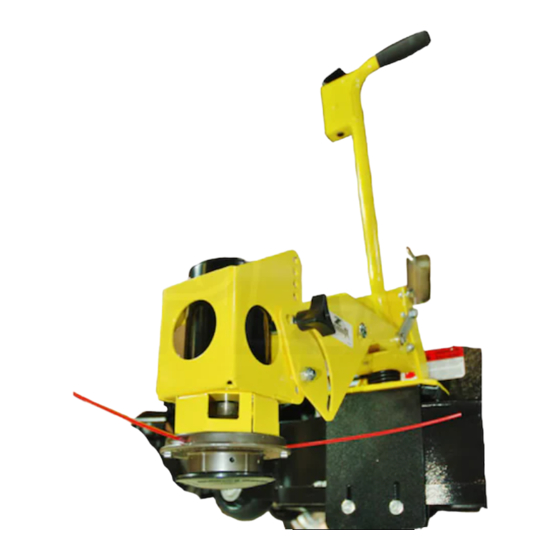
Section 1 Introduction Thank you for purchasing the newly re-designed PECO Z-Trimmer model number ZT-3000. We took all the great features our customers have grown to love, and improved them for greater durability and performance. The Z-Trimmer is an attachment for your riding mower, zero-turn mower or tractor, that allows you to trim and mow at the same time. -
Page 6: Installation For Use
Section 2 Installation For Use Pivot Block Assembly Installation Position and place the Pivot Spring (Item #) over the Pivot Bushing of the Base Plate Assembly (Item #3). Position the top end of the Pivot Spring over the right side of the Spring Bracket of the Base Plate Assembly and the lower end of the Pivot Spring over the bottom left side of the Spring Bracket. -
Page 7: Upper & Lower Handle Assembly
Upper & Lower Handle Assembly First, install the Power Switch (Item #4) by inserting it through the top mount hole of the Upper Handle Assembly (Item #1). Position and place the Safety Cover (Item #5) over the Power Switch and using the Power Switch’s knurl nut, secure the Power Switch and Safety Cover. -
Page 8: Swing Arm Installation
Swing Arm Installation Position the Swing Arm (Item #5) to the front mount holes of the Pivot Block Assembly (Item #1). Place (1) 1/4” Flat Washer (Item #4) between the Swing Arm and the Pivot Block Assembly on both sides. Refer to Figure A. Secure the Lower Handle Assy by using (1) 5/16”-18 x 4”... -
Page 9: Motor Mount Pivot Installation
Motor Mount Pivot Installation Position (2) of the mounting holes of the Motor Mount Pivot (Item #1) between the Swing Arm (Item #2). Refer to Figure A. For desired cut height adjustments, see page 11. Figure A Note: Some parts and features have been hidden from each respective view for visual clarity. -
Page 10: Mounting Instructions
Section 3 Mounting Instructions Figure A Mark and Drill Mark and Drill NOTE: The Z-Trimmer is designed to fit most styles of Holes Holes mowing decks. We recommend using 4 mounting holes Base Plate to secure the Z-Trimmer to the mowing deck. The style of mowing deck on your machine will determine which mounting holes you will use. -
Page 11: Edging
Trimming (cont.) Section 5 Height Adjustment To activate trimmer head, lift the toggle switch cover and While in the down position, adjust the height of the flip the toggle switch forward. To de-activate the trimmer trimmer head so that it is in line with the blades on the head, push the toggle switch cover down. -
Page 12: Trimmer Line
Pull each end taught and adjust if uneven. Refer to Figure A. To order more trimmer line P#(ZT- 0017), contact PECO at (800) 438-5823. Section 7 Tips and Recommendations — Because the Z-Trimmer runs off your machine’s charging system, it is recommended to operate the machine at full throttle when using the Z-Trimmer. -
Page 13: Exploded Views & Parts Lists
ZTA-0100 Z-Trimmer Assembly Exploded View... - Page 14 ZTA-0100 Z-Trimmer Assembly Exploded Parts List...
- Page 15 ZTA-0004_01 Pivot Block Assembly Exploded Parts List...
-
Page 16: Z-Trimmer Wiring Kit
WD-0012 Z-Trimmer Wiring Kit / ZT-3000... -
Page 18: Safety Decals
SAFETY DECALS To promote safe operation, New PECO, Inc. supplies safety decals on all products manufactured. Damage can occur to safety decals either through shipment, use or reconditioning. Contact your local Service Center for replacement decals. Danger/Caution Label Z-Trimmer Logo... - Page 20 P P P PECO PECO PECO PECO PECO New PECO, Inc. 10 Walden Dr | Arden, North Carolina 28704 Phone: 1-800-438-5823 | 828-684-1234 Fax: 828-684-0858 Email: peco@lawnvac.com Website: www.lawnvac.com...
Need help?
Do you have a question about the Z Trimmer ZT-3000 and is the answer not in the manual?
Questions and answers