Advertisement
Quick Links
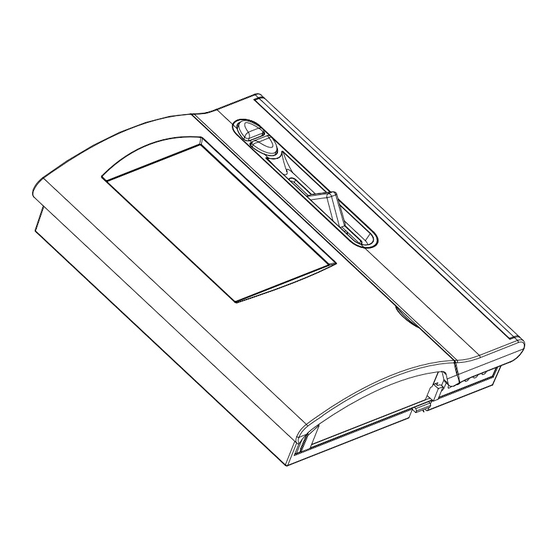
Hotwire Thermostat
Instructions
11
12
14
13
Button and Descriptions
1
Heating temperature setting.
2
Set the automatic operating times.
3
Economy or low temperature mode setting.
4
Set the day. Hold down for 5 seconds to select every day.
5
Vacation / Holiday temperature mode setting.
6
Set the hour.
7
Increase the set value, long-press 5 seconds to lock the keys.
8
Decrease the set value, long-press 5 seconds to unlock the keys.
1
9
Enter / Confirm Key.
2
1
10
Select the Automatic operating mode or Manual operating mode.
3
2
1
11
Indicates the time frames available in Auto Mode.
1
4
2
3
12
RT stands for "room temperature" and FT stands for "floor temperature".
2
3
4
13
Heating indicator.
3
4
"Manu" indicates manual mode, "Auto" indicates automatic mode. In
4
Auto mode, the thermostat executes the preprogrammed schedules.
14
While in Manu mode, the thermostat maintains a constant set temperature
manually set by the user.
Turning your heating On Manually:
Put the Toggle Switch (15) to FT or RT.
Press the Manu / Auto button (10) until the screen (14) shows manual.
Press the "Sun" (1) The current Temperature setting will flash.
Use the up and down keys (7& 8) to adjust to the required Temperature
Around 23degC is an average but you can increase if required.
Press the confirm button. (9) the reading will return to the ambient temperature
Your Thermostat is now on and heating your floor to the desired temperature
you set.
Turning your heating Off Manually:
Put the Toggle Switch (15) to "Off".
Your thermostat and floor are both off and your floor will cool down. Any
settings you have entered into the Thermostat will be maintained
Turning your heating on and off Automatically
Step One: Set The Time and Day:
Move the toggle switch (15) to RT or FT. Press "Clock" (6) and the time
display will start flashing.
Use the up and down keys (7& 8) to adjust to the current time. Holding the
7
buttons down will increase or decrease the time in 15 minutes increments.
8
Press the confirm button (9) once the time is set.
Press "Week" (4) to get to the current Day of the week.
15
Step Two: Set the Desired Temperatures:
Ensure that the thermostat is on Auto (14) before amending Temperatures. To
select Auto use button 10. To change the temperature settings, the temperature
on the screen must be flashing.
1
2
You will need to set 2 Temperatures.
3
4
The Sun button will set the temperature your room or floor will heat to.
5
6
Press "Sun (1) and the temperature will start flashing.
9
10
Use the up and down keys (7& 8) to adjust to the required temperature.
Press (9) Enter to confirm. The reading will return to ambient temperature.
The moon button will set the minimum temperature that will be maintained.
Press "Moon" (3) and the temperature will start flashing.
Use the up and down keys (7& 8) to adjust to the required temperature.
Press the Confirm button (9) once set to desired temperature. The reading
will return to the ambient temperature.
Step Three: Programming On and Off times:
The Thermostat has 2 different times each day that it can switch on and off
HotWire
IE: it can be programmed to come on and off at a specific time in the morning
Specifications
and then on and off at another time later in the day.
The unit comes with the factory settings as follows:
HotWire
Specifications
To change these settings please follow these simple steps.
PVC JACKET
FINAL DIA
Program 1 is the time at which the system will switch on in the morning.
2.0 TO 2.5MM
1. Press "Man" (2) until program 1 is displayed.
PVC JACKET
2. Hold "Week" (4) down for approx 5 seconds to select every day of the week.
FINAL DIA
Below is a chart of standard Heating Elements available: for 240 V AC application:
2.0 TO 2.5MM
*
It is much faster and easier to set the same program every day of the week. However if different
Watts
(230V)
settings are required each day simply repeat these steps on every day of the week.
Below is a chart of standard Heating Elements available: for 240 V AC application:
150
3. Press "Clock" (6) to adjust the time.
Watts
200
(230V)
250
4. Press (9) to confirm.
150
300
200
Very Important: Allow the Thermostat to reset back to today's time and date
350
250
400
after every programming change. This will take about 5 seconds.
300
500
350
Program 2 Is the time at which the system will switch off in the morning.
600
400
500
700
Press "Man" (2) until program 2 is displayed. Follow the other steps ( 2 & 3 & 4)
600
800
outlined above. Remember to let the thermostat reset to todays time & date.
700
900
800
1000
Program 3 is the time at which the system will switch on in the afternoon.
900
1250
1000
1500
Press "Man" (2) until program 3 is displayed. Follow the other steps (2 & 3 & 4)
1250
1750
1500
outlined above. Remember to let the thermostat reset to todays time & date.
2000
1750
2500
Program 4 is the time at which the system will switch off in the afternoon.
2000
3000
2500
Press "Man" (2) until program 4 is displayed. Follow the other steps (2 & 3 & 4)
3000
outlined above. Remember to let the thermostat reset to todays time & date.
Under Tile Heating
TM
Under Tile Heating
TM
On at 6 am and off 8:30 am
HEATING CONDUCTOR
On at 4 pm and off at 9 pm
MULTISTRAND
CONDUCTOR DIA 0.25 TO 0.68MM
HEATING CONDUCTOR
MULTISTRAND
ETFE EXTRUDED INSULATION
CONDUCTOR DIA 0.25 TO 0.68MM
COPPER BRAID SHIELD 0.5MM SQ
ETFE EXTRUDED INSULATION
COPPER BRAID SHIELD 0.5MM SQ
Metres
W/LM
Ohm/m
Total
Ohms
13
11.54
27.13
352.67
Metres
W/LM
Ohm/m
Total
17
11.77
15.56
264.5
Ohms
21
11.93
10.1
211.6
13
11.54
27.13
352.67
25
11.99
7.05
176.33
17
11.77
15.56
264.5
30
11.67
5.04
151.14
21
11.93
10.1
211.6
35
11.43
3.78
132.25
25
11.99
7.05
176.33
43
11.63
2.46
105.8
30
11.67
5.04
151.14
53
35
11.3
11.43
1.66
3.78
88.17
132.25
43
11.63
2.46
105.8
63
11.12
1.2
75.57
53
11.3
1.66
88.17
72
11.13
0.92
66.13
63
11.12
1.2
75.57
82
11.02
0.72
58.78
72
11.13
0.92
66.13
91
11.96
0.58
52.9
82
11.02
0.72
58.78
118
10.6
0.36
42.48
91
11.96
0.58
52.9
141
10.63
0.25
35.27
118
10.6
0.36
42.48
168
10.42
0.18
30.24
141
10.63
0.25
35.27
189
10.59
0.14
26.45
168
10.42
0.18
30.24
235
10.59
0.09
21.15
189
10.59
0.14
26.45
294
10.21
0.06
17.63
235
10.59
0.09
21.15
294
10.21
0.06
17.63
Hotwire Heating Elements are
manufactured from Ethylene
Tetrafluoroethylene (ETFE). EFTE is a
plastic which is flexible and stable up to
150 deg C.
Hotwire Heating Elements are
manufactured from Ethylene
Hotwire Under Tile Heating has
Tetrafluoroethylene (ETFE). EFTE is a
developed safe, efficient and long life
plastic which is flexible and stable up to
ETFE insulated heating elements. The
150 deg C.
Hotwire element can be utilised in
Hotwire Under Tile Heating has
floor heating applications under dry or
developed safe, efficient and long life
moist conditions (heaters pre-cast and
ETFE insulated heating elements. The
Amps
terminated during floor installation).
Hotwire element can be utilised in
Typical product form consists of round
floor heating applications under dry or
0.65
Heating Wires with Copper Braid Shield
moist conditions (heaters pre-cast and
and high temperature PVC Jacket. The
Amps
terminated during floor installation).
0.87
completed diameter of the entire cable is
Typical product form consists of round
1.09
0.65
OD 2.0 mm to 2.7 mm.
Heating Wires with Copper Braid Shield
1.3
and high temperature PVC Jacket. The
0.87
The conductor used for heating
completed diameter of the entire cable is
1.52
1.09
element is multi stranded allowing for
OD 2.0 mm to 2.7 mm.
1.74
1.3
significantly greater flexibility and ease
The conductor used for heating
2.17
1.52
of installation than a single core element.
element is multi stranded allowing for
The completed diameter of the core is
2.61
1.74
significantly greater flexibility and ease
0.25 mm - 0.68 mm.
2.17
of installation than a single core element.
3.04
The completed diameter of the core is
2.61
3.48
0.25 mm - 0.68 mm.
3.04
3.91
3.48
4.35
3.91
5.41
4.35
6.52
5.41
7.61
6.52
8.7
7.61
10.83
8.7
13.04
10.83
13.04
Australia
New Zealand
Australia
New Zealand
Verve Distribution
The Heating Company
Verve Distribution
The Heating Company
6 Todd St
PO BOX 420
6 Todd St
PO BOX 420
Port Adelaide SA 5015
Whitianga NZ
Port Adelaide SA 5015
Whitianga NZ
www.vervedistribution.com.au
www.hotwire.co.nz
www.vervedistribution.com.au
www.hotwire.co.nz
Advertisement

Related Manuals for HotWire T888


Summary of Contents for HotWire T888
- Page 1 Auto mode, the thermostat executes the preprogrammed schedules. ETFE insulated heating elements. The 150 deg C. Hotwire element can be utilised in 2. Hold “Week” (4) down for approx 5 seconds to select every day of the week. FINAL DIA...
- Page 2 Hotwire Thermostat Instructions Additional Functions Additional Functions Key Lock & Unlock Vacation Mode Adjustment Press and hold to lock the thermostat. A lock icon will display. Vacation Mode Adjustment Vacation mode is used to drop the heating down to a minimum set temperature to ensure room stays damp free.
Need help?
Do you have a question about the T888 and is the answer not in the manual?
Questions and answers