Table of Contents
Advertisement
Quick Links
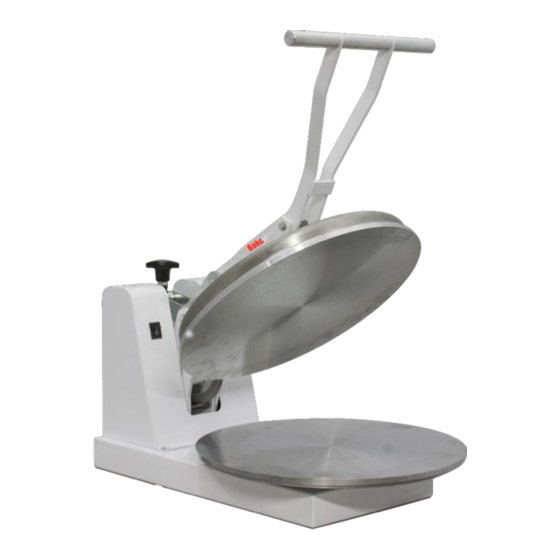
BakeMax BMDM-18
Manual Dough Press
CONTENTS
........................................................................................................
....................................................................................................
.......................................................................................
............................................................................................................
............................................................................................
.......................................................................................................
Warranty
BEFORE warranty repair you MUST get Prior Authorization:
..........................................................................................
...........................................................................
........................................................................................
..........................................................................................
...........................................................................
.........................................................................
...............................................................................
2
3
4
5
6-7
8
9
10-11
12
13
14
15
16
Advertisement
Table of Contents

Subscribe to Our Youtube Channel
Related Manuals for Bake Max BMDM-18


Summary of Contents for Bake Max BMDM-18
-
Page 1: Table Of Contents
BakeMax BMDM-18 Manual Dough Press CONTENTS ..................Receiving & Setup Operation ....................................Setting Temperature & Time ..................Preference Settings ..................Machine Presets ....................Cycle Count ................Temperature & Time Modes ..................Pressing Dough 10-11 ................. Dough Weights & Shrinkage ...................... -
Page 2: Receiving & Setup
RECEIVING & SETUP PLEASE READ THIS MANUAL IN ITS ENTIRETY BEFORE OPERATING YOUR PIZZA PRESS. INSPECTION Inspect your box and machine for hidden shipping damage. Contact the delivery company immediately, should you find damage. PLATEN SURFACE Slight surface imperfections are a normal part of the aluminum casting process for the platens on your press. -
Page 3: Operation
ATION PREPARATION Turn on the machine by pushing the on/off switch. Startup/Splash screen is displayed as the controller boots up. NOTE: The current program number and the software revision of the controller are displayed at startup. (The default settings are program number P 11 for °F, P 12 for °C and software revision RV 1.0) Startup/Splash Screen After booting up, the home screen is displayed showing the current heat... -
Page 4: Setting Temperature & Time
SETTING TEMPERATURE & TIME ADJUST TEMPERATURE: TEMPERATURE ADJUSTMENT SCREEN UP ARROW TEMPERATURE READOUT/SETTING DOWN ARROW 1. Touch the temperature readout on the display. “UP” ▲ and “DOWN” ▼ arrows will appear on the right side of the display and the temperature value will start flashing and to indicate it is in set mode. -
Page 5: Preference Settings
PREFERENCE SETTINGS SETTINGS: 1. Press the “?” on the upper right corner of the display on the Home Menu Screen to access the settings menu. 2. Press the settings sub menu title to be adjusted. SETTINGS MENU SCREEN ADJUST SHUTDOWN TIMEOUT SETTING SET QUANTITY OF PRESETS DISPLAYED... -
Page 6: Machine Presets
MACHINE PRESETS PRESET QUANTITY Temperature presets can be stored in the memory for different trans- fer settings. By default two presets are displayed. This setting can be adjusted to display four presets. PRESET QUANTITY DISPLAYED PREFERENCE SCREEN TWO PRESETS DISPLAYED FOUR PRESETS DISPLAYED SAVE SETTINGS... - Page 7 MACHINE PRESETS STORING PRESETS: NOTE: The factory default settings for all presets is set to 200°F and 10 seconds. HOME MENU SCREEN PRESET LOCATIONS TEMPERATURE SETTING TIME SETTING 1. Set the desired temperature and/or cycle time using the temperature and time adjustment instructions in this document. 2.
-
Page 8: Cycle Count
CYCLE COUNT CYCLE COUNT The cycle count feature counts the number of cycles that the machine has undergone. A cycle is counted every time the countdown timer is activated by closing the press. NOTE: The cycle count will maintain the total count even if the power has been turned off. -
Page 9: Temperature & Time Modes
TEMPERATURE & TIME MODES TEMPERATURE MODE Temperature Mode controls which temperature scale is displayed on the controller home screen. F = Fahrenheit C = Celsius TEMPERATURE MODE PREFERENCE SCREEN UP ARROW TEMPERATURE SCALE PREFERENCE DOWN ARROW SAVE SETTINGS RETURN TO PREVIOUS SCREEN TO CHANGE THE SCALE: 1. -
Page 10: Pressing Dough
PRESSING DOUGH PRESSING DOUGH Your pizza press is designed for easy use and operation to reliably press dough balls. Thickness, shape, and size are directly related to your dough ball, its shape, the temperature of the dough, the recipe of your dough, type of lubricating food oil, as well as the settings of your machine. - Page 11 PRESSING DOUGH CAUTION: Excessive pressure can cause structural damage, voiding the machine warranty! WARNING: Make all adjustments while press is open. Adjusting the thickness while under pressure will result in damage to the press. 4. Lightly lubricate the lower platen with olive oil, food/cooking oil or other food release lubricant.
-
Page 12: Dough Weights & Shrinkage
DOUGH BALL WEIGHTS PIZZA CRUST SIZE WEIGHT OF THE DOUGH BALL 6” 5-8 oz. 8” 6-10 oz. 10” 8-12 oz. 12” 16-18 oz. 14” 18-20 oz. 16” 20-22 oz. 18” 22-24 oz. NOTE: Final Crust size is determined by combination of weight of dough ball and thickness setting. -
Page 13: Faqs
FAQs Q: Why won’t my dough press to size? • Weight of the dough ball - not enough dough • Temperature of the dough ball might be cold - higher temp/ longer press time • Set to thick - change thickness setting Q: When I press my dough it gets sticky? Why? •... -
Page 14: Troubleshooting
TROUBLESHOOTING Timer Won’t Count Down Remove the rear cover. Does the lower microswitch “click” when the machine handle is closed? Take an Ohm meter and Check the adjustment of the verify that the switch contacts switch so you can hear the are opening and closing when switch “click”... -
Page 15: Cleaning & Maintenance
CLEANING & MAINTENANCE WARNING: Before cleaning, performing maintenance or repairs make sure the machine is turned off and the machine is unplugged. ***This appliance is not waterproof. Never spray or pour water or any other cleaning solution onto this appliance. *** CLEANING ALUMINUM UNCOATED HEAT PLATEN(S).
Need help?
Do you have a question about the BMDM-18 and is the answer not in the manual?
Questions and answers