Table of Contents
Advertisement
Advertisement
Table of Contents

Related Manuals for Uberhaus MWK-15CRN1-BJ7


Summary of Contents for Uberhaus MWK-15CRN1-BJ7
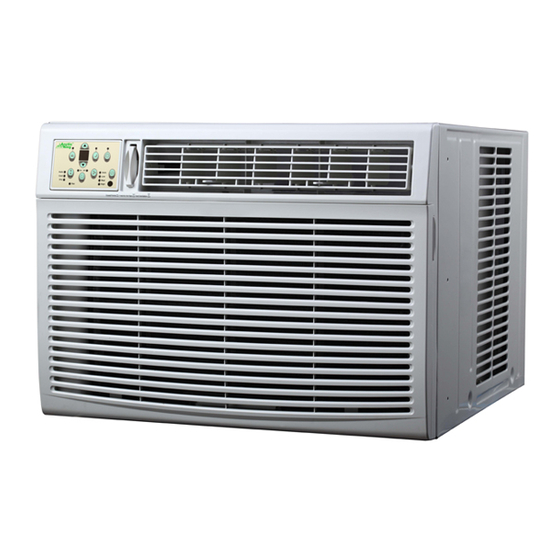
- Page 1 USER MANUAL 87795011 MWK-15CRN1-BJ7 years/ans warranty garantie 1-866-206-0888...
- Page 2 CONTENTS 1. SAFETY PRECAUTIONS..............2 2. IMPORTANT SAFETY INSTRUCTIONS ..........4 3. NORMAL SOUNDS ................5 4. AIR CONDITIONER FEATURES ............5 5. INSTALLATION INSTRUCTIONS............10 6. CARE AND CLEANING ..............18 7. TROUBLESHOOTING TIPS...............19 8. REMOTE CONTROLLER ....21 ..9. WARRANTY..................28 ead This Manual Inside you will find many helpful hints on how to use and maintain your air conditioner properly.
- Page 3 Safety Precautions To prevent injury to the user or other people and property damage, the following instructions must be followed. Incorrect operation due to ignoring of instructions may cause harm or damage. The seriousness is classified by the following indications. WARNING This symbol indicates the possibility of death or serious injury.
- Page 4 ! CAUTION When the air filter is to be Do not clean the air Ventilate the room well when removed, do not touch the conditioner with water. used together with a stove, metal parts of the unit. etc. It may cause an injury. Water may enter the unit and An oxygen shortage may occur.
- Page 5 IMPORTANT SAFETY INSTRUCTIONS For your safety WARNING NOTE The power supply cord with Do not store or use gasoline or other flammable vapours and liquids in this air conditioner contains a current the vicinity of this or any other appliance. detection device designed to reduce Avoid fire hazard or electric shock.
- Page 6 NORMAL SOUNDS High Pitched Chatter High efficiency compressors may have a high pitched chatter Vibration during the cooling cycle. Unit may vibrate and make noise because of poor wall or window construction or incorrect installation. Sound of Rushing Air At the front of the unit, you may hear the sound of rushing air being moved by the fan Pinging or Switching...
- Page 7 AIR CONDITIONER FEATURES(CONTINUED) NOTE: TO SELECT THE To choose operating mode, press the Mode button. Each time you press the button, a mode is selected OPERATING MODE: in a sequence that goes from Auto, Cool, Dry ,Heat and Fan. The indicator light beside will be illuminated and remained on once the mode is selected.
- Page 8 AIR CONDITIONER FEATURES(CONTINUED) NOTE: The following instructions represent the Unit Controls, the same instructions can be used for the Remote Control. TURN UNIT ON DO THIS: Press the On/Off button. Auto TO CHANGE TEMPERATURE SETTING: NOTE: Press or hold either Up( ) or Down ( ) button until the desired temperature is seen on the display.
- Page 9 AIR CONDITIONER FEATURES(CONTINUED) TIMER: AUTO START/ NOTE: When the unit is on or off, first press the Timer button, STOP FEATURE: the TIMER ON indicator light illuminates. It indicates the Auto Start program is initiated. - When the time of TIMER ON is displayed, press the Timer button again, the TIMER OFF indicator light illuminates.
- Page 10 ADDITIONAL THINGS YOU SHOULD KNOW Now that you have mastered the operating procedure, here are more features in your control that you should become familiar with. The Cool circuit has an automatic 3 minute time delayed start if the unit is turned off and on quickly.
- Page 11 INSTALLATION INSTRUCTIONS Please read ALL instructions before installing. Two people are recommend to install this product. If a new electrical outlet is required, have the outlet installed by a qualified electrician before installing unit. Preliminary Instructions Window Sash Seal Do the following before starting to install unit. See illustrations below.
- Page 12 Tools Required (not included) A large flat blade screwdriver Tape measure Adjustable wrench or pliers Pencil Level Socket wrenches Phillips Screwdriver Hardware (Packed with the unit) 7/16" Locking 2 ea. screw and Flat washer for window panels 3/4" Long Hex-head Screw Safety Lock 1/2"...
- Page 13 Window Mounting 9. Your unit may come with internal packaging. Remove Chassis This packaging must be removed prior to installing the air conditioner back into the 1. Pull down front panel and remove filter. cabinet.(see Fig.5). (See Fig.1). 2. Lift front upwards and place to one side. 3.
- Page 14 3. Shift cabinet left or right as needed to line up center of cabinet on center line marked on stool. Air Conditioner Plastic Cabinet 4. Fasten cabinet to window stool with 2 screws Frame (You may wish to pre-drill pilot holes). View 5.
- Page 15 3. Install support brackets(with sill angle 2. Attach right angle safety lock as shown. brackets attached) to correct hole in bottom of cabinet as shown. 4. Tighten all 6 bolts securely. Safety Lock 3 4 Long Hex-head Screws 1 2 Long Screws and Locknuts Install Chassis into Cabinet and Install Front to Unit...
- Page 16 Through-Wall Installation NOTE: Consult local building codes prior to Carefully measure and cut an opening with the installation, or a qualified carpenter. following dimensions depending on your model. See Fig.1 and Fig.2. Select Wall Location WIDTH X = inside model width plus twice the thickness of framing material used.
- Page 17 NOTE: If wall thickness is 8-1/2 or more, add aluminum flashing over bottom of frame opening to assure no water can enter area between inner 1 Long Wood and outer wall. Screw Fig.2 Caulking Required Refer to Step 4 of Window Mounting for assembly of support brackets.
- Page 18 OPTIONAL: Caulking and installation of trim on interior wall may be done. You can buy wood from your local number or hardware supply. On the outside, caulk openings around top and sides of cabinet, and all sides of wood sleeve to the opening. NOTE: See Step 7, Item 3 of Window Mounting Instructions for bottom rail seal location.
- Page 19 CARE AND CLEANING CAUTION Clean your air conditioner occasionally to keep it looking new. Be sure to unplug the unit before cleaning to prevent chock or fire hazards. Air Filter Cleaning The air filter should be checked at least once a month to see if cleaning is necessary.
- Page 20 TROUBLESHOOTING TIPS Before calling for service, review this list. It may save you time and expense. This list includes common occurrences that are not the result of defective workman-ship or materials in this appliance. Problem Solution Wall plug disconnected. Push plug firmly into wall outlet. Air conditioner does not start House fuse blown or circuit breaker tripped.
- Page 21 Problem Solution Unit removing large quantity of moisture from humid room. This is normal during Water dripping excessively humid days. OUTSIDE when unit is cooling. Remote control not located within range. Place remote control within 20 feet and at a Remote sensor 180 radius of the front of the unit.
- Page 22 FEATURES OF REMOTE CONTROL 16 ft (5m) of your 16 ft (5m)
- Page 26 change...
- Page 27 is displayed is displayed...
- Page 29 WARRANTY Thank you for purchasing this UBERHAUS product. These products have been made to demanding high-quality standards and are guaranteed for domestic use against manufacturing faults for a period of 36 months from the date of purchase. This warranty does not affect your statutory rights.
Need help?
Do you have a question about the MWK-15CRN1-BJ7 and is the answer not in the manual?
Questions and answers